Appium Tutorial 2021 is ready for all testers! I will use Appium Desktop and Android Studio to create a sample mobile test automation project for you. After that, we will continue with the Advance Appium Tutorial series. First, we need to do a proper Appium Installation. Alright, Let’s start!
Appium Tutorial Prerequisites: JAVA and Maven Installation
Download JAVA JDK first. Here is the Link: JAVA JDK 11
Installation steps and configuration settings have described in this article at step-4 and step-5.
For MACOS users please visit the below article for all installation needs.
Windows users will go on with the below installation steps. ;)
Android Studio Installation
Let’s go to Android Studio Download and install Android Studio. After that, apply the following steps. Click the “Next” icons and finally click the “Finish“.
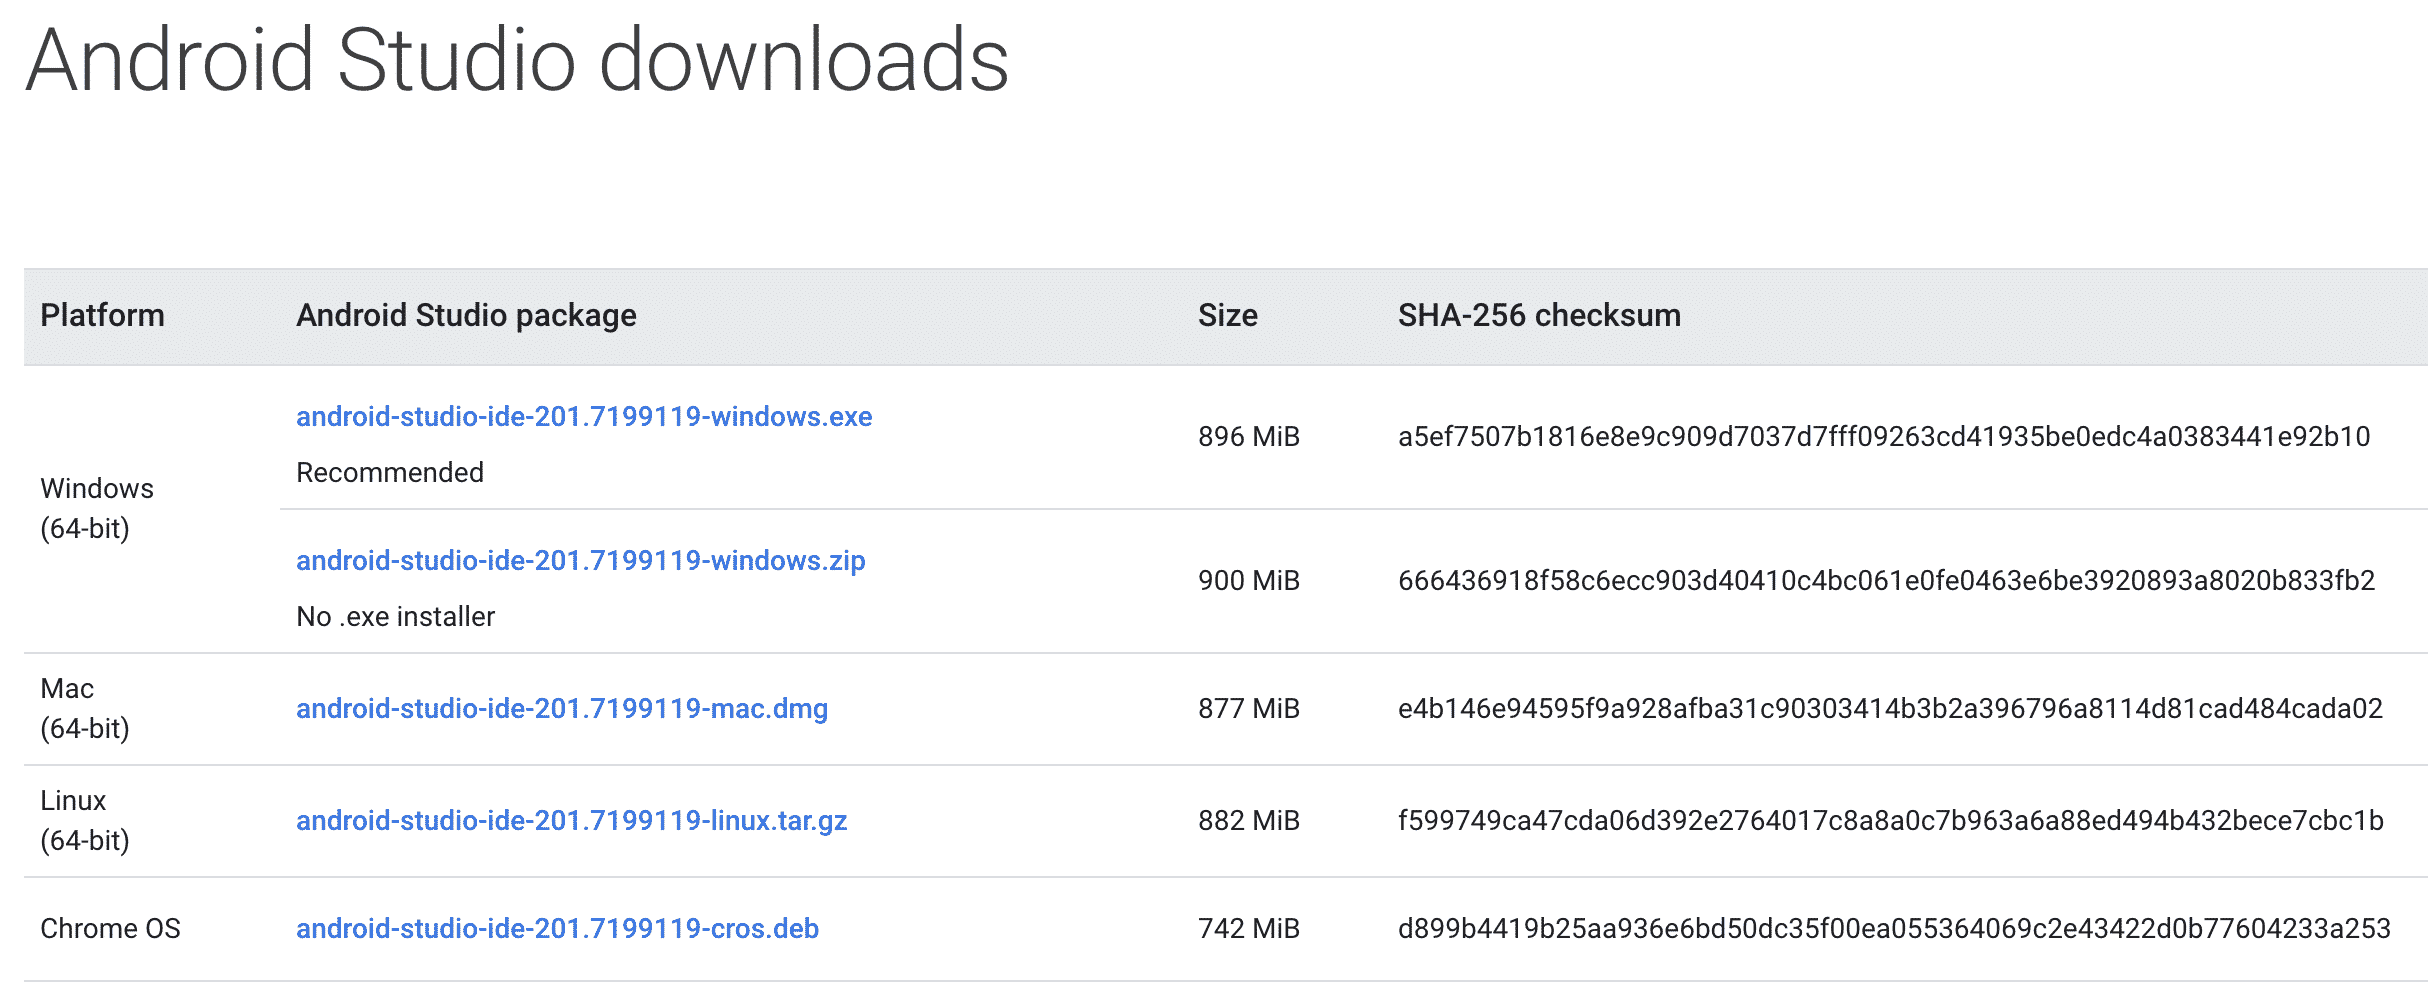
Click to download Android Studio based on your operating system Windows, macOS, Chrome OS, or Linux. We are going on with Windows.
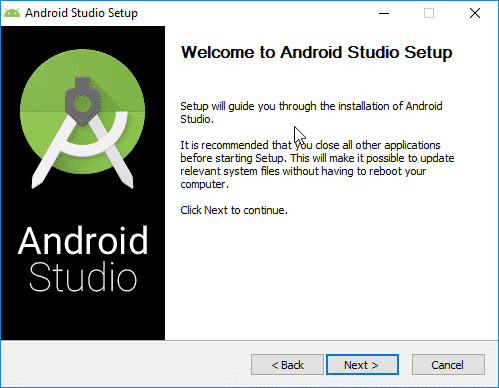
After download the Android Studio, installation is straightforward. Click the next button.
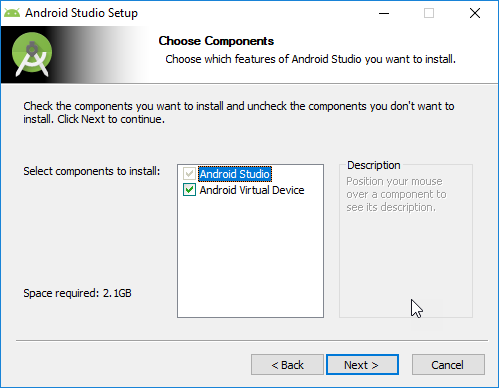
Select all options and click the next button.
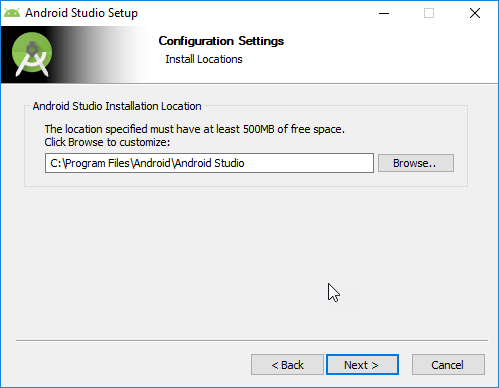
Select your directory or keep the default and click next. I kept it as default. ;)
and click the install button to start the installation process.
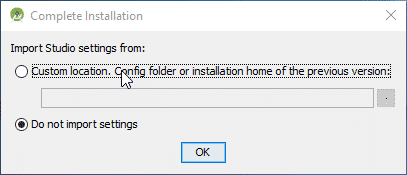
If it is your first time installing Android Studio then just select the “Do not import settings” option and click the OK button. If you are updating it, you can import your previous settings.
Click the next button and continue.
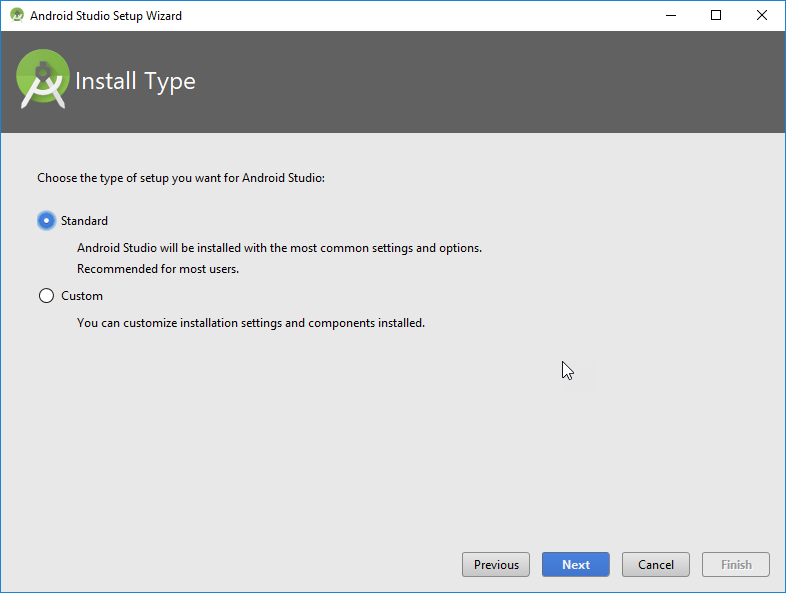
I installed the Android Studio with standard settings and configurations as shown below screenshot.
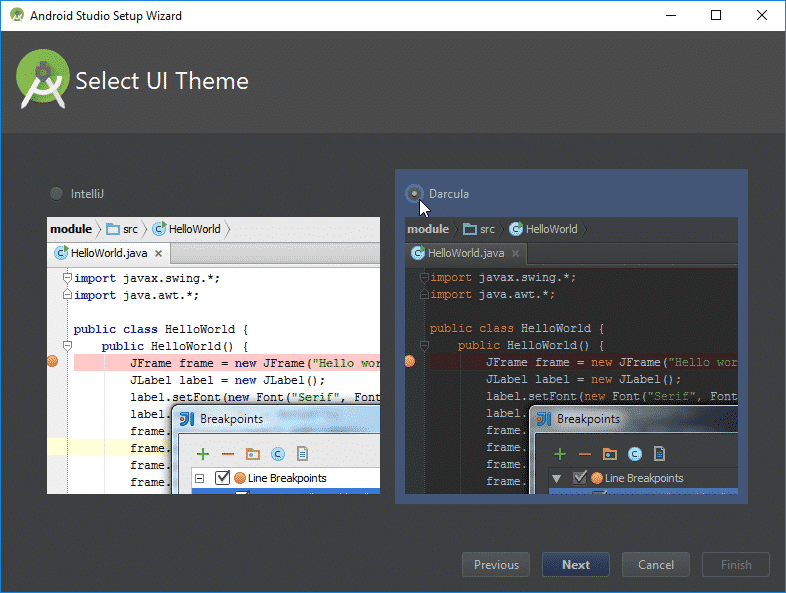
Select your UI Theme. I prefer Darcula because it is better for the eyes but you can go with the white classical theme if you want.
Click the “Finish” button and install the required tools.
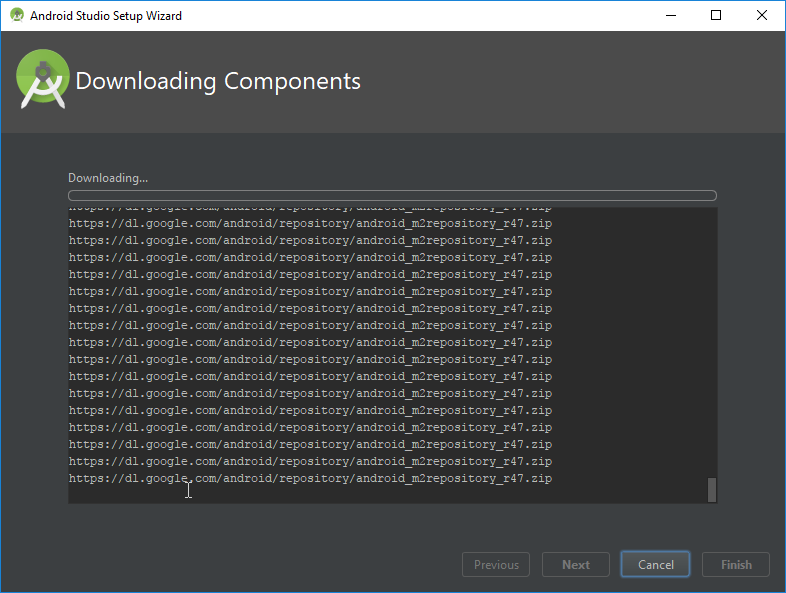
Then, just wait until all libraries to be downloaded and the installation to be finished.
After all these steps, click the finish button.
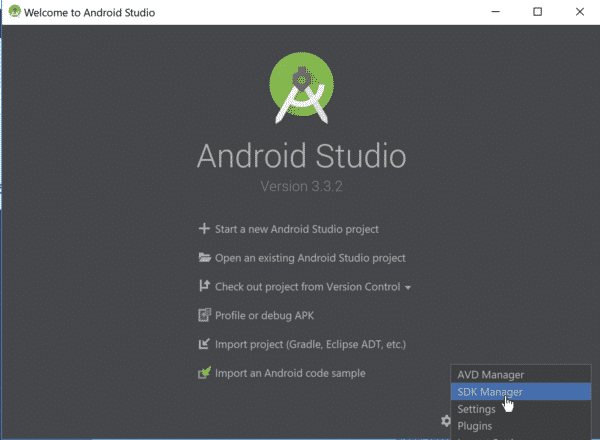
After clicking the “Finish” button. Go to “Configure” > “SDK Manager” to get SDK information. It is required for Android SDK path settings.
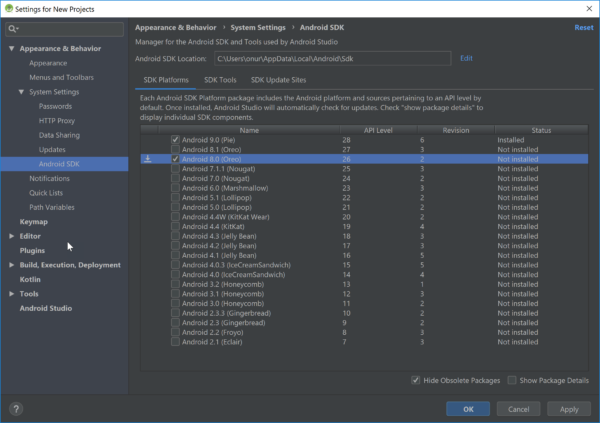
Select your device’s or emulator’s Android API level (Version). We will go with Android 11 API, please install that one.
When took the below screenshot the latest version was 9.0 but for this example, we will go with Android 11. I am not using windows anymore thus I could not update the screenshot but I wanted to mention it to guide you correctly.
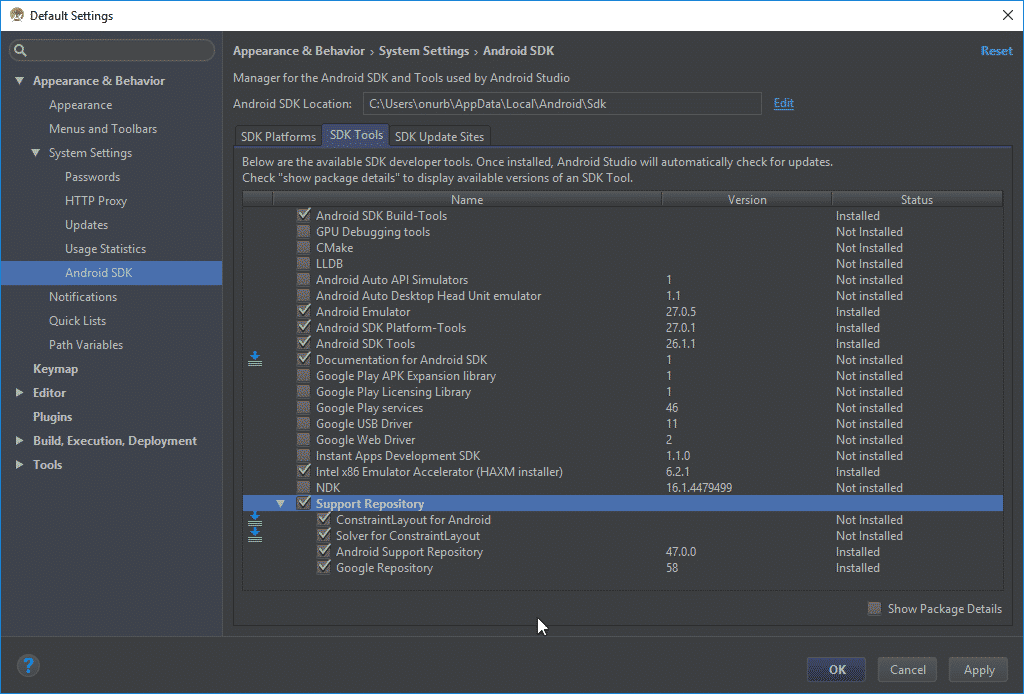
And select the required tools as shown below and click “OK.
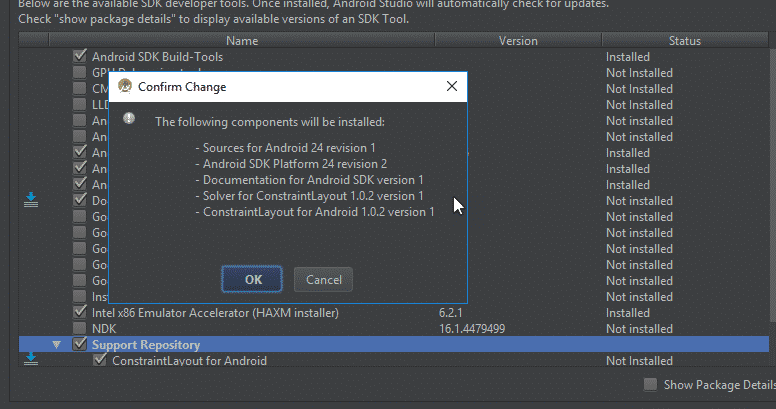
Click OK one more time, please. ;)
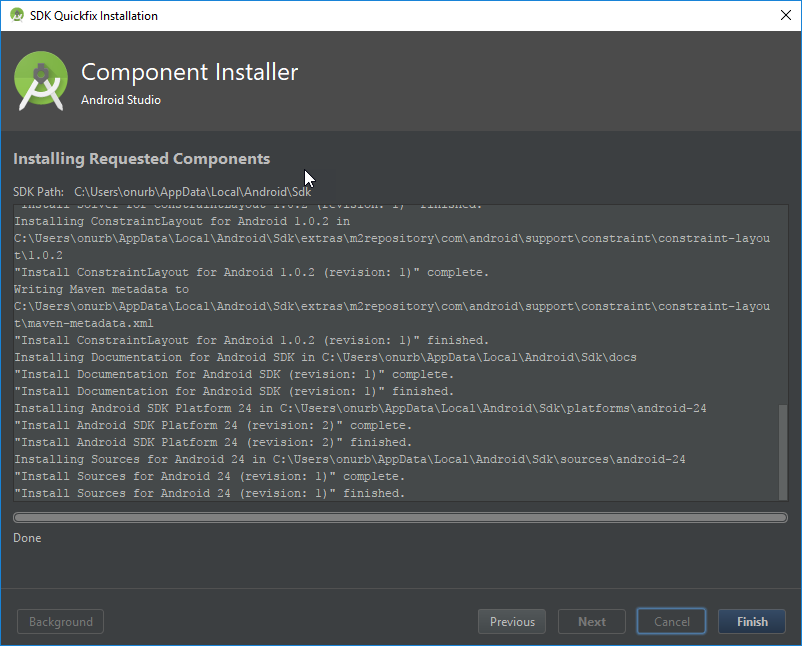
Click the Finish button and continue.
After the installation of the required tools, go to the SDK Manager page and copy the SDK path as shown below. We will use it. ;)
Download RapidEE tool and install it and open it as administrator.
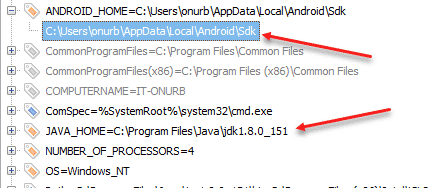
And then add ANDROID_HOME variable and its path should be Android SDK’s path. Also, check your JAVA_HOME variable. JAVA_HOME should equal to JAVA SDK’s path.
Then, you need to add required Android tools and JAVA JRE paths to your system path as shown below.
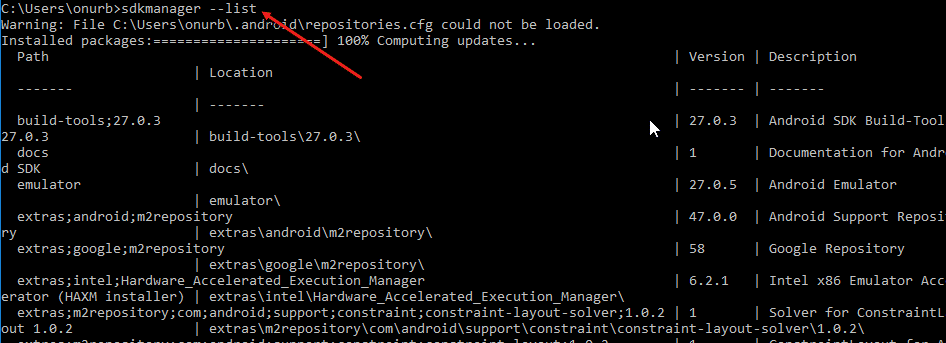
After that, check your settings and installations. Open a command prompt window and type “sdkmanager –list” command as shown below.
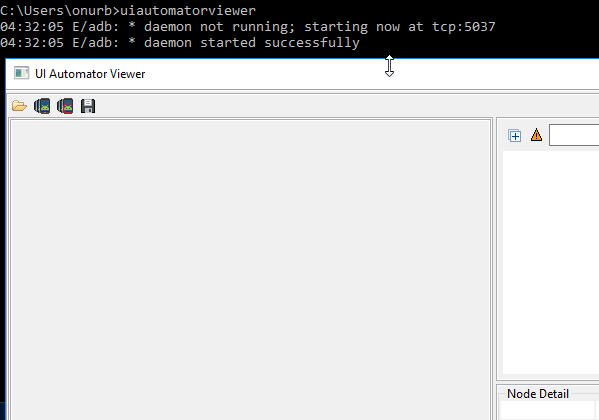
and type “uiautomatorviewer” to check uiautomatorviewer is working properly.
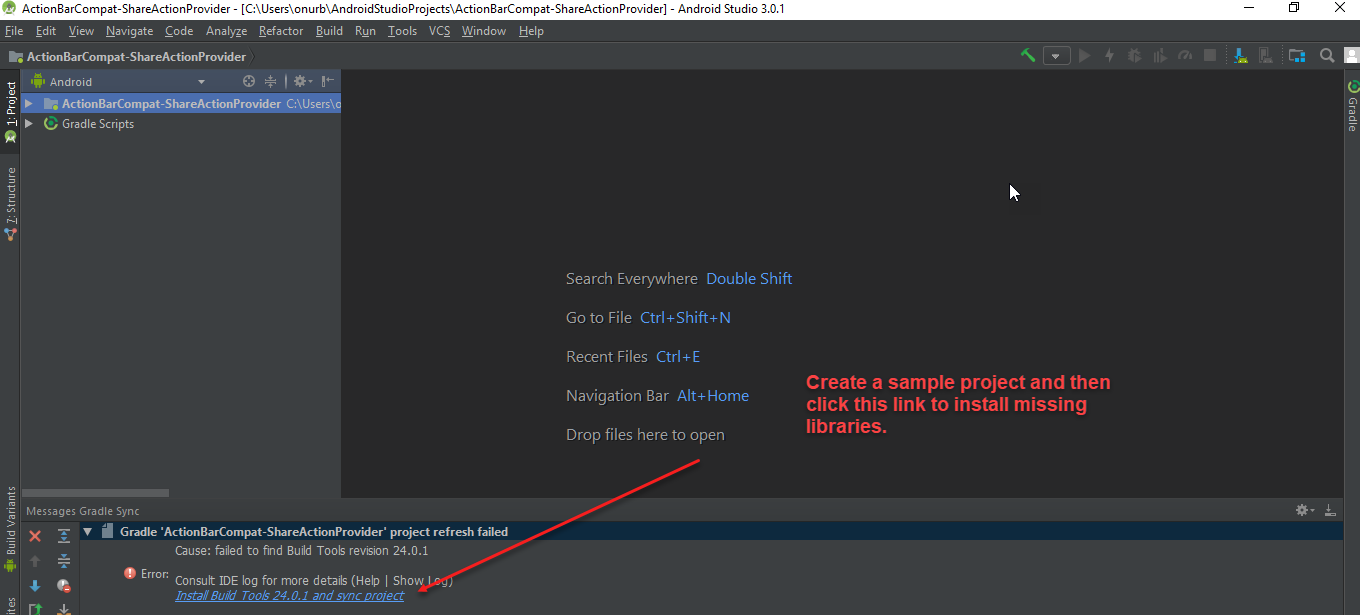
Then, create a sample project in Android Studio and then click the link as shown below to install missing libraries.
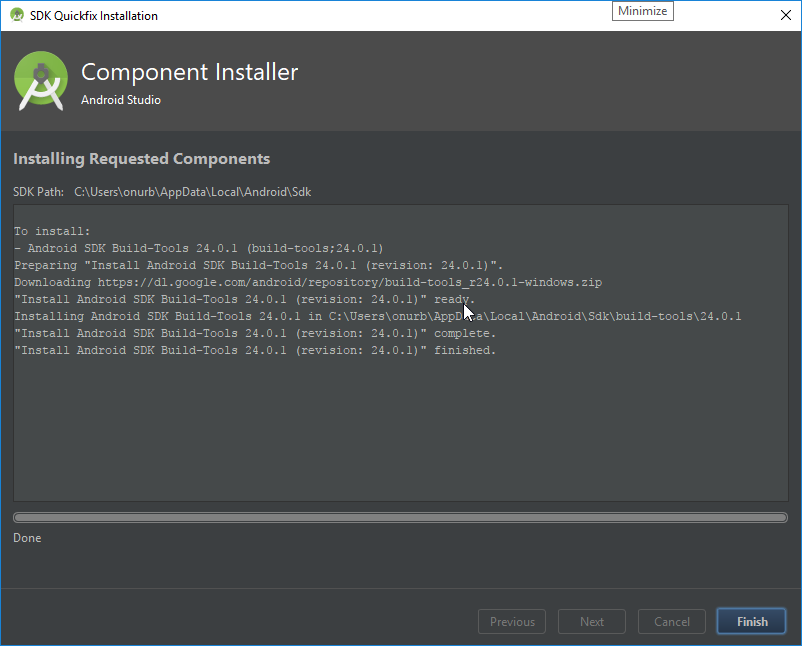
After installation, click the Finish button.
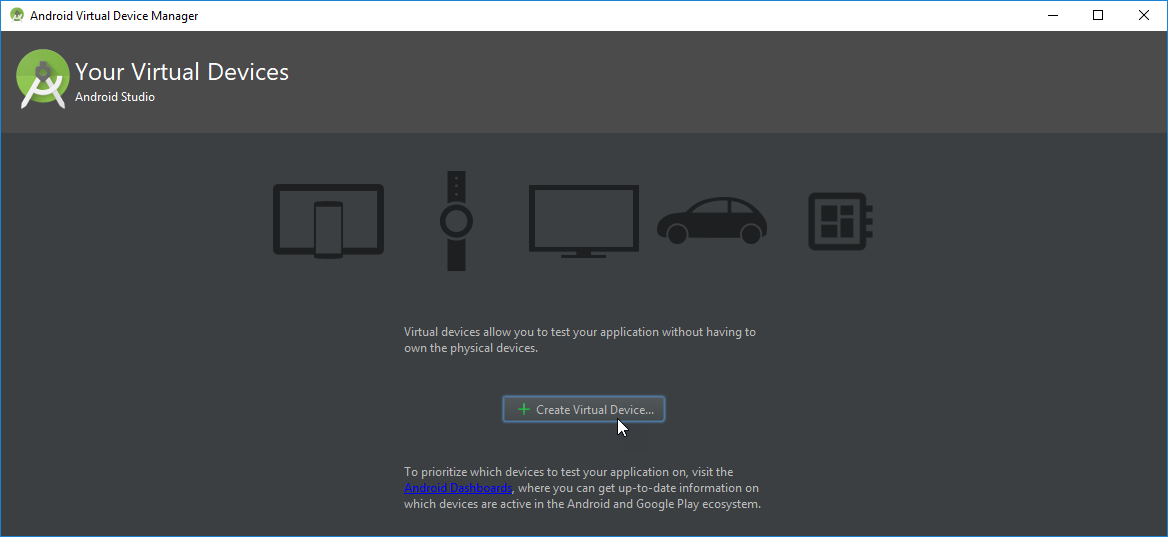
After installing missing libraries you will see the device and little and sweet android icon. :) When you click this icon, you will open the android virtual device manager.
Let’s create a virtual device. I will also explain how to do mobile automation with a real device too. Don’t worry. ;) Click to “+ Create a Virtual Device” button.
Then, select a virtual device in the device list.
To run ARM-based apk files on X86 platforms (windows or mac),
please refer to this article: https://www.swtestacademy.com/how-to-run-arm-apk-on-x86-systems/
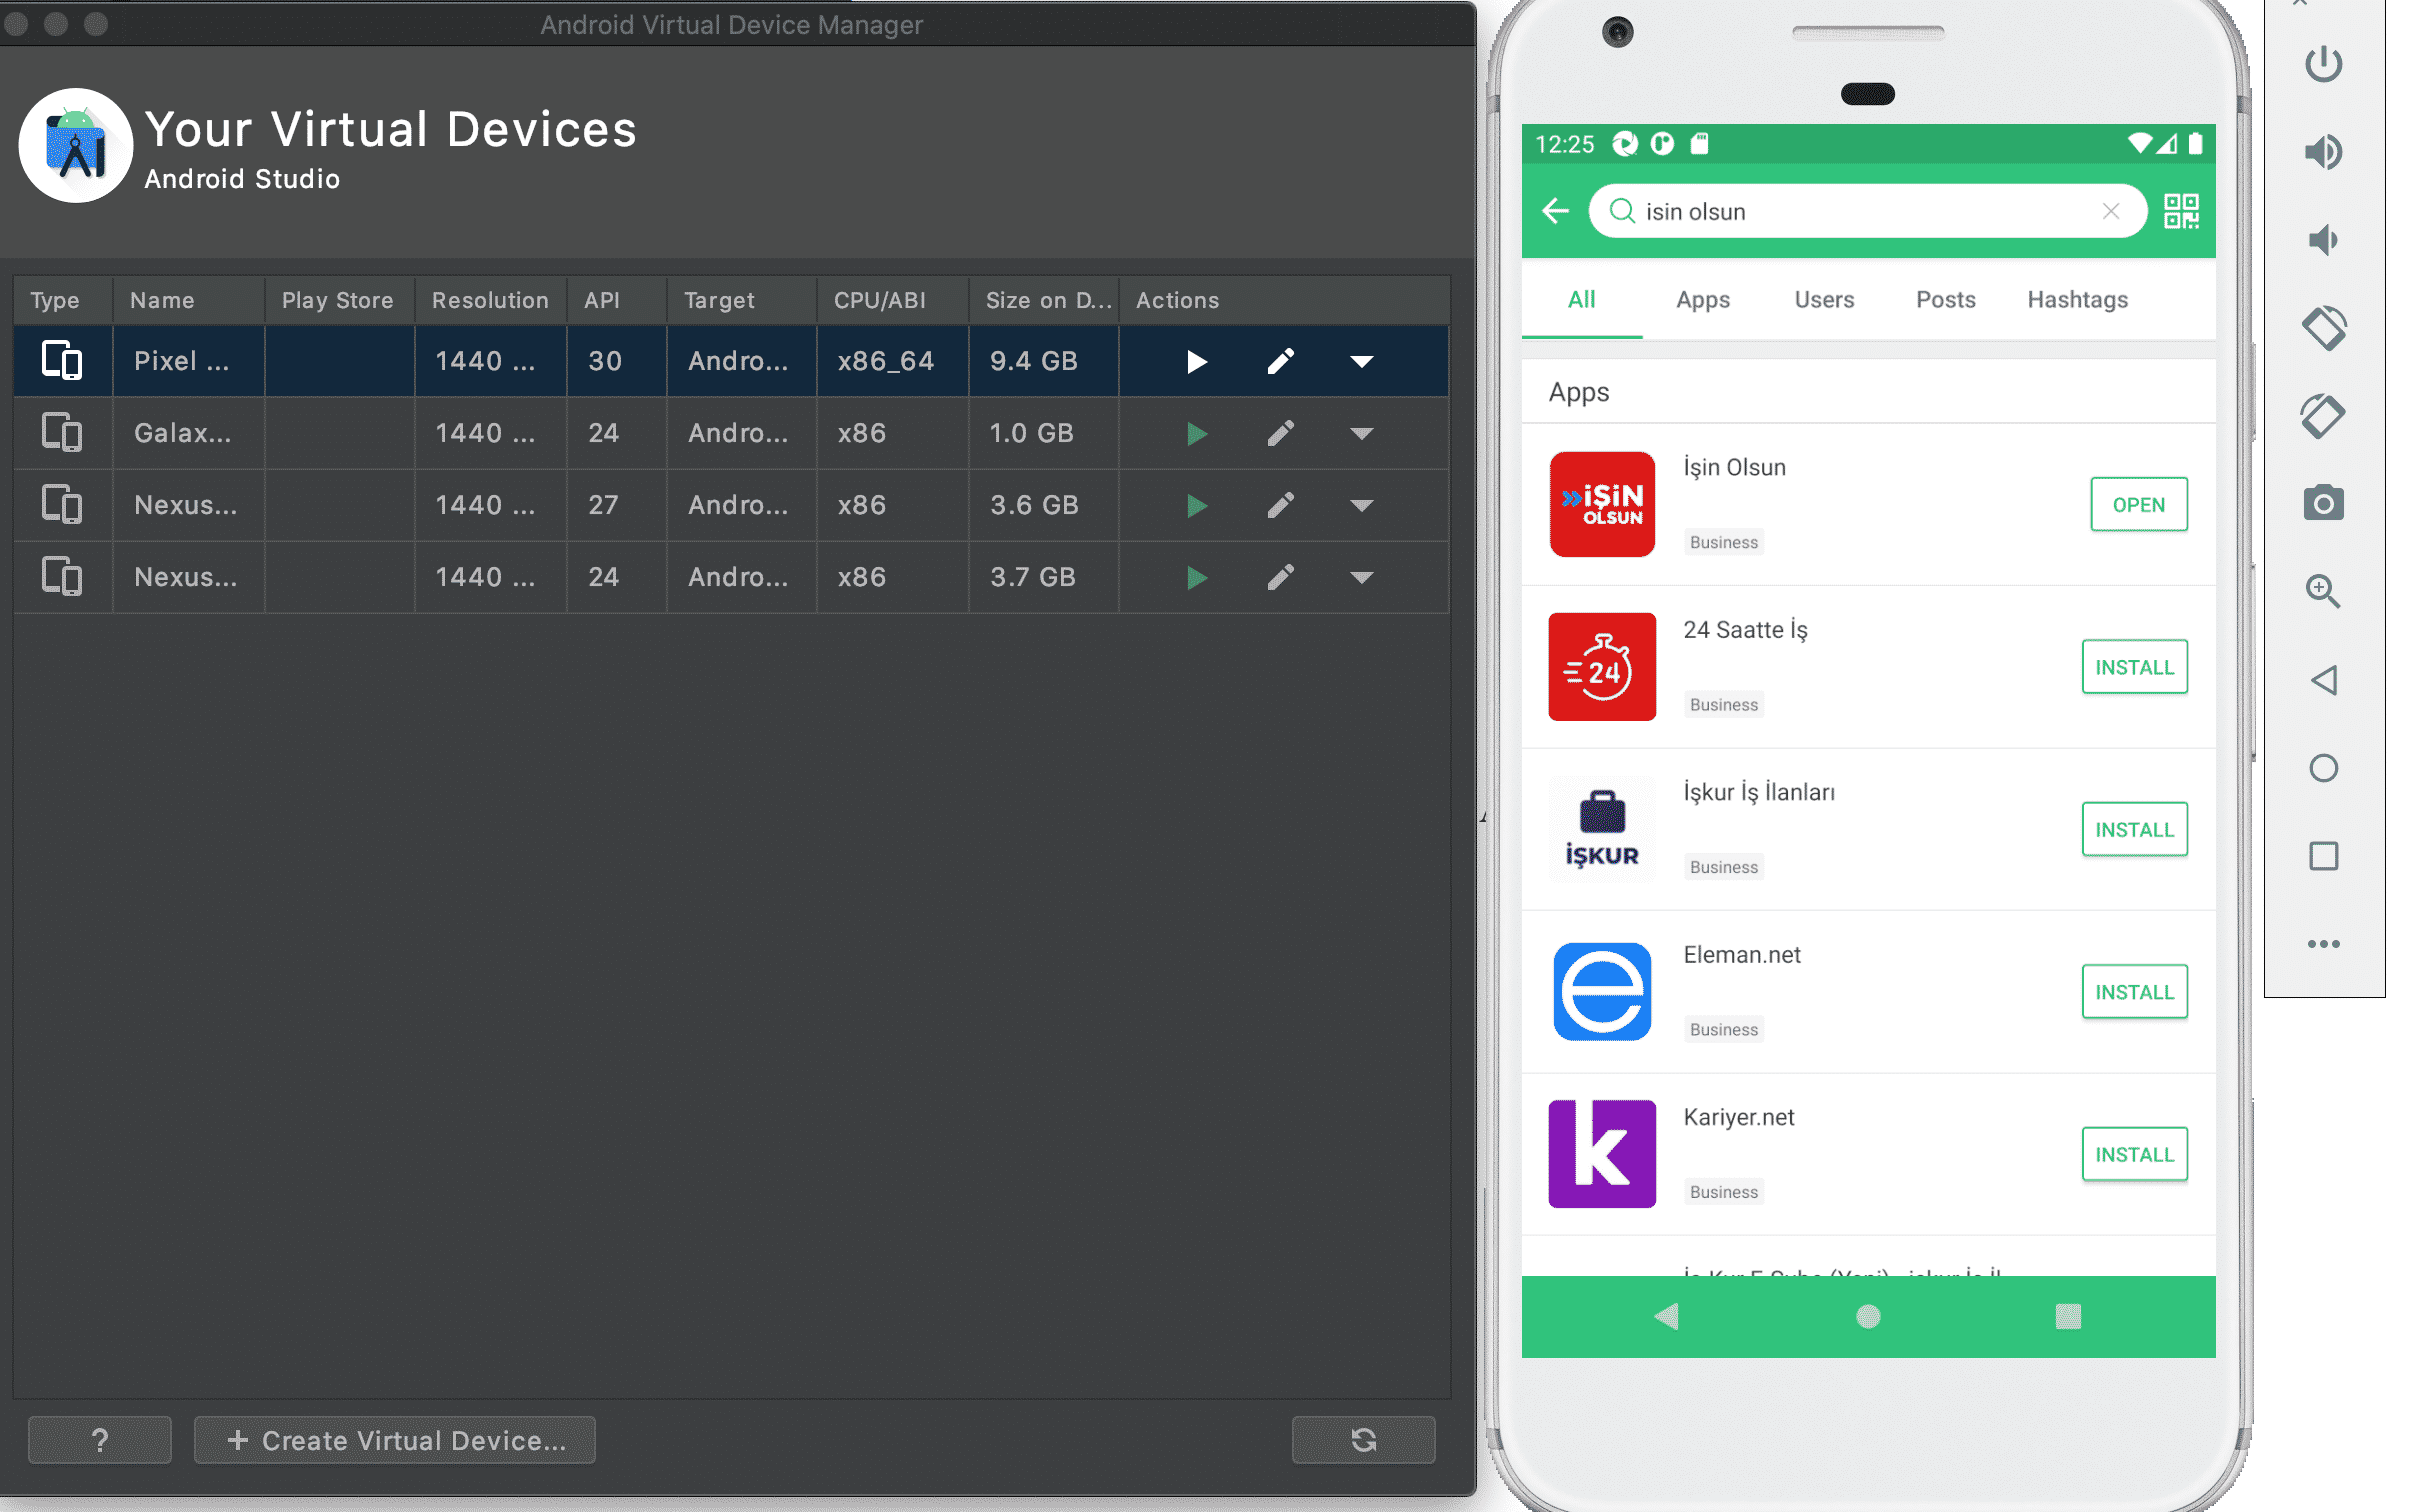
After coming back to the above article and after installing your device, you will see the below result.
Until now, we installed JAVA and Android-related libraries and did their settings and configurations. Now, it is time to download Appium.
Appium Desktop Installation and Configurations
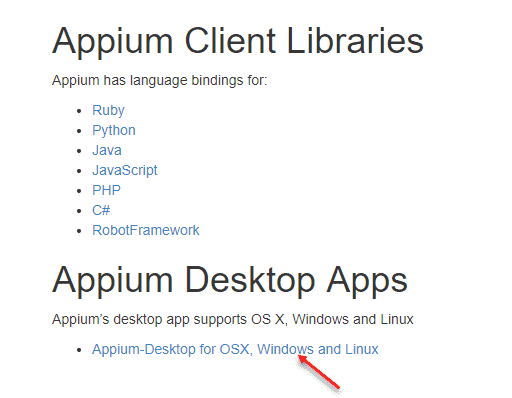
Go to http://appium.io/downloads.html and click the “Appium-Desktop for OSX, Windows, and Linux” link.
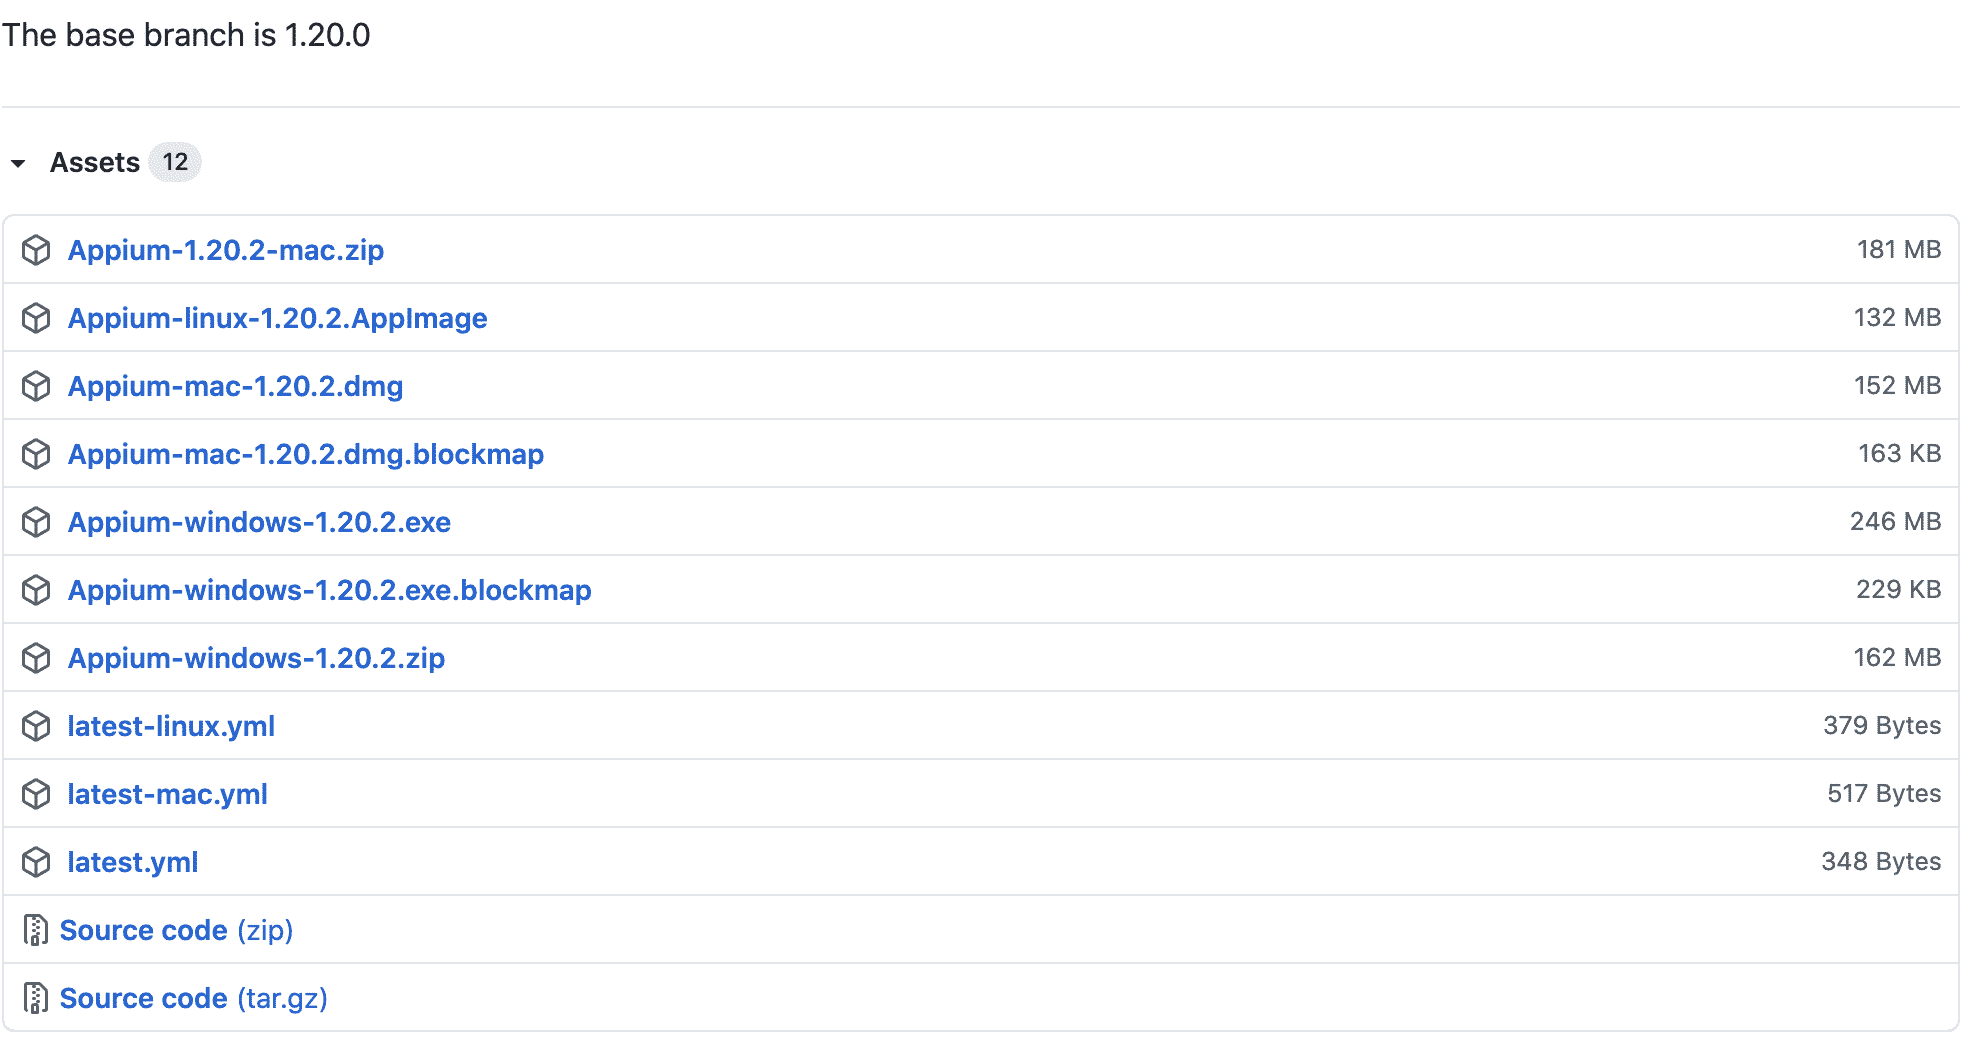
On the below page, click “appium-desktop-Setup-1.20.2.exe” file. (I am writing this article the latest release is 1.20.2, you can install the latest version when you are installing appium.)
When the installation file downloaded, click run and start to install appium desktop.
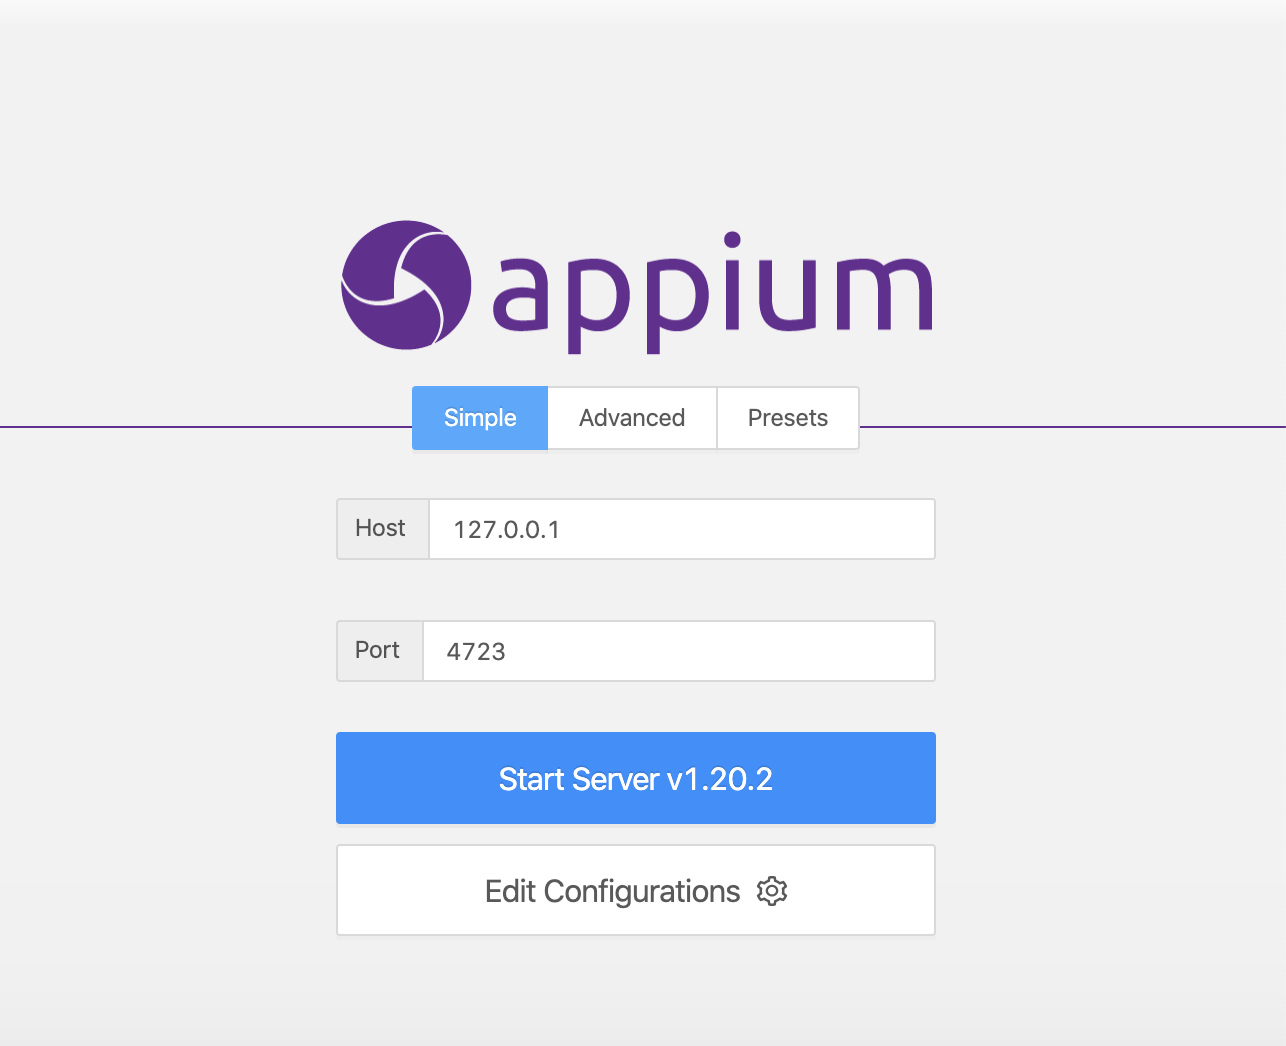
When installation finished, double-click the appium icon and open the appium server as shown below.
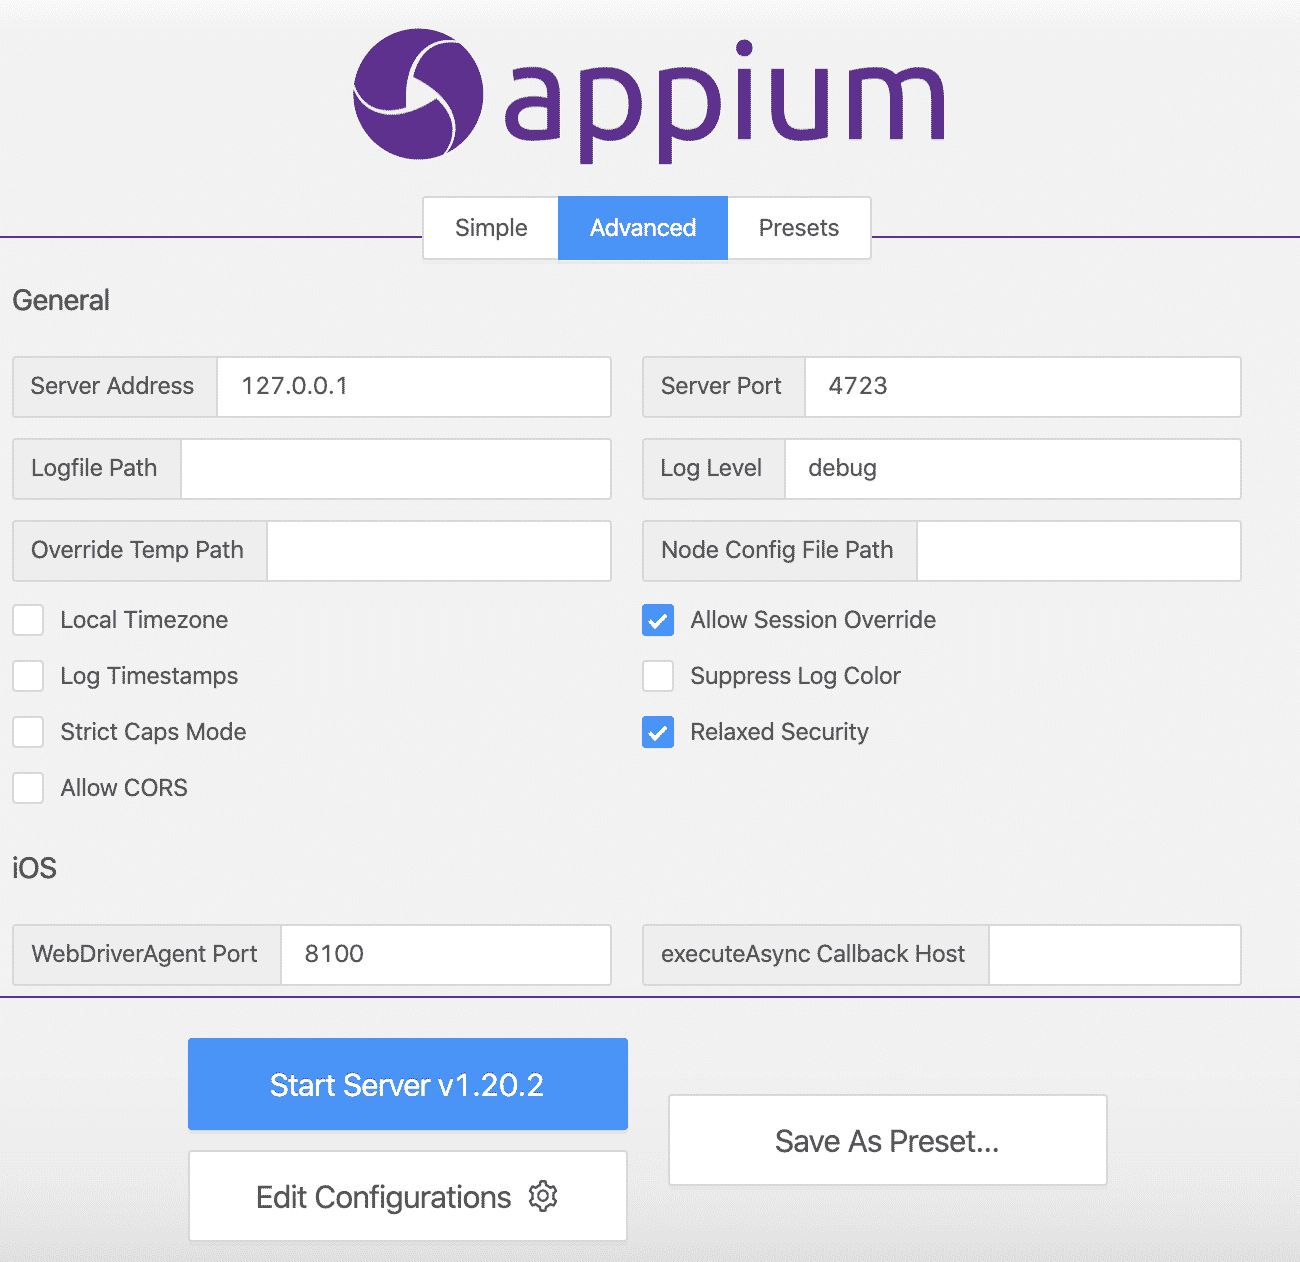
Let’s click the “Advanced” tab and change the Server Address to “127.0.0.1” and click Allow Session Override for override session when there will be problems and click “Start Server”. If you will use a real device and then use “0.0.0.0” for “Server Adress”.
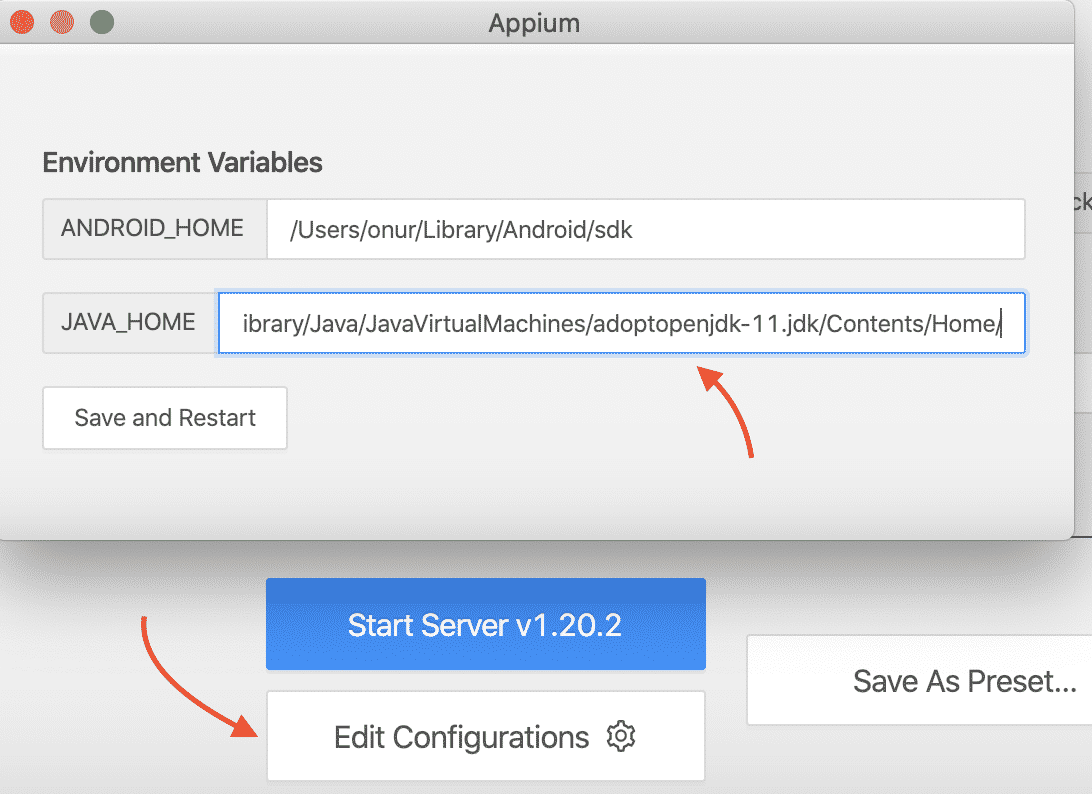
Set Android and JAVA home in Appium Desktop.
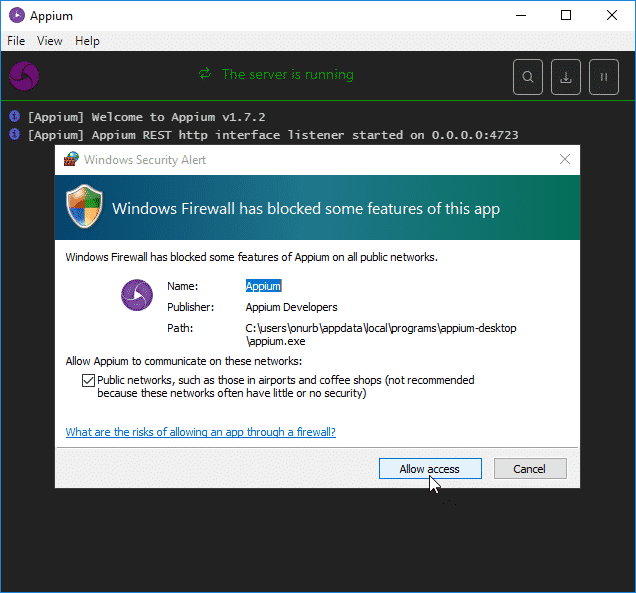
Give the required permission to Appium Server.
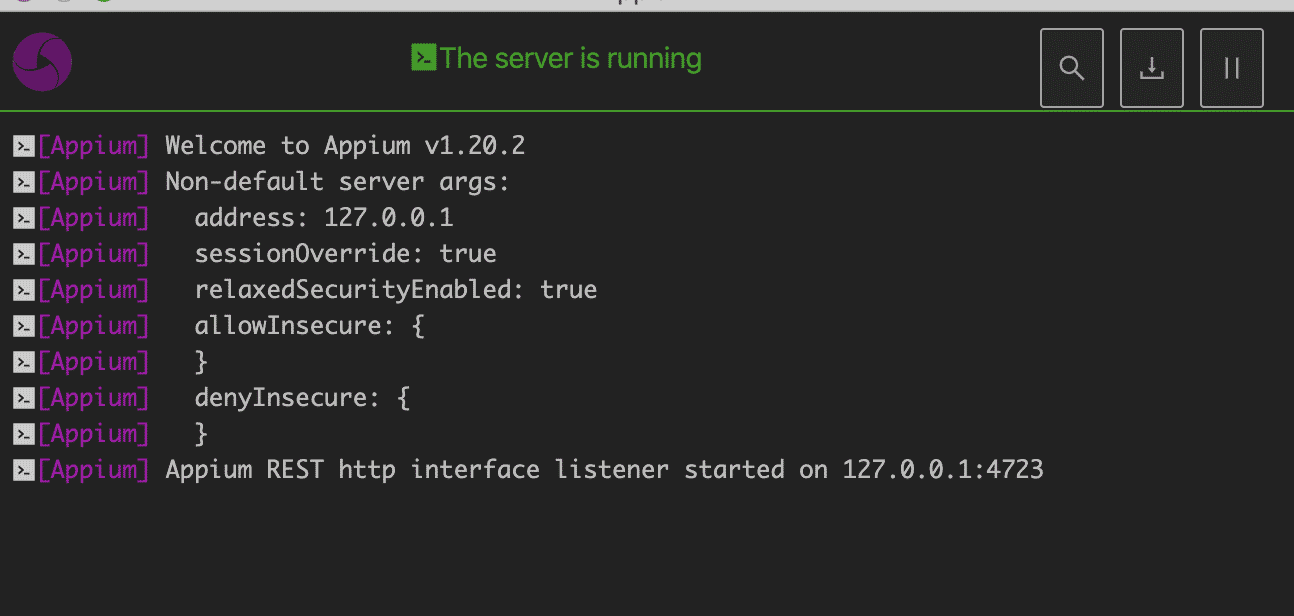
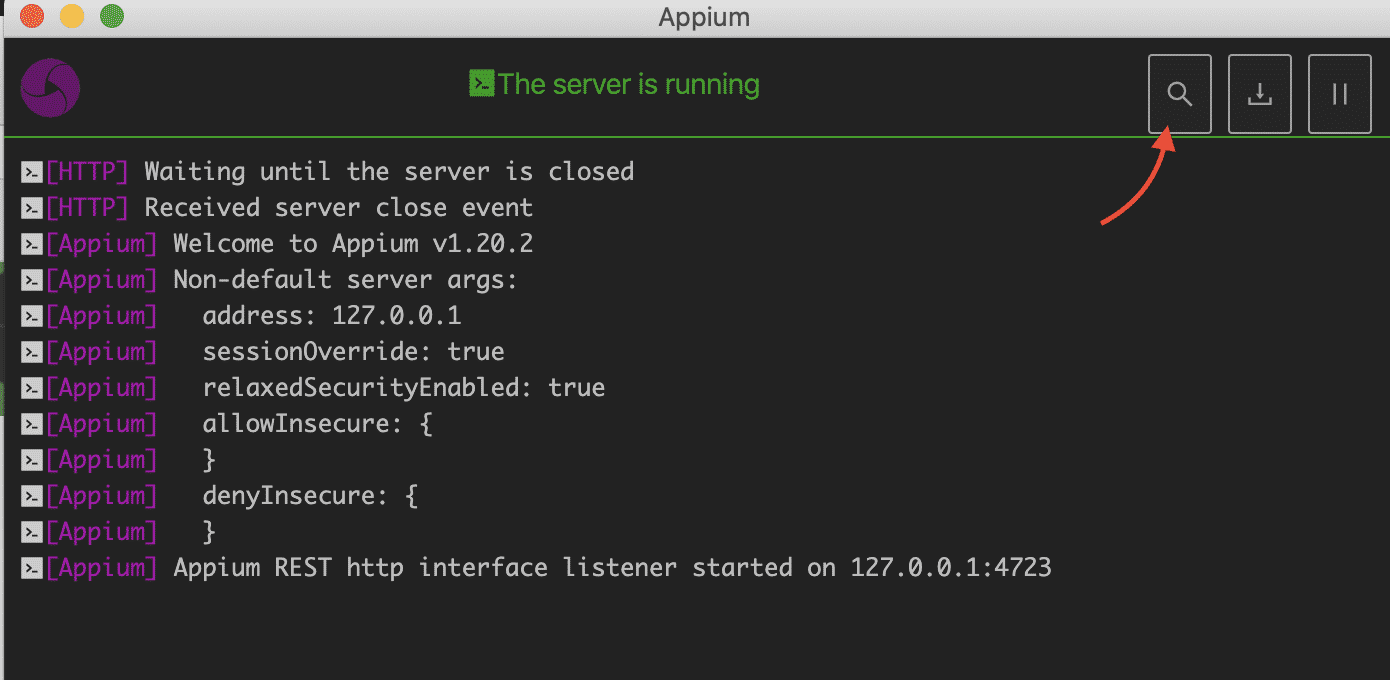
You will see the server up and running.
Android Virtual Device and Pre-Test Settings
Before starting the tests you can directly install your apk or xapk files if you have. In our example, first, we will install apk pure app.
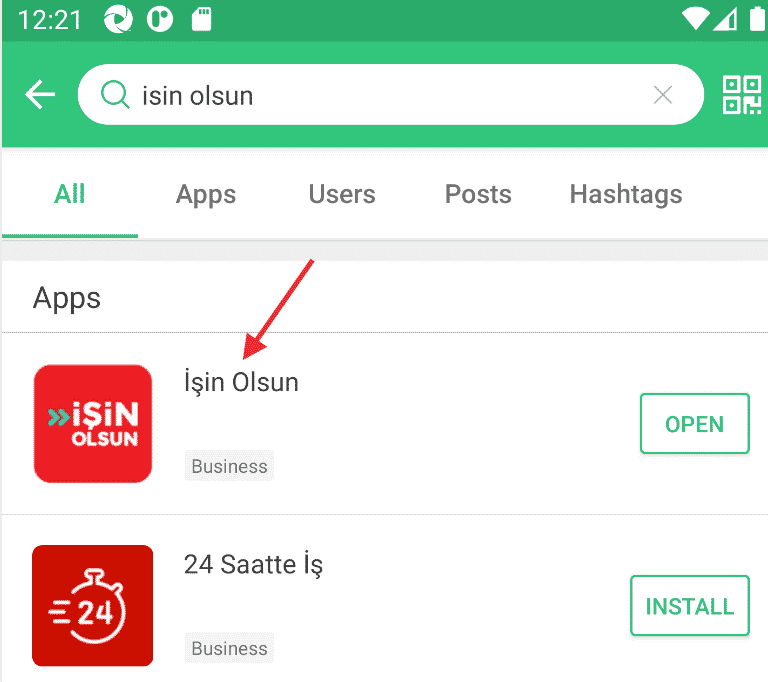
After please open the apk pure app and search for any app you want to install. In this example, I will go with the “Isin Olsun” application. My previous company’s app. :-)
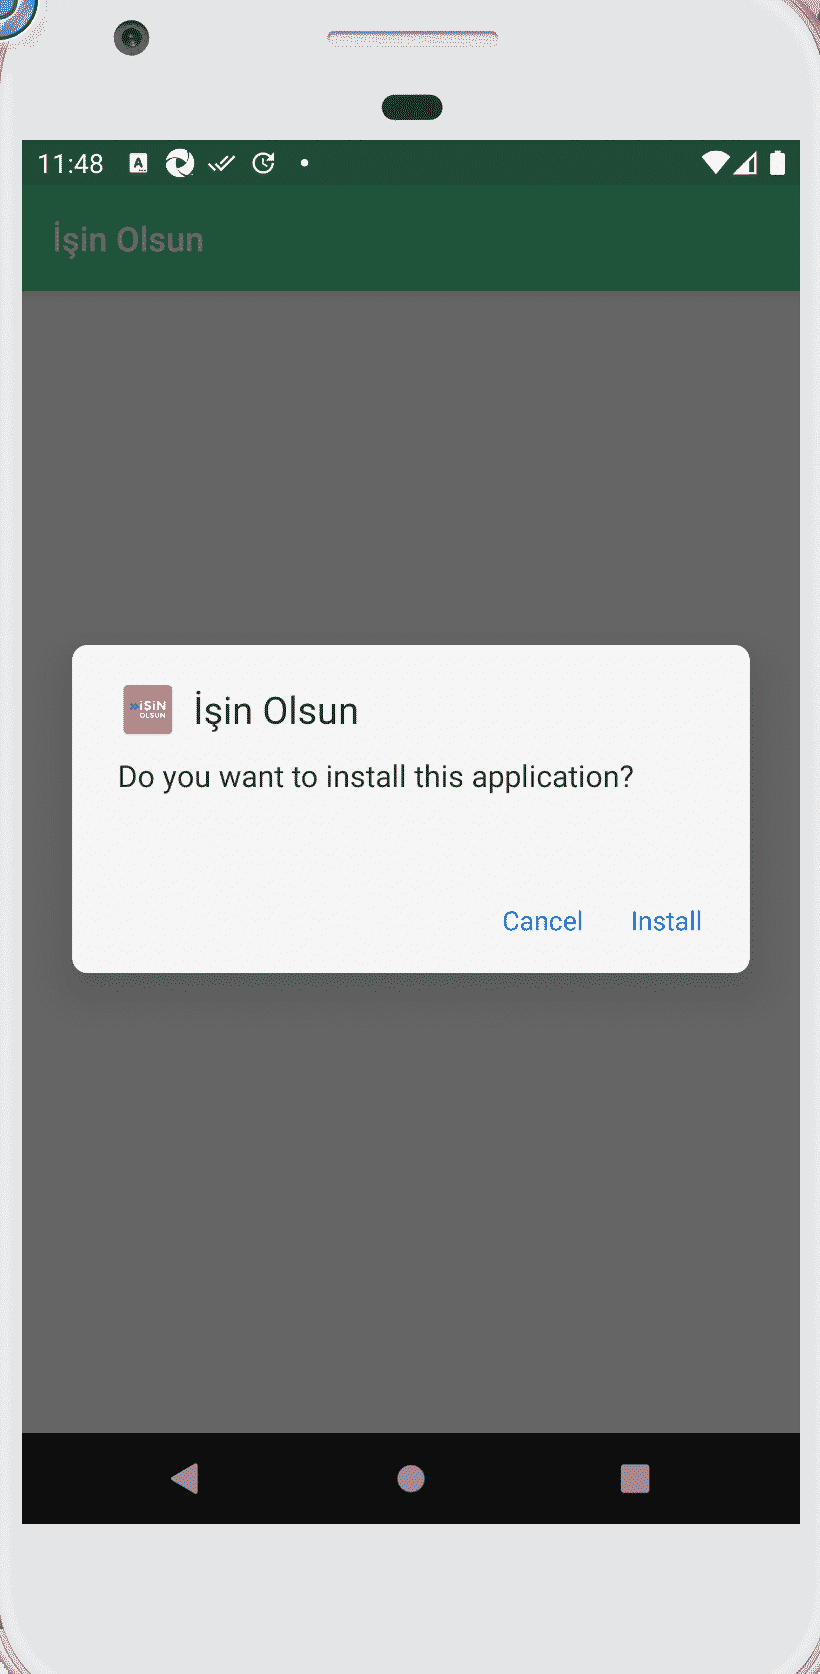
After clicking the install button, the app will be installed.
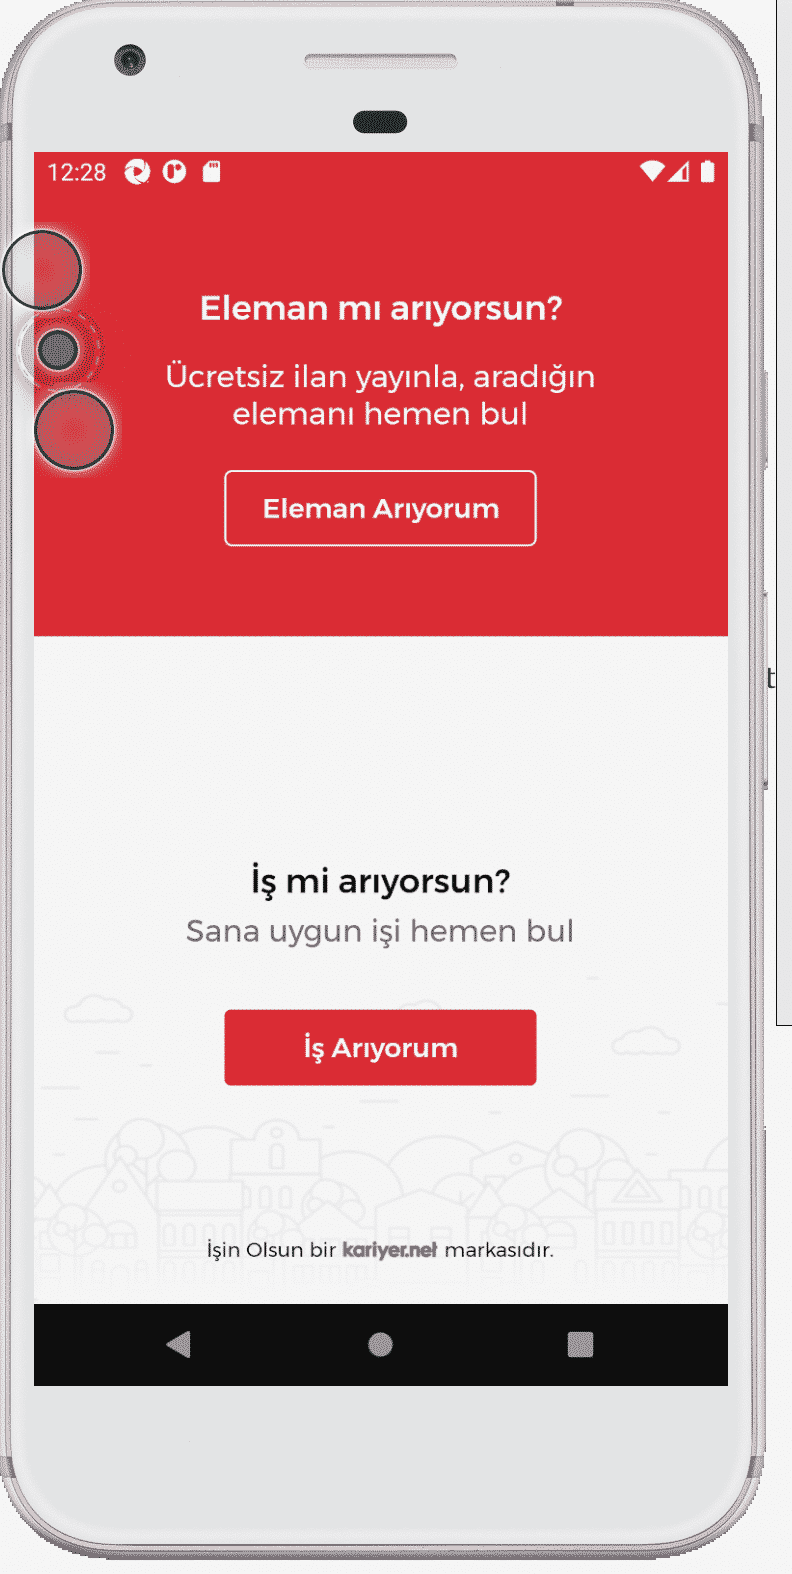
After these steps, when you click the app icon, you will see that it is opening as expected. :)
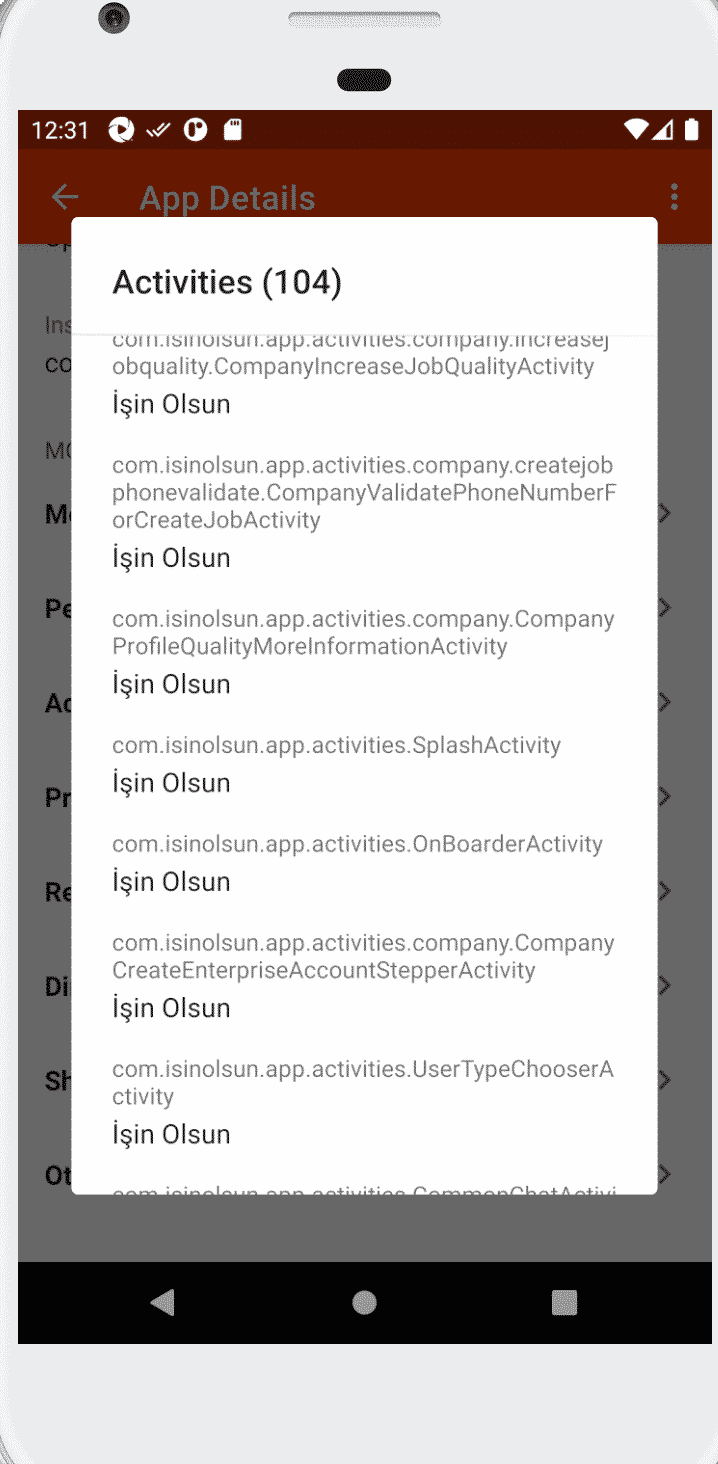
In order to find the splash activity, I installed the APK Info app via APK Pure application. For this, just open the APK pure app, search the “Apk Info” and install the app.
Then, I opened the APK Info app and find our application “İşin Olsun” and click it.
Then I saw all the information about our app. When I looked at the Activities section, I saw that our application is starting with “com.isinolsun.app.activities.SplashActivity“. I will use this info in the automation code’s desired capabilities section. Also, I will use app package info which is “com.isinolsun.com“
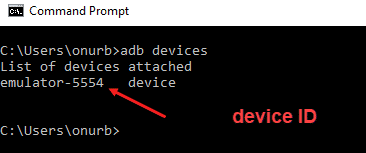
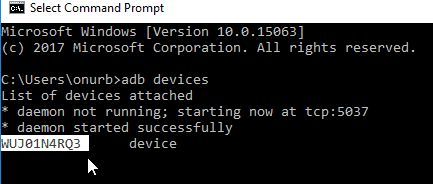
Then, open a command prompt and write “adb devices” command to see connected devices and get the device ID as shown below.
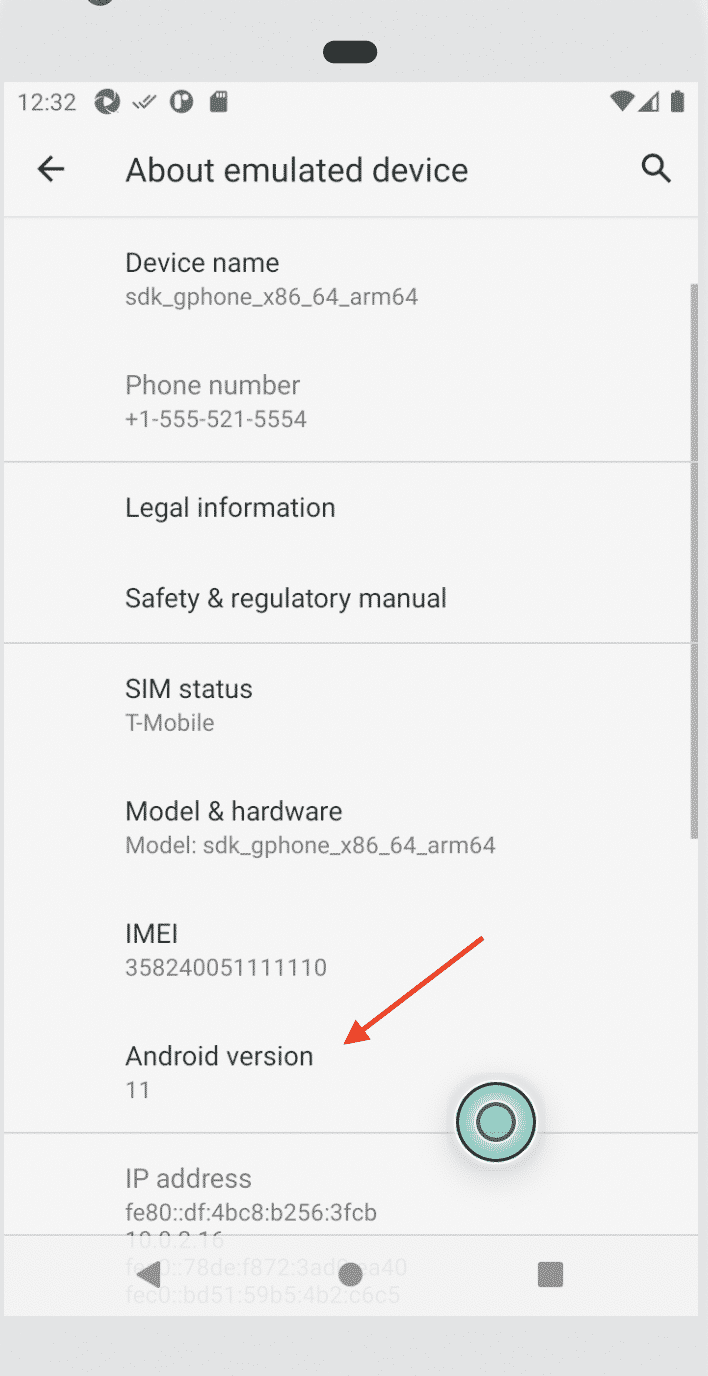
Go to your AVD’s setting tab and check your AVD’s Android Version as shown below. We will use these settings in our test project.
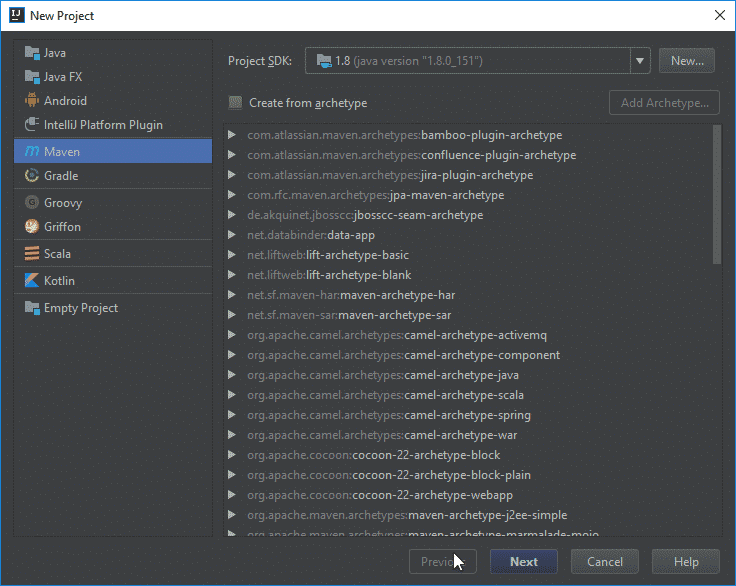
Then, open IntelliJ IDE and create a new project as shown below. First, select Maven and click Next button.
Then, write your project’s GroupId and ArtifactId. You can write the same as shown below. It does not affect anything, just naming.
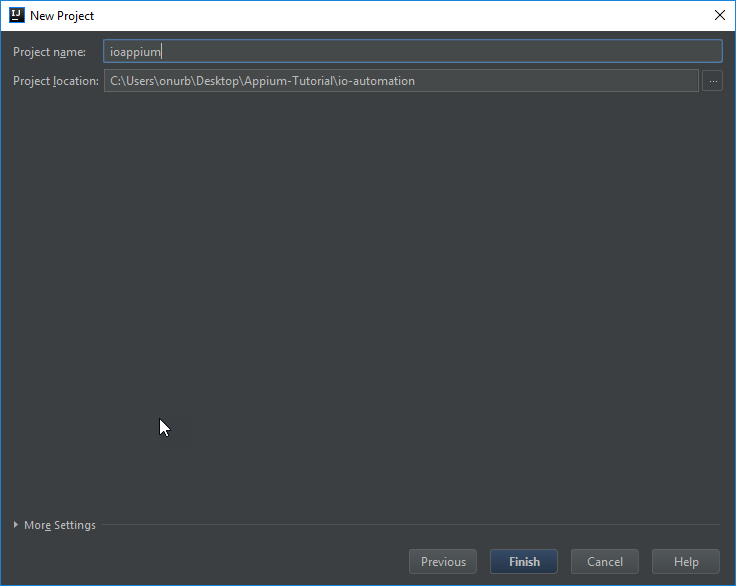
Then, give a name to your project.
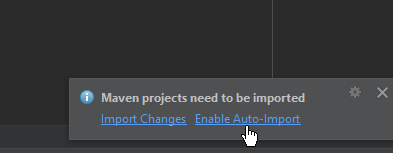
Then, click “Enable Auto-Import” in the right bottom corner.
Go to mvnrepository.com website and get all frameworks’ latest dependency information. We will use TestNG, Appium, Selenium.
Our POM.xml will look like as below. You can see appium’s, selenium’s, and TestNG’s dependencies. I used JAVA11 JDK in this example.
<?xml version="1.0" encoding="UTF-8"?>
<project xmlns="http://maven.apache.org/POM/4.0.0"
         xmlns:xsi="http://www.w3.org/2001/XMLSchema-instance"
         xsi:schemaLocation="http://maven.apache.org/POM/4.0.0 http://maven.apache.org/xsd/maven-4.0.0.xsd">
    <modelVersion>4.0.0</modelVersion>
    <groupId>io-appium</groupId>
    <artifactId>io-appium</artifactId>
    <version>1.0-SNAPSHOT</version>
    <build>
        <plugins>
            <plugin>
                <groupId>org.apache.maven.plugins</groupId>
                <artifactId>maven-compiler-plugin</artifactId>
                <configuration>
                    <source>11</source>
                    <target>11</target>
                </configuration>
            </plugin>
        </plugins>
    </build>
    <dependencies>
        <!-- https://mvnrepository.com/artifact/io.appium/java-client -->
        <dependency>
            <groupId>io.appium</groupId>
            <artifactId>java-client</artifactId>
            <version>7.5.1</version>
        </dependency>
        <!-- https://mvnrepository.com/artifact/org.seleniumhq.selenium/selenium-java -->
        <dependency>
            <groupId>org.seleniumhq.selenium</groupId>
            <artifactId>selenium-java</artifactId>
            <version>3.141.59</version>
        </dependency>
        <!-- https://mvnrepository.com/artifact/org.testng/testng -->
        <dependency>
            <groupId>org.testng</groupId>
            <artifactId>testng</artifactId>
            <version>7.4.0</version>
            <scope>test</scope>
        </dependency>
    </dependencies>
</project>
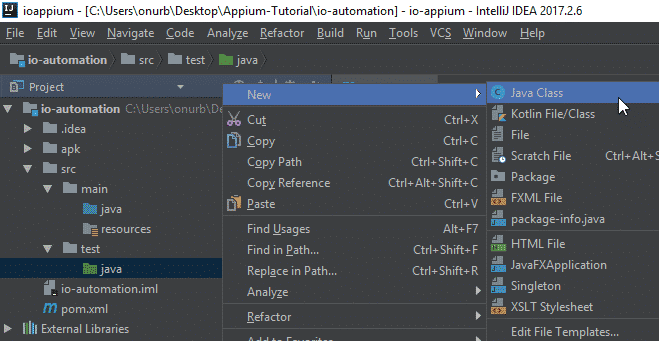
Create a new Java Class as shown below and give a name to your test class. For now, keep it empty, after emulator settings, we will come back to test code at the end of the article.
Now, let’s start the emulator get your device’s information from the android studio as shown below.
After starting the application on the emulator, go to the server and click the magnifier icon to open the inspector.
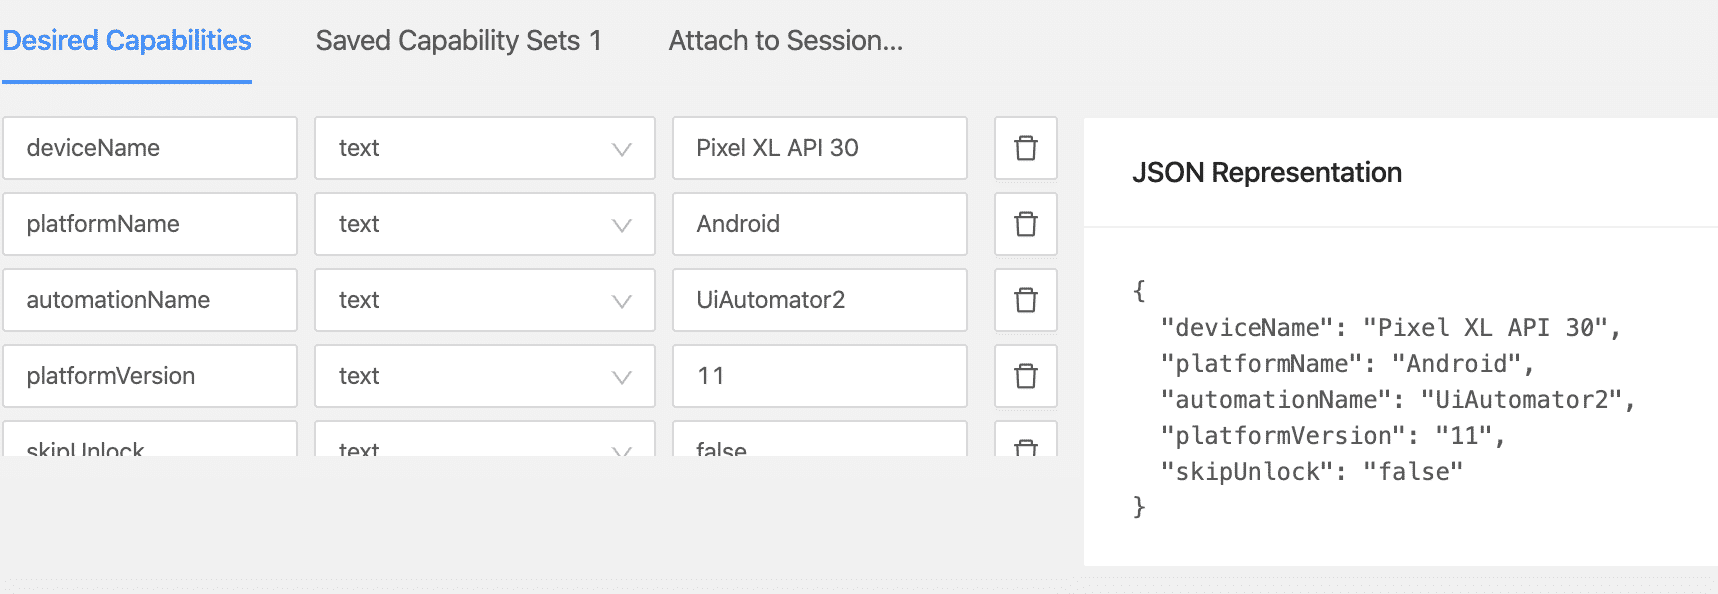
Then, start to enter the capabilities of your device as shown below in the inspector.
{
  "deviceName": "Pixel XL API 30",
  "platformName": "Android",
  "automationName": "UiAutomator2",
  "platformVersion": "11",
  "skipUnlock": "false"
}
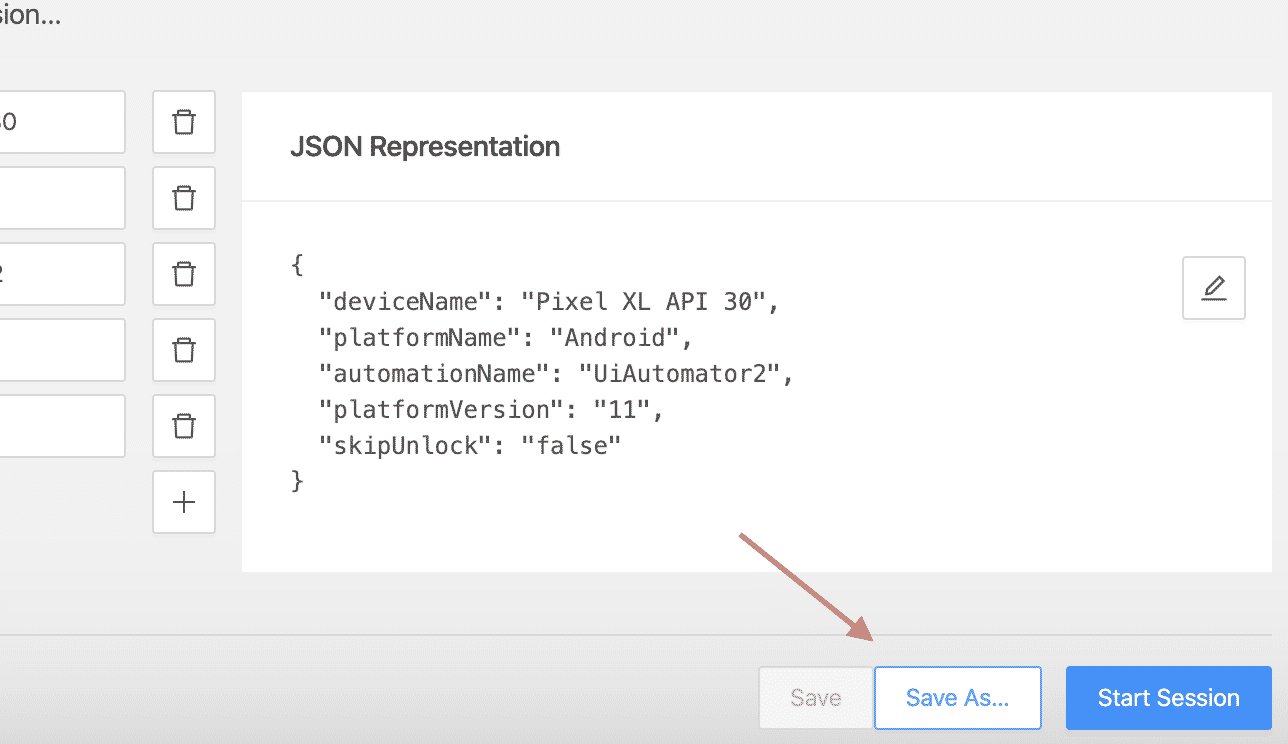
Also, you can save these settings and use them later.
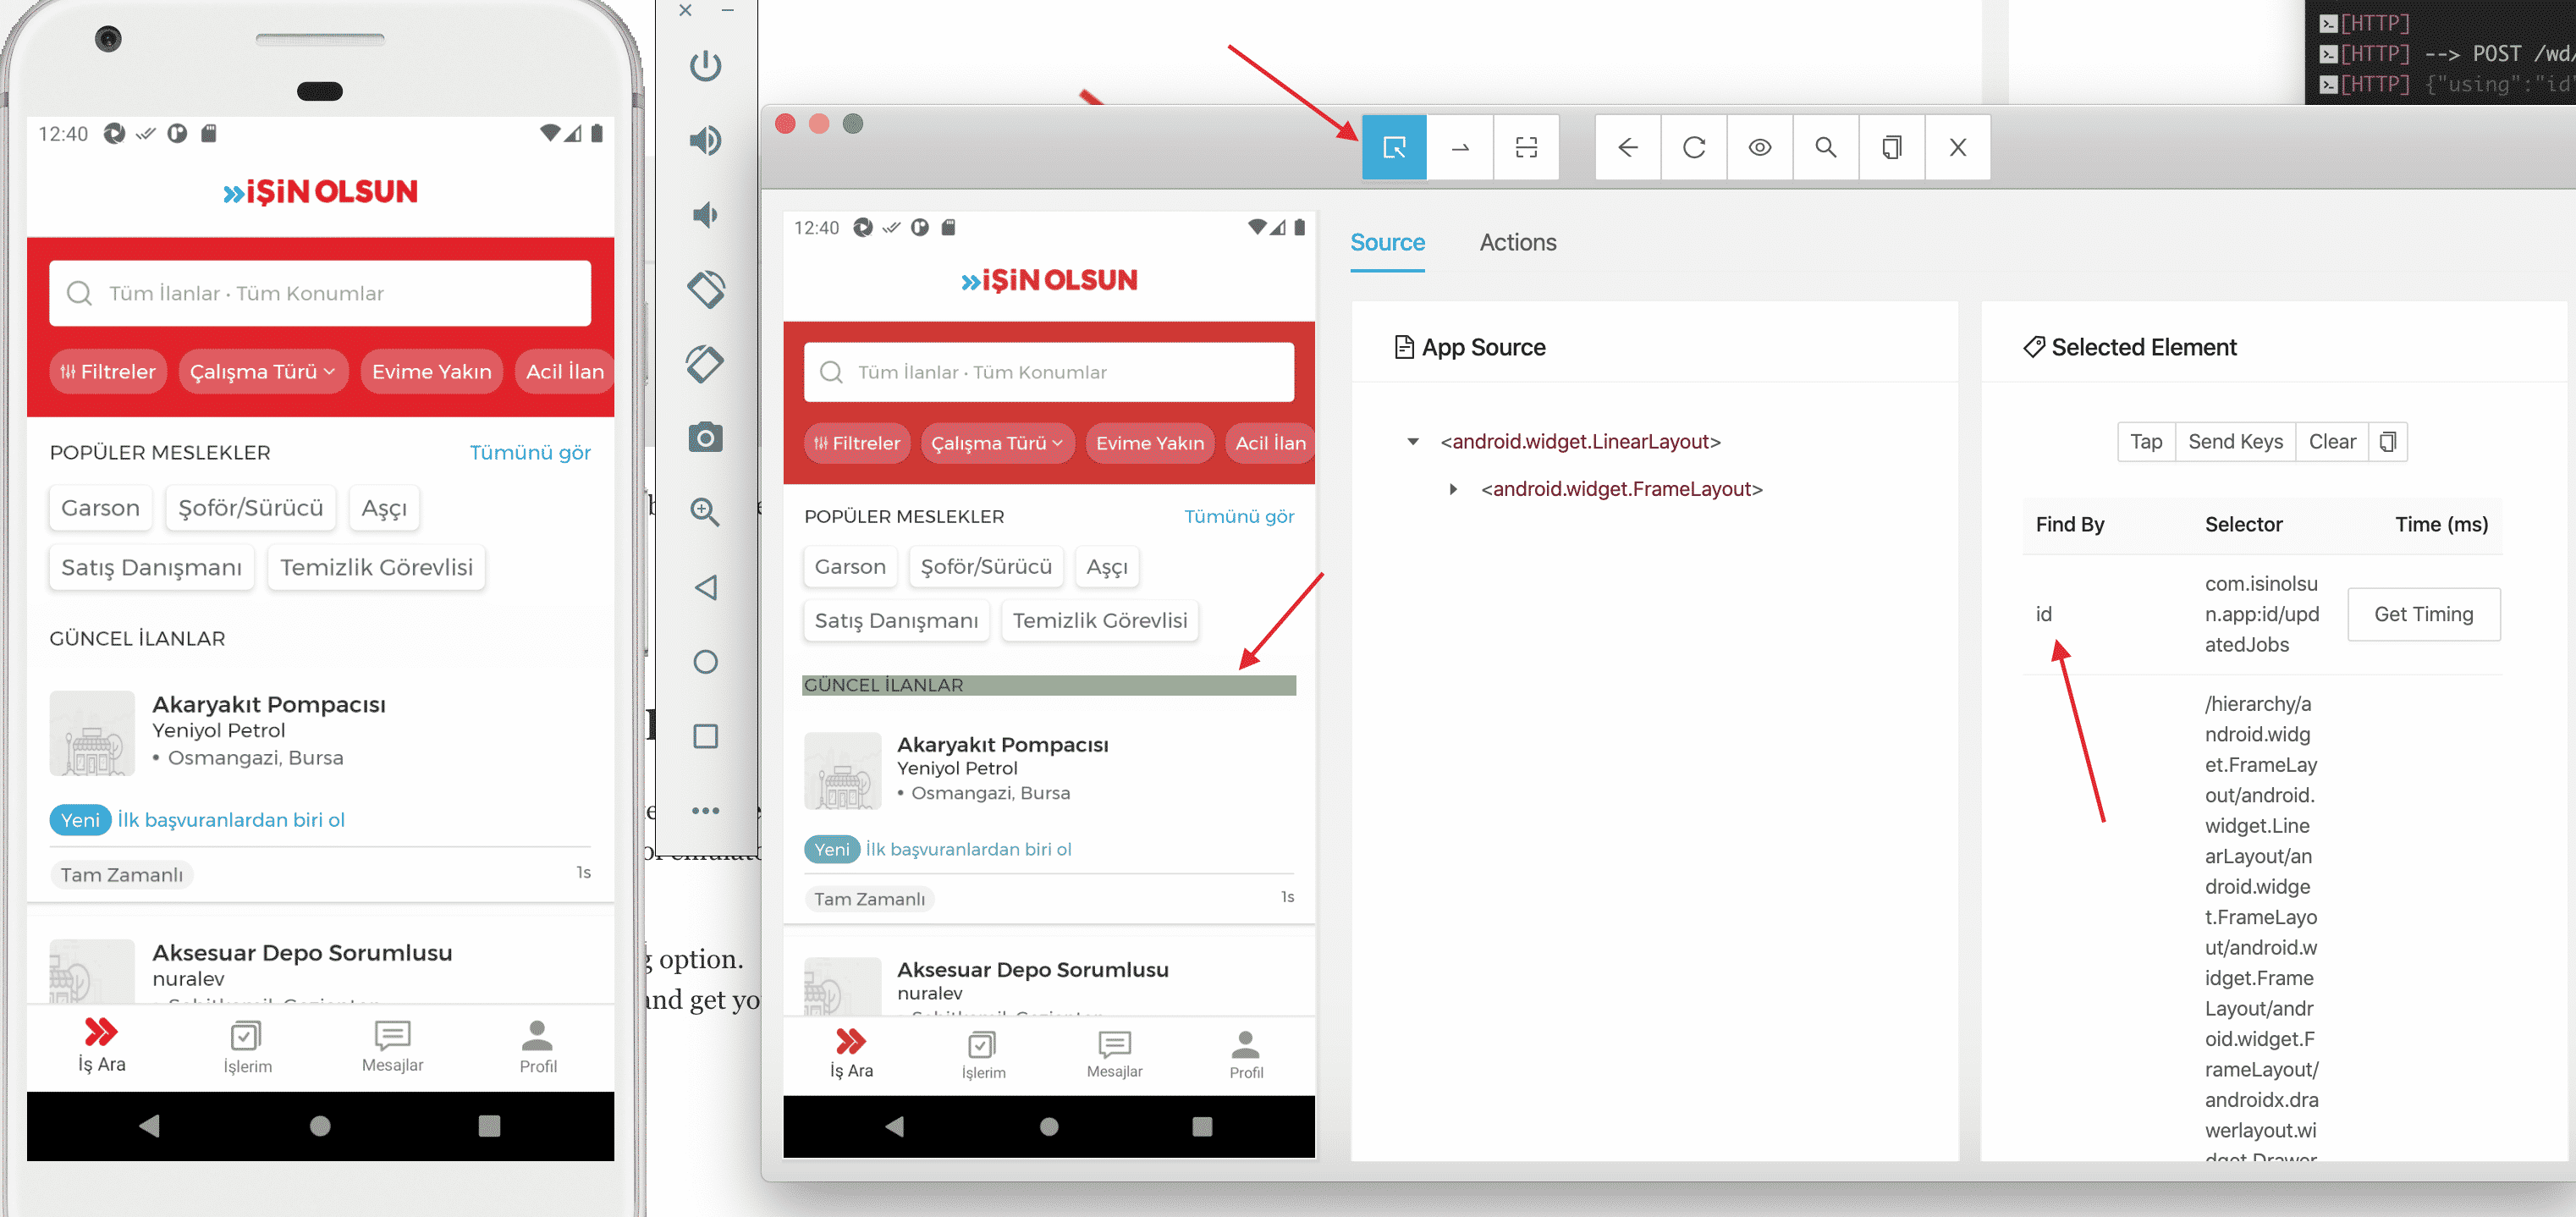
and click “Start Session” to start the inspector session to get your mobile elements ids. Get mobile element’s id’s as shown below. We will use them for our first mobile automation project.
After all of these steps, we need to write our test automation code.
How to Use Real Device instead of Emulator
In emulators, you may face some problems. When I tried to run my test on the emulator XPath locators did not work. Normally, I did not want to use XPath but in our app some for some elements I did not have other options. Then, I tried the same test on a real device, my test worked flawlessly and very fast. Thus, I suggest you use real devices instead of emulators. In order to use the real device we should do the followings:
- Connect your real device to your laptop via a USB port.
- Go to Settings > Developer Settings and enable the USB Debugging option.
- Open the command prompt and type “adb devices” command and get your device ID.
Mobile Test Automation Project by Using Appium and TestNG
It is time to write some code for our Appium Tutorial. The test code of the project is shown below. I added inline comments. The most critical part is DesiredCapabilities, the rest of the code is very similar to Selenium and TestNG test automation codes. Also, you can find this project on GitHub.
Project’s GitHub URL: https://github.com/swtestacademy/appium-sample-test
Below code opens İsinOlsun app, skips splash screen, clicks “job search” button, then accepts notifications and then clicks the second job on the main screen and that’s all. :) It is easy because it is our first test case.
import io.appium.java_client.MobileElement;
import io.appium.java_client.android.AndroidDriver;
import java.net.MalformedURLException;
import java.net.URL;
import org.openqa.selenium.By;
import org.openqa.selenium.remote.DesiredCapabilities;
import org.openqa.selenium.support.ui.ExpectedConditions;
import org.openqa.selenium.support.ui.WebDriverWait;
import org.testng.Assert;
import org.testng.annotations.AfterMethod;
import org.testng.annotations.BeforeMethod;
import org.testng.annotations.Test;
public class ioSampleTest {
    public AndroidDriver<MobileElement> driver;
    public WebDriverWait                wait;
    //Elements By
    By jobsBy           = By.id("com.isinolsun.app:id/rootRelativeView");
    By allowWhenUsingBy = By.id("com.android.permissioncontroller:id/permission_allow_foreground_only_button");
    By searchingJobBy   = By.id("com.isinolsun.app:id/bluecollar_type_button");
    By animationBy      = By.id("com.isinolsun.app:id/animation_view");
    By toolBarTitleBy   = By.id("com.isinolsun.app:id/toolbarTitle");
    @BeforeMethod
    public void setup() throws MalformedURLException {
        DesiredCapabilities caps = new DesiredCapabilities();
        caps.setCapability("deviceName", "Pixel XL API 30");
        caps.setCapability("udid", "emulator-5554"); //DeviceId from "adb devices" command
        caps.setCapability("platformName", "Android");
        caps.setCapability("platformVersion", "11.0");
        caps.setCapability("skipUnlock", "true");
        caps.setCapability("appPackage", "com.isinolsun.app");
        caps.setCapability("appActivity", "com.isinolsun.app.activities.SplashActivity");
        caps.setCapability("noReset", "false");
        driver = new AndroidDriver<MobileElement>(new URL("http://127.0.0.1:4723/wd/hub"), caps);
        wait = new WebDriverWait(driver, 10);
    }
    @Test
    public void basicTest() throws InterruptedException {
        //Click and pass Splash
        wait.until(ExpectedConditions.visibilityOfElementLocated(animationBy)).click();
        //Click I am searching a job
        wait.until(ExpectedConditions.visibilityOfElementLocated(searchingJobBy)).click();
        //Notification Allow
        if (wait.until(ExpectedConditions.visibilityOfElementLocated(allowWhenUsingBy)).isDisplayed()) {
            wait.until(ExpectedConditions.visibilityOfElementLocated(allowWhenUsingBy)).click();
        }
        //Click Second Job
        wait.until(ExpectedConditions.visibilityOfAllElementsLocatedBy(jobsBy)).get(1).click();
        //Do a simple assertion
        String toolBarTitleStr = wait.until(ExpectedConditions.visibilityOfElementLocated(toolBarTitleBy)).getText();
        Assert.assertTrue(toolBarTitleStr.toLowerCase().contains("detay"));
    }
    @AfterMethod
    public void teardown() {
        driver.quit();
    }
}
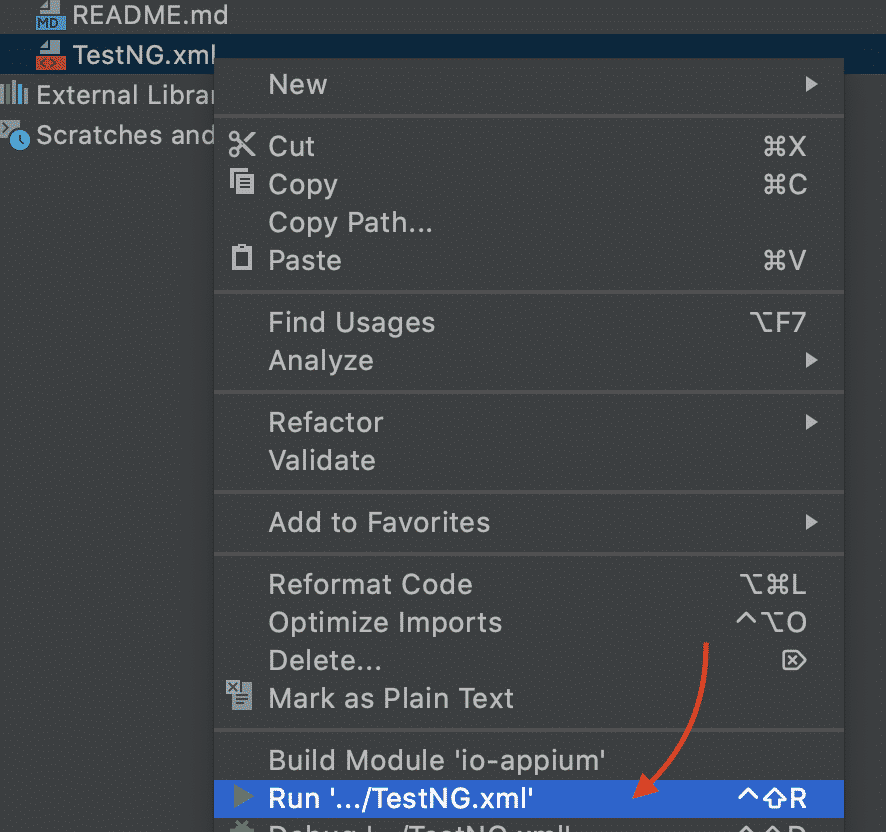
Then, run the test.
And the test should pass as shown below screenshot.
That’s all for this Appium Tutorial. I hope you successfully installed and configured all settings and run your mobile automation code.
If you have any questions please write a comment, me or another expert will try to help you.
GitHub Project
https://github.com/swtestacademy/appium-sample-test
Other Appium Tutorials
Now, you can learn Appium Parallel Testing and How to set up your Own Wireless Mobile Device Farm!
Appium Parallel Testing on Real Devices
Appium Parallel Testing on Multiple Emulators
Appium Cucumber TestNG with Parallel Test Execution
Do you want to learn Appium Actions such as Tab, MultiTouch, Press, Swipe?
I hope you like this article if you like it or if you have any troubles please share your comments with us.
Thanks.
Onur Baskirt

Onur Baskirt is a Software Engineering Leader with international experience in world-class companies. Now, he is a Software Engineering Lead at Emirates Airlines in Dubai.











Hey Onur…such a great tutorial by u…very well described and easy to understand. Can u make a tutorial on how to setup appium(not desktop) on mac with latest release. a step by step guide to install appium and run sample code. it would help me or might other people who are working on mac a lot. Thanks in advance
Hi Mayur, I would like to but I don’t have MAC. :( When I have one, I will do it. But it is not so hard. You can install appium with npm and use it with below command. Please also check this article. http://www.swtestacademy.com/appium-parallel-tests/ and go to “Alternative Way | Appium with Node.js”
Thanks Onur for your quick response…i will check and let u know. And i am very excited to perform http://www.swtestacademy.com/appium-parallel-tests this article at my end.
Welcome :) and Good Luck! ;)
Hey Onur,
i was able to perform successfully the article “http://www.swtestacademy.com/appium-parallel-tests” on Windows but not on MAC. can u help me out
On MAC what kind of problem did you face? CAnberk Akduygu has MAC, I do not have. He may help you. ;)
Great article, we’re waiting more Turkish versions for other articles :)
Thanks Ufuk. I hope I can but it really takes too much time. I am trying to create a global software testing blog from our country. But also some new blogs are coming with Turkish content. I am happy for that. :)
Hi Onur,
As appium going to release Java client 6, can you please share the codes for gesture handling like scroll,swipe,zoom,pinch,page scroll, swipe without using objects etc?
Waiting for your response.
I am super busy Siddharth but I am so happy that Ahmet Samet Baltaci will prepare a document and we will share it on swtestacademy.com. :) Thanks Ahmet.
Here is the article: http://www.swtestacademy.com/appium-mobile-actions-swipe-tap-press/
Hi Onur:
I have some issues trying to do the drag and drop.
I’m not able to do that.
Could you please help me?
Would you please try below code snippet?
TouchAction action = new TouchAction(driver);
action.longPress(elem1).waitAction(3000).moveTo(elem2).perform().release();
http://www.swtestacademy.com/appium-mobile-actions-swipe-tap-press/
Hi Mr. Onur,
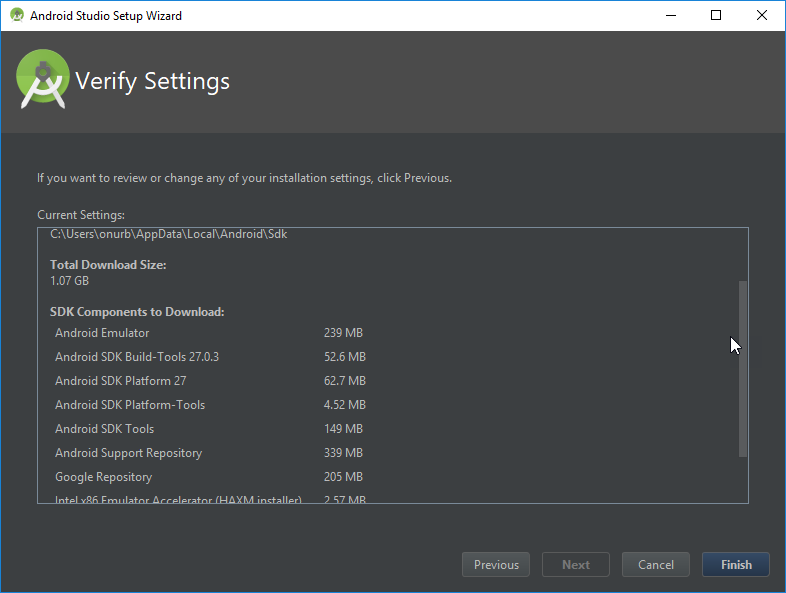
While installing Android Studio, when I reached the “Verify Settings” step, the screenshot appears as below:
Current Settings
Setup Type
Standard
SDK Folder:
C:\Users\automation\AppData\Local\Android\Sdk
However, the “Verify Settings” page in your blog appears as follows:
Current Settings
C:\Users\onurb\AppData\Local\Android\Sdk
Total Download Size: 1.07 GB
SDK Components to Download:
Android Emulator 239MB
Android SDK Building –Tools 27.0.3 52.03MB
Android SDK Platform 27 62.7MB
Android SDK Platform Tools 4.52MB
Android SDK Tools 149 MB
Android Support Repository 339MB
Google Repository 205MB
Could you please explain if I may be doing something incorrectly causing this difference and if so, could you also please let me now what I need to do get the same information as in your document?
Thanks in advance,
Regards
Sai
I also noticed that “Android API 28” is “Partially Installed”
Hi Onur,
I just noticed that the 2 comments I left have been removed by moderator. Since the queries I posted are related to issues I am facing while installing the Android Studio following the instructions in your blog, would you please let me know if you want me to post them again?
Thanks and Regards
Satyasai
Hello Satyasai, I was sleeping, we did not remove them. I will check your problem and get back to you. Note: Comments are passing under moderation before publishing. That’s why you did not see your comments. ;)
Please check here: https://stackoverflow.com/questions/4771895/android-sdk-manager-not-installing-components
Your problem looks like a bit configurational and device related. Try to do a setup with administrative rights.
Hi Onur,
I think I resolved the issue by clearing the contents of the directory “C:\Users\automation\AppData\Local\Android\Sdk” and reinstalling.
Regards
Satyasai
Hi Onur,
Thank you so much for replying patiently to my queries. It is 1st time that I have seen blog authors take time to respond and that too so fast. Thanks also for pointing me to the stackoverflow site. Currently I am continuing with installing the 2 SDKs that did not get installed in the original, which I am doing individually – each taking hours. Thanks for sharing very clear and easy to follow instructions.
Regards
Satyasai
You are very welcome Satyasai.
Hello Onur,
There is a small typo. The “-list” in the command “sdkmanager -list” needs to be “–list” with 2 dashes instead of 1 dash as in “sdkmanager –list”. I noticed the 2 dashes when I viewed the screenshot from close.
Regards
Satyasai
Great! I hope you did all the steps. Good luck!
Thank you for your helpful tutorial, I have an error at the end of step-4 when I start a session, I see this message :
An unknown serverside message…cannot the app package.
I see the app in emulator close or somehow crashed!
how can I solve this issue? thank you again
please check here: https://github.com/appium/appium-desktop/issues/327
Thank you again, I have tried to connect with other APKs like calculator and it is ok. But still, I have that problem with IsinOlsun and my application. the error on appium server is :
Encountered internal error running command: Error: Cannot start the ‘com.isinolsun.app’ application. Original error: Error executing adbExec. Original error: ‘Command ‘C\:\\Users\\naser\\AppData\\Local\\Android\\Sdk\\platform-tools\\adb.exe -P 5037 -s 0eebac319805 shell am start -W -n com.isinolsun.app/com.isinolsun.app.activities.OnBoarderActivity -S’ exited with code 4294967295′; Stderr: ‘Security exception: Permission Denial: starting Intent { flg=0x10000000 cmp=com.isinolsun.app/.activities.OnBoarderActivity } from null (pid=12948, uid=2000) not exported from uid 10139
and from Inspector Session, I can not start and connect! Please Do advice me what should I do. Thank you again
I Found my solution:
install the latest version Appium v1.9.0
Error was still there,
..” Security exception: Permission Denial..”.
and the solution was in this link:
https://github.com/appium/appium/blob/master/docs/en/writing-running-appium/android/activity-startup.md
in Command Prompt:
adb shell am start -W -n com.isinolsun.app/com.isinolsun.app.activities.SplashActivity -S -a android.intent.action.MAIN -c android.intent.category.LAUNCHER -f 0x10200000
and done connected!
Great! Thanks Masha to share the solution.
Thank you so much for this detailed steps on latest. Can you please help also with identification of elements ? There are so many pages related to XCUITest iOS app testing and finding elements using predicate strings / class. But there is no clue about how do we implement in our selenium java. Any help on this will save lots of time
For iOS testing I would like to suggest this page: http://www.swtestacademy.com/ios-testing-appium-java/
Hey could you please tell me why we are not able to download the sdk tools only form the andoid website which you had explain in
http://www.swtestacademy.com/appium-start-guide/
Thanks in advance
At that time we do not need to get all the things. That’s why SDK only version was enough.
Yes SDK only version is enough but where can we download this version as this version is no longer available on the android official site
Thanks
Yes Sukhpreet, you are totally right. I could not find it anymore and that’s why I downloaded the full version and prepared a new article for this.
hi, here is the link to download android sdk version, https://dl.google.com/android/android-sdk_r24.4.1-windows.zip?hl=zh-cn
Thanks, Lily. Did you try this SDK version? And also how do you create an emulator with this without Android Studio installation? I would like to hear your experience. I thank you very much for your contribution.
Hi Onur,
Great article! I tried following step by step on my Mac and got Appium installed (latest ver 1.8.2). I’ve also cloned the sample test project and fired it up in IntelliJ. It would start the İşin Olsun app on both virtual and physical devices, but timeout when waiting for UI element to become visible. I played around with the timeout value of the driver and increased to 1000sec, still the same. Looks like it is just not able to find any the UI elements at all. I have also try older versions of Appium included 1.3.1 which is used in your article. Still the same result. Am I missing anything? Thanks in advance!
cheers,
Thomas
Hello Thomas, first thank you for your comment. I have not tried the latest Appium version. For the last 2-3 months, I am working on API automation. I highly suggest you try another application rather than IsinOlsun apk. In APK Pure you can find many apks. If the result is the same then we will talk again. For the İsinOlsun app please recheck the activities and try different activities for fire-up. Maybe the team has been changed some stuff in the app. I don’t know the latest status. I am not head of İsinOlsun IT team anymore. Thus, I don’t know the latest details.
Hi Onur,
Thanks for getting back to me.
I have finally made it working! I tried with other apps too and same error. So I googled a bit and found that it seems to be a bug introduced in the latest Appium. https://github.com/appium/appium/issues/10874.
Finally I found that Appium Node.js ver 1.8.1 works perfectly for me.
cheers,
Thomas
Hi Thomas, I am happy to hear that you are on track. Thank you so much for letting know that bug with us.
Cheers,
Onur
Hi,
I am getting issue while opening the uiautomatorview in console window
This is the error which I got
C:\Users\HR>uiautomateviewer
‘uiautomateviewer’ is not recognized as an internal or external command,
operable program or batch file.
C:\Users\HR>uiautomatorviewer
‘”C:\Users\HR\AppData\Local\Android\Sdk\tools\lib\\find_java64.exe” -s’ is not recognized as an internal or external command,
operable program or batch file.
ERROR: No suitable Java found. In order to properly use the Android Developer
Tools, you need a suitable version of Java JDK installed on your system.
We recommend that you install the JDK version of JavaSE, available here:
http://www.oracle.com/technetwork/java/javase/downloads
If you already have Java installed, you can define the JAVA_HOME environment
variable in Control Panel / System / Avanced System Settings to point to the
JDK folder.
You can find the complete Android SDK requirements here:
http://developer.android.com/sdk/requirements.html
Please help as I am unable to continue with your article
Thanks
Hi, you have to do below steps which are explained in the article:
1) And then add ANDROID_HOME variable and its path should be Android SDK’s path. Also, check your JAVA_HOME variable. JAVA_HOME should equal to JAVA SDK’s path.
2) Then, you need to add required Android tools and JAVA JRE paths to your system path as shown below.
3) After that, check your settings and installations. Open a command prompt window and type “sdkmanager –list” command as shown below.
Please do these settings carefully, restart your PC and run the command again. If you have a problem, then check your installation folders and do a proper installation.
HI Onur,
Great article that was easy to follow.
I had been banging away trying to get the different components up and running.
Your instructions offered great clarity.
Mobile Automation here I come!
Kind regards,
Paul
Hi Paul, I am also glad to hear that. If you face any problem or If you have any suggestions, I would like to hear from you. Happy automating! :)
Hi onur,
Would you please tell me how to fix the following error
C:\Users\HR>uiautomateviewer
‘uiautomateviewer’ is not recognized as an internal or external command,
operable program or batch file.
C:\Users\HR>uiautomatorviewer
‘”C:\Users\HR\AppData\Local\Android\Sdk\tools\lib\\find_java64.exe” -s’ is not recognized as an internal or external command,
operable program or batch file.
I have also set sdk variables in the system variable.
Please check below solutions:
https://stackoverflow.com/questions/22180954/adt-bundle-cant-find-java
https://superuser.com/questions/193873/what-is-the-path-for-jdk-on-windows-7-64-bit
Depending on if you installed the 64-bit or 32-bit JDK it should be in:
32-bit: C:\Program Files (x86)\Java\jdk1.6.0_21\bin
64-bit: C:\Program Files\Java\jdk1.6.0_21\bin
You should be able to edit your PATH environment variable to include that path.
Hi Onur,
I am unable to install apk on my vertual device I got the following error
While dragging the apk on my android virtual device
“failed to start adb check settings to verify your chosen adb path is valid”
Hı Sukhpreet, please check this one: https://stackoverflow.com/questions/41337336/android-studio-failed-to-start-adb I hope it helps.
This is nice article ! but when you want to setup configuration for real device, you can also find step by step installation of appium on mac with real device configuration by following the link
– https://techsouljours.blogspot.com/
https://techsouljours.blogspot.com/2018/08/install-appium-on-mac.html
Have a good blogging. :)
Hi Onur,
I am facing a problem wherein I am not able to find the elements that are within a FrameLayout, so while I run the appium script using the resource id, I get No such element found exception. Can you please tell me how to address this issue, as I am stuck with this case since past 2 months.
I am using appium 1.8.1 desktop
Also tried using automation name as UiAutomator2 but still of no help.
Hi, I hope this tactic will help: https://stackoverflow.com/questions/35378885/how-to-find-inner-elements-in-appium
Hi Onur,
Thank you for your article, it helped me to set up my automation testing.
I am facing a problem. I want to automate my test scenarios. How may I detect if my test scenario failed or passed?
For example I am checking for user registration. when it finish I want to report in logs that registration finished successfully. How may I detect this?
And one more question is how to restart test test scenario if application crashes?
Appium 1.9.1.
Python 3.7.2
Work with real devices and emulators
https://medium.com/@ssaurel/how-to-auto-restart-an-android-application-after-a-crash-or-a-force-close-error-1a361677c0ce
https://discuss.appium.io/t/how-to-generate-test-reports-in-appium/17513
Hi Onur,
Thank you for such a great article.
All your articles are very helpful.
Welcome Dear Dinesh for your kind and nice comment. I am happy that this article helps. :)
Hi Onur,
Thank you for such a great tutorial
It’s very helpful.
I am doing the last part “code opens İsinOlsun app”
but i have no idea how to do
I am new to Intellij IDEA
Didn’t know how to link with appium
You are welcome.
Open the intelliJ and do the followings:
Click New -> PRoject from Version Control -> Git
Then copy and paste this URL: https://github.com/swtestacademy/appium-sample-test.git
Then, sample project will open on IntelliJ. If you see, auto update maven indices just click ok. Maven will update the dependencies automatically.
After these steps, run the test code. It may work but maybe will fail at clicking the second job because this app is not stable on the emulator.
We are linking Appium and JAVA code with desired capabilities. You can find it also in the code. Like shown as follows:
@BeforeMethod(new URL(“http://127.0.0.1:4723/wd/hub”),caps);
public void setup () throws MalformedURLException {
DesiredCapabilities caps = new DesiredCapabilities();
caps.setCapability(“deviceName”, “Galaxy Nexus API 24”);
caps.setCapability(“udid”, “emulator-5554”); //DeviceId from “adb devices” command
caps.setCapability(“platformName”, “Android”);
caps.setCapability(“platformVersion”, “7.0”);
caps.setCapability(“skipUnlock”,”true”);
caps.setCapability(“appPackage”, “com.isinolsun.app”);
caps.setCapability(“appActivity”,”com.isinolsun.app.activities.SplashActivity”);
caps.setCapability(“noReset”,”false”);
driver = new AndroidDriver
wait = new WebDriverWait(driver, 10);
}
Thank you, Onur.
I know how it works
Welcome :)
Feel sorry
I saw another video then know how to use Intellij IDEA
just like Android studio
cheers
Newman
Cheers, buddy!
Hi Onur
I am new to Intellij IDEA, wonder that if i develop with community version will be okay?Cause i try to use community version to do the same thing, then find out there is no auto-import for maven project.
Thanks
Newman
ohhh..i get the answer
just need to add libraries manually on website: central.maven.org
sorry for disturbing
Newman
No worries. :)
Hi Onur,
Can you post a tutorial on how to integrate Appium with the latest visual studio? I already have a project but I don’t know how to start integrating it to my visual studio.
I already installed Appium desktop and Android studio and already connected it (I followed your steps above).
Thanks in Advance!
Hi Edward,
I suggest you this course: http://www.executeautomation.com/site/course/appium-automation-with-c/
Hi Onur,
My bad, what I mean is Visual Studio Code.
Oh I am using IntelliJ. I have visual studio code but I am not using it extensively.
Hi Onur,
Why is intellij not recognizing these scripts?
driver.findElement(By.xpath(“//*[@text=’Sign in’]”)).click();
driver.findElement(By.xpath(“//*[@text=’Make a Payment’]”)).click();
driver.findElement(By.xpath(“//*[@class=’android.view.View’ and ./*[@text=’From :’]]”)).click();
driver.findElement(By.xpath(“//*[@class=’android.view.View’ and ./*[@text=’Everyday Offset’]]”)).click();
driver.findElement(By.xpath(“//*[@class=’android.view.View’ and ./*[@text=’To:’]]”)).click();
driver.findElement(By.xpath(“(//*[@class=’android.view.View’ and ./parent::*[@class=’android.view.View’ and ./parent::*[@class=’android.view.View’ and (./preceding-sibling::* | ./following-sibling::*)[@text=’Select Account’]] and (./preceding-sibling::* | ./following-sibling::*)[@class=’android.view.View’]]]/*[./*[@text=’A C Green – 138899729′]])[1]”)).click();
driver.findElement(By.xpath(“//*[@class=’android.view.View’ and ./*[@text=’Amount:’]]”)).click();
driver.findElement(By.xpath(“//*[@class=’android.widget.EditText’ and ./parent::*[(./preceding-sibling::* | ./following-sibling::*)[@text]]]”)).sendKeys(“12.25”);
driver.findElement(By.xpath(“//*[@class=’android.view.View’ and ./*[@text=’Description:’]]”)).click();
driver.findElement(By.xpath(“//*[@class=’android.widget.EditText’ and ./parent::*[./parent::*[./parent::*[./parent::*[(./preceding-sibling::* | ./following-sibling::*)[@text=’Description:’]]]]]]”)).sendKeys(“Test”);
driver.findElement(By.xpath(“//*[@text=’Continue’]”)).click();
driver.findElement(By.xpath(“//*[@text=’Make payment’]”)).click();
I really don’t know. Better to ask them Edward. Would you kindly write a question on StackOverflow, please?
Hi,
I am getting this error. Kindly help!
CMD command:
C:\Users\anmolagarwal>sdkmanager -list
Warning: File C:\Users\anmolagarwal\.android\repositories.cfg could not be loaded.
Warning: Failed to find package -list
And then when try to install the apk, it failes to install and gives this error –
APK failed to install.
Could not parse error string.
please try these.
https://stackoverflow.com/questions/47028626/repositories-cfg-could-not-be-loaded-in-windows-10
Hi Onur,
I’m getting this error. I copied your codes above.
Apr. 17, 2019 11:23:14 AM io.appium.java_client.remote.AppiumCommandExecutor$1 lambda$0
INFO: Detected dialect: W3C
It may be a local problem. Better to investigate based on below links.
https://discuss.appium.io/t/having-problems-running-script/23482
https://sqa.stackexchange.com/questions/25367/selenium-webdriver-geckodriver-info-detected-dialect-w3c-error
https://github.com/appium/appium/issues/10055
Thanks Onur,
How can I find element with just a class and text element?
Please check this article. https://www.swtestacademy.com/selenium-find-element/
Also, this command is now working on me:
wait.until(ExpectedConditions.visibilityOfElementLocated
(By.className(“android.widget.Button[@text=’Sign In’]”)));
You need to put a breakpoint at that step. Then evaluate expressions that you are passing to find the problem and solution. By the way, maybe the app has been changed. You can try to write tests for other applications.
Hi Onur,
How can I find element in a modal/pop-up? Appium seems not to find elements in there?
Thanks!
Maybe u need to switch to the modal if it an alert. https://www.swtestacademy.com/selenium-webdriver-alerts/
Hi Onur
I can’t leave any comment on this website
I approved and now you can see it ;) All comments are passing approval process that’s why u did not see your comment immediately. ;)
ohhh… i can
it so weird that i try couple times to leave comments but failed
it’s very help , thank you Onur
but I have a problem that doing parallel test on 2 devices
like i have applicatio to login
open app
input email
input password
press login
everything is fine until input password
A mobile will do input password and press login twice, but B mobile do nothing
Do you have idea about this?
thank you
Keith
hmm sorry Onur
I redo your project again
everything work fine
I have no idea why.. so weird . Thank you again
Happy to hear that Keith :)
Nice, but what is the “RapiEE tool” used for?
oh i know now, its for setting environment variables
Yes you are right.
can you pls create create a tutorial about testing web applications on mobile? thanks
We were doing it by selenium by changing the user agent.https://www.swtestacademy.com/change-user-agent-selenium-webdriver/
And with new Selenium version also provides some new features: https://www.swtestacademy.com/selenium-4-chrome-dev-tools-samples/
Hi Onur,
would like to ask for creating a sample project in android studio in the above, is it select the basic activity project type?
Hi Kevin,
I did not get your question. I am sorry. “Select the basic activity type?”
Nice jobs!! keep work up!! Nice article
Getting error when running android mobile application
org.openqa.selenium.WebDriverException: An unknown server-side error occurred while processing the command. Original error: Could not find ‘adb.exe’ in PATH. Please set the ANDROID_HOME or ANDROID_SDK_ROOT environment variables to the corect Android SDK root directory path. (WARNING: The server did not provide any stacktrace information)
Command duration or timeout: 672 milliseconds
It seems the problem is the Android SDK path definition.
Thanks for great article!
But I have an error, when I run automation code, it just open the app on Android then close, do not proceed Click method, nothing happen at all.
MAybe app has been changed, I wrote it for a long time ago. When I will find time, I will update the article with an another app.
THX for this tutorial.
For information, I spend a lot of time on JRE/JDK library compatibility.
I am realy not a JAVA expert and the execution of the sdkmanager always failed.
Then I realise I have to pay attention to get exactly the same version number of JDK and JRE.
Now I have a good environement, I have to make my first test.
I am super happy to hear that! In appium automation, the first installations, versions compatibility, etc. are so crucial and I am so happy that this article helped you to have a stable and running appium automation environment. :)
Good morning.
I think Onur has my same problema. I’m following this tutorial, and now I see:
“Then, create a sample project in Android Studio and then click the link as shown below to install missing libraries.”
But how do we create that sample project? Maybe the tutorial should be updated including which option to select to create the project (“Basic activity”, or “Empty activity”, etc), and how to fill the form (name, package name, languaje, etc).
java.lang.NullPointerException: Cannot invoke “io.appium.java_client.android.AndroidDriver.quit()” because “this.driver” is null
Getting this error while running same code you mentioned