iOS Testing is very crucial if a company depends on its mobile apps. Nowadays, mobile apps are always in our life and most of the users are using mobile apps instead of web application or websites. In this article, I will explain to you how to automate iOS mobile apps by using Appium and JAVA. I will describe how to install the tools, how to create a project and how to do the required settings. Here is the quick outline of iOS mobile test automation article:
- Required installation for Appium iOS mobile automation
- Creating a project with Page Object Model (POM).
- Writing a sample test case for iOS Testing
- Adding Allure Report to our project.
iOS Testing Step-1: Prerequisites for Appium
1.1. Homebrew Installation
In order to install and update the required packages easily, we should install HomeBrew and enable it. Let’s open the terminal and type below command and enter to install HomeBrew.
/usr/bin/ruby -e “$(curl -fsSL https://raw.githubusercontent.com/Homebrew/install/master/install)”
Then, let’s type brew -v command and hit the enter key. If you will see the version information, that means the installation has been done correctly.
1.2. Node.js Installation
We need to write brew install node command and hit the enter key to install node.js.
We can verify the installation by executing node -v command on terminal. If we see the version information, that means installation went well and node has been installed.
1.3. Appium Installation
In order to install the latest version of Appium mobile automation tool, we need to write npm install -g appium and hit the enter key on the terminal. In this way, we will install the latest version of appium.
If you want to use a specific version of Appium such as 1.7.2, you need to use this command npm install [email protected]
When the installation finishes, execute appium -v command to check Appium’s installation and its version.
When you execute appium command, appium listener starts.
1.4. Installation and Settings of Required Packages for iOS Testing
1.4.1. In order to run our tests on real devices, we need to install libimobiledevice dependency by executing brew install libimobiledevice command on terminal.
1.4.2. To deploy our apps to our devices by using ios-deploy. We can install it with brew install ios-deploy command.
1.4.3. WebDriverAgent opens the apps when it is downloaded to the device. It is a WebDriver server application which let us control iOS devices remotely. We can integrate it with XCTest.framework and run the commands on the device. WebDriverAgent is developed at Facebook for end-to-end testing. In order to install it, we should to the below steps:
Go to https://github.com/facebook/WebDriverAgent address and download the WebDriverAgent project to your MacBook. Double-click the file which has .zip extension and extract its content. Then open the terminal and execute below command:
cd /usr/local/lib/node_modules/appium/node_modules/appium-xcuitest-driver/
Then, you need to write open . and hit the enter key.
Copy the WebDriverAgent folder to appium-xcuitest-driver window.
Don’t close this window! Open the terminal and run the below commands:
cd WebDriverAgent

mkdir -p Resources/WebDriverAgent.bundle

./Scripts/bootstrap.sh
You might be asked to install Carthage which is a Decentralized dependency manager for Cocoa. Then you should execute below command.
brew install carthage
Now you are ready to go.
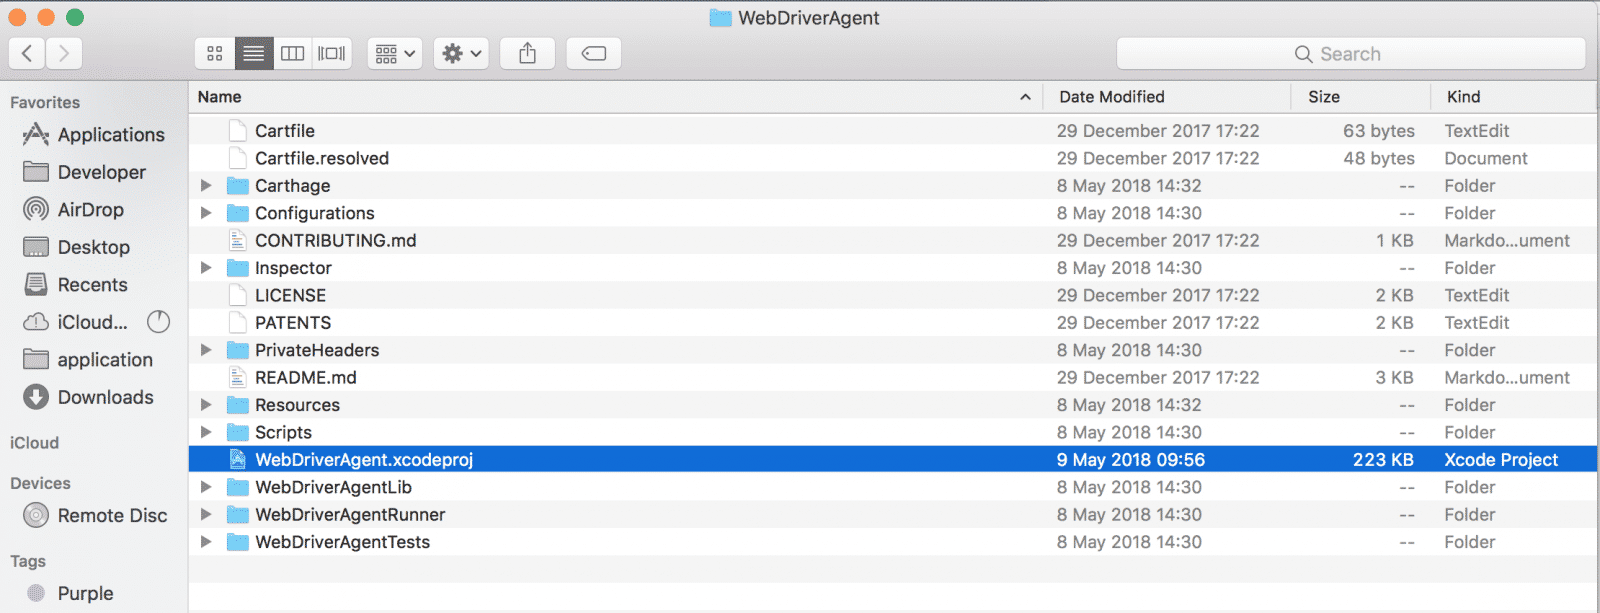
On appium-xcuitest-driver window, click the WebDriverAgent folder and open the WebDriverAgent.xcodeproj folder with XCode.
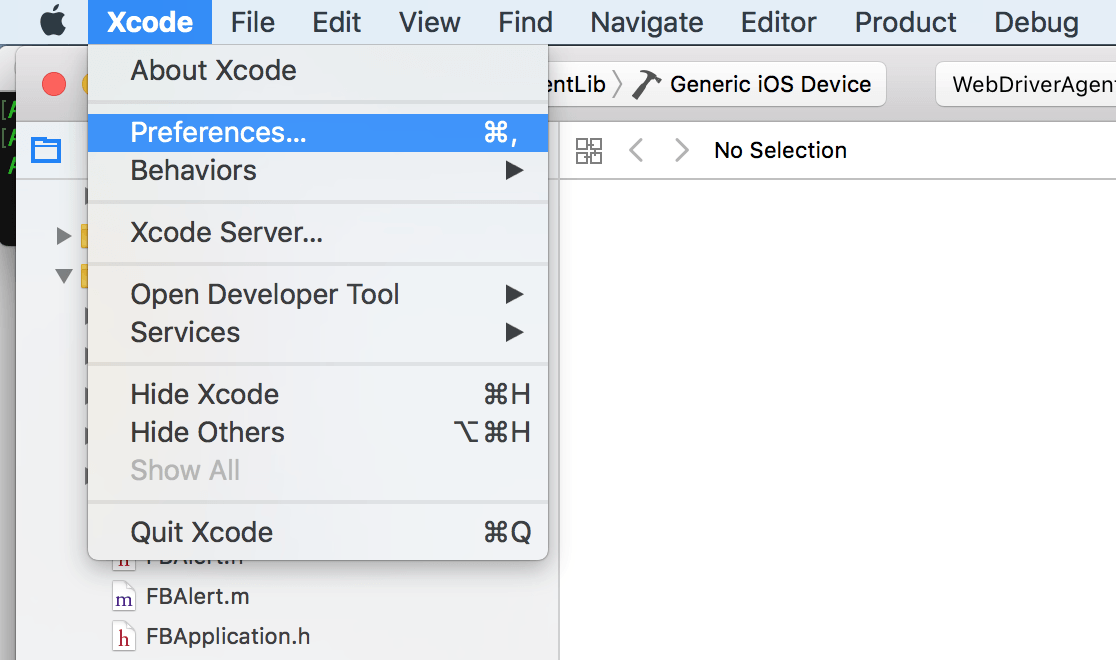
Click the Preferences tab which is located at the left top corner.
Then, select the Accounts menu and log into your account with your Apple Developer Username and Password.
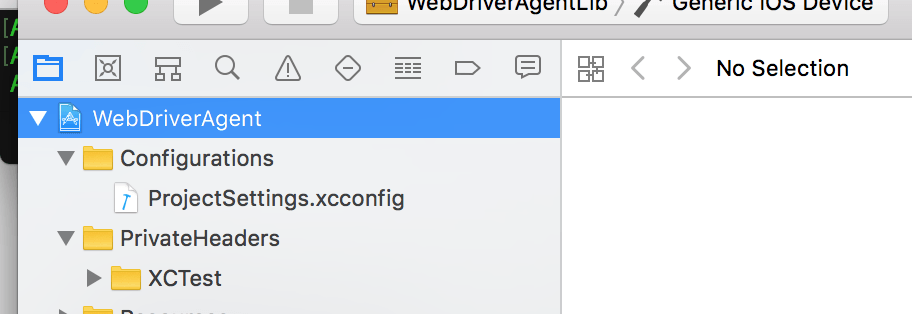
After that, double-click the WebDriverAgent folder which is located let top corner.
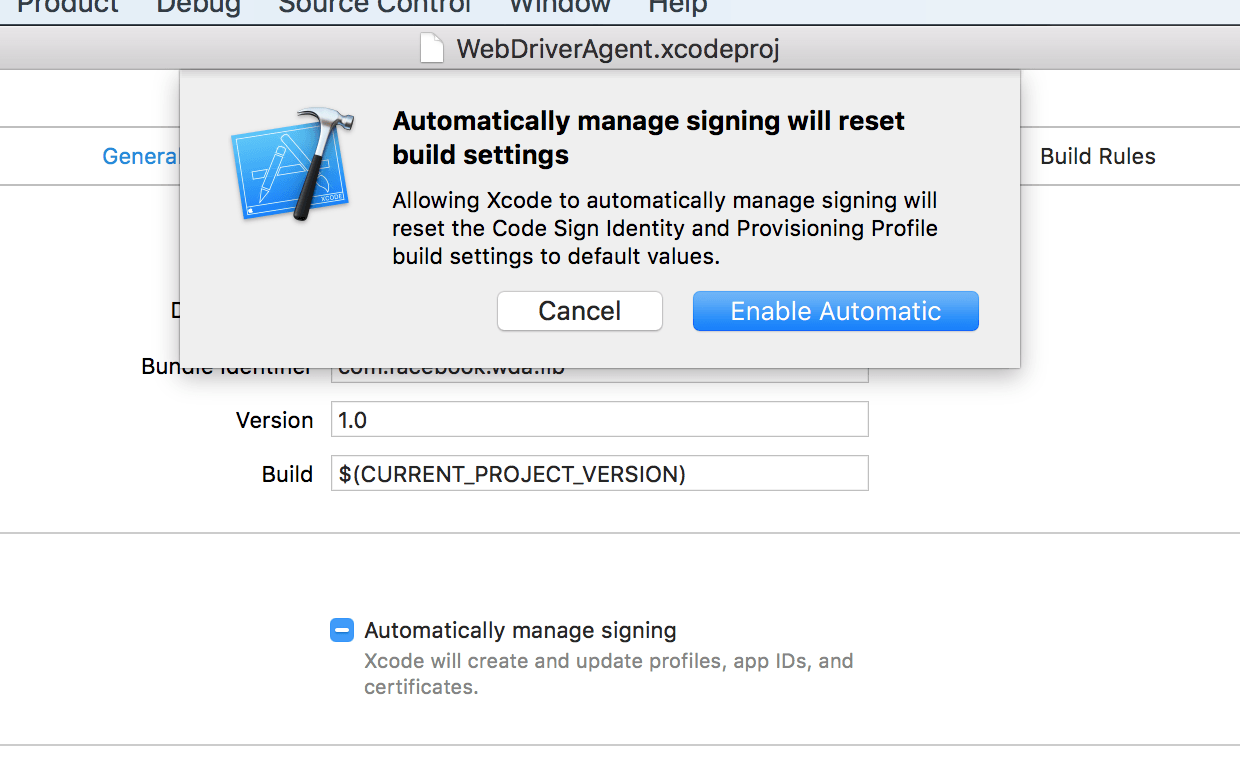
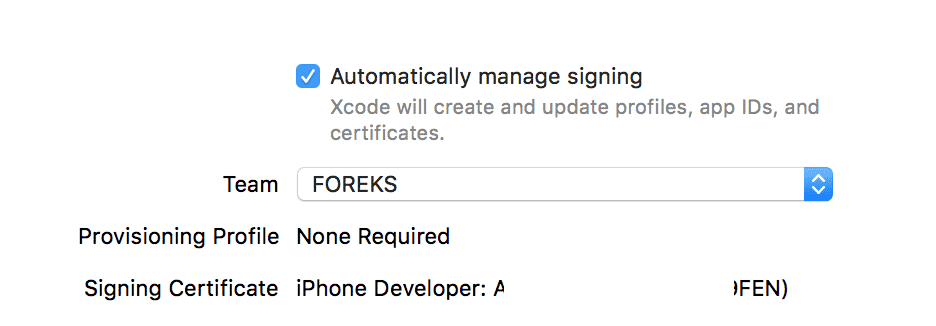
Then, click the WebDriverAgentLib and click the Automatically Manage Signing checkbox for all pages under the Target Folder and select the team knowledge in your Apple Developer account.
After selecting Automatically Manage Signing check box, select the Enable Automatic in prompting pop-up.
Select the team and see that the Provisioning Profile and Signing Certificate fields automatically filled with required information.
In the top menu before the product tab, click the Clean and Build buttons and when you see the Succeeded sign, that means that you did all the settings and installed correctly. Now, we are ready to create our automation project.
iOS Testing Step-2: iOS Mobile Automation with Page Object Model
First, I want to give a little bit information about the tools and tech stack which I used for iOS Testing of this project.
- Programming Language: JAVA
- Mobile Test Automation Toolkit: Appium
- Test Runner Framework: TestNG
- Reporting Tool: Allure by Yandex QA Team
- Build Tool: Gradle
- Logger: Log4j
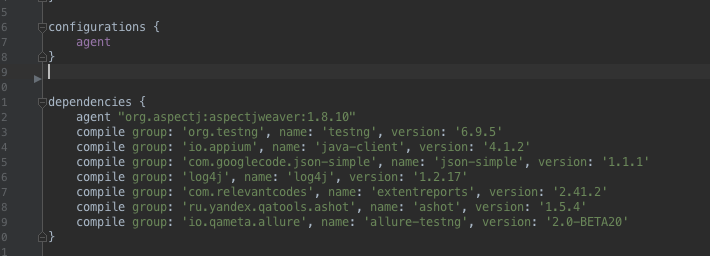
2.1. Gradle Definitions build.gradle
Dependencies:
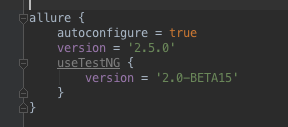
Plugin:
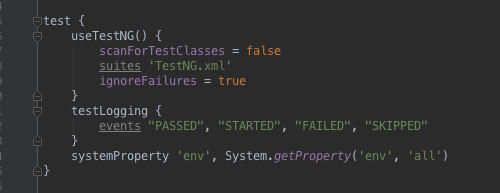
TestNG Suite and Test Task Declaration:
For Gradle allureServe Command Execution:
2.2. Device Definitions
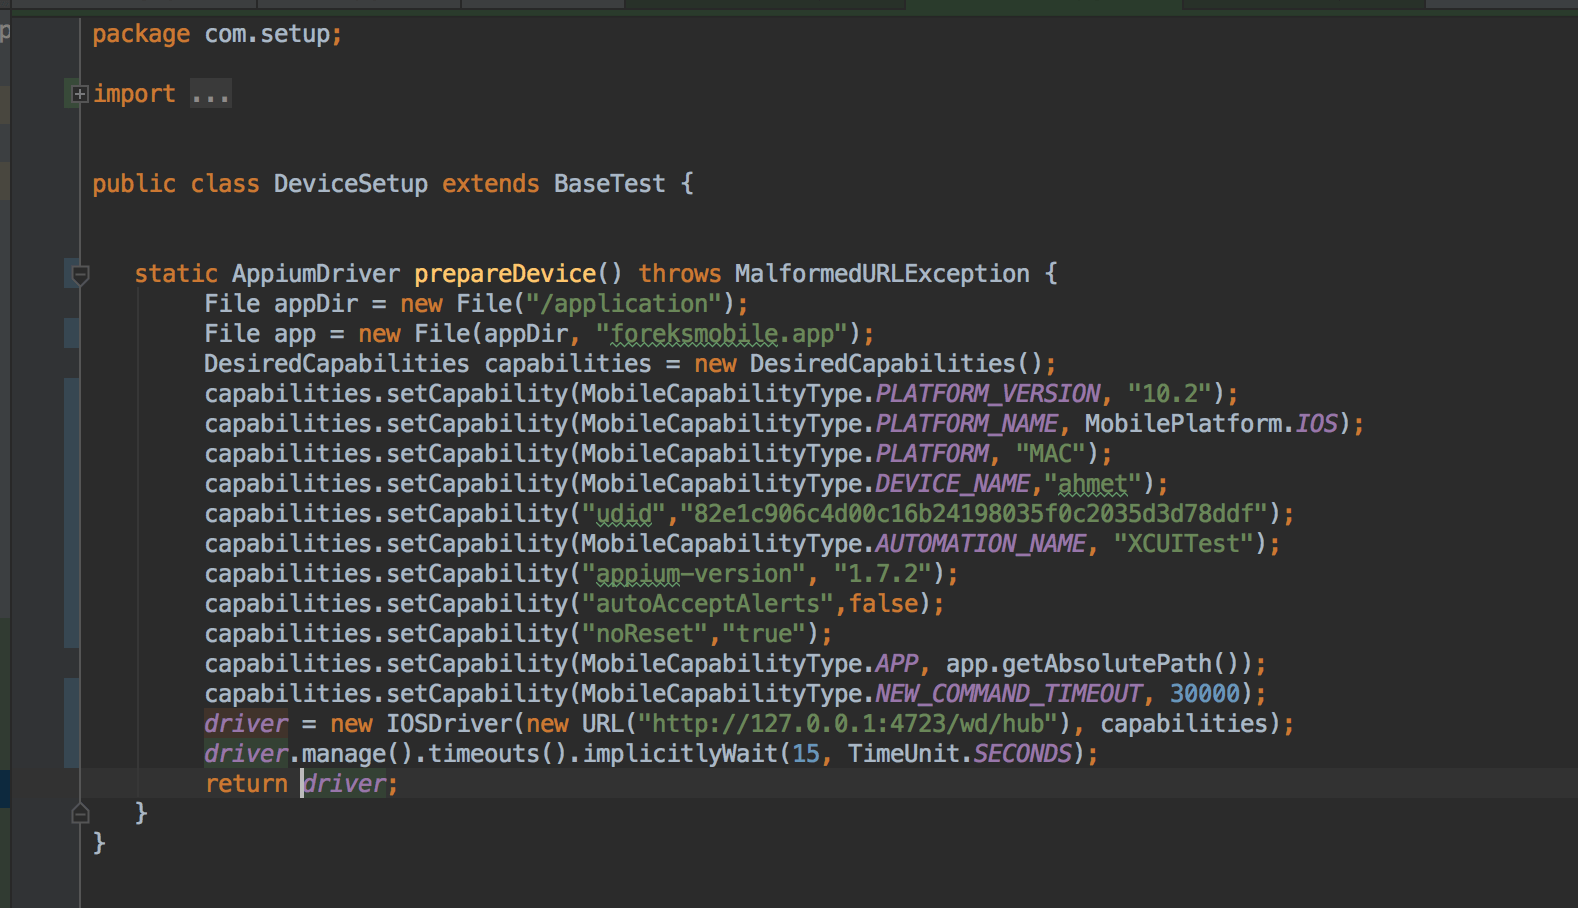
To test an App with Appium for iOS Testing, an IOS or Android device must be defined and this device should be raised before every test, suite or class. For Device Definition, the device’s Name, UDID, Version and Url information of Appium Server need to be defined.
PLATFORM_VERSION: The iOS version of the device which is using for the test.
APP: Under the File command, the folder where the app is located and the path of the application are defined. The path is given under APP capability. The most important feature that I would like to mention about IOS applications is the need for apps .app, not .ipa extension. When the application to be tested through Xcode is built, the resulting .app extension file should be used in tests. Applications with compressed .ipa extension are not working.
Device Name and UDID: The name of the device used for the test and the UDID information are entered. To find the UDID information, connect the device to your computer and then turn on the terminal and run idevice_id –list.
AutoAcceptAlerts Capability: This capability is to handle notification popups when the intended application is installed. For example, this app wants to send you a notification. As the application wants to access your location, if the value of this capability is true to close incoming popups when the app is first loaded, all popups of this type will be automatically closed by saying yes.
NoReset Capability: According to the working structure of the project, the application will be removed after each test, suite, class, and reinstalled. If the value is false, re-installs. If it is True, it will continue to test with the first installed app without installing.
2.3. BasePage Class
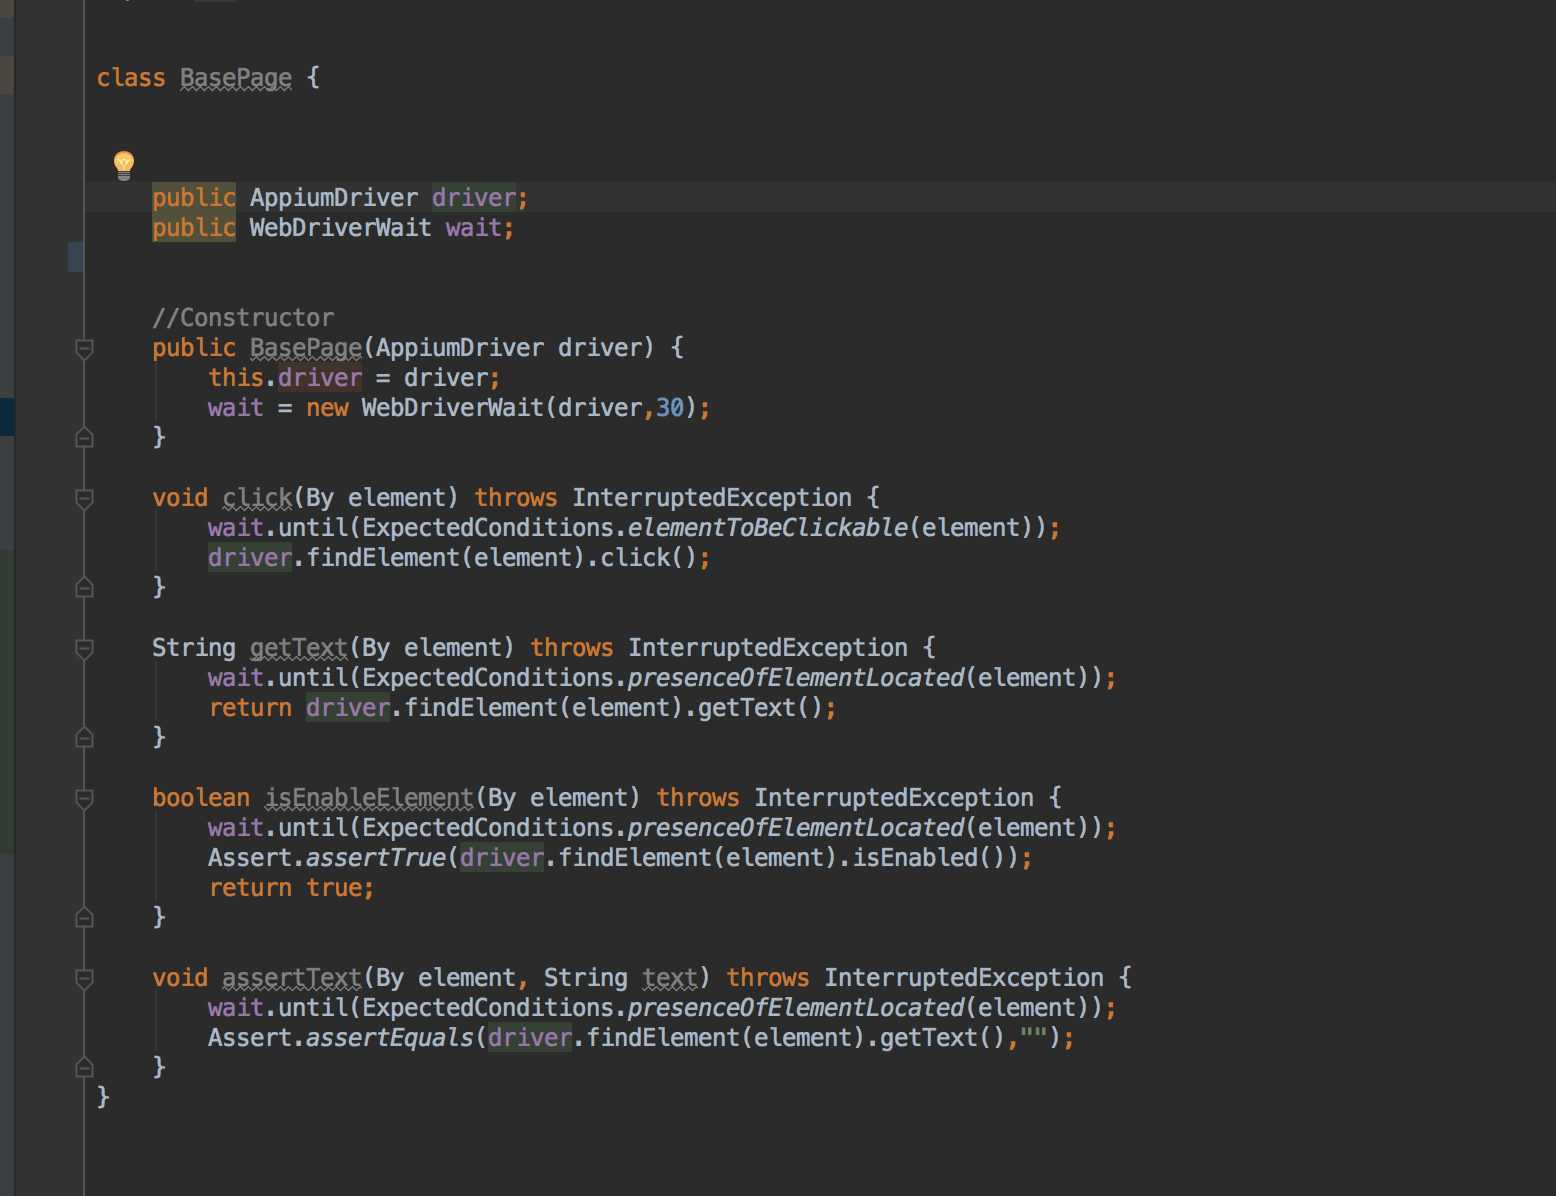
In the BasePage class we define the functions we will use in the project. Here we define the common functions because the test functions we write will extend to the class BasePage. For example, click, getText, and so on.
In other pages, we should extend BasePage class and use its methods as shown below.
2.4. Writing Test Cases for iOS Testing
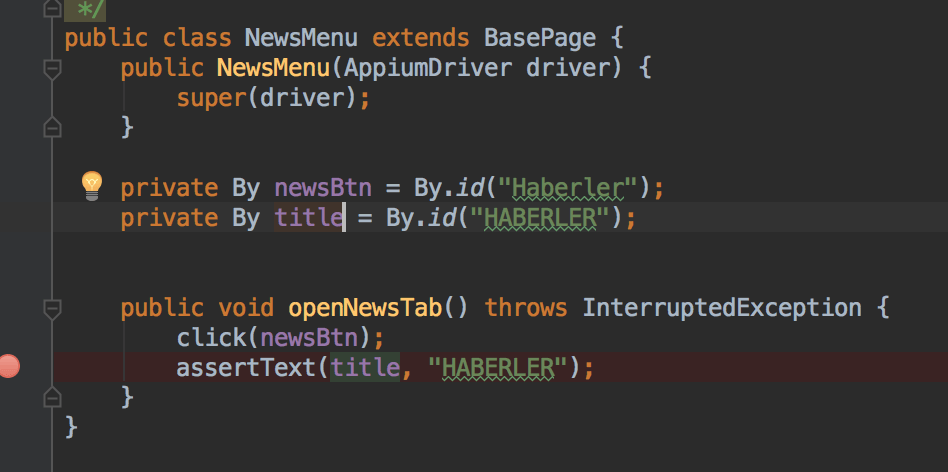
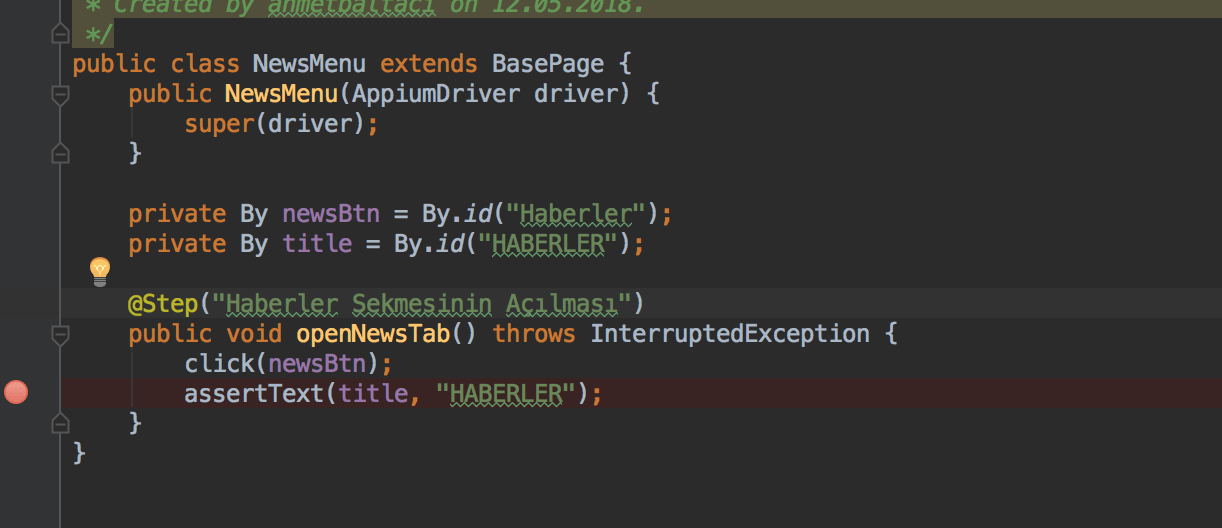
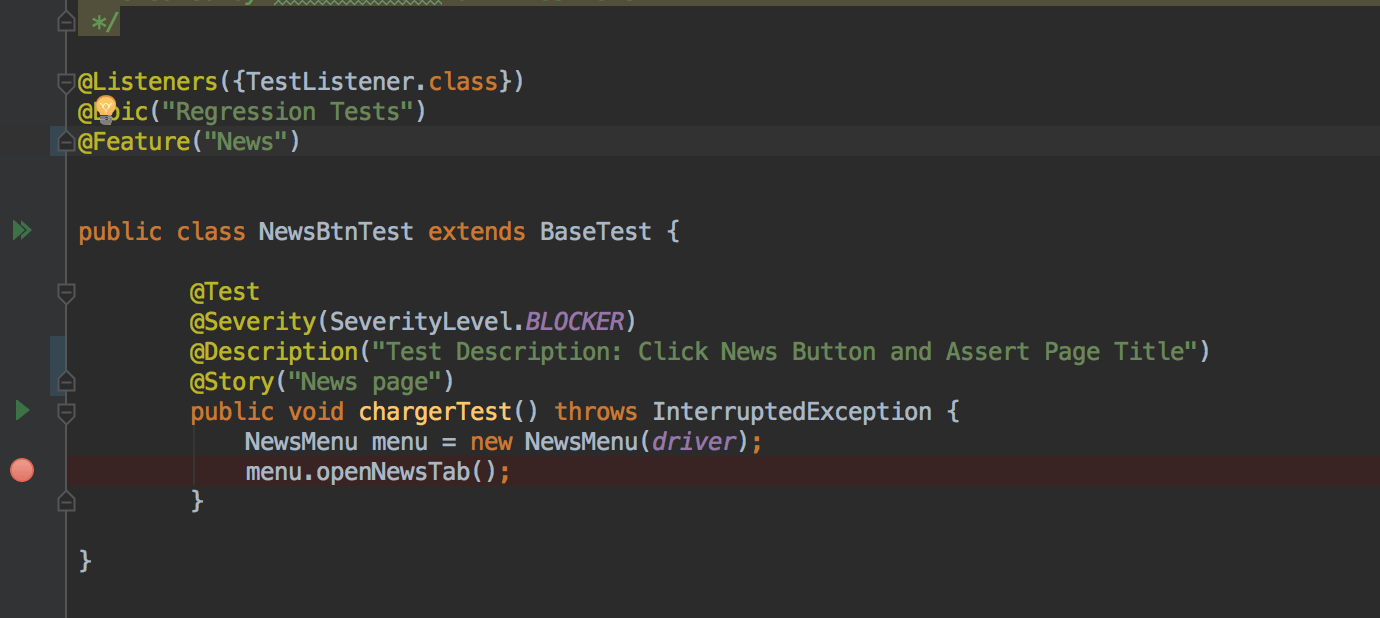
When writing test cases in this project, we write the functions in page classes and use them in test classes to create test cases. Below is an example of a page/menu/screen which extends BasePage Class.
and we use openNewsTab function in our test class as shown below:
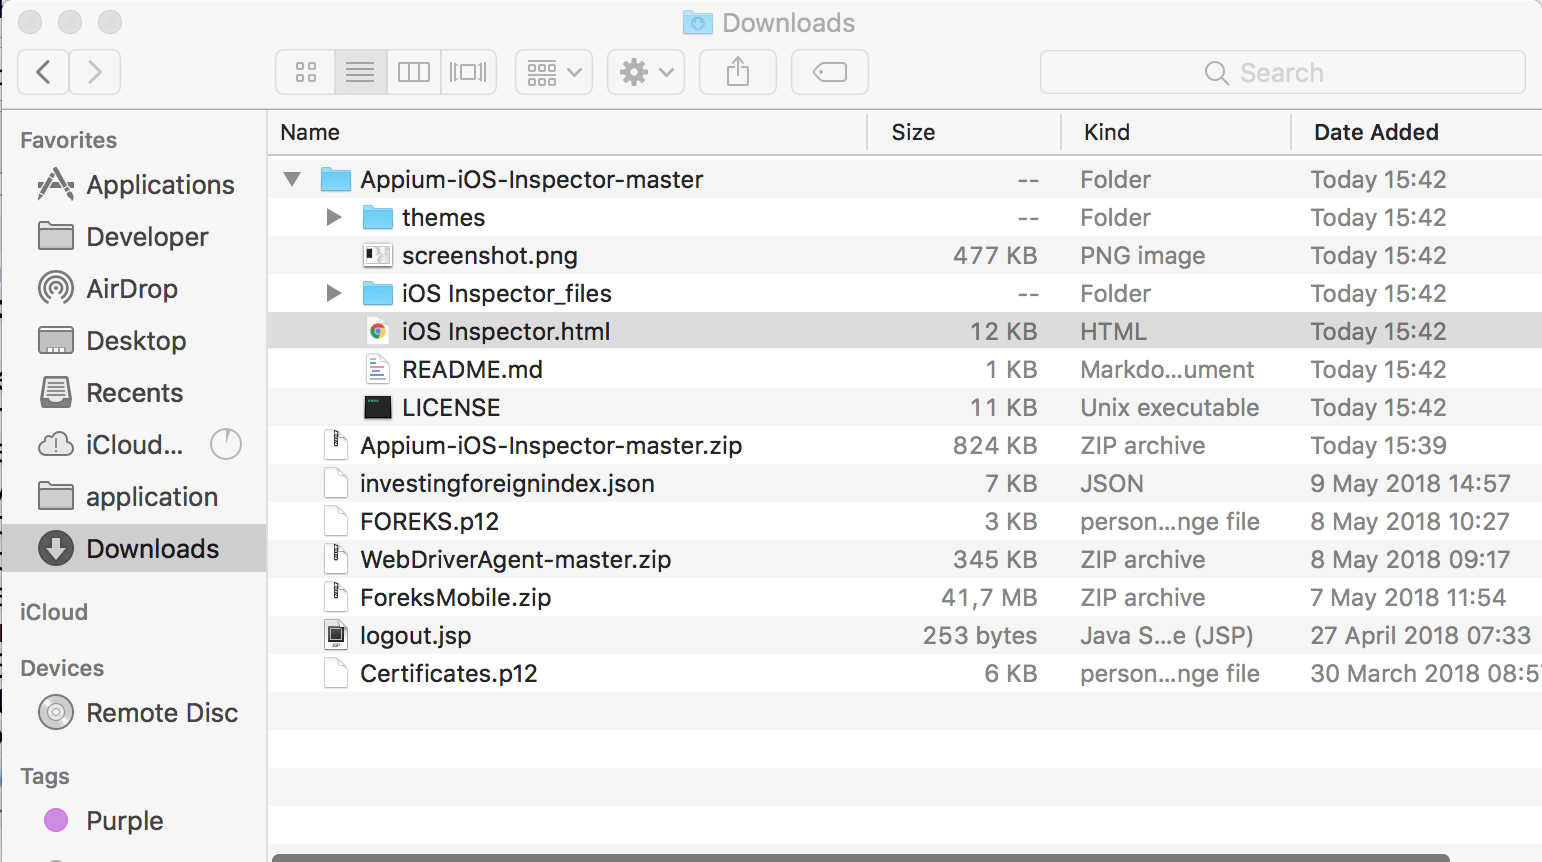
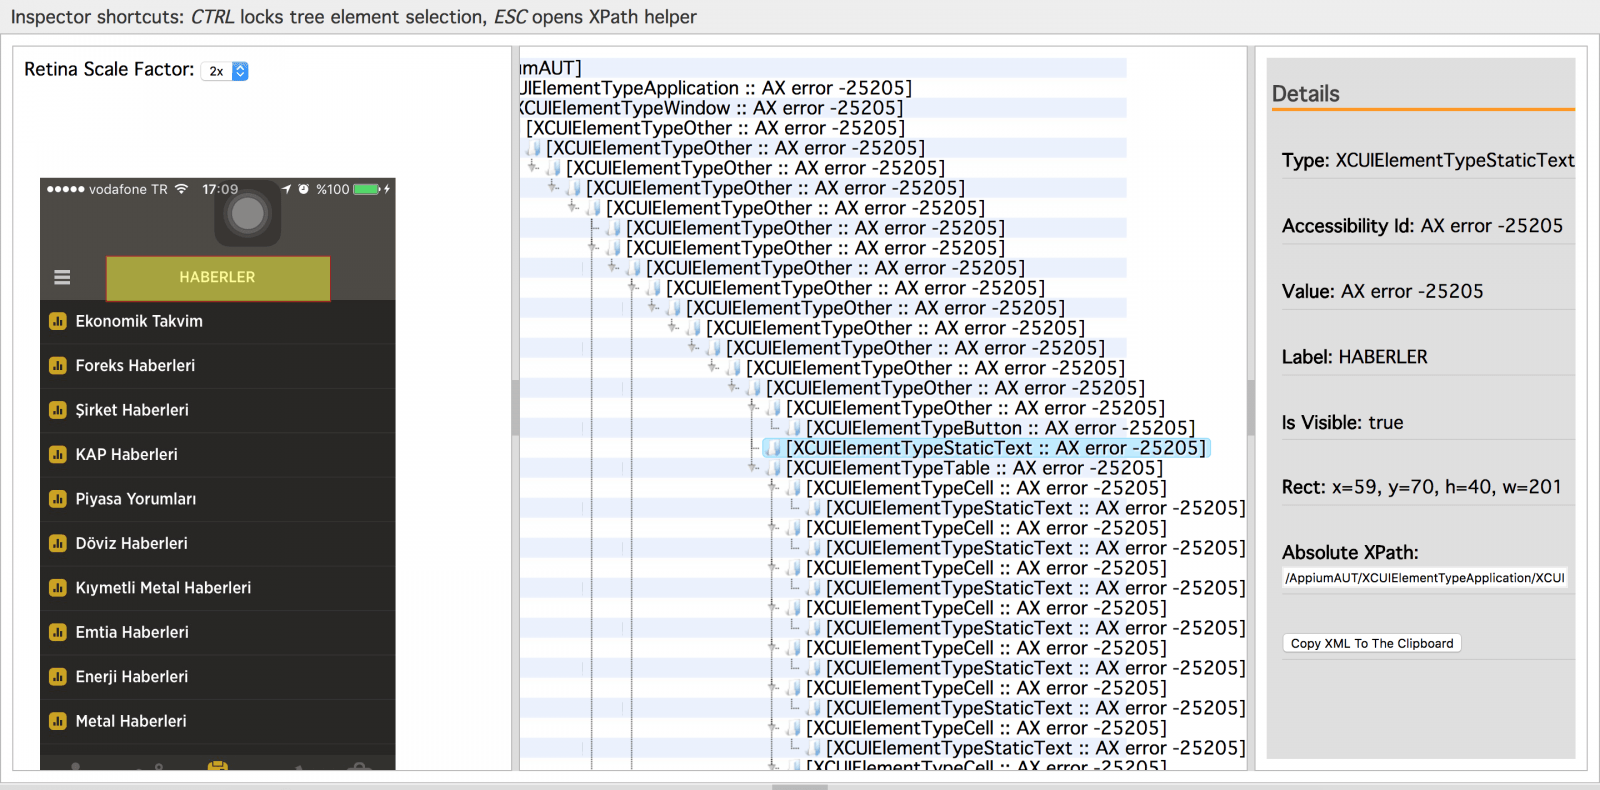
Note: Here is how I defined the “newsBtn” and “title” Locators as shown in the screenshot. I will tell you how I found the Id values. Go to https://github.com/mykola-mokhnach/Appium-iOS-Inspector and unzip the project.
First, kill and start the Appium and open the iOS Inspector.html file. In your tests which field’s ID is needed, you should put a debug point there and open your test in debug mode. When you are at that debug point, open iOS Inspector.html page and refresh the page and see the device screen in the browser. In the browser select the required field and reach its Id value.
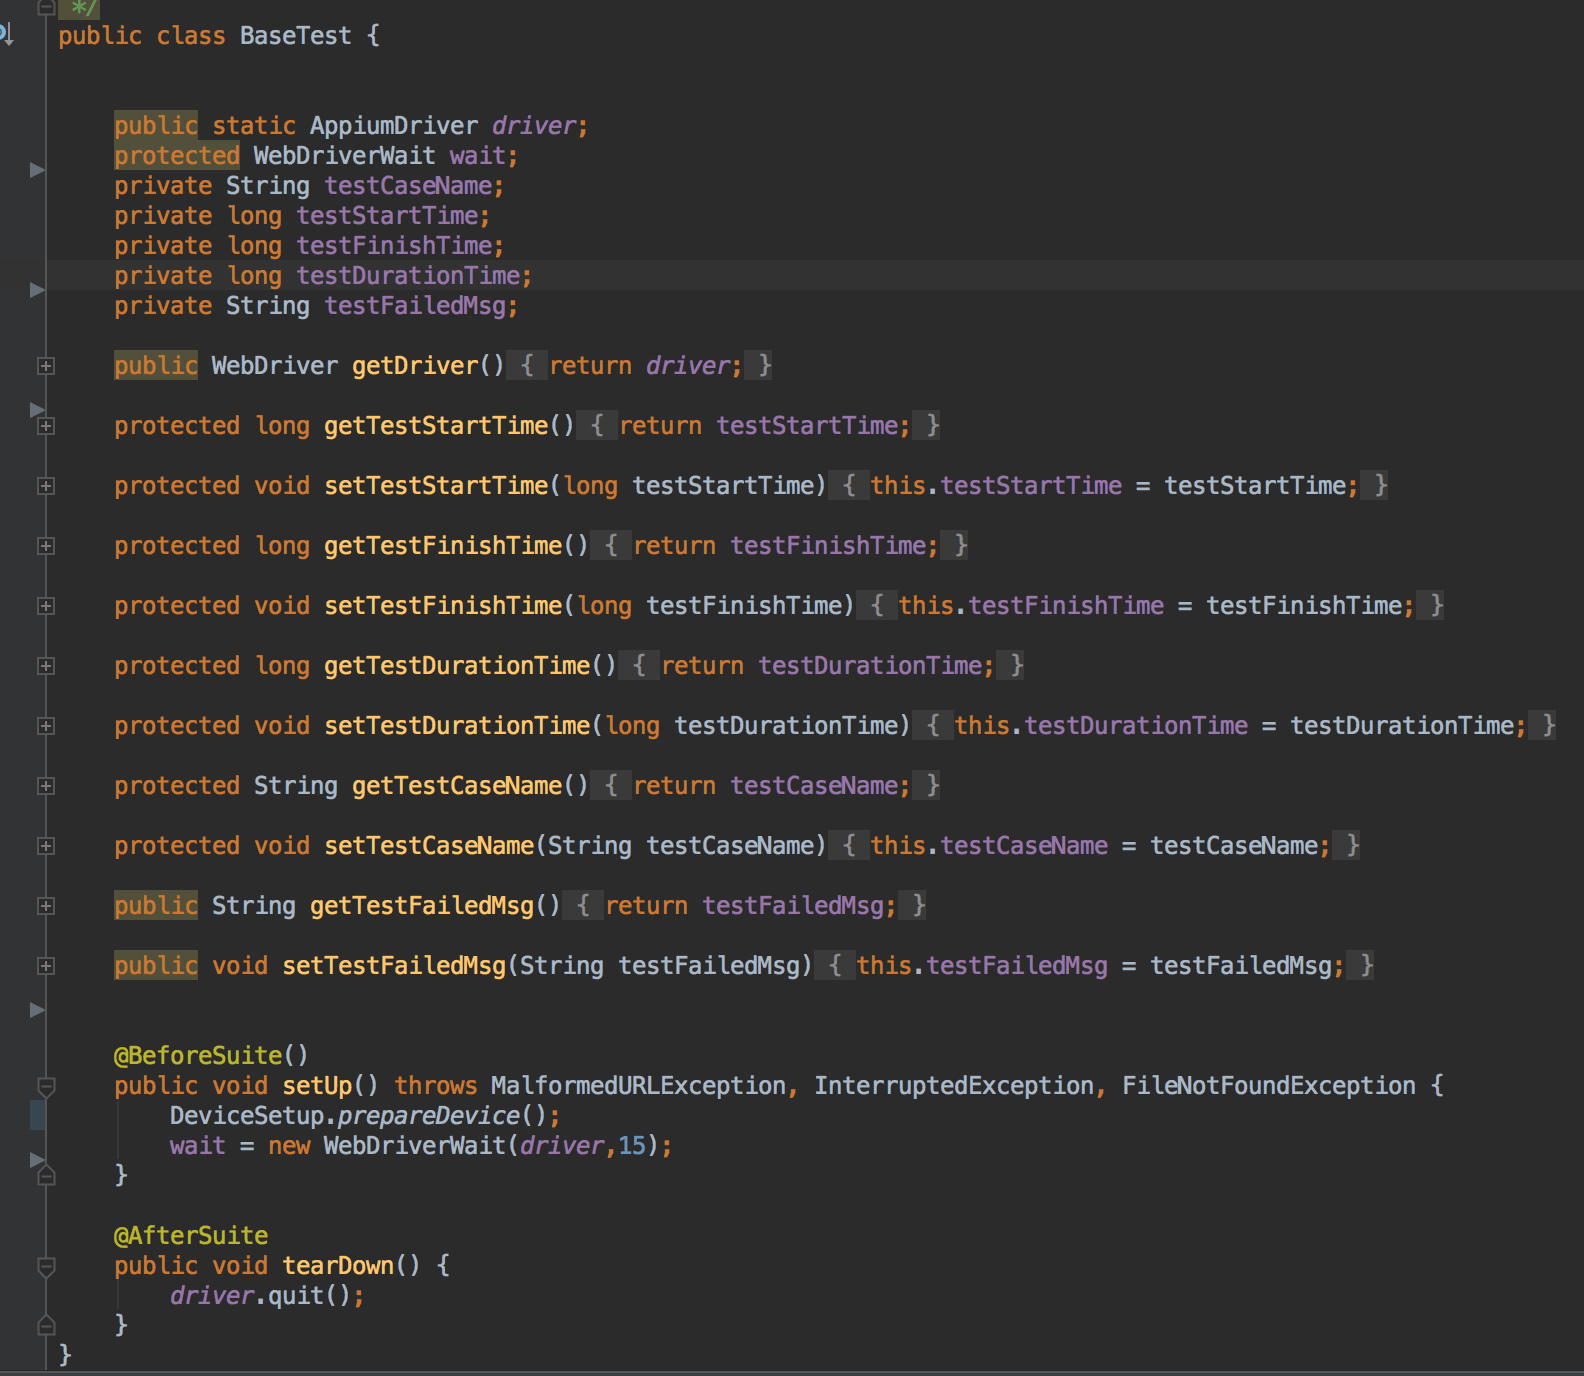
Test Case Classes extend BaseTest class. In the BaseTest class, the prepareDevice function is executed. The Device is turned on before the test runs. After the test is finished, the device is turned off.
It can be defined variables that are common to all tests in BaseTest class. All tests will extend this class, it will be useful to define common areas in this class.
2.5. Test Listener
The Test Listener’s Attributes class will be used to define what actions should be taken before and after tests to test for success or failure. This class extends BaseTest and also manages the testing phases by implementing ITestListener. @Listeners annotation is added to the test classes.
2.6 Build and Run the Project and Create Allure Report
You should run gradle clean test then, the project will build and run. After execution, you should run gradle allureServe to create allure report on the browser. If you want to create allure report in the project you should run gradle allureReport and report will be created into the folder which is declared in allure.properties file. You can find Allure Report details in this article.
You can find the example project here: https://github.com/ahmetbaltaci/Appium
Thanks.
-Ahmet

He is a QA / Test Automation Engineer Foreks Bilgi İletişim Hizmetleri A.Ş.






Hi Ahmet,
Such a nice tutorial by u..thanks for this. Can u plz show us how we can test android and ios app in single maven framework?
AS I know, If every element’s id/accessility id vs same, you need to use AppiumDriver to automate both.
Hi, is there a way we can automate ios app using emulator instead of real devices
https://stackoverflow.com/questions/44455068/ios-automation-with-appium-on-simulator