In order to start working with Kubernetes, you need to set up a Kubernetes cluster. There are various ways of creating a Kubernetes cluster both on-premise and cloud. In this tutorial, I will mainly focus on how to create a Kubernetes cluster on your local machine. Let’s start!
If you want to set up your Kubernetes cluster on the cloud, here are the links for the most popular cloud providers on how to set up a cluster and pricing:
- AWS: https://aws.amazon.com/eks/
- GCP: https://cloud.google.com/kubernetes-engine
- Azure: https://azure.microsoft.com/en-us/services/kubernetes-service/
Before creating your Kubernetes cluster I advise you to install kubectl. Here are the instructions for installing it according to your operating system: https://kubernetes.io/docs/tasks/tools/
Once the kubectl is installed, you can check the nodes on your local machine (which won’t return you any if you haven’t set one before) by the following command:
kubectl get nodes

As you can see this doesn’t give me any results yet as I haven’t set up a cluster in my local machine.
Now, let’s see different the ways of creating a k8s cluster.
Create a Kubernetes Cluster with Minikube
One of the most popular ways of building a Kubernetes cluster is to use minikube. Minikube spawns virtual machines for each node in the cluster which are communicating with one another.
Here you may follow the installation of minikube according to your operating system: https://minikube.sigs.k8s.io/docs/start/
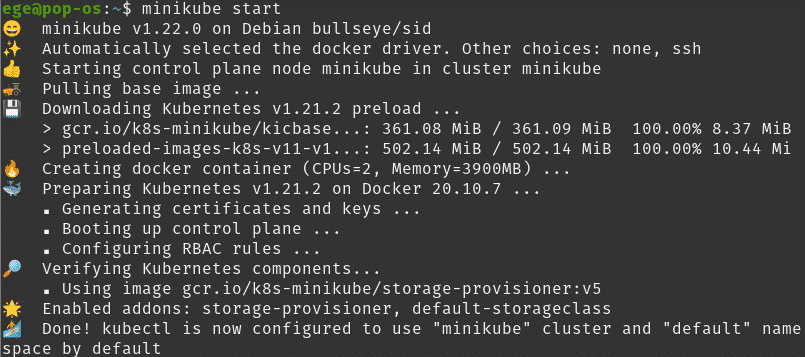
Once installed, you can start your Kubernetes cluster with the following command:
minikube start
Once it is done, you can check the nodes again:
kubectl get nodes

As you can see minikube just spun up a single node that is acting as master since we haven’t specified to have more nodes. It also acts as the only worker node. Deployments are covered in detail in the following tutorials, but you can try to run a single pod by:
kubectl run nginx --image=nginx

This will start a pod which is called Nginx and runs the image Nginx in the default namespace. To check it out you may:
kubectl get pods

Minikube also has its own dashboard. Start it by typing:
minikube dashboard
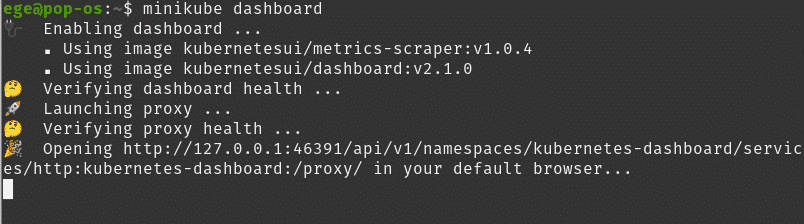
And you will see the dashboard running on the specific URL and port. You can observe your running pod on the dashboard as well:

You may delete your cluster by typing:
minikube delete --all

For additional information on minikube, you can follow the documentation on the link provided for installation.
Now let’s see how you can create a cluster using kind.
Create a Kubernetes (K8s) Cluster with Kind
Kind is another popular tool for creating a k8s cluster easily. Unlike minikube, kind uses docker to set up clusters instead of virtual machines which makes it faster on setting up one. Since it is using docker under the hood, the Kind assumes you have a docker installed on your pc. In addition to docker, kind also requires you to have Golang installed.
Here you can find the proper installation according to your operating system:
https://kind.sigs.k8s.io/docs/user/quick-start/#installation
Once installed, setting up a cluster using kind is pretty straightforward:
kind create cluster

Then you can check if node(s) are up and running.
kubectl get nodes

For deleting the cluster just type:
kind delete cluster

Set up a K8s Cluster with K3s
Another alternative for setting up a k8s cluster is k3s which is very lightweight ( 60 MB ). It is generally used in IoT & Edge Computing.
You can find information about how to install and more here: https://k3s.io/
After you install the cluster you may check nodes by:
sudo k3s kubectl get node

You may find more about k3s on the documentation page: https://rancher.com/docs/k3s/latest/en/
Set up a K8s Cluster with Kubeadm
You may also use the kubeadm tool by the k8s team for setting up your cluster. This is more advanced compared to the other ways of creating a k8s cluster.
You may set up a cluster in a single node ( like your local pc ) but then master and worker will be on the same node. As a best practice, it is better to use at least with a master and worker node. Therefore I will be using virtual machines to create two machines with some minimum requirements ( like at least 2 CPUs, 2 GB of ram ) described here: https://kubernetes.io/docs/setup/production-environment/tools/kubeadm/install-kubeadm/
If the virtual machine does not satisfy the required criteria then its kubeadm tool will throw an error and won’t let you create the cluster. I have used the following article as a guide and advice you to follow it for creating your virtual images and setting up your cluster: https://medium.com/swlh/setup-own-kubernetes-cluster-via-virtualbox-99a82605bfcc. In this article, I will just briefly show you how to use the kubeadm tool.
After following the installation steps according to your operating system, you need to check for the IP address of your master node and initialize creating the cluster by:
kubeadm init --apiserver-advertise-address 192.168.10.10 --pod-network-cidr=10.244.0.0/16
Please remember that the command should be as run as a root.
Here I used “–apiserver-advertise-address” and input the IP of the master node. I might have used “–control-plane-endpoint” as well to define the IP address of the master.
The difference described in the documentation clearly: While –apiserver-advertise-address can be used to set the advertise address for this particular control-plane node’s API server, –control-plane-endpoint can be used to set the shared endpoint for all control-plane nodes. –control-plane-endpoint allows both IP addresses and DNS names that can map to IP addresses.
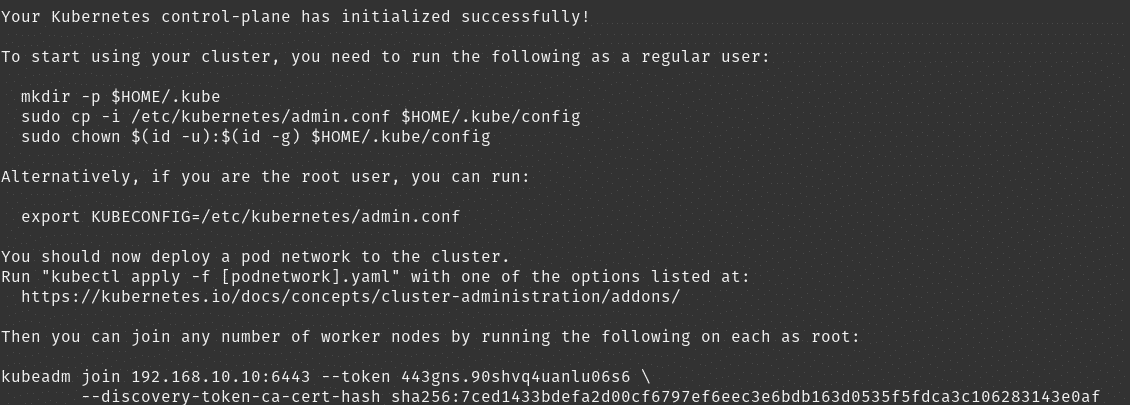
The setup will take a minute or slightly more and once it is done you will get the instructions to run as a regular user and you will have the command for worker node(s) to join the master. Similar to the following:
kubeadm join 192.168.10.10:6443 --token 443gns.90shvq4uanlu06s6 \

--discovery-token-ca-cert-hash sha256:7ced1433bdefa2d00cf6797ef6eec3e6bdb163d0535f5fdca3c106283143e0af
After creating Kube config and changing the owner of the file, we need to apply a network plugin.
For instance, if we will use flannel we should run the command:
kubectl apply -f https://raw.githubusercontent.com/coreos/flannel/master/Documentation/kube-flannel.yml

Now it is time to add worker nodes, go to the worker node(s) and use the command created by kubeadm init to make your worker node connect to master.
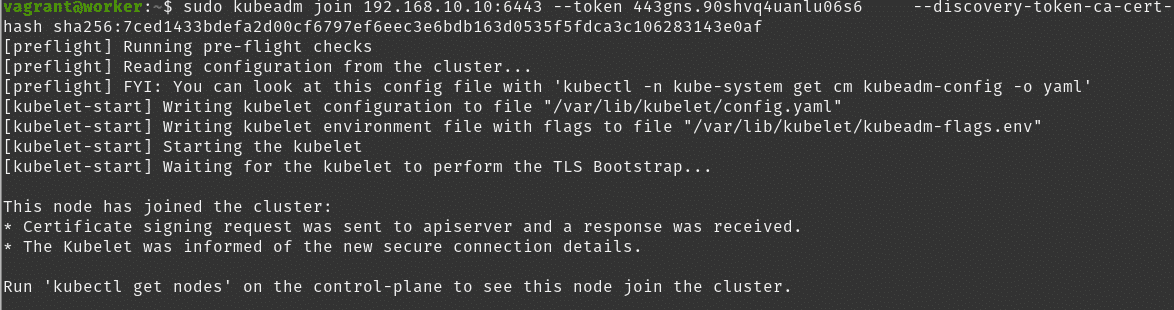
Now we will be able to see the nodes in the control-plane (master node).

That’s it for setting up your cluster, choose the way that is most appropriate for your use case.
See you in the next episode of the Kubernetes Series.
Kubernetes Series
- Episode 1: Introduction to Kubernetes
- Episode 2: How to Create a Kubernetes Cluster
- Episode 3: Kubectl
- Episode 4.1: Kubernetes Objects
- Episode 4.2: Kubernetes Workloads
- Episode 4.3: Kubernetes Services
- Episode 4.4: Kubernetes Storage
- Episode 4.5: Kubernetes Configuration Objects
- Episode 5: Scheduling in Kubernetes
- Episode 6: Kubernetes Upgrade and Deployment Strategies
- Episode 7: Kubernetes Security
- Episode 8: Deploy a Full Stack Application in Kubernetes
Thanks for reading,
Ege Aksoz

Holding a BSc in Mechatronics, Ege loves to automate. He is now working as a Software Development Engineer In Test at XebiaLabs, Amsterdam.