This is the complete JavaFX Tutorial with examples! I tried all my best to help you to get started with JavaFX! When I started to work in my current position, one of my tasks is to do manual operations for campaign products every week. After the second week, I thought that I have to automate this task using a GUI-based desktop program instead of using some DB scripts manually. Then, I started to search which solution I should choose. Finally, I ended up with my decision with JavaFX. This is the starting point of my JavaFX journey. In my JavaFX post series, I will try to describe how to create a JavaFX application, how to use its core components, how to communicate with DB, and so on.
Before starting JavaFX post series, I want to thank Marko Jakob. I learned a lot stuff from his tutorial series and I suggest that check that tutorial series.
Let’s get started!
What is JavaFX?
It is a next-generation GUI toolkit and you can create rich GUI applications with JavaFX. You can also customize styles using CSS and edit them with XML. Also, it includes a drag and drops design editor that is called as SceneBuilder. It is much easier to design GUIs with SceneBuilder. You can drag and drop GUI elements and then modify their style with CSS or edit them with XML. For more details please visit here.
Prerequisites for JavaFX Tutorial
- Install latest JAVA JDK 8 from here.
- Install IntelliJ, Eclipse or Netbeans IDE (I prefer IntelliJ)
- Install Scene Builder from here.
- Install Oracle Express Edition from here.
Create a JavaFX Project
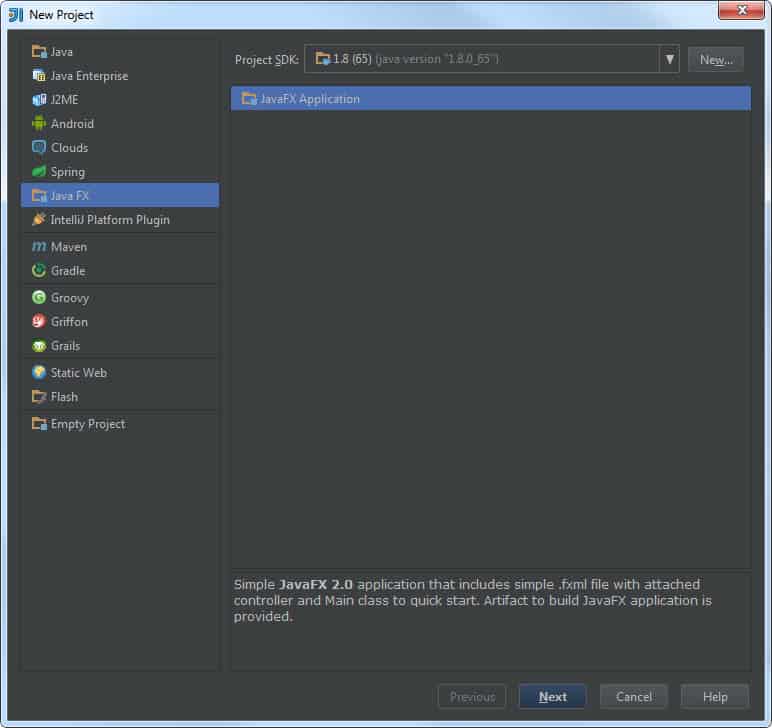
Open IntelliJ (you can use the latest version when you are reading the article) and click File ->> New Project and then click Java FX and click Next button.
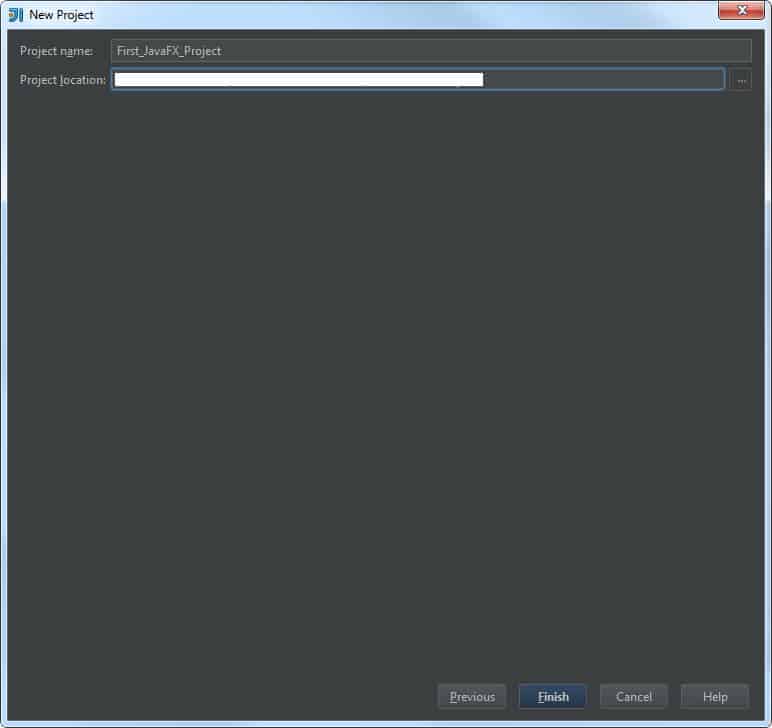
Type “First_JavaFX_Project” as Project name and set your Project Location as you want and click the Finish button.
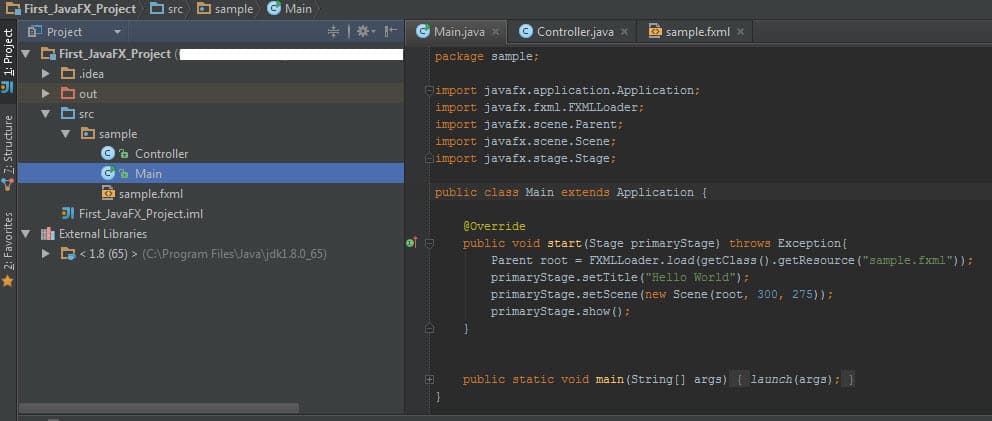
Thanks to IntelliJ, it automatically creates a JavaFX project structure and puts a sample Hello World code into the Main class.
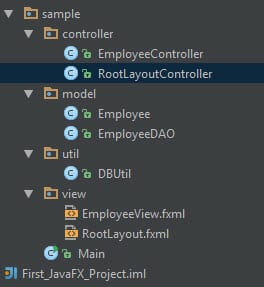
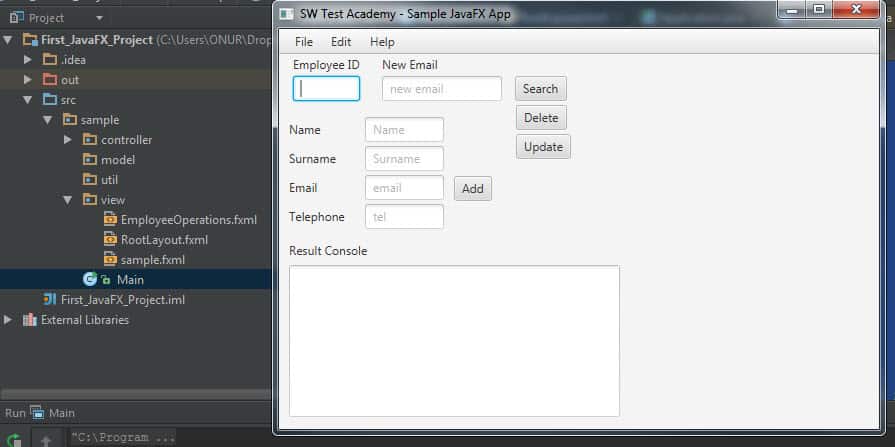
We are going to write our code based on MVC (Model-View-Controller) principle. Thus, I used three (plus one “util” package) packages. These are controller, model, and view. We should move .fxml files into view package and controller classes in the controller package. Also, I added one extra package and called it util. It is for utility classes such as DBUtil for database connection operations. “model” package comprises “model” and “DataAccessObject” classes. A sample application structure is shown below figure.
Also, we need to set the SceneBuilder path. To do this, go to File ->> Settings, type “JavaFX” in the search bar. Then, copy and paste the SceneBuilder path as shown below and click OK. Also, please check this link.
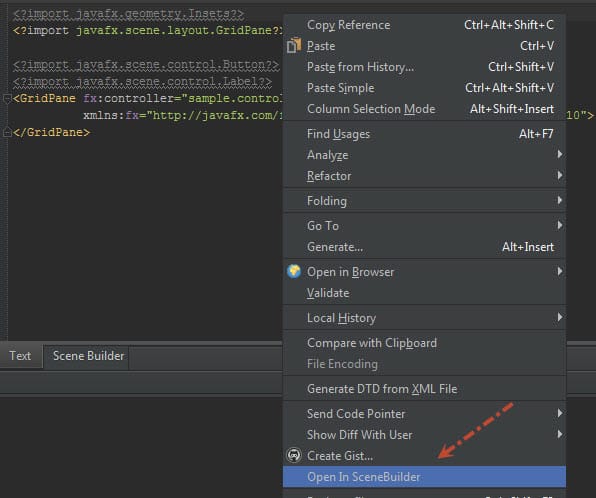
After setting the SceneBuilder path, go into sample.fxml file and right-click, then you will see the “Open in SceneBuilder” option. When you click this option, the selected FXML file will open in SceneBuilder. You can also check here.
We have almost finished our setup. For our first example, we will use Oracle DB and default HR schema. In the second post, we will do some DML (Database Manipulation) operations such as Create, Read, Update, Delete, Insert, etc. I also explained how to install and use Oracle Express at the end of this post.
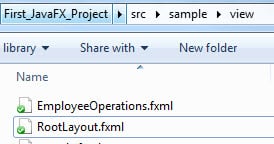
Now, let’s go to our project’s view folder and create EmployeeOperations.fxml and RootLayout.fxml files manually. To do this, right-click your mouse and create a new empty text file, and changed its name to EmployeeOperations.fxml (in the next post, I will change its name to EmployeeView.fxml). Do the same for the RootLayout.fxml. If you want, you can do this with SceneBuilder. Finally, in the view folder, we will have these two .fxml files.
Go to Windows Start and type SceneBuilder and then press Enter, then SceneBuilder will open.
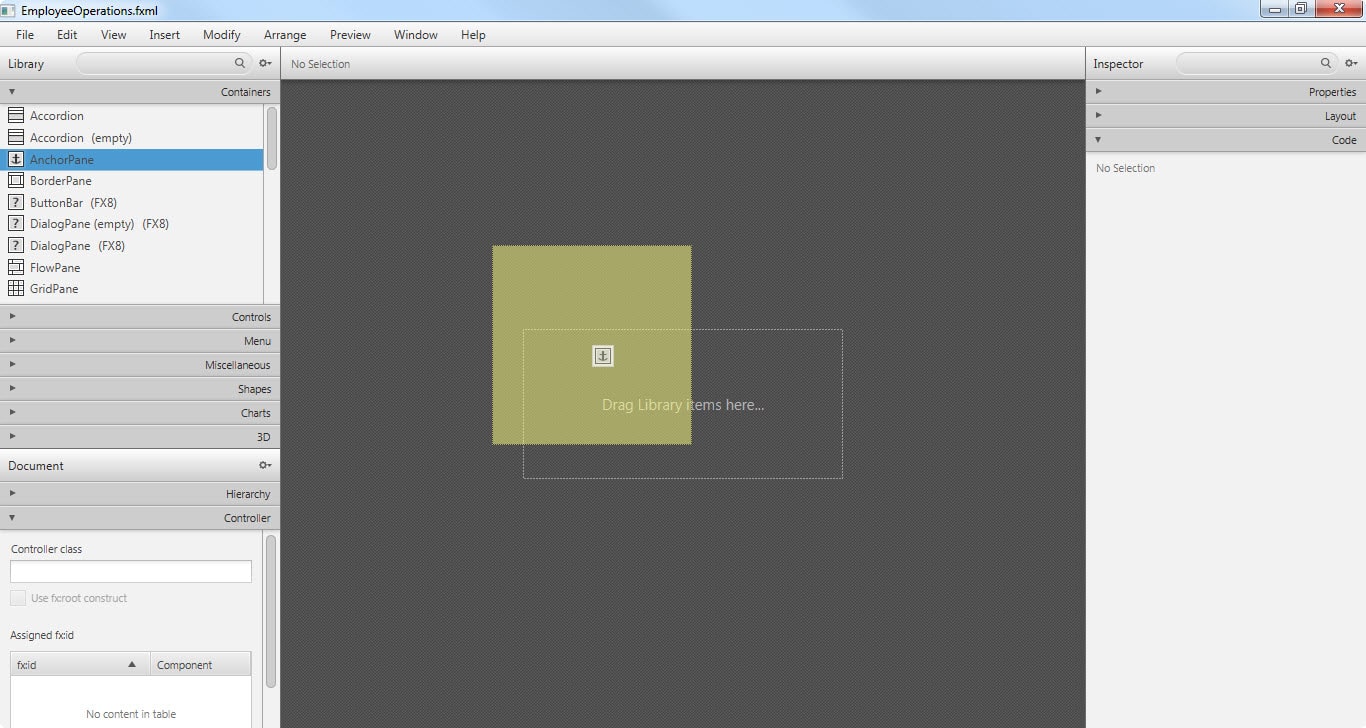
After that, click “File ->> Open” and open EmployeeOperations.fxml file.
Actually, there are two ways to design user interface. One of them is using IntelliJ to manipulate .fxml file or using SceneBuilder to design the UI. Using SceneBuilder when creating and designing UI at the first time is much easier and reasonable. I generally use intelliJ for manipulating UI at later stages.
First, open EmployeeOperations.fxml file and drag and drop Anchor Pane into the middle pane of SceneBuilder.
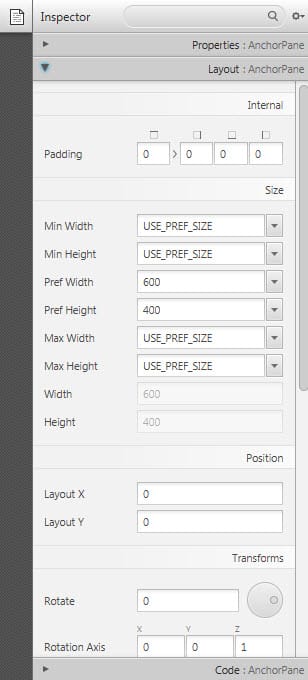
Then, if you want you can modify its properties by using the right pane.
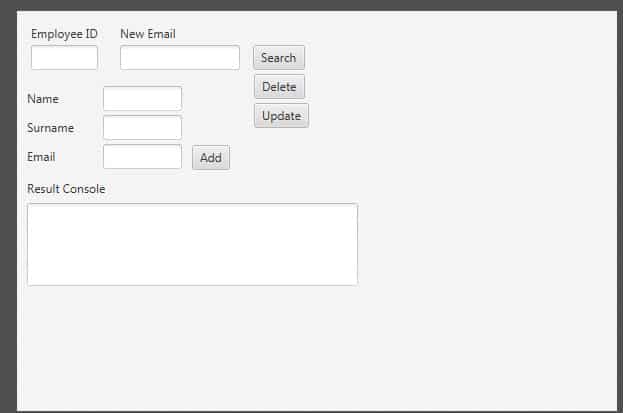
You can use the left pane’s Controls section to add TextField, Label, TextArea, and button to design your UI as shown below. The below figure is the draft version of the UI, not the final version.
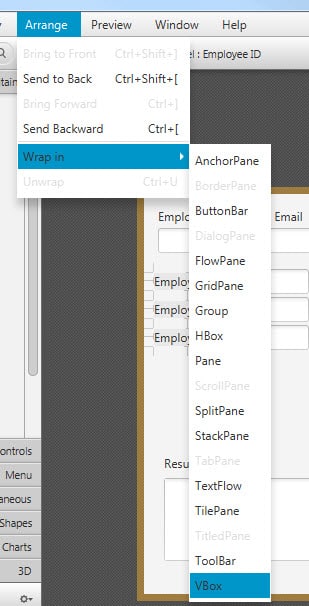
You can also group UI elements. Select the UI elements that you want to group then go to “Arrange > Wrap in” then click the appropriate choice. If elements are vertically listed, then chose VBox. If they are horizontally listed, then chose HBox.
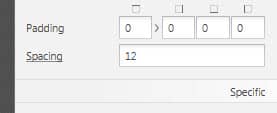
After grouping those elements, you can change the spaces of elements by using the right pane Layout section’s Spacing option.
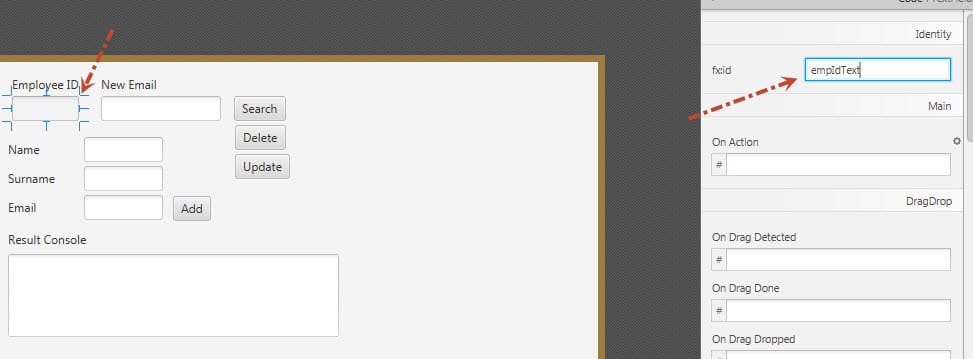
Then, in order to use these components in the code, you should set fx:id values on the right pane as shown below.
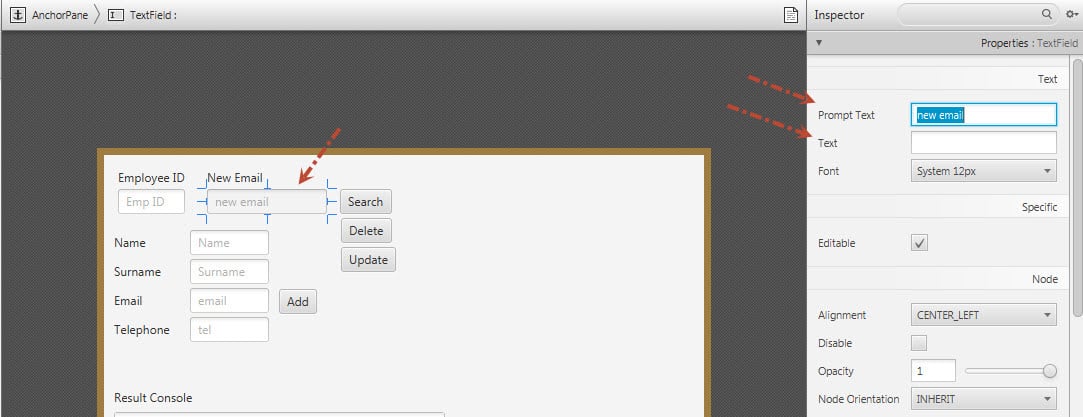
If you want to set prompt text and default text you can use the Properties section on the right pane. You can change Prompt Text and Text values as shown below.
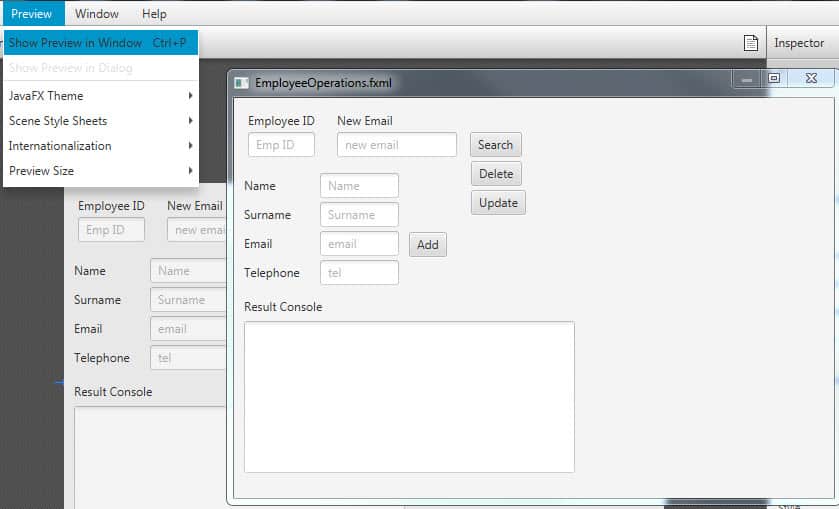
While designing UI, you can check its status by typing Ctrl + P.
For more information about layout design, you should visit here and https://dzone.com/refcardz/javafx-8-1 (I suggest you to visit DZone. They explained layout design very well.)
Now, let’s design RootLayout. Open RootLayout.fxml with SceneBuilder.
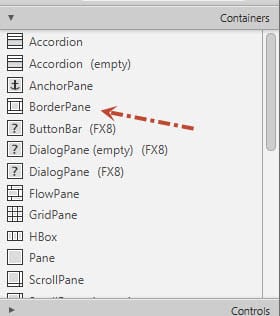
This time drag and drop BorderPane.
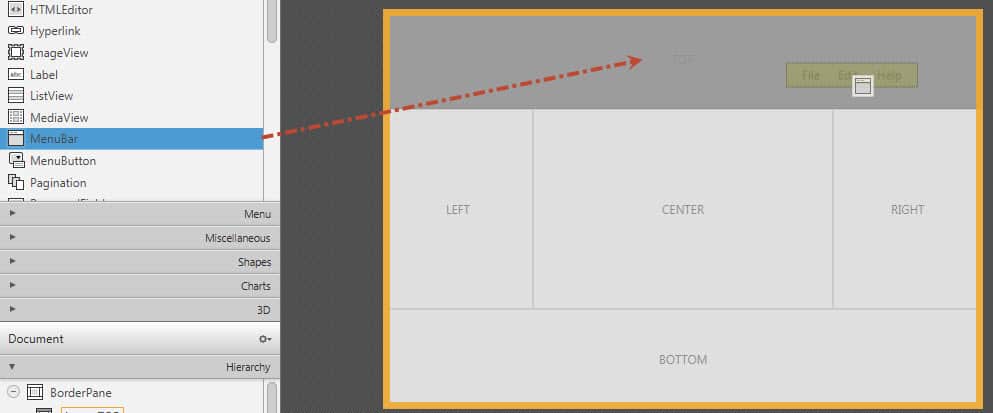
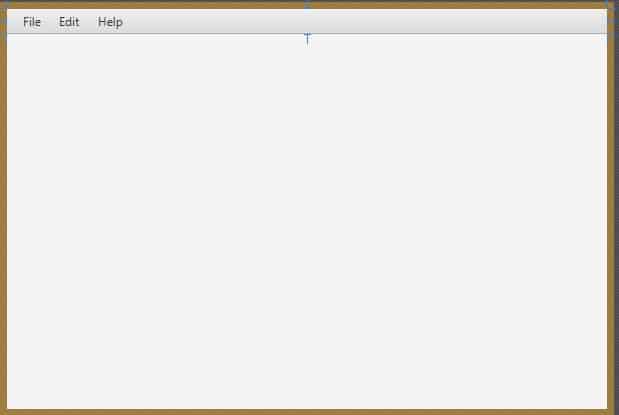
Then, add MenuBar into the TOP slot.
RootLayout’s final design is shown below.
Our aim is to show EmployeeOperations.fxml into RootLayout.fxml. Now, I want to explain JavaFX application structure briefly. Our generated Main class code is shown below.
package sample;

import javafx.application.Application;
import javafx.fxml.FXMLLoader;
import javafx.scene.Parent;
import javafx.scene.Scene;
import javafx.stage.Stage;

public class Main extends Application {

    @Override
    public void start(Stage primaryStage) throws Exception{
        Parent root = FXMLLoader.load(getClass().getResource("view/sample.fxml"));
        primaryStage.setTitle("Hello World");
        primaryStage.setScene(new Scene(root, 300, 275));
        primaryStage.show();
    }
    public static void main(String[fusion_builder_container hundred_percent="yes" overflow="visible"][fusion_builder_row][fusion_builder_column type="1_1" background_position="left top" background_color="" border_size="" border_color="" border_style="solid" spacing="yes" background_image="" background_repeat="no-repeat" padding="" margin_top="0px" margin_bottom="0px" class="" id="" animation_type="" animation_speed="0.3" animation_direction="left" hide_on_mobile="no" center_content="no" min_height="none"][] args) {
        launch(args);
    }
}
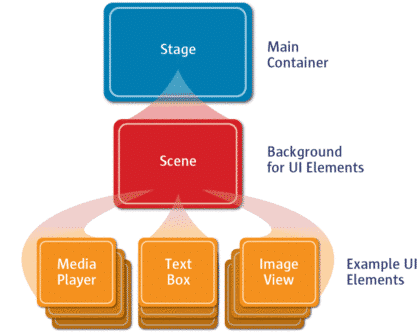
This is the default (generated) Main class and it extends the Application class. It has a start and main methods. The key method is here start method. It is automatically called with stage parameter when the application launched as you can see in the main method.
As you can see below figure, the main container is Stage and it consists of a scene and the scene comprises all kinds of JavaFX elements such as text field, button, etc. All JavaFX applications structure is like that. You can find more information here.
If we change the main class code as shown below, we can open the Employee Operations view inside of the RootLayout Border Pane. I tried to add comments and make the code more understandable.
package sample;

import javafx.application.Application;
import javafx.fxml.FXMLLoader;
import javafx.scene.Scene;
import javafx.scene.layout.AnchorPane;
import javafx.scene.layout.BorderPane;
import javafx.stage.Stage;

import java.io.IOException;

//Main class which extends from Application Class
public class Main extends Application {

    //This is our PrimaryStage (It contains everything)
    private Stage primaryStage;

    //This is the BorderPane of RootLayout
    private BorderPane rootLayout;

    @Override
    public void start(Stage primaryStage) {
        //1) Declare a primary stage (Everything will be on this stage)
        this.primaryStage = primaryStage;

        //Optional: Set a title for primary stage
        this.primaryStage.setTitle("SW Test Academy - Sample JavaFX App");

        //2) Initialize RootLayout
        initRootLayout();

        //3) Display the EmployeeOperations View
        showEmployeeOperationsView();
    }

    //Initializes the root layout.
    public void initRootLayout() {
        try {
            //First, load root layout from RootLayout.fxml
            FXMLLoader loader = new FXMLLoader();
            loader.setLocation(Main.class.getResource("view/RootLayout.fxml"));
            rootLayout = (BorderPane) loader.load();

            //Second, show the scene containing the root layout.
            Scene scene = new Scene(rootLayout); //We are sending rootLayout to the Scene.
            primaryStage.setScene(scene); //Set the scene in primary stage.

            //Third, show the primary stage
            primaryStage.show(); //Display the primary stage
        } catch (IOException e) {
            e.printStackTrace();
        }
    }

    //Shows the employee operations view inside the root layout.
    public void showEmployeeOperationsView() {
        try {
            //First, load EmployeeOperationsView from EmployeeOperations.fxml
            FXMLLoader loader = new FXMLLoader();
            loader.setLocation(Main.class.getResource("view/EmployeeOperations.fxml"));
            AnchorPane employeeOperationsView = (AnchorPane) loader.load();

            // Set Employee Operations view into the center of root layout.
            rootLayout.setCenter(employeeOperationsView);
        } catch (IOException e) {
            e.printStackTrace();
        }
    }

    public static void main(String[] args) {
        launch(args);
    }
}
Result:
Note: Above UI design is the draft version and in the next post, we will change and finalize it. In this post, I do not want to focus on the final design of our UI.
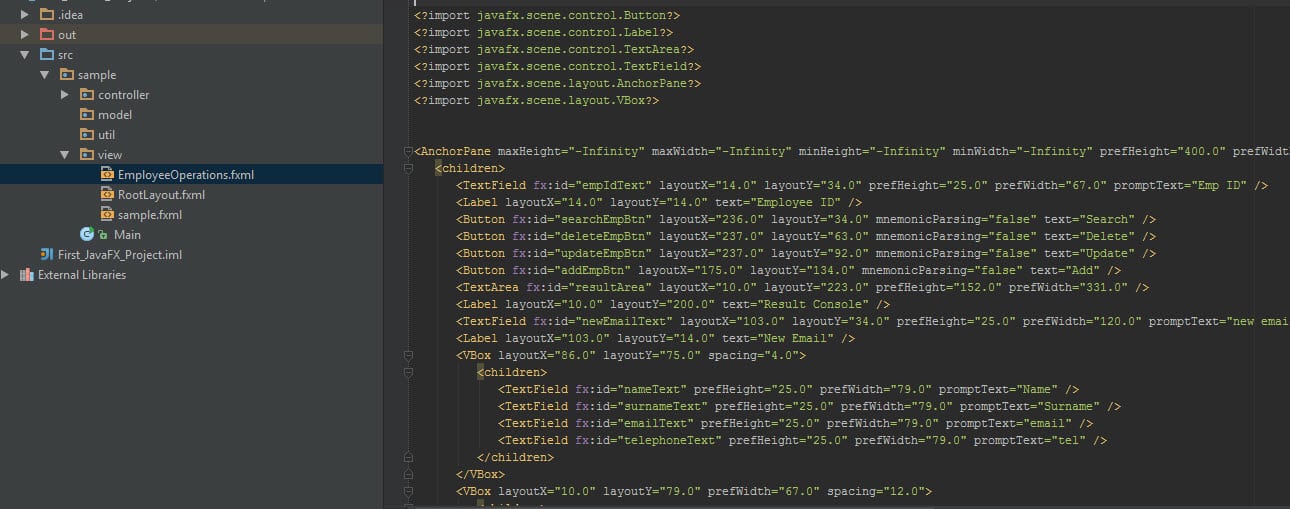
When you click any .fxml file in IntelliJ, you can see its content as shown below.
Before start to coding, I want to explain how to install Oracle Express Database
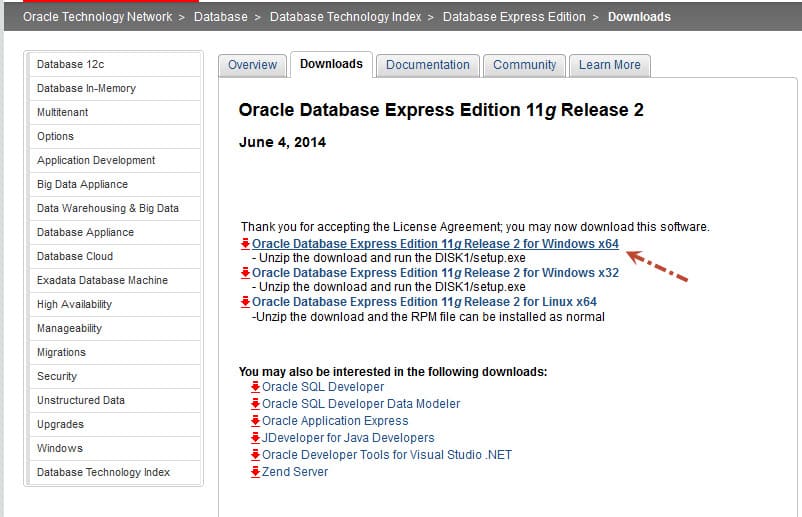
First, you should visit this link and install Oracle Database Express Edition 11g Release 2.
After you install Oracle Express, please go to this link and UNLOCK HR sample user account. In this tutorial, we will use the HR schema and its tables.
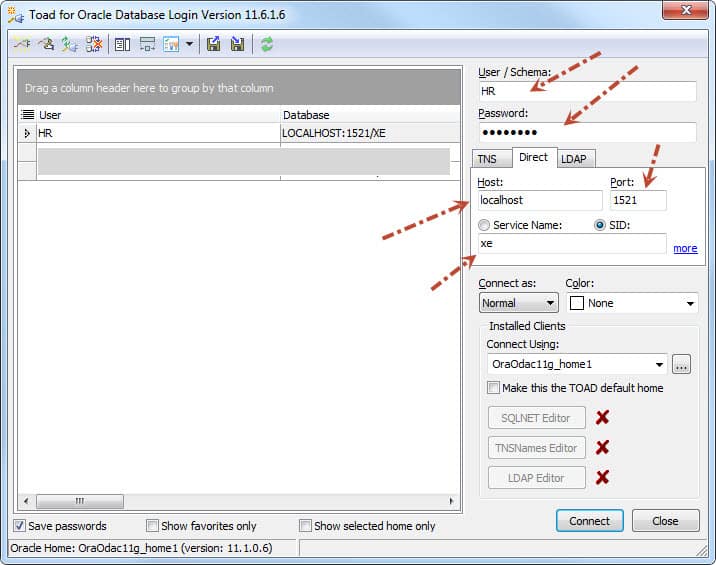
Then, try to connect the database with TOAD or Oracle SQL Developer. (I prefer TOAD)
You can see how to connect DB with TOAD below screenshot.
Now, we are ready to start coding. In the next post, we will use DAO (Data Access Object) Design Pattern and create EmployeeController controller (Business Class), Employee model (Employee Model), EmployeeDAO (Data Access Class) classes, and DBUtil class (DB Connection Utility) for DB connection operations.
JavaFX Tutorial Series
JavaFX – Part 1: Getting Started with JavaFX (This post)
JavaFX – Part 2: JavaFX Database Operations
GitHub Project
https://github.com/swtestacademy/javafxexample
Java 8 and JavaFX References
Java 8 API – JavaDoc for the standard Java classes
JavaFX 8 API – JavaDoc for JavaFX classes
ControlsFX API – JavaDoc for the ControlsFX project for additional JavaFX controls
Oracle’s JavaFX Tutorials – Official JavaFX Tutorials by Oracle

Onur Baskirt is a Software Engineering Leader with international experience in world-class companies. Now, he is a Software Engineering Lead at Emirates Airlines in Dubai.





This is really helpful and comprehensive Thanks!!!