Hello everybody, Selenium Grid is used to speed up the execution of a test pass by using multiple machines to run tests in parallel. It routes the test suites to available browsers and decreases the test execution time. Today, we are going to describe how to extend Selenium Grid for your needs. It’s going to be Extending Selenium Grid 101 course. :) Let’s learn how to extend Selenium Grid!
Creating Your Extension Projects
- Create a Quickstart Maven Project. The most important part is the GroupId and ArtifactId. They are going to be crucial in next steps. Our GroupId is “com.swtestacademy” and ArtifactId is “ExtendedGrid”.
- Add “Selenium Standalone Server” dependency into your pom.xml
<dependency>
 <groupId>org.seleniumhq.selenium</groupId>
 <artifactId>selenium-server</artifactId>
 <version>3.12.0</version>
</dependency>
You’re ready to extend Selenium Grid. Let’s start coding.
Code Implementation
Create a java class and extend it by using DeafaultRemoteProxy class and implement TestSessionListener Interface.
public class ExtendedProxy extends DefaultRemoteProxy implements TestSessionListener
Then you’ll be able to override some methods. Those methods are:
- BeforeSession (It’s trigger before a session is created)
- AfterSession (It’s trigger after a session is finished)
- BeforeCommand (It’s trigger before a command is executed)
- AfterCommand (It’s trigger after a command is executed)
Let’s do some basic stuff with them as below in this class.
@Override
public void beforeCommand(TestSession session, HttpServletRequest request,
                         HttpServletResponse response) {
   System.out.println("****** SWTESTACADEMY *****");
   System.out.println("Selenium Extending Grid - Before Command");
   System.out.println("Method " +request.getMethod());
   System.out.println("getRequestURI " +request.getRequestURI());
   System.out.println("Session "+session.toString());

}

@Override
public void afterCommand(TestSession session, HttpServletRequest request,
                         HttpServletResponse response) {
   System.out.println("****** SWTESTACADEMY *****");
   System.out.println("Selenium Extending Grid - After Command");
}

@Override
public void beforeSession(TestSession session){
   System.out.println("****** SWTESTACADEMY *****");
   System.out.println("Selenium Extending Grid - Before Session");
}

@Override
public void afterSession(TestSession session){
   System.out.println("****** SWTESTACADEMY *****");
   System.out.println("Selenium Extending Grid - After Session");
}
Build Your Grid
In order to build your Selenium Grid and export a jar file. You need to do some modifications into your pom.xml. You’re also going to use different maven command while building your project.
Add “maven assembly plugin” into your pom.xml’s plugins section. All you need to change is the value inside MainClass tag according to your package names. With this plugin, all the dependencies will be included in your extended grid jar files.
<plugin>
 <groupId>org.apache.maven.plugins</groupId>
 <artifactId>maven-assembly-plugin</artifactId>
 <executions>
   <execution>
     <id>create-my-bundle</id>
     <phase>package</phase>
     <goals>
       <goal>single</goal>
     </goals>
     <configuration>
       <archive>
         <manifest>
           <mainClass>com.swtestacademy.ExtendedProxy
           </mainClass>
         </manifest>
         <manifestEntries>
           <Class-Path>.</Class-Path>
         </manifestEntries>
       </archive>
       <descriptorRefs>
         <descriptorRef>jar-with-dependencies</descriptorRef>
       </descriptorRefs>
     </configuration>
   </execution>
 </executions>
</plugin>
Add below plugin into plugins section also. By this way, you specify the main class that will be executed when Grid is launched. This main class is “org.openqa.grid.selenium.GridLauncherV3”. You shouldn’t change this value.
<plugin>
 <artifactId>maven-assembly-plugin</artifactId>
 <version>2.5</version>
 <configuration>
   <descriptorRefs>
     <descriptorRef>jar-with-dependencies</descriptorRef>
   </descriptorRefs>
   <archive>
     <manifest>
       <mainClass>org.openqa.grid.selenium.GridLauncherV3</mainClass>
       <addDefaultImplementationEntries>true</addDefaultImplementationEntries>
     </manifest>
   </archive>
 </configuration>
 <executions>
   <execution>
     <id>make-assembly</id> <!-- this is used for inheritance merges -->
     <phase>package</phase> <!-- bind to the packaging phase -->
     <goals>
       <goal>single</goal>
     </goals>
   </execution>
 </executions>
</plugin>
<plugin>
 <groupId>org.codehaus.mojo</groupId>
 <artifactId>exec-maven-plugin</artifactId>
 <version>1.2.1</version>
 <executions>
   <execution>
     <goals>
       <goal>java</goal>
     </goals>
   </execution>
 </executions>
 <configuration>
   <mainClass>org.openqa.grid.selenium.GridLauncherV3</mainClass>
 </configuration>
</plugin>
Build Your Package
Run below maven command to build your jar file with all the dependencies.
mvn clean compile assembly:single
Now you have a target folder like these with extenededGrid-1.0-SNAPSHOT-jar-with-dependencies.jar file. Copy this jar file into another folder where you’ll run your Grid.
Start You Extended Grid as a HUB
Run your ExtendedGrid with the new jar file. Actually, there’s no difference compared to the standard Selenium Grid. Only name of the jar file is changed.
java -jar extenededGrid-1.0-SNAPSHOT-jar-with-dependencies.jar -role hub
Then your Grid will run as HUB. You should be able to reach SeleniumGrid console by browsing http://localhost:4444/grid/console.
Connect Nodes to Extended Hub
You need to create node.json file for your nodes. Let’s create a basic one. This node will be a Chrome Browser node with 5 instance. The most important part is to change the proxy value with the extended java class. By this way, all your command will be proxied by this class. In case you keep it as the default which is “org.openqa.grid.selenium.proxy.DefaultRemoteProxy” your extended class will not work.
{
  "capabilities":
  [
    {
      "browserName": "chrome",
      "maxInstances": 5,
      "seleniumProtocol": "WebDriver"
    }
  ],
  "proxy": "com.swtestacademy.ExtendedProxy",
  "maxSession": 5,
  "port": 5555,
  "register": true,
  "registerCycle": 5000,
  "hub": "http://localhost:4444",
  "nodeStatusCheckTimeout": 5000,
  "nodePolling": 5000,
  "role": "node",
  "unregisterIfStillDownAfter": 60000,
  "downPollingLimit": 2,
  "debug": false,
  "servlets" : [],
  "withoutServlets": [],
  "custom": {}
}
Save that as node.json into a folder. Run your Grid nodes
java -Dwebdriver.chrome.driver="chromedriver" -jar extenededGrid-1.0-SNAPSHOT-jar-with-dependencies.jar -role node -nodeConfig node.json
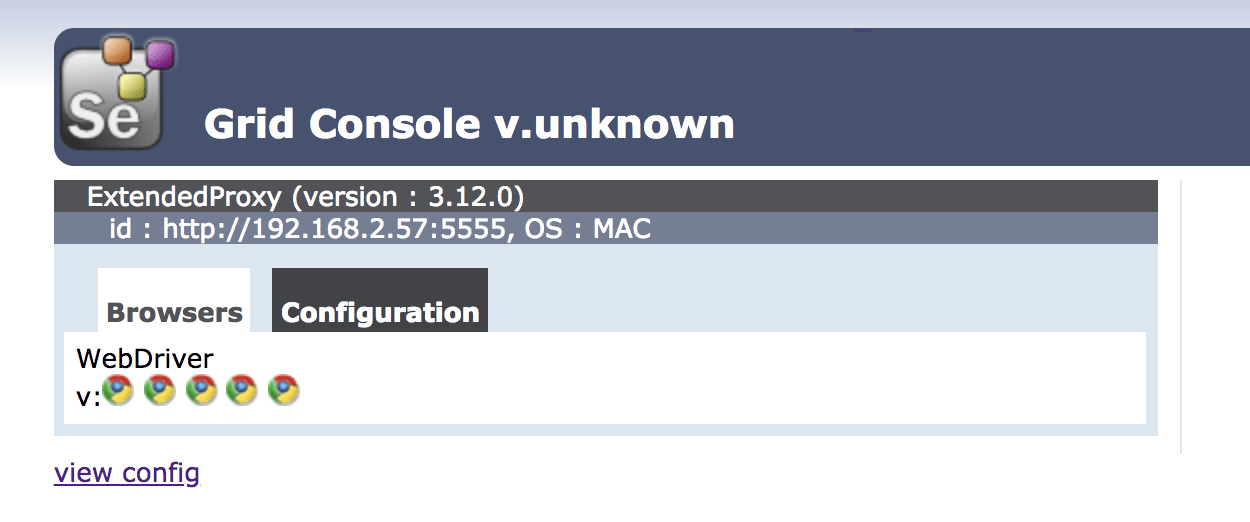
Your Nodes should be ready if you go into your Grid console, you will see below screenshot.
Try Your Extended Selenium Grid
Create a simple Selenium project with some click, sendKeys events and run it. If you see your sysout command on the console, it means your extended grid works like a charm.
11:50:37.279 INFO [TestSlot.getNewSession] - Trying to create a new session on test slot {server:CONFIG_UUID=6c4bc0f1-8078-4010-b88c-4a34cd3575e6, seleniumProtocol=WebDriver, browserName=chrome, maxInstances=5, platformName=MAC, platform=MAC}
****** SWTESTACADEMY *****
Selenium Extending Grid - Before Session
****** SWTESTACADEMY *****
Selenium Extending Grid - Before Command
Method POST
getRequestURI /wd/hub/session
Session 026aad5c-cc6c-4c12-a23e-b7a8c7f9e84f (int. key, remote not contacted yet.)
****** SWTESTACADEMY *****
Selenium Extending Grid - After Command
****** SWTESTACADEMY *****
Selenium Extending Grid - Before Command
Method POST
getRequestURI /wd/hub/session/3ea3677c0fa99c9c41a96a9305755b47/url
Session ext. key 3ea3677c0fa99c9c41a96a9305755b47
****** SWTESTACADEMY *****
Selenium Extending Grid - After Command
****** SWTESTACADEMY *****
Selenium Extending Grid - Before Command
Method GET
getRequestURI /wd/hub/session/3ea3677c0fa99c9c41a96a9305755b47/title
Session ext. key 3ea3677c0fa99c9c41a96a9305755b47
****** SWTESTACADEMY *****
Selenium Extending Grid - After Command
****** SWTESTACADEMY *****
Selenium Extending Grid - Before Command
Method POST
getRequestURI /wd/hub/session/3ea3677c0fa99c9c41a96a9305755b47/element
Session ext. key 3ea3677c0fa99c9c41a96a9305755b47
****** SWTESTACADEMY *****
Selenium Extending Grid - After Command
****** SWTESTACADEMY *****
Selenium Extending Grid - Before Command
Method POST
getRequestURI /wd/hub/session/3ea3677c0fa99c9c41a96a9305755b47/element/0.5511914491038135-1/value
Session ext. key 3ea3677c0fa99c9c41a96a9305755b47
****** SWTESTACADEMY *****
Selenium Extending Grid - After Command
****** SWTESTACADEMY *****
Selenium Extending Grid - Before Command
Method POST
getRequestURI /wd/hub/session/3ea3677c0fa99c9c41a96a9305755b47/element
Session ext. key 3ea3677c0fa99c9c41a96a9305755b47
****** SWTESTACADEMY *****
Selenium Extending Grid - After Command
****** SWTESTACADEMY *****
Selenium Extending Grid - Before Command
Method POST
getRequestURI /wd/hub/session/3ea3677c0fa99c9c41a96a9305755b47/element/0.5511914491038135-2/click
Session ext. key 3ea3677c0fa99c9c41a96a9305755b47
****** SWTESTACADEMY *****
Selenium Extending Grid - After Command
We’ll add some functionalities into our Extended Grid in the next tutorials.
[fusion_widget_area name=”avada-custom-sidebar-seleniumwidget” title_size=”” title_color=”” background_color=”” padding_top=”” padding_right=”” padding_bottom=”” padding_left=”” hide_on_mobile=”small-visibility,medium-visibility,large-visibility” class=”” id=””][/fusion_widget_area]
Thanks for reading.
-Canberk

Canberk Akduygu is a Test Lead working in the Netherlands
how do i create node json in eclipse also i am getting error while running maven in comand prompt “Execution default-cli of goal org.apache.maven.plugins:maven-assembly-plugin:2.5:single failed”
This is a problem of Maven. I believe you have a missing plug-in in pom.xml.
Did you forget to add maven-assembly-plugin by mistake?
Hi, This is really interesting. Eagerly waiting for your upcoming tutorials.
Hi , I’m new to selenium grid , i gone through this post
I’m not getting What exactly we achieved here , as shown above we can do same thing just by using selenium provided jar and mark browser instances to 5 , that will give same result.
So why doing all this?
I’m not getting the concept of extending selenium grid. can you please elaborate it more here .
Thanks for you Wonderful post!!
Actually, setting the browser instances to 5 is the least important part of the tutorial.
I wanted to tell how you can override Selenium Grid’s functionalities like AfterSession, AfterCommand, etc…
This post is an entry level post. You can find the advanced one here. Hope this will make you understand more clearly of what I want to achieve http://www.swtestacademy.com/selenium-grid-video-recording-capability/
Thanks For quick response and sharing this valuable knowledge !!
Now picture is clear!! :-)
Good to have your future Post here!!