
In this article, I will explain how to install the report portal locally and integrate it with Spring Boot (WebFlux) Junit 5 projects.
Installation
We can install reportpotal via docker or Kubernetes. In this tutorial, I will explain the docker-compose method. If you use Docker for Windows or macOS, make sure there is at least 3GB dedicated to Docker.
Step-1: We need to install Docker Desktop on our machine. Link: https://www.docker.com/products/docker-desktop/
Step-2: Download the docker-compose file from reportportal’s official page. Link: https://github.com/reportportal/reportportal/blob/master/docker-compose.yml
After this, we can run the below command for installation:
curl -LO https://raw.githubusercontent.com/reportportal/reportportal/master/docker-compose.yml |
Step-3: Start the application with the command below.
docker-compose -p reportportal up -d --force-recreate |
The meaning of the arguments:
- -p reportportal adds project prefix ‘reportportal’ to all containers
- up creates and starts containers
- -d daemon mode
- –force-recreate Re-creates containers by force
Useful commands:
- docker-compose logs – It shows logs from all containers
- docker logs <container_name> – It shows logs from selected container
- docker ps -a | grep “reportportal_” | awk ‘{print $1}’ | xargs docker rm -f – It deletes all ReportPortal containers
Step-4: Check the status of the containers on the Docker desktop or docker ps command, and if you see that all containers are healthy, you can open this link to reach the report portal.
Link: localhost:8080
Note: Reportportal will move to Elastic Search instead of PostgreSQL in version 5.8.0 and onwards. The docker installation currently has data migration and postgreSQL-related issues on M1 Machines. After the 5.8.0 announcement, this version will be tried as a POC, and the documentation will be updated. Link: https://github.com/reportportal/reportportal/issues/1644#issuecomment-1332185468
Configuring ReportPortal Before Integration with a Specific Microservice
Open ReportPortal UI
Go to http:$IP_ADDRESS_OF_REPORT_PORTAL:8080 (by default, it is http://localhost:8080)
Log in as Admin user and create the project (more details here and here).
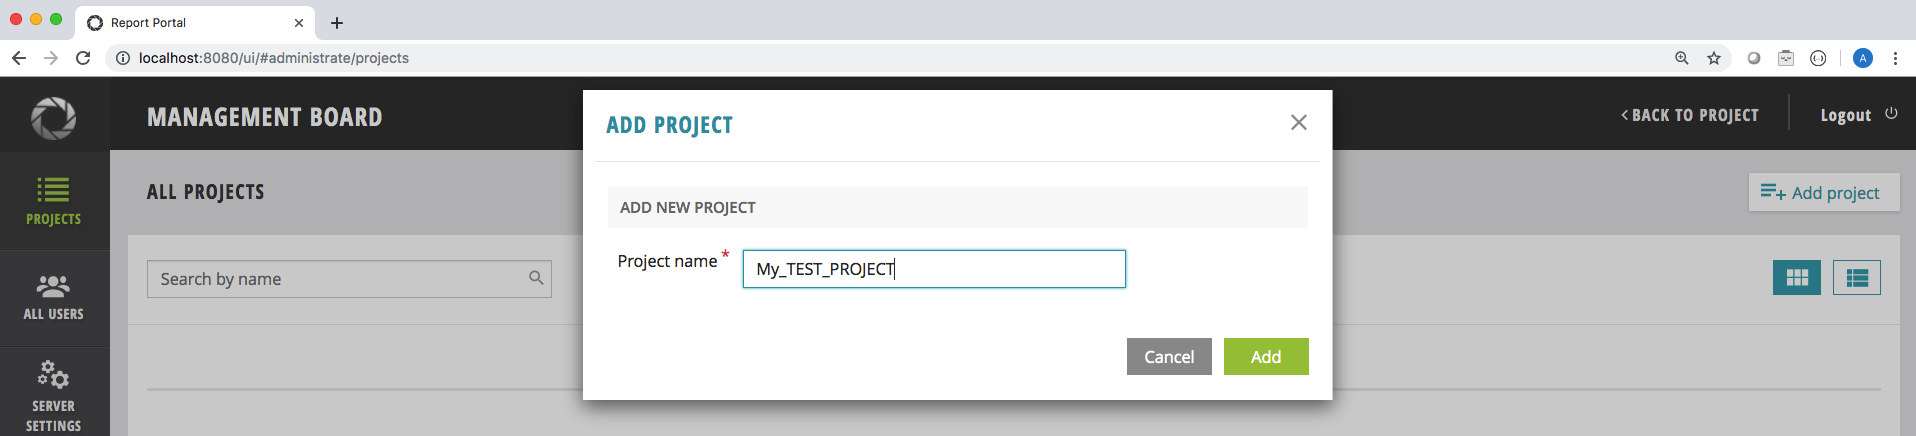

Add users to your project:
Go to Administrative -> My Test Project -> Members -> Add user
Example link http://localhost:8080/ui/#administrate/project-details/my_test_project/members
ReportPortal Spring Boot Microservices Integration
First, we need to add the below dependencies in pom.xml.
<dependency>
    <groupId>com.epam.reportportal</groupId>
    <artifactId>agent-java-junit5</artifactId>
    <version>5.1.5</version>
</dependency>

<dependency>
    <groupId>com.epam.reportportal</groupId>
    <artifactId>logger-java-logback</artifactId>
    <version>5.1.1</version>
</dependency>
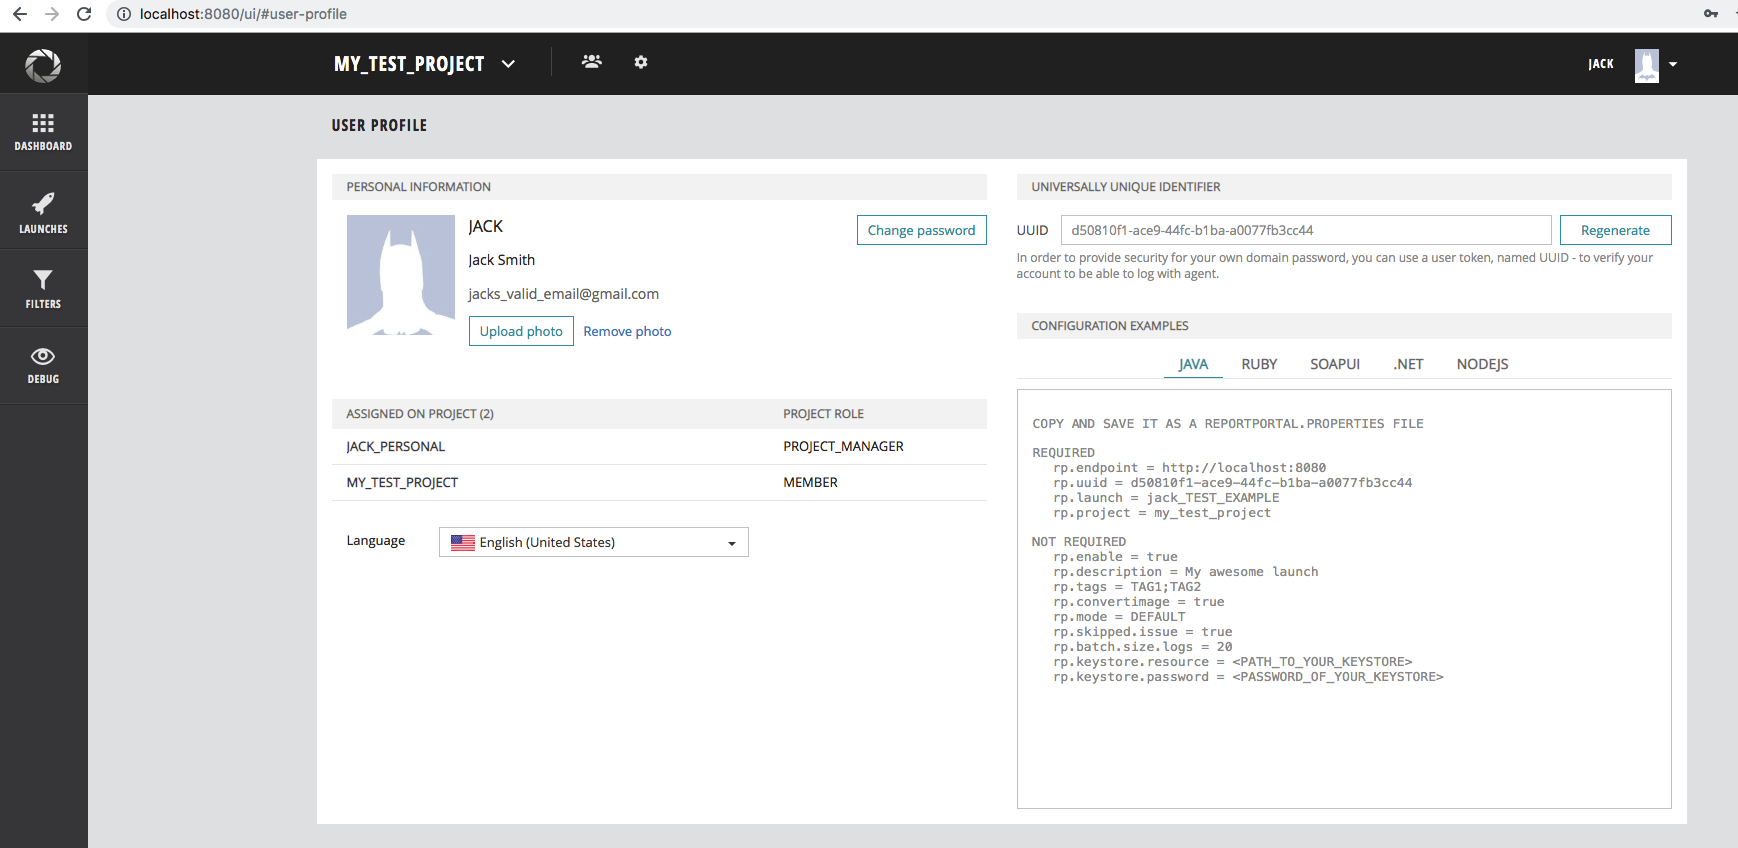
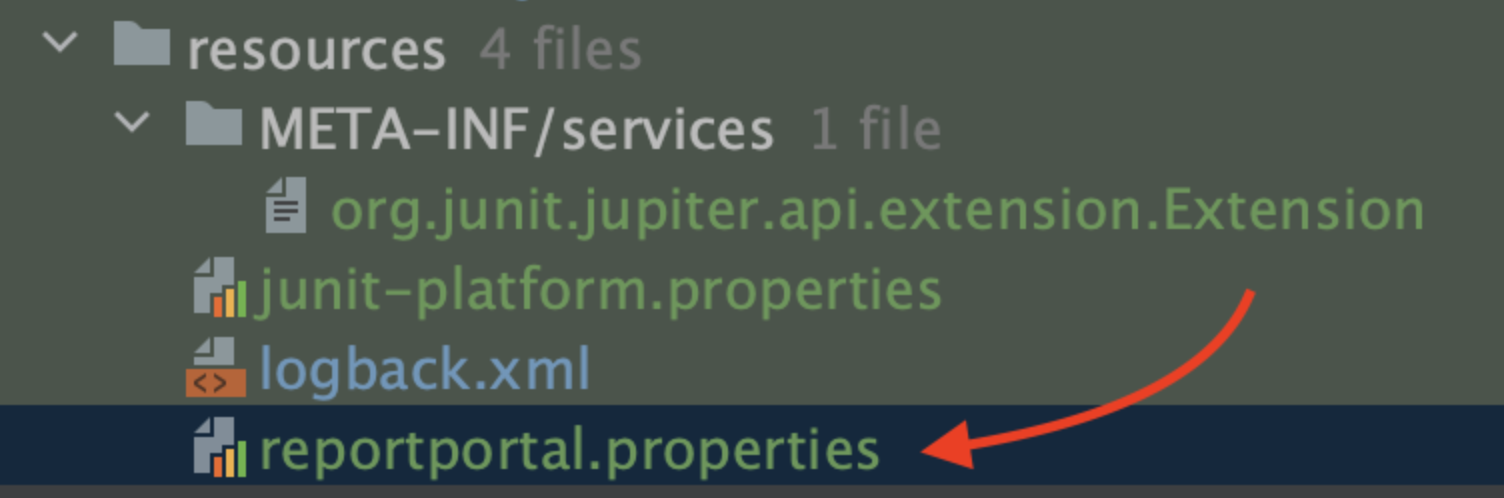
Under the test/resources folder, we need to create the reportportal.properties file and set the values according to reportportal’s URL, uuid, launch name, and project name.
After you have created a new user in your project, you can get reportportal.properties file example from the user Profile page
To do that, log in as a created user and go to the User icon in the header -> Profile
There, in the Configuration Examples section, you can find the example of reportportal.properties file for that user.
More details on
reportportal.propertiesfile could be found here.
rp.uuid = dfcb4dc5-c3b6-49fa-b47f-742a8e78f532rp.launch =superadmin_yoursericerp.project = yourserice |
Again, under test/resources folder, there is a logback.xml file, and we need to update it to gather reportportal logs.
<?xml version="1.0" encoding="UTF-8"?>
<configuration>
    <property name="REPORT_PORTAL_PATTERN" value="%d [%t] %-5level %logger{36} - %msg%n%throwable"/>

    <appender name="CONSOLE" class="ch.qos.logback.core.ConsoleAppender">
        <encoder>
            <pattern>${REPORT_PORTAL_PATTERN}</pattern>
            <charset>utf8</charset>
        </encoder>
        <immediateFlush>false</immediateFlush>
    </appender>

    <appender name="FILE" class="ch.qos.logback.core.FileAppender">
        <file>./logs/report_portal_${myTimestamp}.log</file>
        <append>true</append>
        <encoder>
            <pattern>${REPORT_PORTAL_PATTERN}</pattern>
            <charset>utf8</charset>
        </encoder>
    </appender>

    <root level="INFO">
        <appender-ref ref="CONSOLE" />
    </root>
</configuration>
We must create a new file under test/resources folder and name it as “junit-platform-properties” and copy-paste the below value into it.
junit.jupiter.extensions.autodetection.enabled=true |

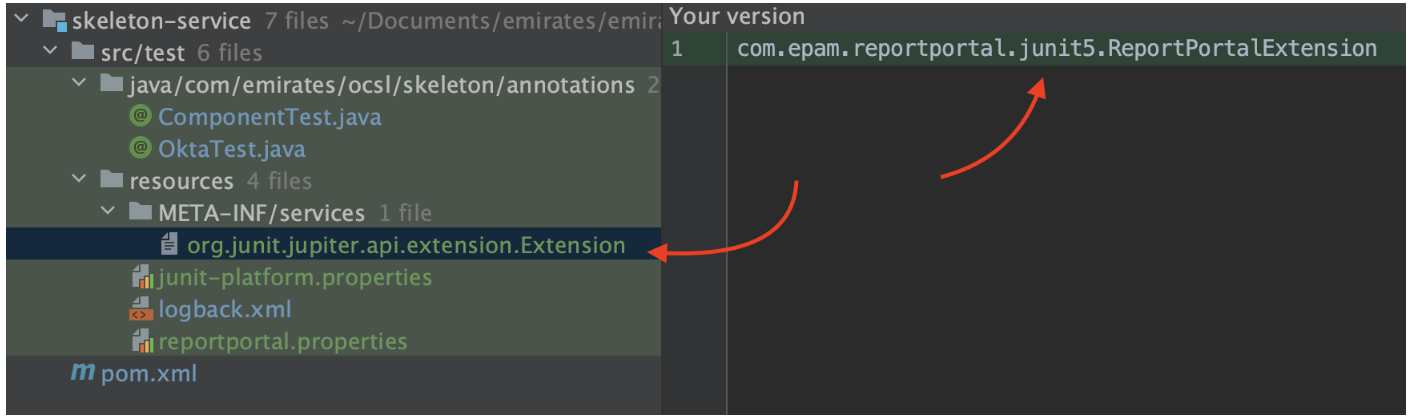
Create a new folder as “META-INF/services” under the test/resources folder, and inside this folder, create a new file as “org.junit.jupiter.api.extension.Extension” and copy and paste the below line into it.
com.epam.reportportal.junit5.ReportPortalExtension |
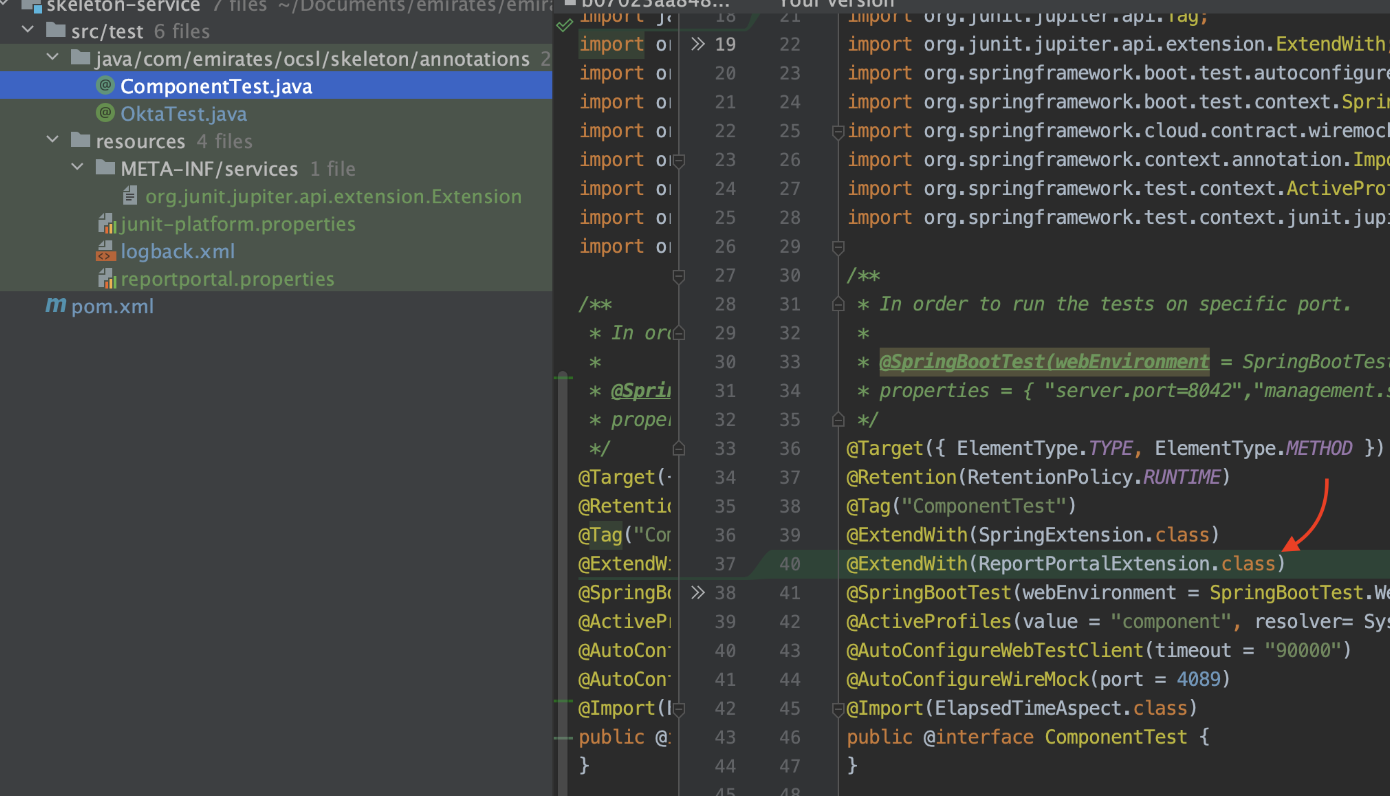
And finally, we must add the report portal extension “ReportPortalExtension.class” to the tests, as shown below.
References:
- https://reportportal.io/installation
- https://reportportal.io/docs/Deploy-with-Docker
- https://github.com/reportportal/agent-java-junit5
Thanks,
Onur Baskirt

Onur Baskirt is a Software Engineering Leader with international experience in world-class companies. Now, he is a Software Engineering Lead at Emirates Airlines in Dubai.