Today I am going to tell you about how to testing in Gitlab and creating a small pipeline by using GitLab CI/CD. GitLab is a web-based DevOps lifecycle tool that provides a Git-repository manager with CI/CD pipeline features.
Our sample pipeline will consist of building a NodeJS application and running the integration tests. It’s very straight forward.
We’ll hopefully cover additional steps in future posts.
You can find the example source code in https://gitlab.com/canberkakduygu/demoproject/. This time our project is hosted on Gitlab so we can show you the benefit of Gitlab CI/CD environment.
Introduction to the Sample Application for Testing in Gitlab
Our application does addition, subtraction, multiplication and division operations. There are 4 GET methods to do those operations. All the codes are under the routes folder. Then we have a test folder where you can find 2 services test written with mocha and chai libraries.
Why CI/CD?
Cause we want to get early feedback for the changes that we made in our application. GitLab CI/CD pipelines are configured using a YML file called gitlab-ci.yml within each project. The .gitlab-ci.yml file defines the structure and order of the pipelines and determines:
- What to execute using GitLab Runner.
- What decisions to make when specific conditions are encountered. For example, when a process succeeds or fails.
- etc..
gitlab-ci.yml files are basically text files. There’s always a good chance that you can make a mistake. Gitlab provides us a way to validate the content of the file by the web interface. Just go to CI/CD on the left menu, Select Pipeline then click CI Lint. You can copy-paste the content of your yml file and see the results.
Structure of GITLAB-CI.YML File
image: node:latest

stages:
  - build-test

local_integration_test:
  stage: build-test
  script:
    - npm install
    - node server.js &
    - npm test "test/integration/test.js"
As you can see, at the beginning we have image parameter. It defines which docker image we are going to use. As the application is a nodeJS application I set the parameter to node:latest so I can get the latest node binaries.
Then we have stages parameter. You can think of them as the jobs that you are going to execute. You can write as many as you want. They will be executed sequentially.
Then we define the individual jobs that we defined previously. I used local_integration_test title for my first job. There’s no limitation for the job name. Then you have to define the stage name for the job by using stage parameter. Then we have to define script parameter. This is where we define the commands that will be executed by Gitlab Runner.
- npm install will install all dependencies
- node server.js & will start the server
- npm test “test/integration/test.js” will start out integration tests
There are many more parameters like before_script, after_script, tag, allow_failure, etc. You can go to Gitlab documentation and read about them.
Execution Results
When you commit your project, GitLab is going to recognize your yml file and start running it. After each commit, you will see the result of your changes.
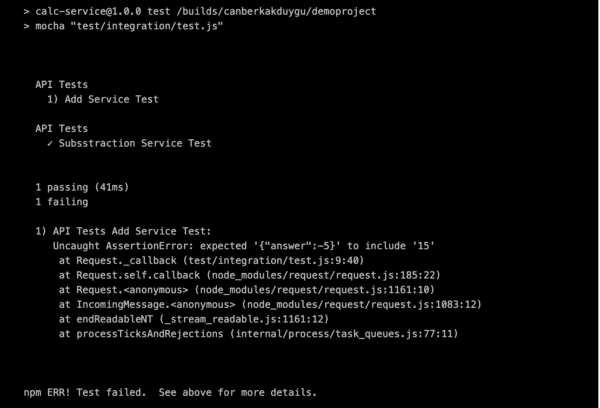
After my initial commit, the application is built and then automated tests executed. Here are the results. Then I intentionally added a bug to web services source codes. After the commit, Gitlab started the whole process again.
Then, I have a failure in my pipeline.
You can go to a specific execution and see the reason for the failure. In my case, it was a test failure.
Then I committed and pushed my change to gitlab. Here’s the final result.
This as the first post about our Gitlab article. Hope you enjoyed it.

Canberk Akduygu is a Test Lead working in the Netherlands


