In this tutorial, we will learn how to install Gatling, and perform our first load test using the recorder on Windows. Let’s first understand what Gatling is.
What is Gatling?
Gatling is an open-source load and performance testing framework based on Scala, Akka and Netty.[1]
What are the advantages of Gatling?
- Free and open source.
- Powerful yet efficient system source management.
- Operating system and browser independent.
- Supports ‘Http’, ‘Websocket’, ‘Server-sent events’, ‘JMS’ protocols.
How to install Gatling?
Installing Gatling is pretty easy. Go to http://gatling.io/download/ and click on ‘Download Now’.

Extract the folder to the path of your choice. That’s it!
Install JDK
Gatling requires JDK. How to install JDK has explained in this article on step 4.
How to prepare performance test scenarios?
It is time to write our first load test. There are two ways of preparing a test, recording and writing your own test using Scala. We will talk about writing your own test in Scala later. In this tutorial, we will cover recording a scenario.
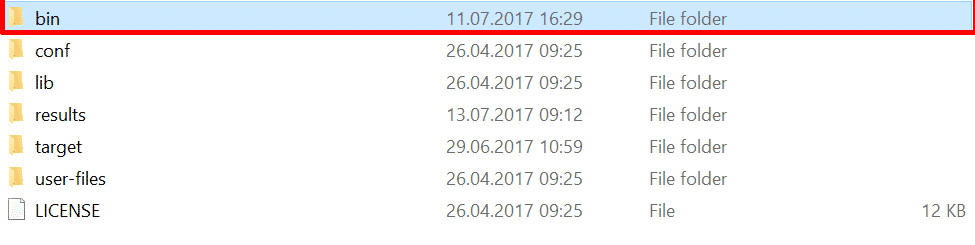
Navigate to the folder where you have extracted the gatling. On the “\bin” you will see two batch files, gatling.bat and recorder.bat.
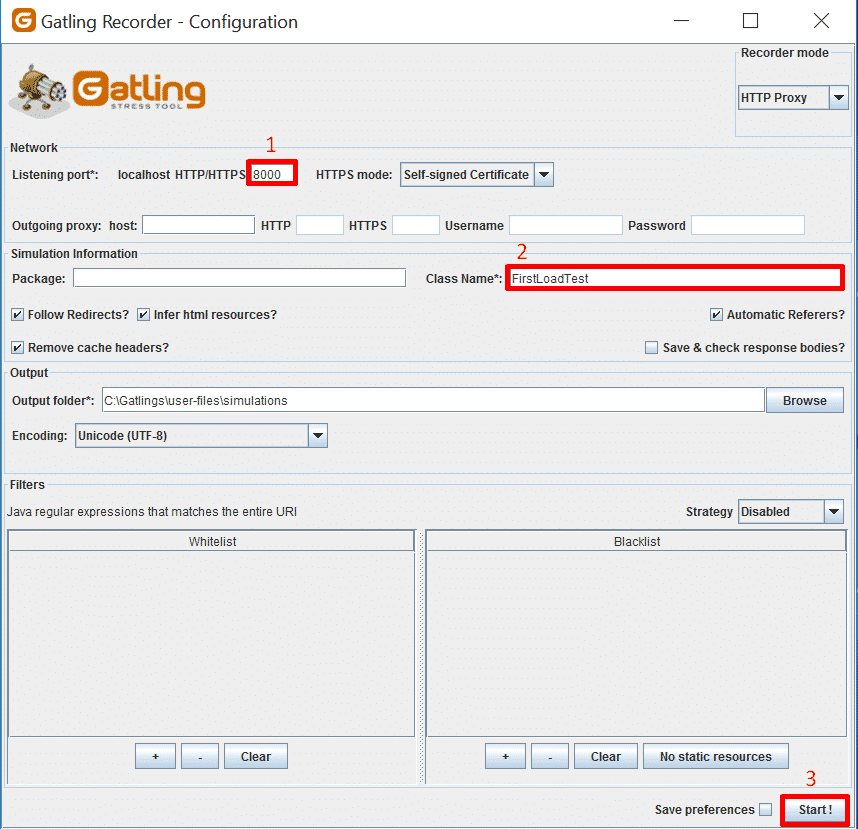
Click on recorder.bat,

First, we need to define the port that recorder will listen. The default value is 8000. If that port is not in use on your computer, you can use the default value. Then name your class (i.e project) and click on start!
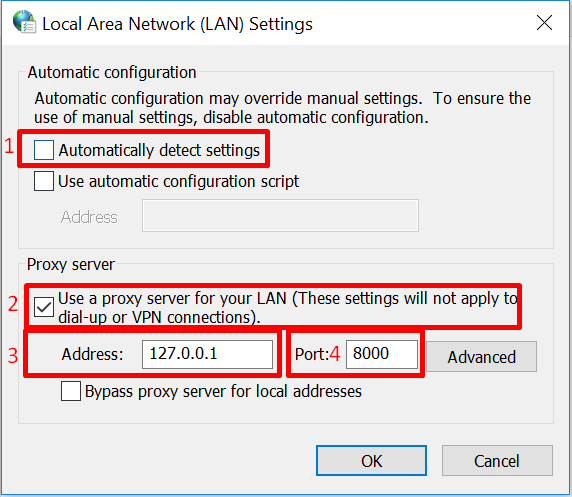
Since recorder listen to a pre-defined port, we need to configure the browser. For Google Chrome and Internet Explorer, go to ‘Control Panel’, select ‘Internet options’ and navigate to ‘Connections’ tab. Inside this tab click on ‘LAN settings’. Here deselect ‘Automatically detect settings’ if it is selected. Check ‘Use a proxy server for your LAN, change the address to ‘127.0.0.1’ and port to the defined value on gatling recorder. Click ‘Ok’.
If you are using Firefox, click on the menu button located on top right. Then click on ‘Options’.
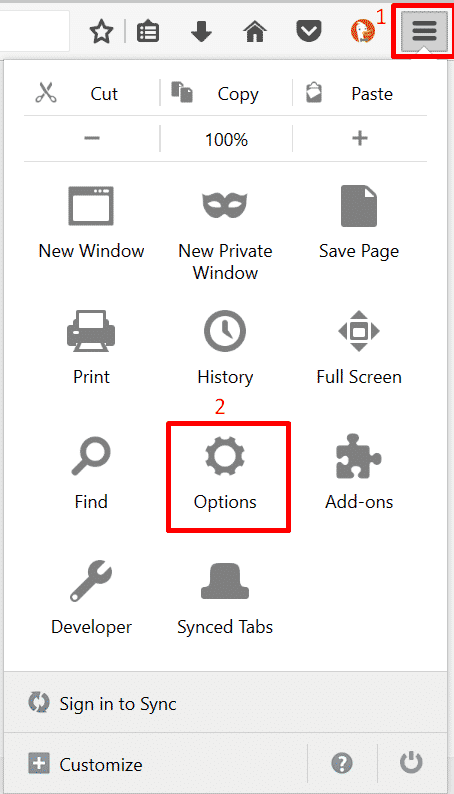
Go to ‘Advanced’ tab on left menu, and there under ‘Network’ tab, click on ‘Settings’.
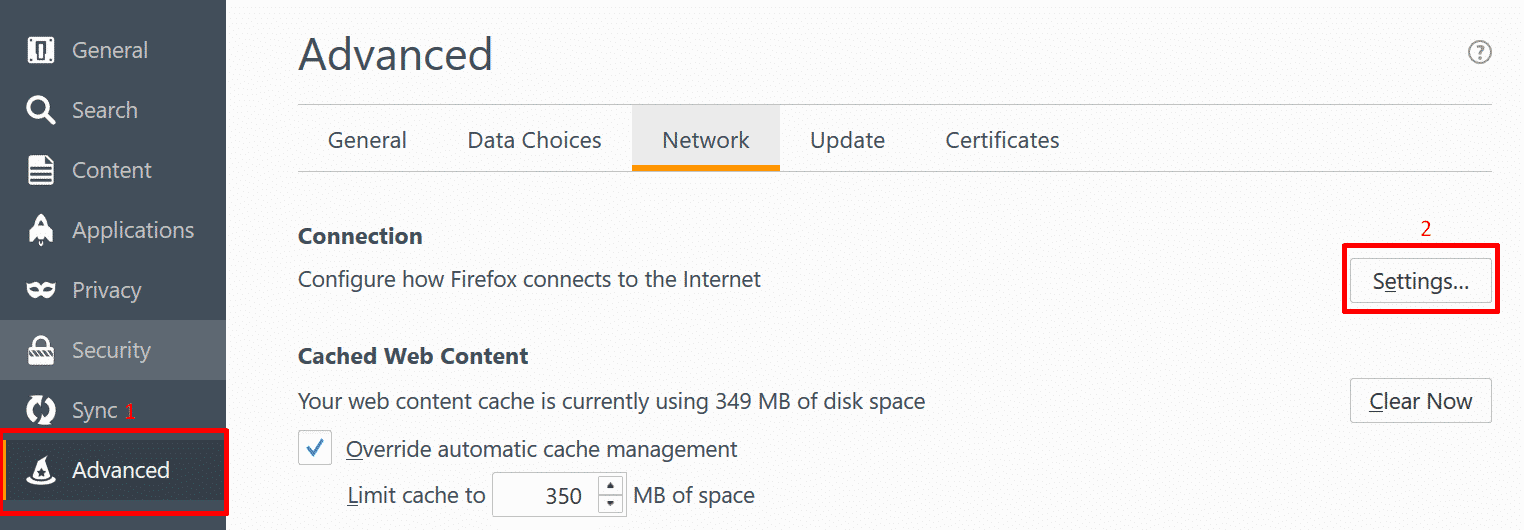
Select ‘Manual Proxy Configuration’, set ‘Http Proxy’ to ‘192.0.0.1’ and port to the defined value.
Now we are ready to record a test. Open the browser you have configured and simulate the user behavior that you would like to test. Do not forget to add some think time since a normal user would stop and think before clicks on a link on the web page.
For this tutorial, I will navigate to ‘www.swtestacademy.com’, wait a few seconds and then search ‘Gatling’.
Now let’s stop the recorder. Notice Gatling recorder recorded our steps and list the entire requests on ‘Executed Events’ section.
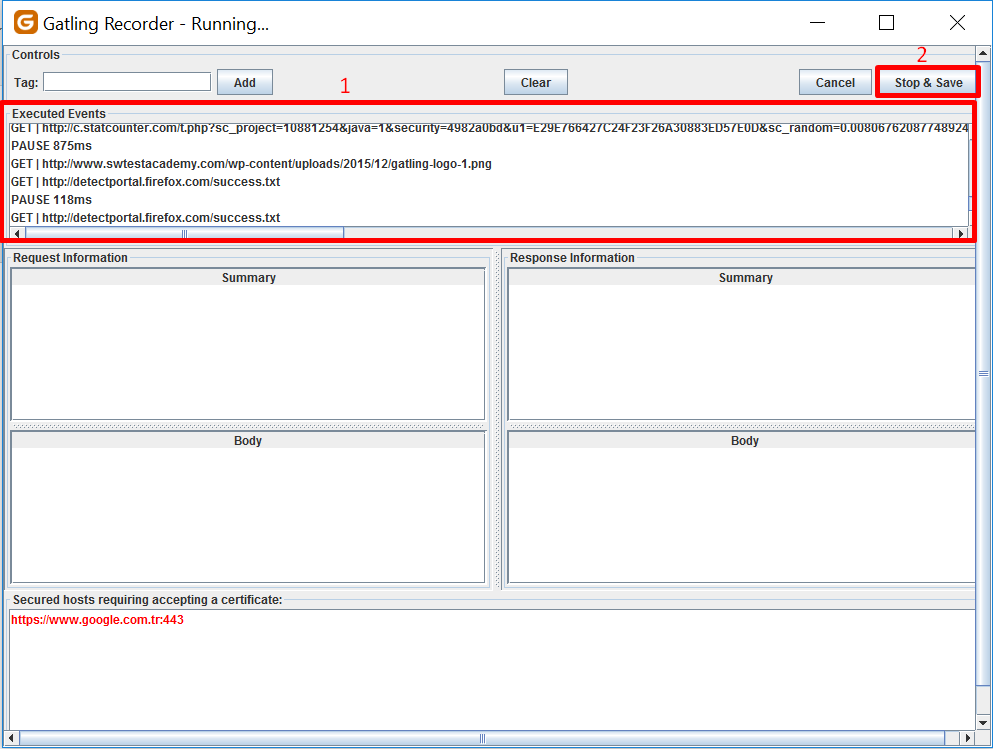
Congratulations you have recorded your first load test! It is saved under “user-files\simulations”. Now it is time to run it.
How to execute performance test with Gatling?
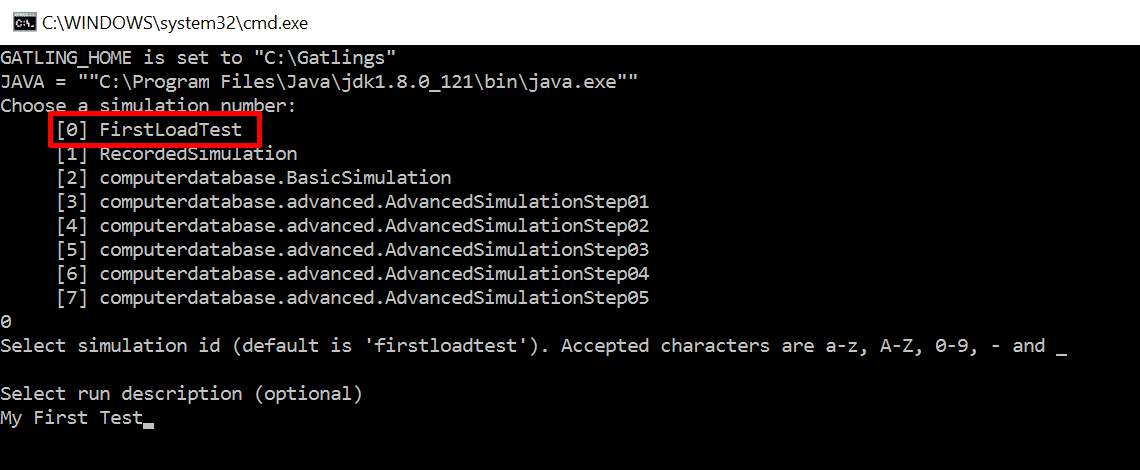
Go to “\bin” folder again and this time click on “gatling.bat”.

You will see the simulation you have recorded on the simulations list. Type the number (‘0’ in this example) related to your simulation and hit ‘enter’. You might pass simulation id for now and you might type some description for your simulation.
Once you hit enter, test will start and you will see the results in the end.
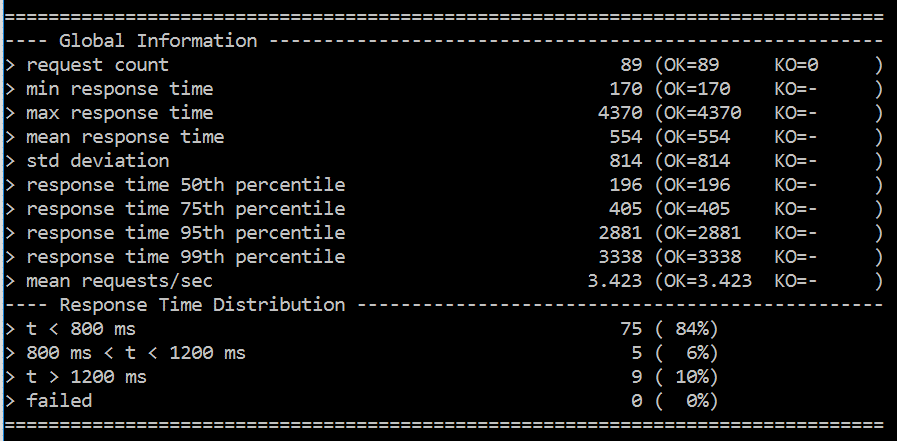
A detailed report has generated under “\results”. We will cover how to read load testing metrics on another article.
Notice this test only created one user. If we would like to change the simulation (i.e how you inject users), we need to edit the simulation code generated by the recorder.
Navigate to “\user-files\simulation”. You wil see the scala file ‘FirstLoadTest’. You can edit the file with a text editor of your choice or with an IDE (You might give IntelliJ’s Scala plugin a try).
Once the file is opened, you will notice that the recorder converted every step into a scala code. Now we need to choose how we would like to simulate users. If you like to learn different types of simulating users, go here. In this tutorial, I will ramp users up to 100 users in 60 seconds.
Each gatling load test requires ‘setUp’ function. For changing the simulation, we need to edit this function. By default, one user is created by gatling. That is done by, ‘atOnceUsers’ function. For changing the simulation we need change this function. The function we are looking for ramping users up is ,as the name suggests, ‘rampUsers’.
Edit the setUp function from this;

To this;
![]()
After saving your scala file, navigate back to “\bin” and double-click “gatling.bat”. Re-run the “FirstLoadTest” again.
You will observe that it will create 100 users in 60 seconds and completes the load test.
Congratulations! You wrote you first load test using Gatling!
[fusion_widget_area name=”avada-custom-sidebar-performancetestingwidget” title_size=”” title_color=”” background_color=”” padding_top=”” padding_right=”” padding_bottom=”” padding_left=”” hide_on_mobile=”small-visibility,medium-visibility,large-visibility” class=”” id=”” /]
Thanks
-Ege

Holding a BSc in Mechatronics, Ege loves to automate. He is now working as a Software Development Engineer In Test at XebiaLabs, Amsterdam.