In this article, we will learn how to integrate your test automation suite with Gurock’s TestRails application. TestRail is a web-based test case management software to manage, track & organize test cases. Our aim in this tutorial is to create a test suite in TestRails before test execution, then update run results according to test automation results.
Tech Stack
- Java
- TestNG
Assumption
We expect you to store the automation test case in TestRail.
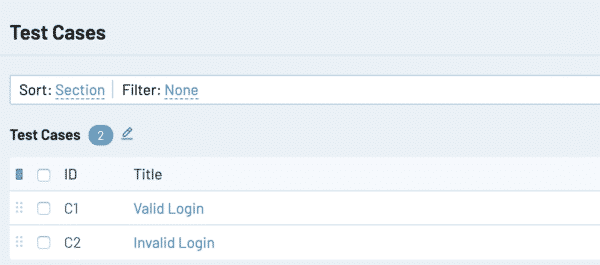
Here are the test cases that we keep in the TestRail app.
- Valid Login has 1 as ID
- Invalid Login has 2 as ID
Create Annotation to Associate Test Code with Test Rails ID
We already talked about creating a custom annotation for the Java project in https://www.swtestacademy.com/custom-java-annotations/
So we used the same approach and created an annotation called TestRail.
@Retention(RetentionPolicy.RUNTIME)
@Target(ElementType.METHOD) //on method level
public @interface TestRails {

String id() default "none";
}
Then we associate our test cases with actual Test Rails ID’s like. Now validLogin functionality has 1 as we store this test case in TestRails with 1 as id.
@TestRails(id="1")
@Test
public void validLogin()
{
Assert.assertTrue(true);
}

@TestRails(id="2")
@Test
public void invalidLogin()
{
Assert.assertTrue(false);
}
Create a Test Suite in TestRail
We need to create a different suite for every execution that we execute so we’ll be able to store the result in different execution records. So we should use BeforeSuite annotation and create a Test Suite by using TestRail API’s. You can download the TestRails Java bindings from this site so you’ll have a base structure to reach TestRails’ API’s.
@BeforeSuite
public void createSuite(ITestContext ctx) throws IOException, APIException {
client = new APIClient("https://swtestacademy.testrail.io");
client.setUser("USER_NAME");
client.setPassword("PASSWORD");
Map data = new HashMap();
data.put("include_all",true);
data.put("name","Test Run "+System.currentTimeMillis());
JSONObject c = null;
c = (JSONObject)client.sendPost("add_run/"+PROJECT_ID,data);
Long suite_id = (Long)c.get("id");
ctx.setAttribute("suiteId",suite_id);
}
- First, we create a Client with our username and password.
- Then we use add_run API to create a test run. You need to provide the test project Id to the endpoint and parameters. You can check the docs via this link
- include_all means include all case
- name will be the name of your test run for a specific Test Rails project.
- After the suite is created properly, we store the RUN id in test context for future usage.
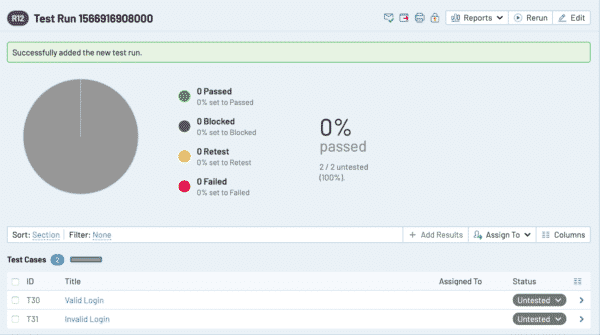
Now execute this method and see that Test Run is created.
Retrieve Test Case ID from Annotation
In order to update the test case’s status after execution, I need to have the id stated in the annotation before we start the execution. By using the below code, you can get the TestRail annotations related to test and store this value in the test context. Now test context has test run id and test case id.
@BeforeMethod
public void beforeTest(ITestContext ctx,Method method) throws NoSuchMethodException {
	Method m = TestNGProject.class.getMethod(method.getName());
	if (m.isAnnotationPresent(TestRails.class)) {
		TestRails ta = m.getAnnotation(TestRails.class);
		ctx.setAttribute("caseId",ta.id());
	}
}
Update Test Rails Status
Right now, all you need to do is to update the status of the test case related to the testing run that you created earlier. For this you have to use add_result_for_case/suiteId/caseId endpoint. Documentation can be found in the link.
- In AfterMethod annotation, we trigger the endpoint with some parameters. According to API documentation, we should send 1 if the test is a success and 5 if it’s a failure.
- I prefer to add an error message to the comment section of test execution by sending the comment attribute to the endpoint.
- Finally, we read the run and test case Id’s we stored in Test Context and execute the API call.
@AfterMethod
public void afterTest(ITestResult result, ITestContext ctx) throws IOException, APIException {
	Map data = new HashMap();
	if(result.isSuccess()) {
		data.put("status_id",1);
	}
	else{
		data.put("status_id",5);
                data.put("comment", result.getThrowable().toString());
        }
	String caseId = (String)ctx.getAttribute("caseId");
	Long suiteId = (Long)ctx.getAttribute("suiteId");
	client.sendPost("add_result_for_case/"+suiteId+"/"+caseId,data);

}
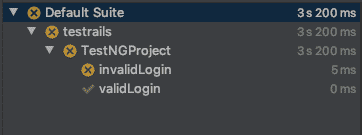
Let’s run the test cases and see what will happen. One test case passed and one other failed.
Let’s see what happens in TestRail. Run is created, test cases are added and their statuses are updated.
The test run is created, test statuses are updated.
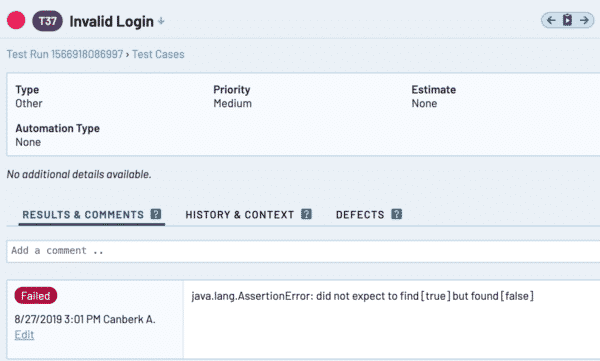
If you open the failed case, you’ll see the error message also.
Hope that article will encourage you to create more integration into your test automation suite.
Source code can be found on GitHub (https://github.com/swtestacademy/TestRailsIntegration)
Happy testing!

Canberk Akduygu is a Test Lead working in the Netherlands


Selamlar çok başarılı ve faydalı bir anlatım olmuş teşekkürler fail olan caselere ekran görüntüsü nasıl ekleyebiliriz.
Testrail entegrasyonunun listener kullanarak belirli senaryolarda çalışmasını nasıl sağlayabiliriz?
can you help me with my cucumber API testing automation framework