In the agile world, you must manage your test process with lean and fast tools. At Kariyer.net we searched many solutions for test case management. Our first priorities are two-way JIRA integration, ultra-fast and easy usage, short learning path and period, strong reporting and monitoring capabilities, lean and simple UI, quick and helpful support, and informative documentation, and so on… Finally, we finalized this process and selected TestRail as our test case management tool.
In this article, I explained how we started to manage test cycles during two weeks of agile scrum sprints with TestRail.
I notice you again, this not a complete and comprehensive TestRail documentation, the explanations and knowledge in this article is our way to use TestRail. (When I prepared this article TestRail version was 5.2.1.3472)
Note: TestRail 5.3 announced! Please check the new features on https://blog.gurock.com/testrail-5-3-agile-test-management/
For extensive TestRail documentation please visit below link.
http://www.gurock.com/testrail/support/Special Thanks: I thank Dennis Gurock for his help and support during and after our evaluation period.
TestRail Screens
Dashboard Screen
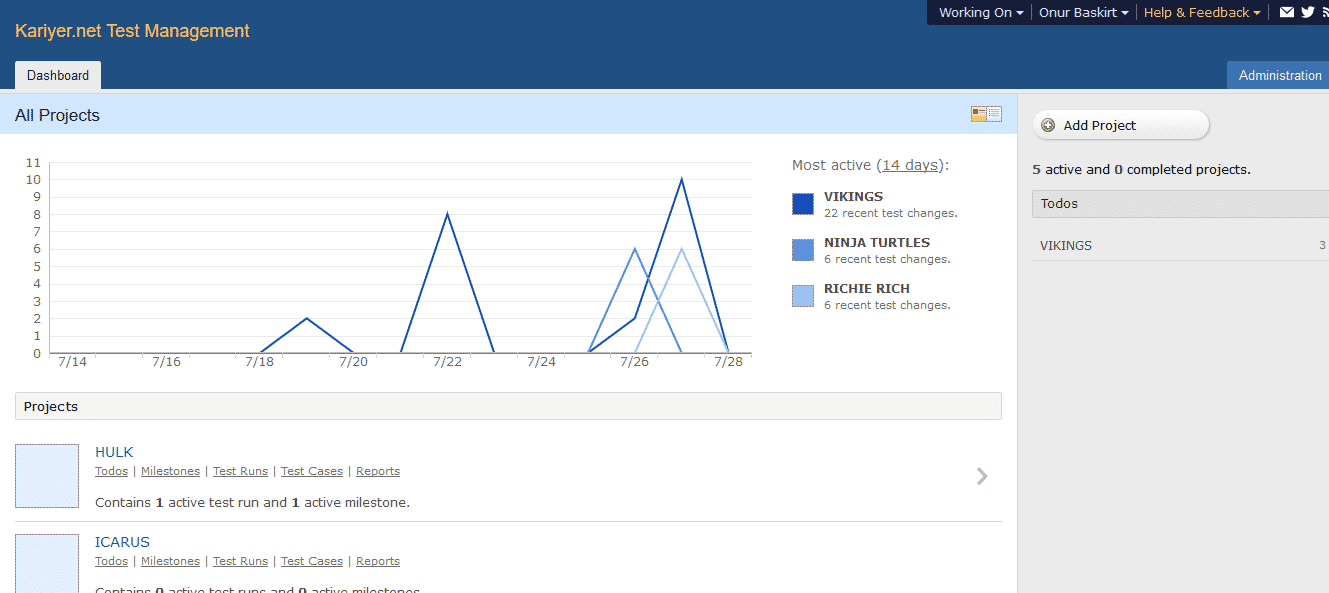
When logged in TestRail, you first see the projects page as a dashboard. You can add a new project from the left menu on this page. Also, you can see the activity graph for all projects for the last 7-14-30-60-90 days.
You should simply click the project name when you want to go through the project details.
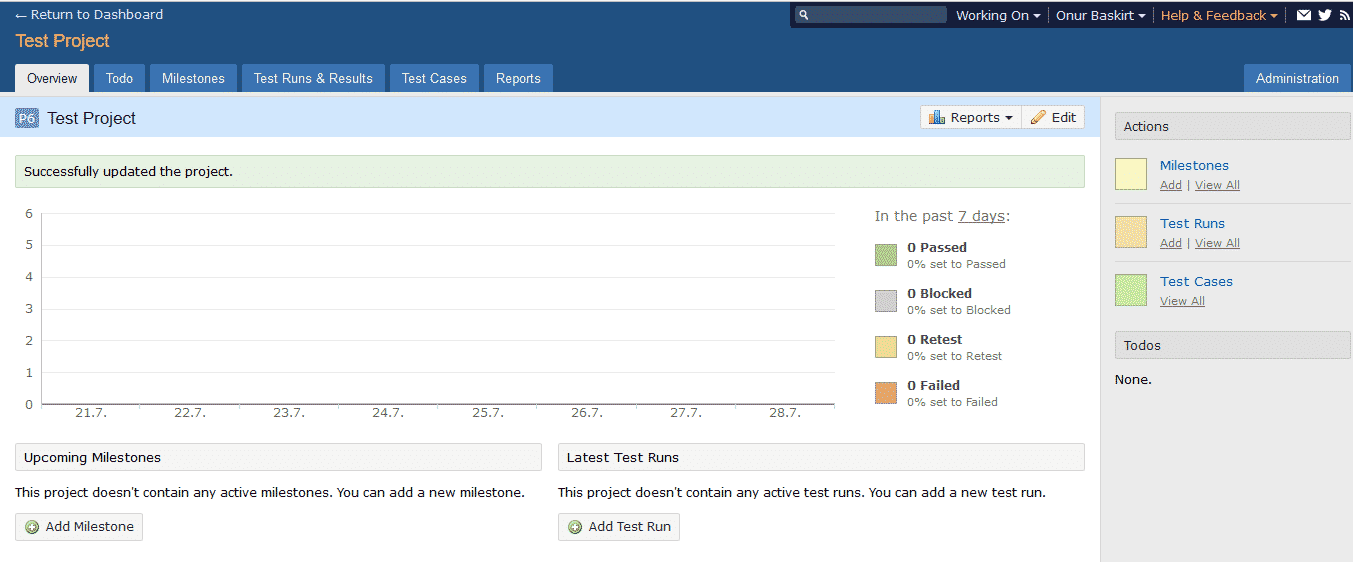
When you go to the project page, you will see a page shown below. In this screen, you can access milestones, test runs, test plans, test cases, and reports and see project activity graph.
Milestones: We can collect many sprints in one milestone and manage them.
Test Plans: You can use Test Plans as Agile Sprints.
Test Runs: Test Runs are the test executions/runs in a test plan (sprint).
Test Cases: Test Cases are our test scenarios according to user needs.
Reports: You can create customized and detailed test reports on this page.
TestRail comprises seven tabs. These are summarized below.
Overview: General view of the projects
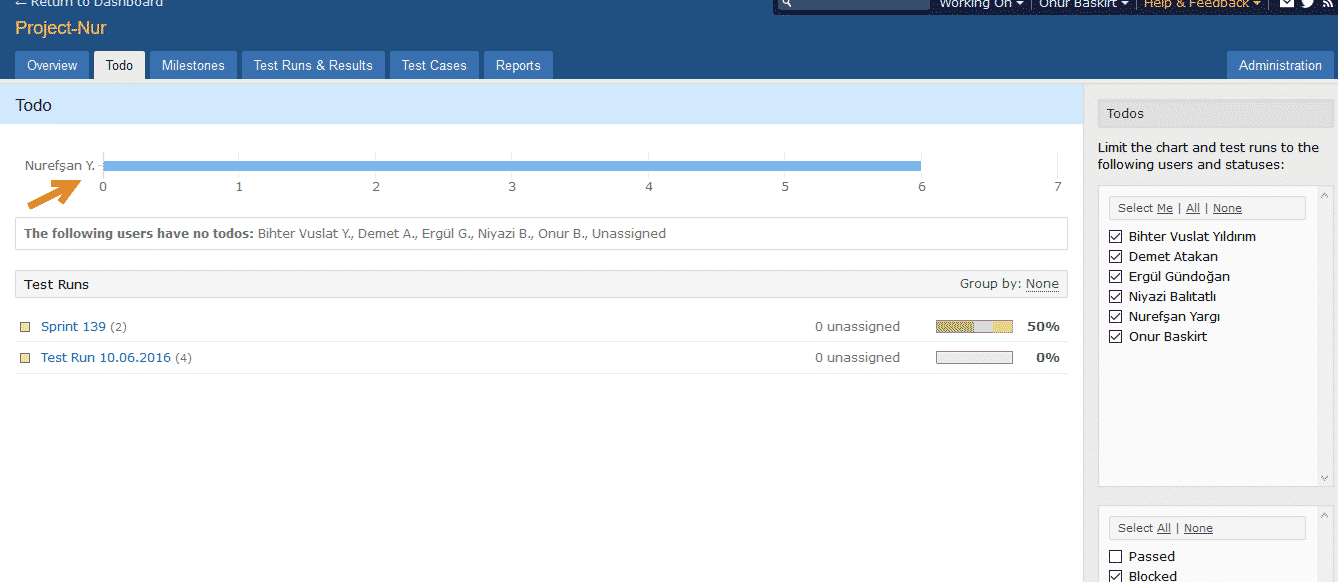
Todo: On this page, you can see the TODO tasks assigned to the specific user.
Milestones: You can merge and collect your test plans into milestones.
Test Runs & Results: It comprises all test plans (sprints), the test execution cycles (test runs), and their results.
Test Cases: You can write and organize your test cases on this page.
Reports: All kinds of detailed reports will be generated on this page.
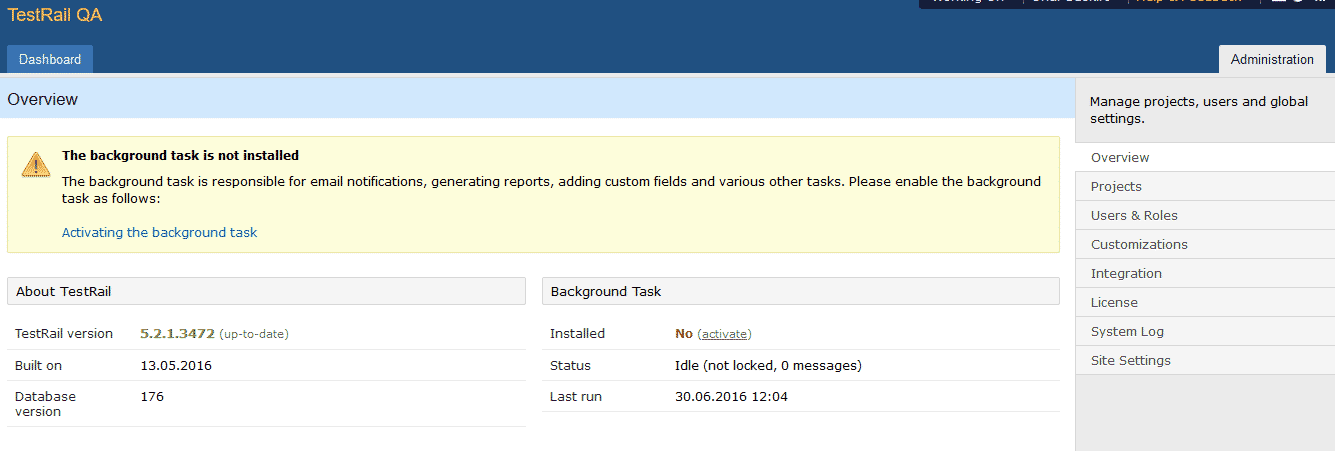
Administration: You can manage and do all settings on this page. Only admin users can see this tab.
Step by Step Test Rail Usage in Agile (Scrum) Sprints
1- Preparing Test Cases
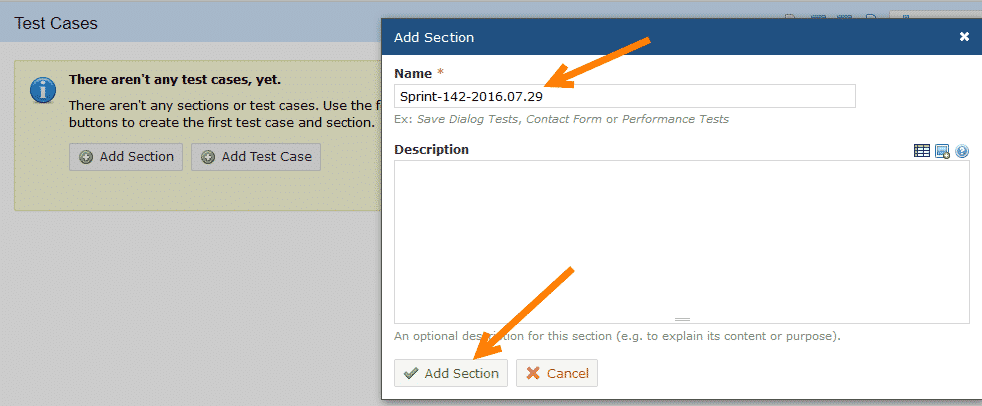
First, click the “Test Cases” tab and click “Add Section” to add a section. It can be our sprint name. We should order and organize our test cases under sections and subsections. We are using the below way to organize test cases.
Sprints = Sections
Stories = Subsections
To provide standardization, we use a naming format for sections.
Section Naming Format: Sprint-{$Current_Sprint_Number}-{$Sprint_Deadline}
Example Section Name: Sprint-142-2016.07.29
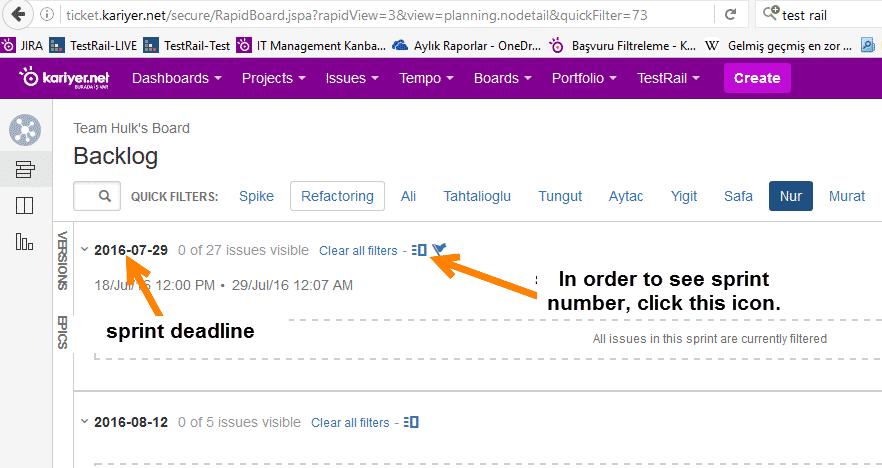
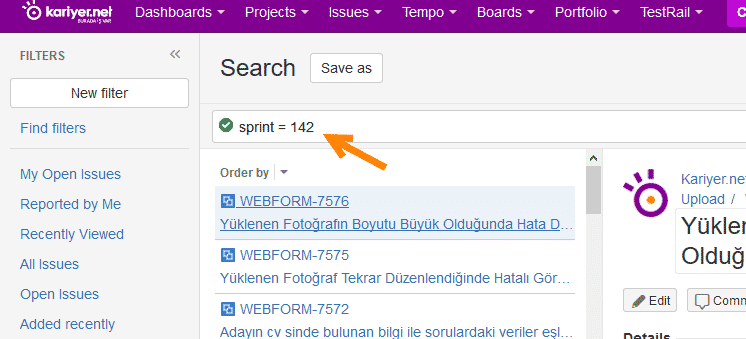
You can find your actual sprint number in JIRA. To get this, go to JIRA Agile board and click the icon is shown on the below image.
After the declaration of a section, we need to create stories (subsections), and under the subsection, we should create test cases of the related story. We can do this by clicking the “Add Subsection” link, and then a subsection will be automatically created. We should also be careful to give a name to the subsection.
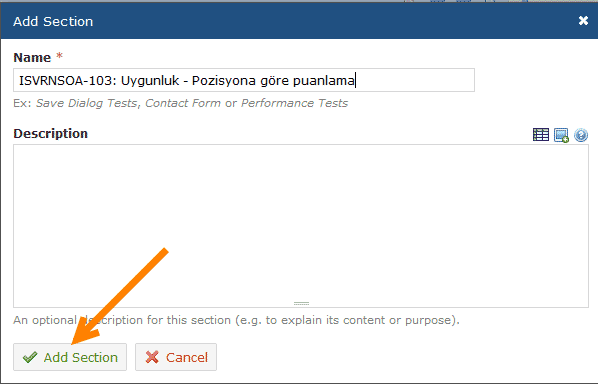
Subsection Format: JIRA Ticket ID: Ticket Summary
Example: ISVRNSOA-103: Uygunluk – Pozisyona göre puanlama
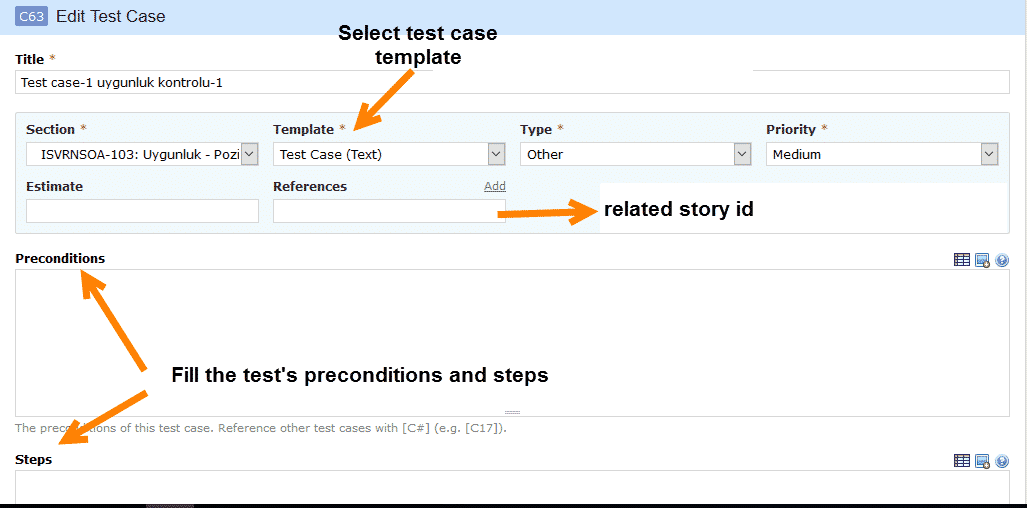
After this step, we can add our test cases under the subsections by clicking the “Add Case” link.
After that, we can click the edit button to write our test cases.
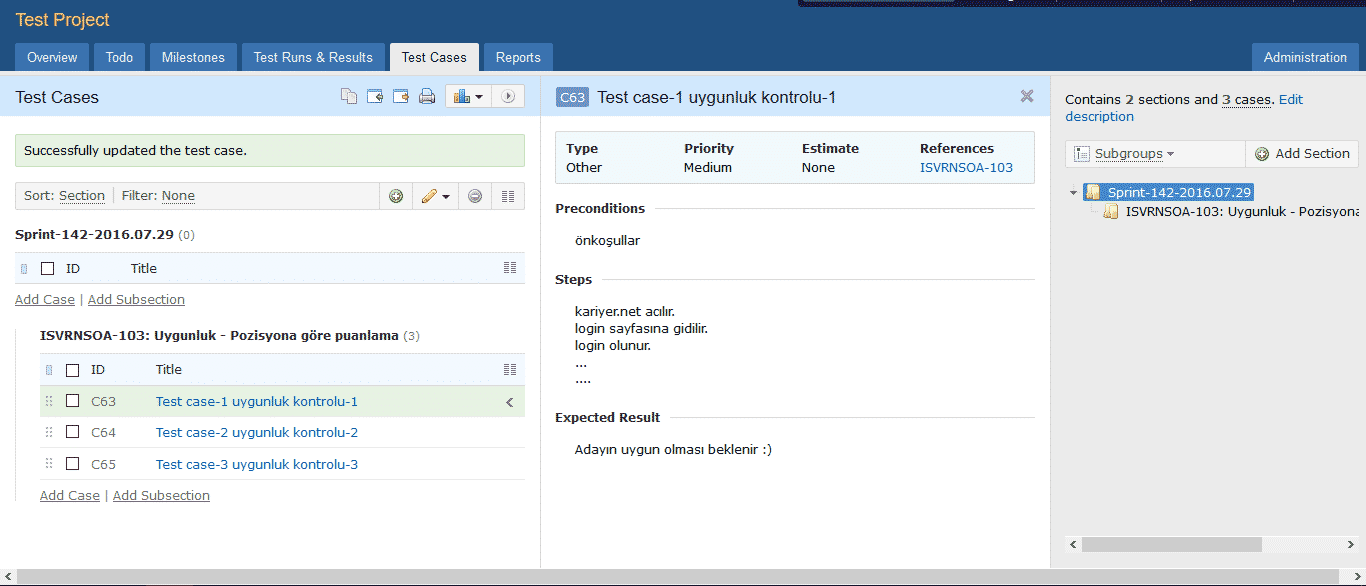
You can click the arrow icon shown on the image below and open “3 Column View Mode”. In this view mode, you can see the details of each test case.
Note: I hope in future releases of TestRail, we can also edit test cases in this mode. It will increase our test case writing speed dramatically.
Also, you can filter sections and subsections with the filter which is located at the left pane.
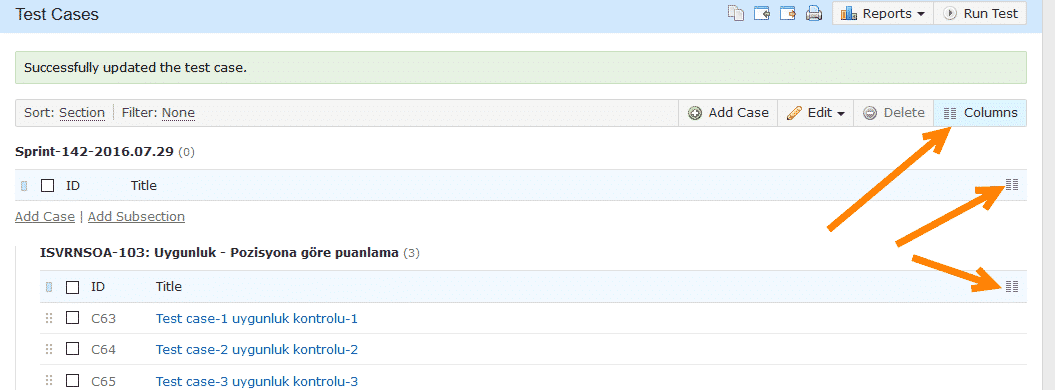
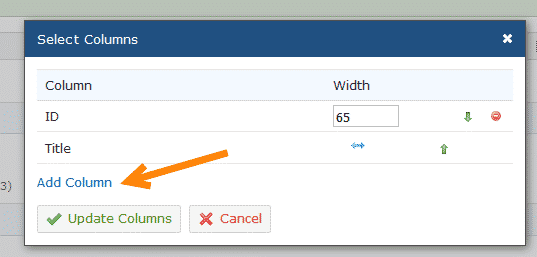
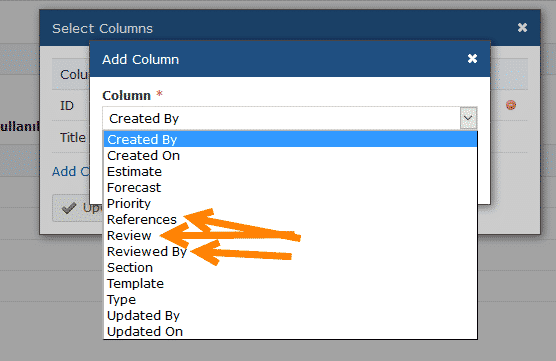
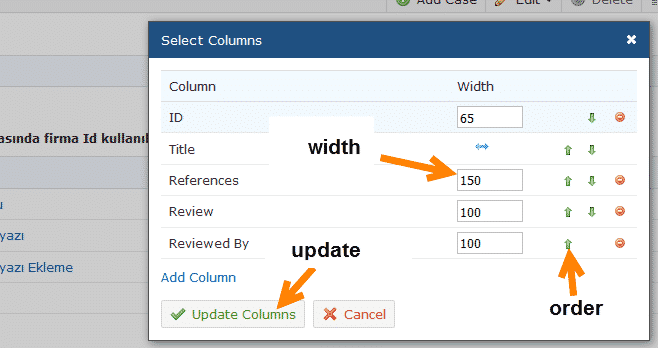
You can configure the test case column by clicking Columns which is shown in the below image.
2- Create a Test Plan and Run Test Cases
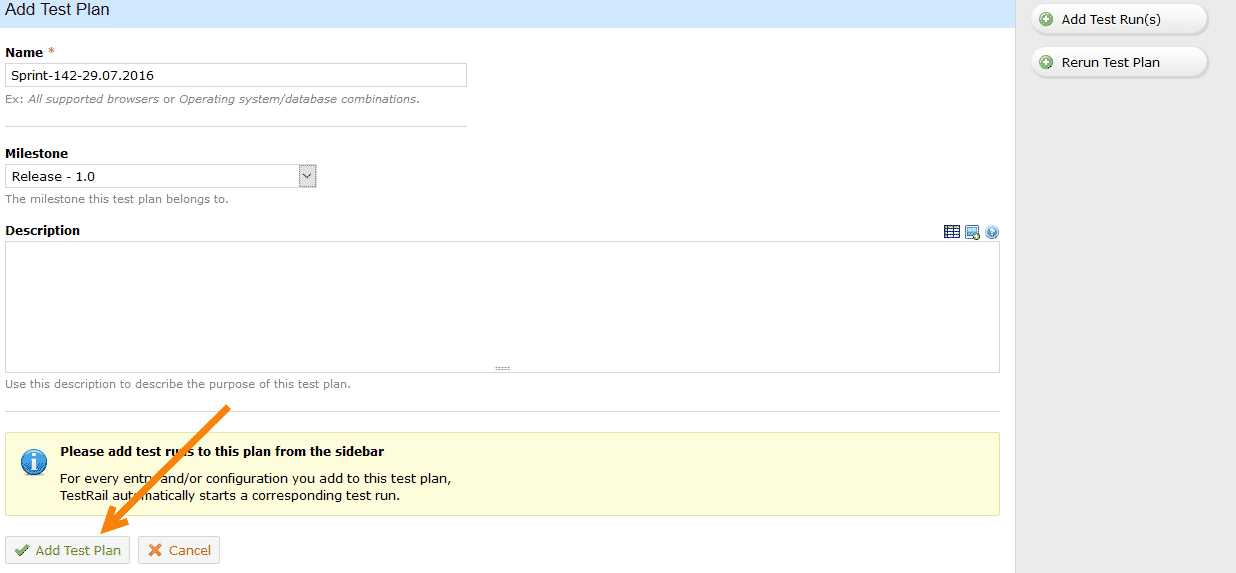
Test Plan should be our Sprints. To add a test plan, click the “Test Runs & Results” tab and then click the “Add Test Plan” button.
We should be careful about naming conventions again for the test plans. We are using “Sprint-$Sprint_Number-$Sprint_Deadline” as a naming format.
Example: Sprint-142-29.07.2016
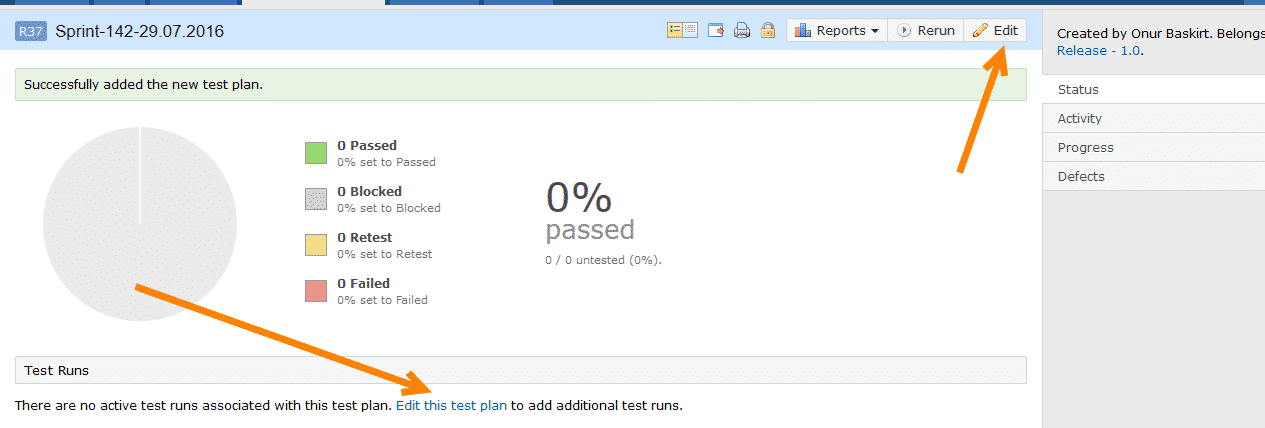
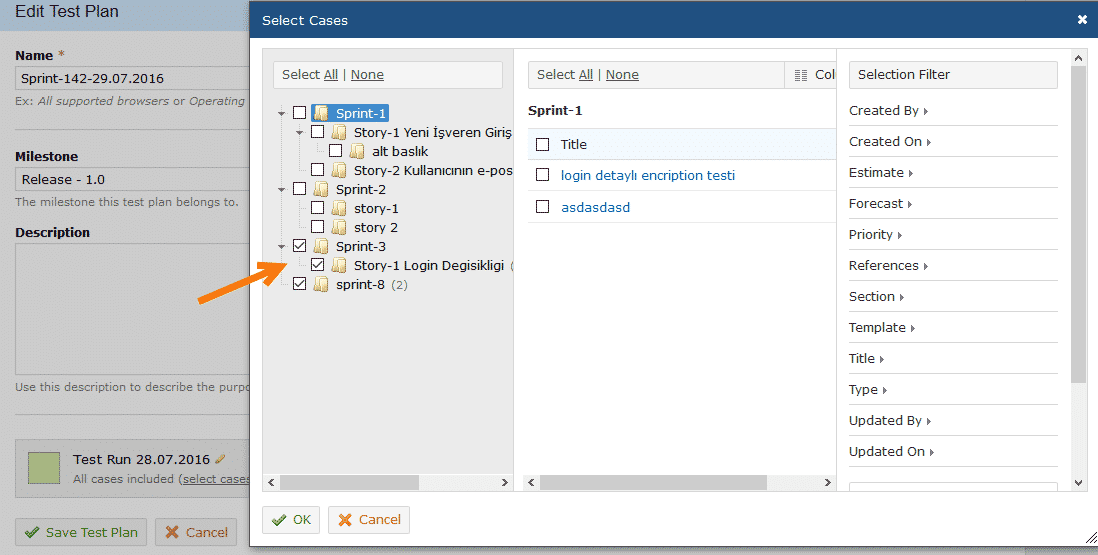
After creating a test plan, we need to create a test run and add test cases to it. After this step, we can execute test cases. To add a test run, click the “Edit” button of the test plan and then click the “Add Test Run(s)” button on the left pane.
We can add test cases by clicking “select cases” link which are shown on below image.
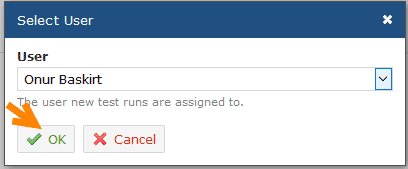
Also, we can change the assignee of the test cases by clicking the “change” link.
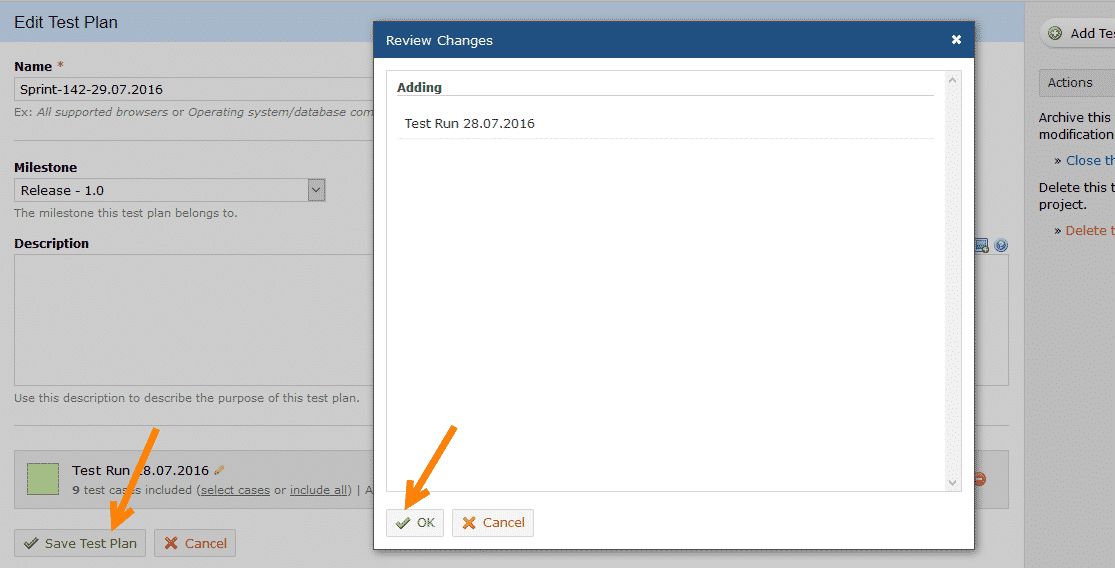
At the last step, we click the “Save Test Plan” button and click the “OK” button to save the settings.
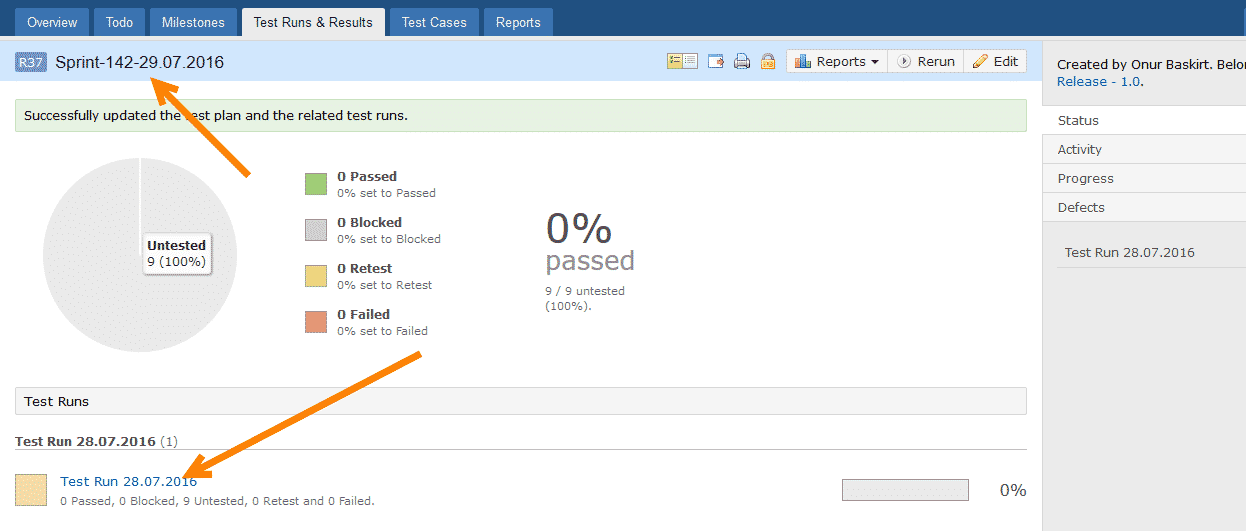
Now, our test plan and test run are ready. We can click Test Run, go to the Test Run screen, and execute our test cases.
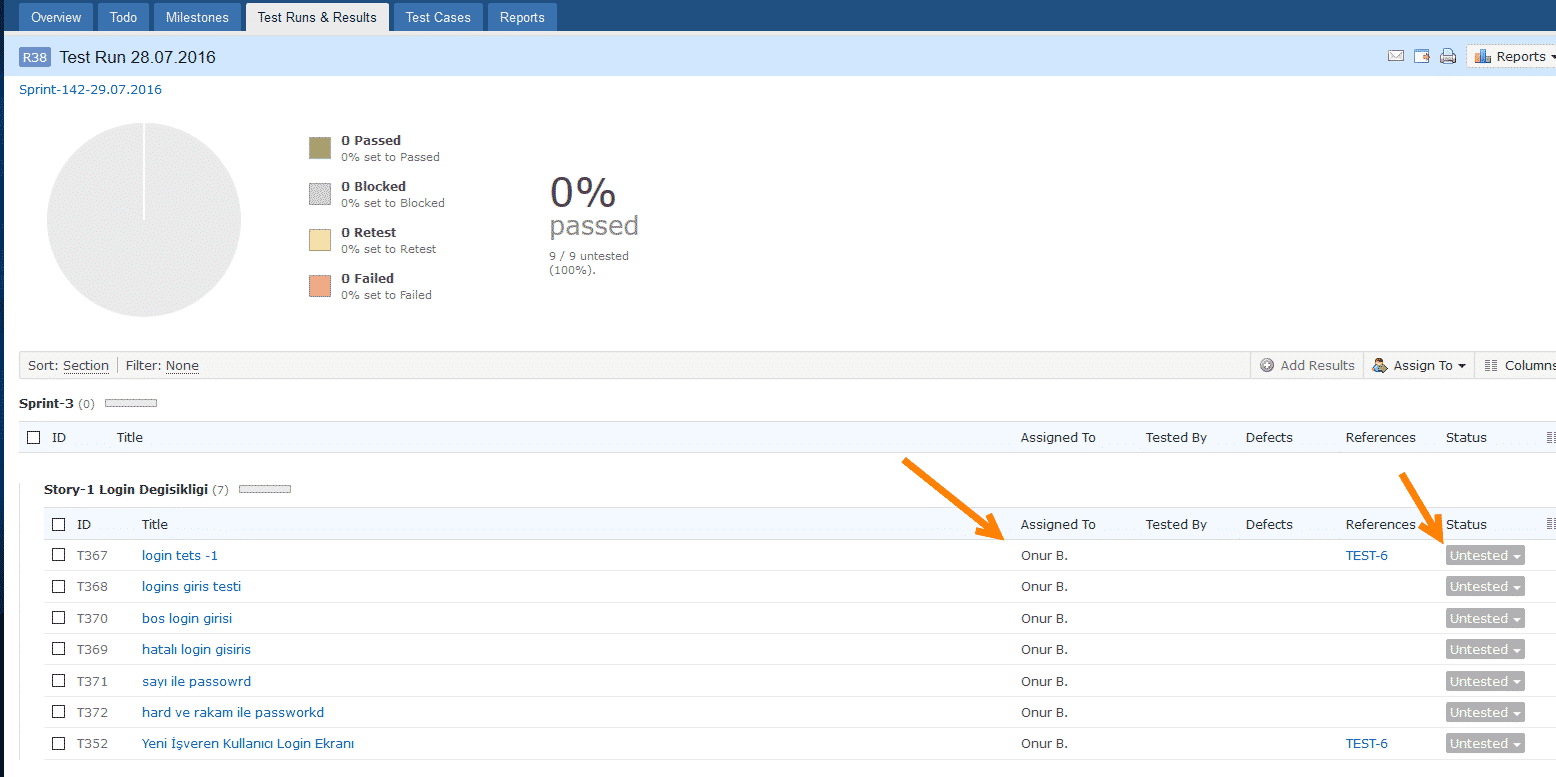
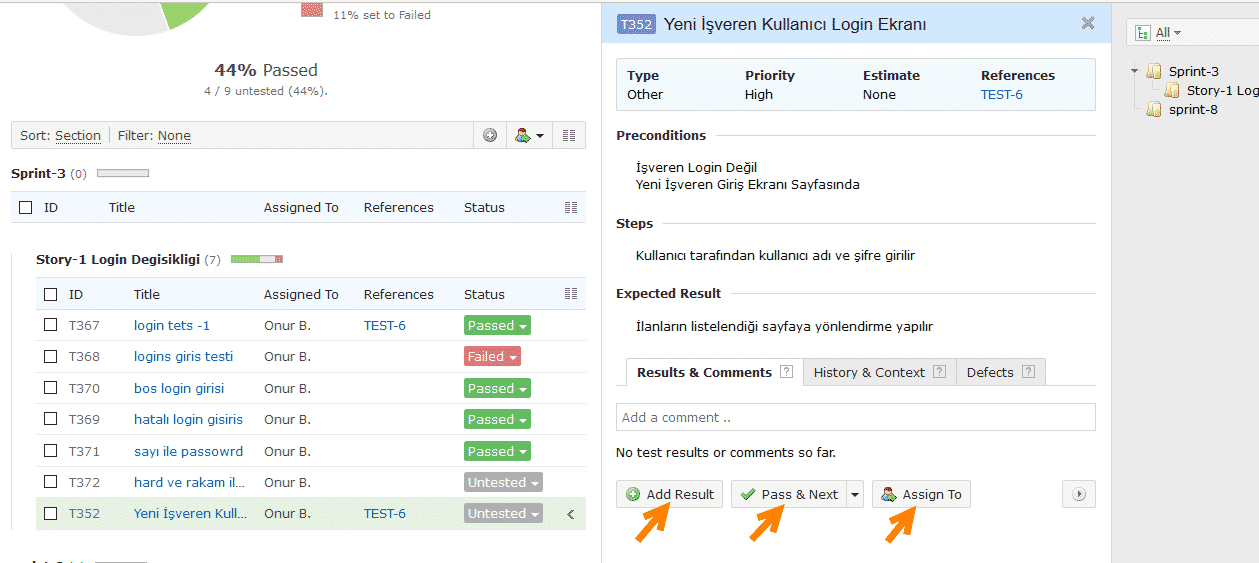
When we click Test Run, we will see the below page. Here we can see test case scenarios and their results/status. We can change test case statuses by clicking them.
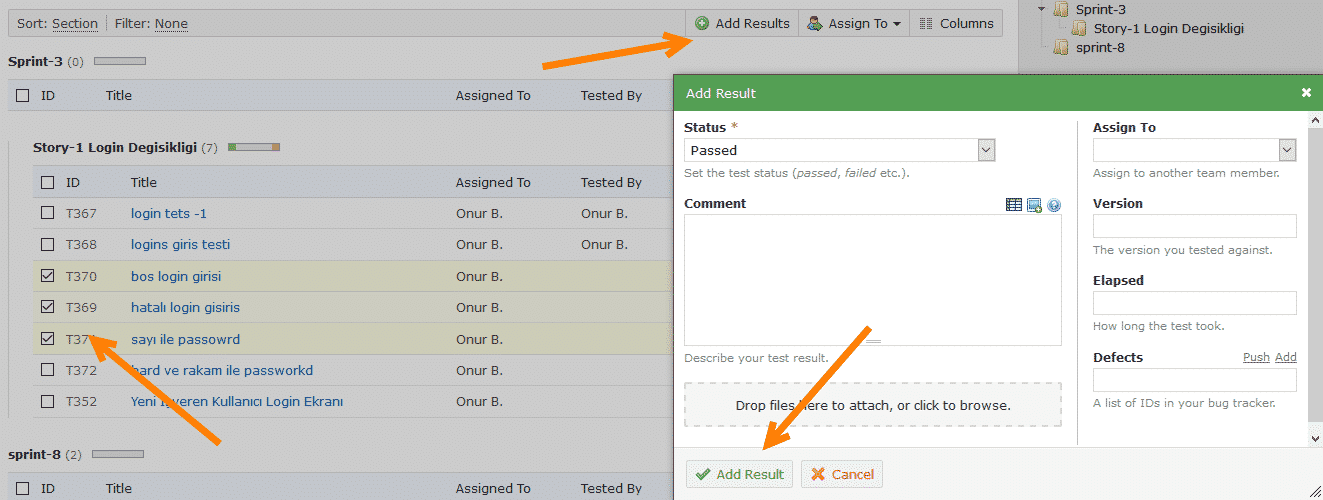
In order to change the result of multiple test cases, we should select the related test cases by clicking the check-boxes located right side of them, then click the “Add Results” button and change their results.
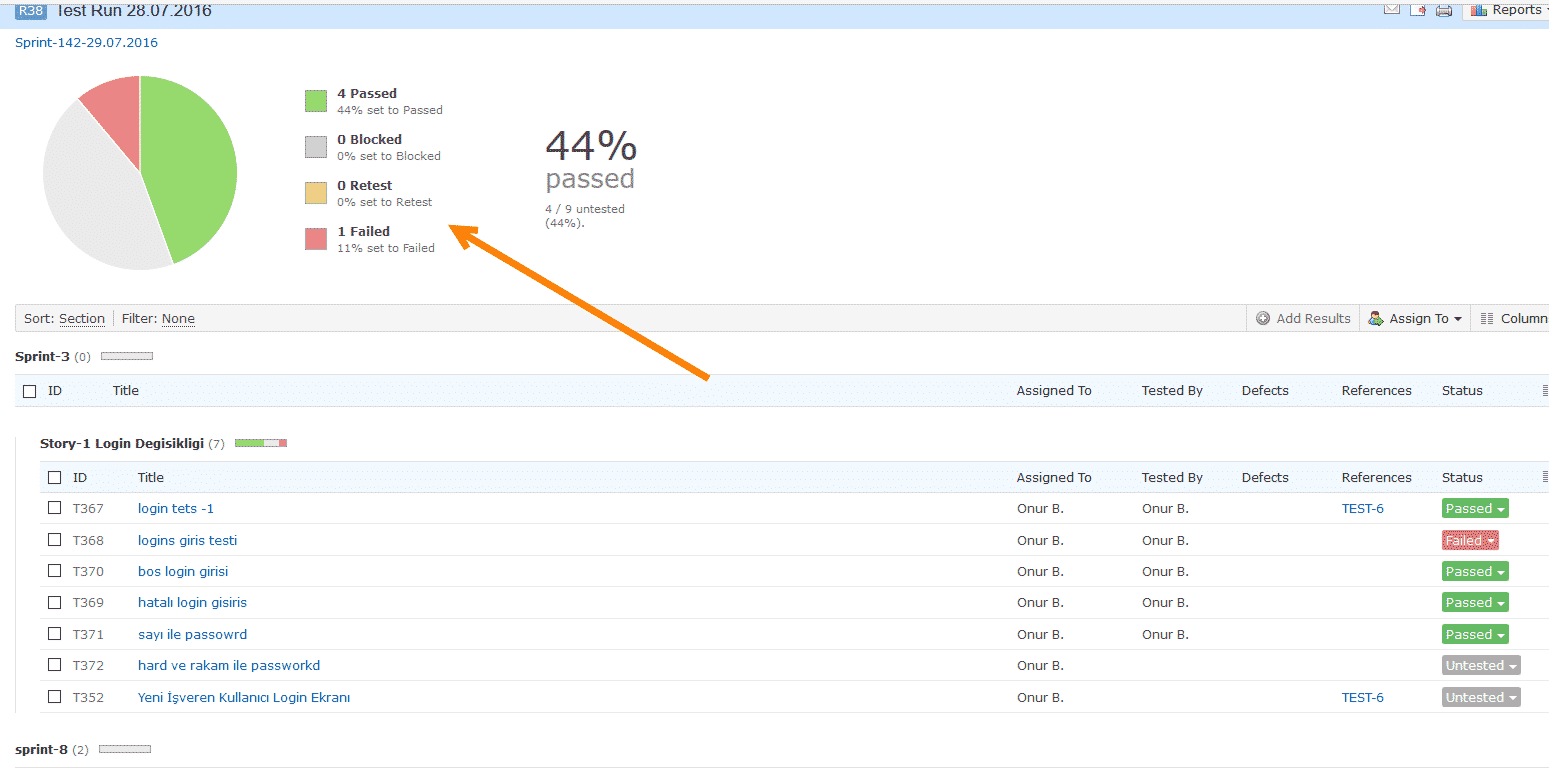
When the tests are executed, their statuses change simultaneously.
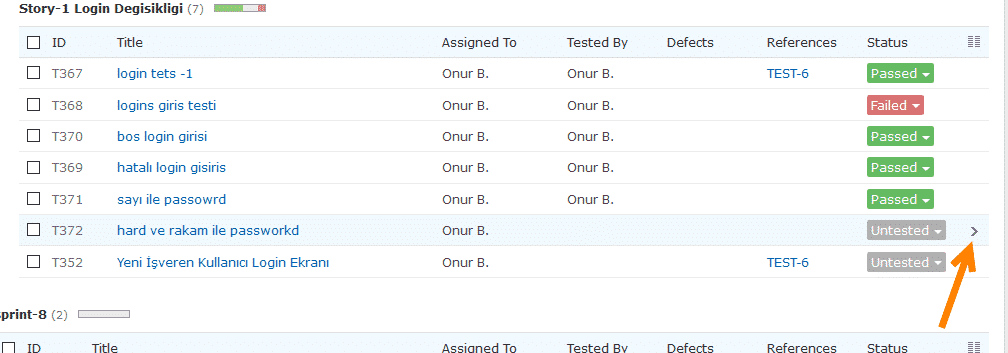
In order to switch “3 column view” mode, we click > arrow icon. We can see the details of test cases and execute them in this mode.
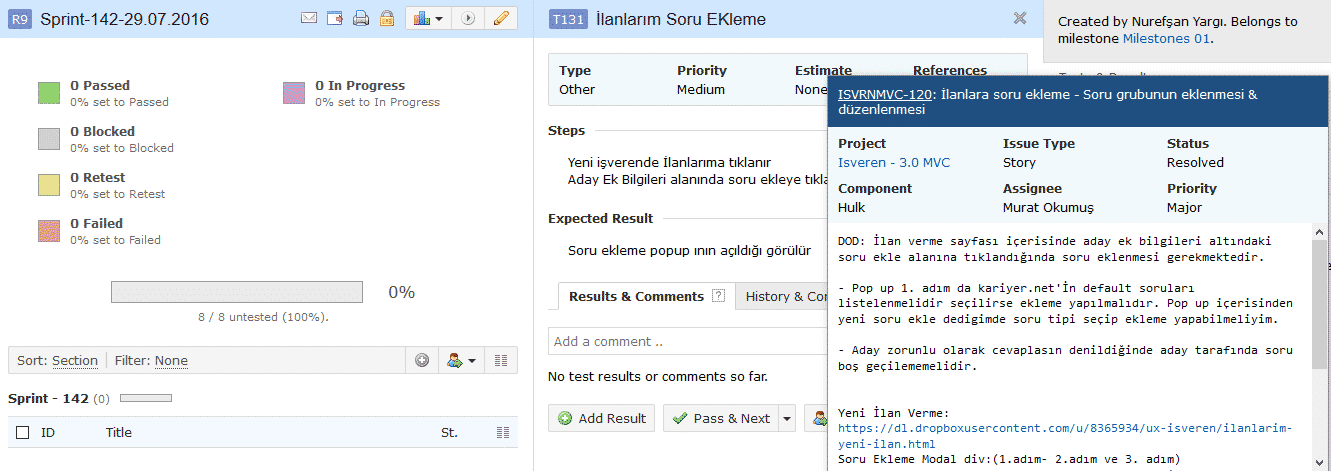
References are our stories. When you hover on them, you can see their details.
3- Create Test Reports
To create a report, click the “Reports” tab. You can see many report options and types on the Reports page in the right pane. If you want to report a high-level sprint summary report, you can click + sign of Plan under the Summary section.
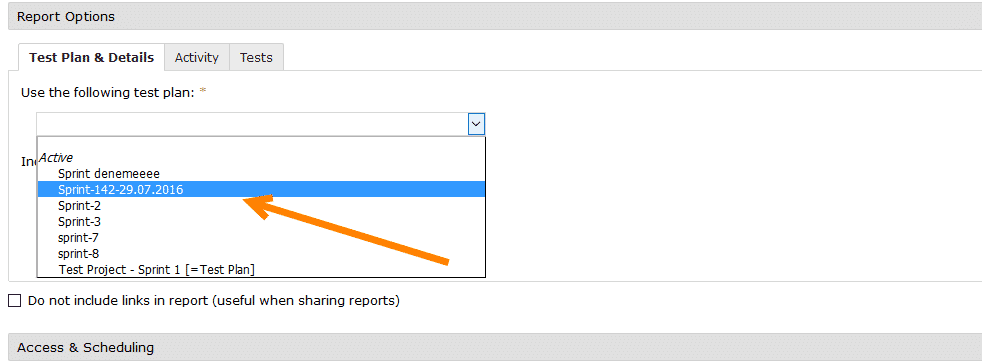
After clicking + sign, select the related test plan (=sprint) in the Report Options section.
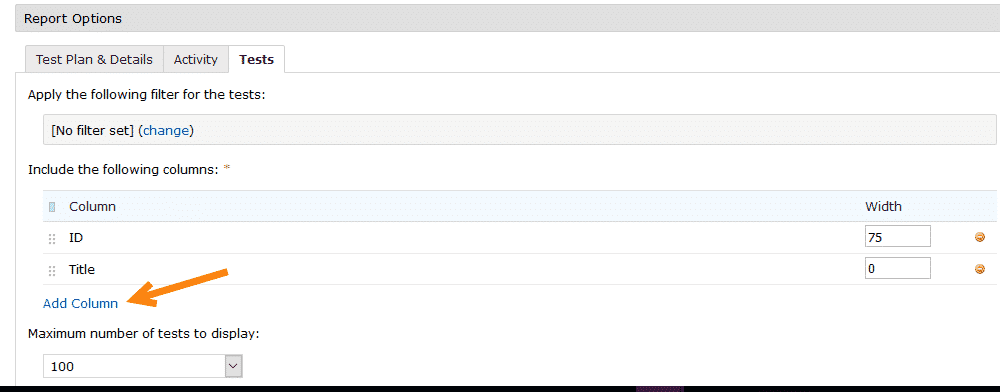
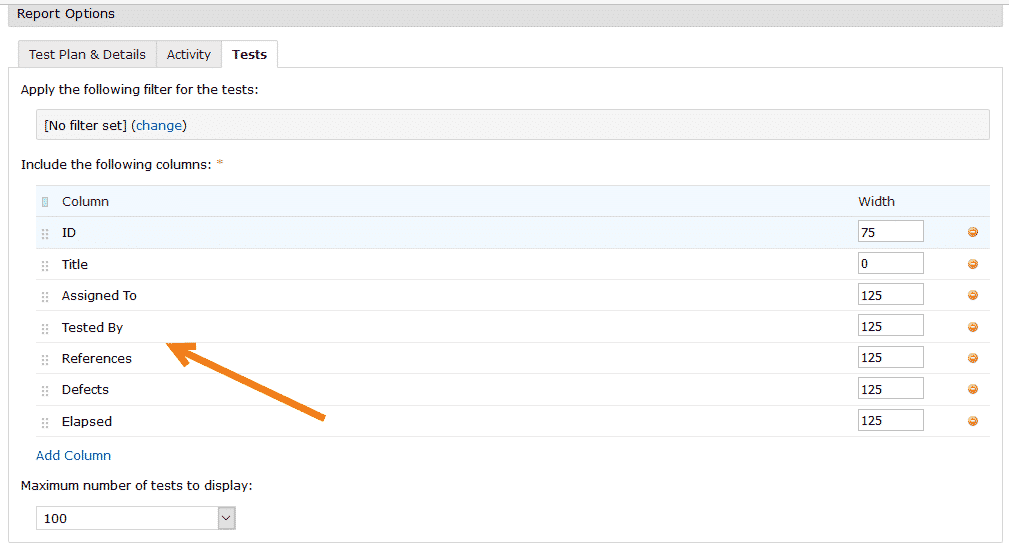
You can add test case columns by clicking the Tests tab and the “Add Column” link.
You can configure your report’s privacy settings and scheduling period in the “Access & Scheduling” section.
You need to select check-boxes if you want to schedule your report for a specific periodical time.
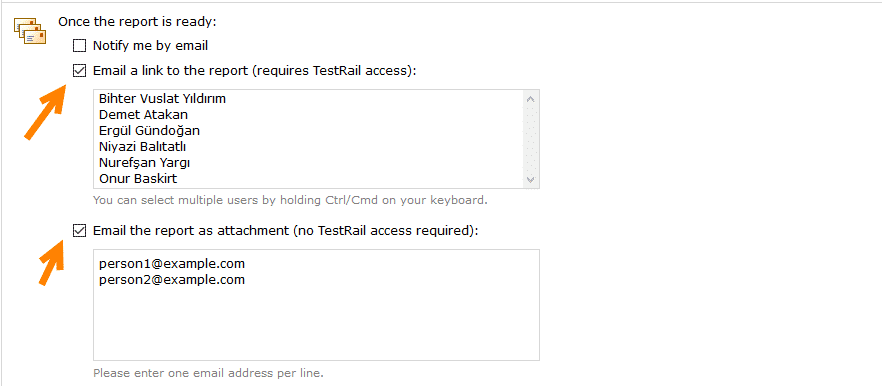
Also, you can send the report as mail.
And finally, when you click the “Add Report” button, TestRail will start to create your test report.
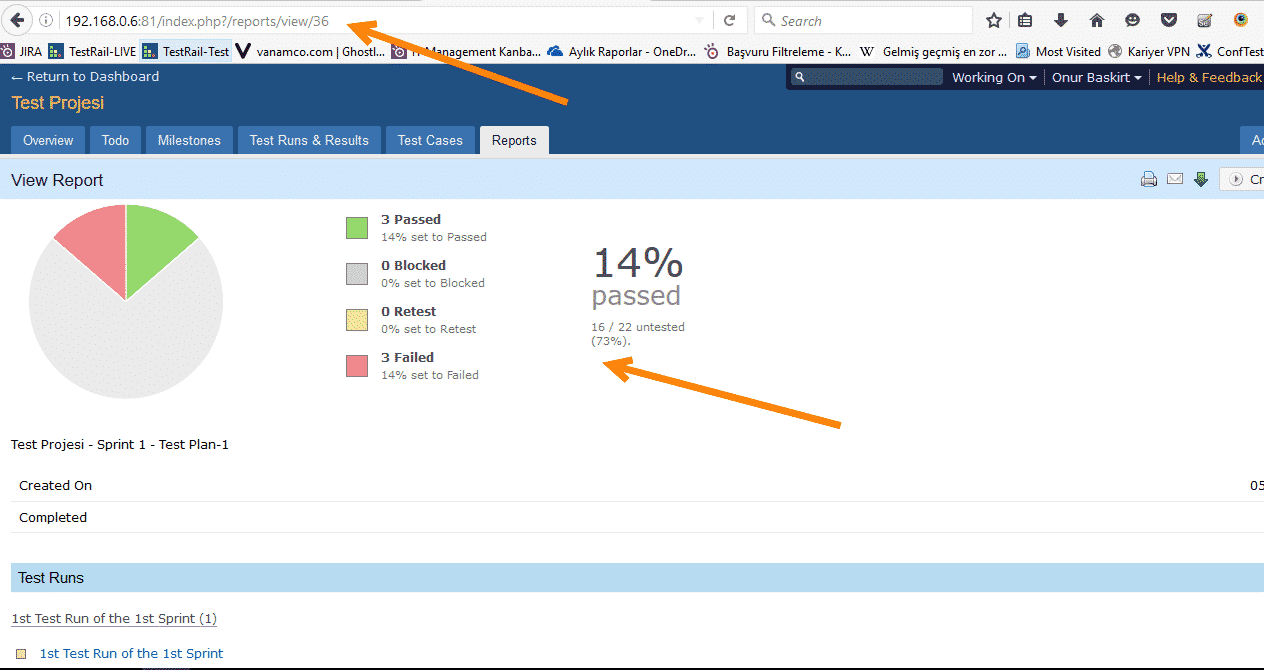
Also, you can use report link to share the report to your colleagues.
4- TestRail JIRA Integration
TestRail and JIRA have two ways of integration. You can do the settings on the administration page. You can see the details on this page. In TestRail:
– You can reach story content by writing story ids in the “References” text boxes.
– You can see the content preview of the defects by writing defect ids in the “Defects” text boxes.
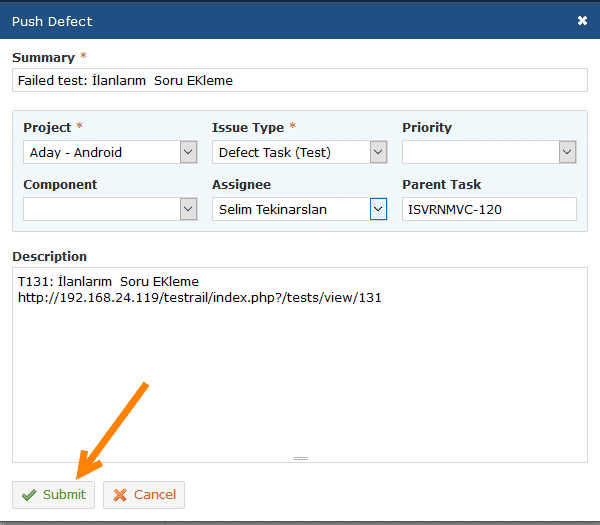
– You can automatically open defects inside TestRail by clicking the “push” link in the defects section.
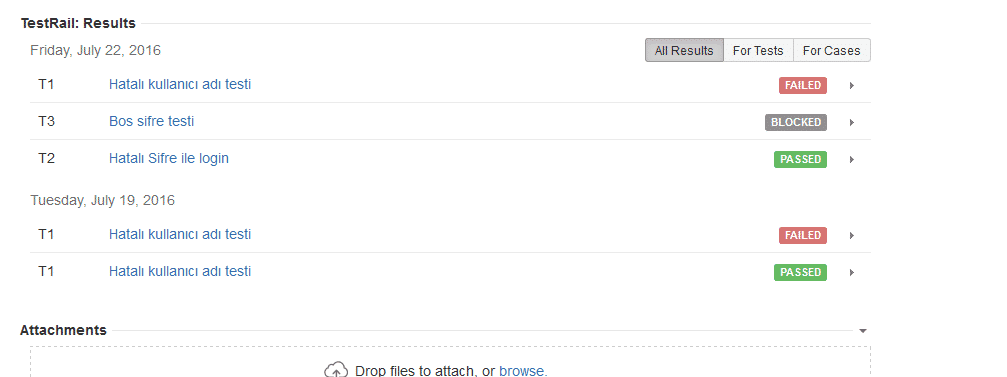
We can also see the test case names and results in JIRA on the related story page.
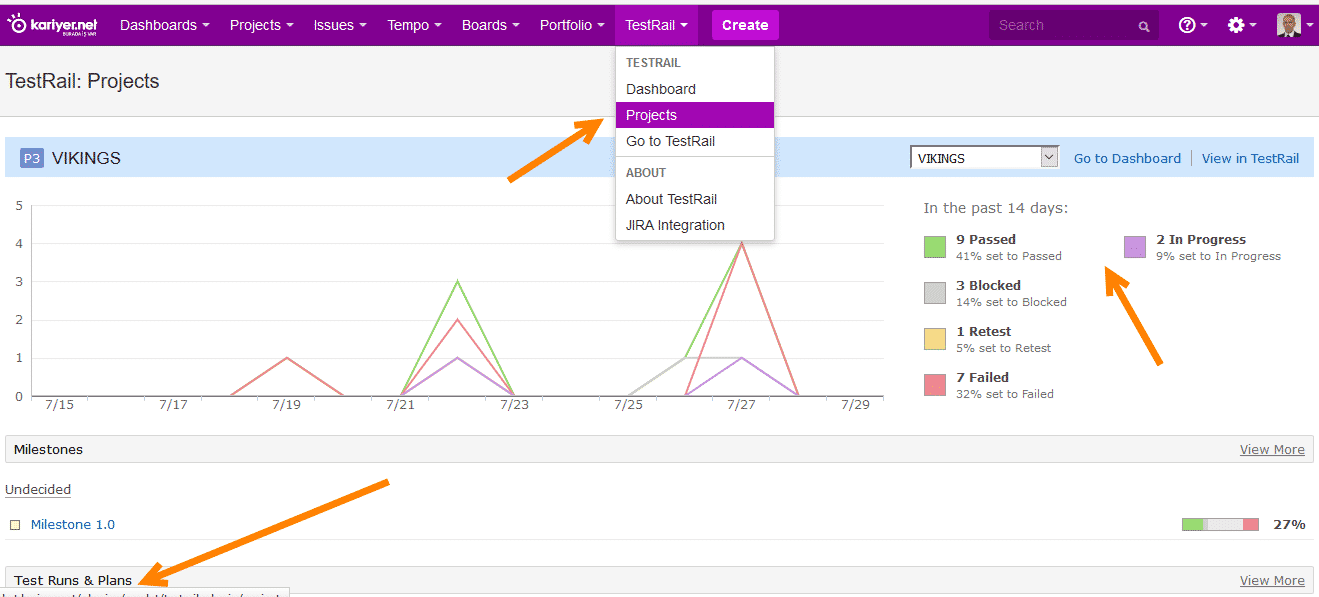
In the TestRail section in JIRA, you can see the dashboard, projects, etc.
You can do many more things with TestRail, I wanted to describe the basics in this article. I hope this helps you with your AGILE Test Management life cycle.
Thanks,
Onur Baskirt

Onur Baskirt is a Software Engineering Leader with international experience in world-class companies. Now, he is a Software Engineering Lead at Emirates Airlines in Dubai.


