If you are using Jenkins and want to deploy Azure .NET applications, you should read this article.
After reading, you will be able to do Continuous Integration, Continuous Delivery with Jenkins for Azure WebApps basically.
Prerequisites:
• .NET web application running on Azure App Services.
• Jenkins master or slave Windows machine with Microsoft Build Tools(MSBuild). Jenkins MSbuild plugin.
• Jenkins plugin (Change assembly version plugin)
• Jenkins plugin (Version Number Plug-In)
Setup
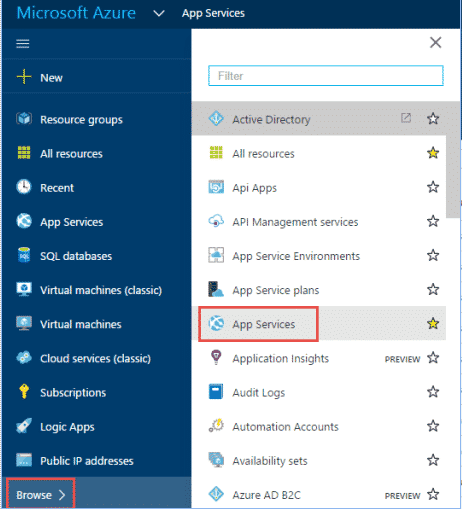
1. Create a Web Application on Azure on AppServices
You must be sure that your application has already configured for running/working on Azure.
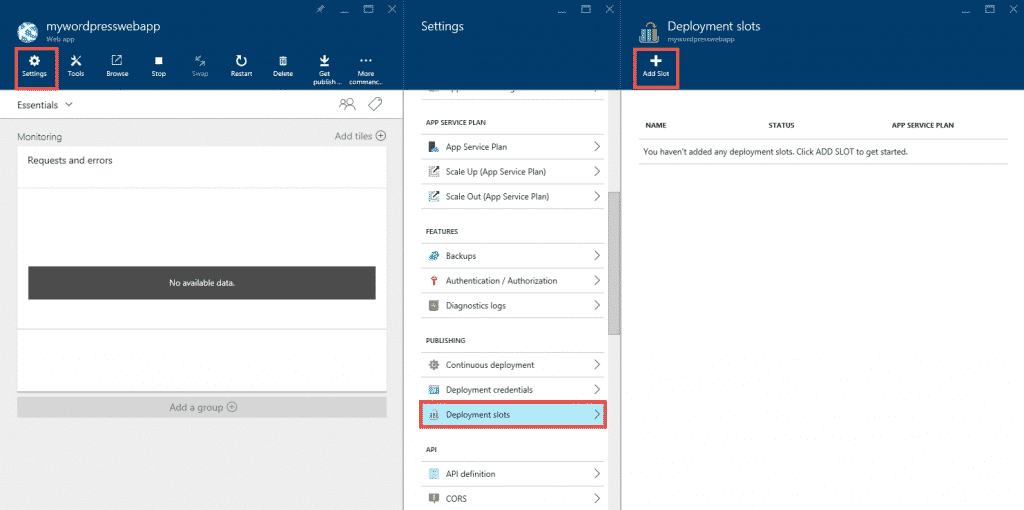
2. Create deployment slots for your Azure Application
You should create different environments as you need like testing, staging, development, alpha, beta, production vs…
If your domain’s look like this http://myapp.azurewebsites.net/,
after creating a staging slot, you should have a second environment and access it for your application like this http://myapp-staging.azurewebsites.net/
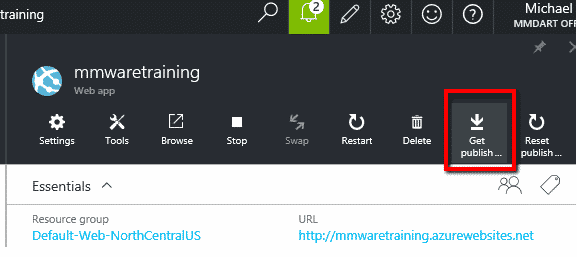
3. Get publish profile for Azure Application
You must download your needed webapps publish profile from Azure App Services.
(Optional) Set your swap options
I recommend that you should create a staging slot and download it’s publish profile to your Jenkins build server.
Because, You should not deploy your applications to production directly, You must test it before.
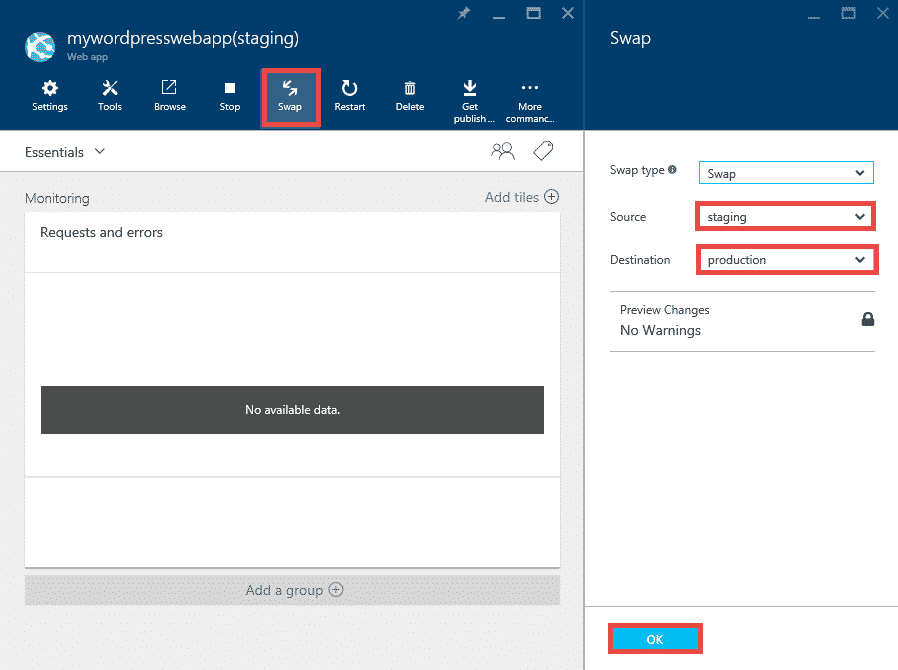
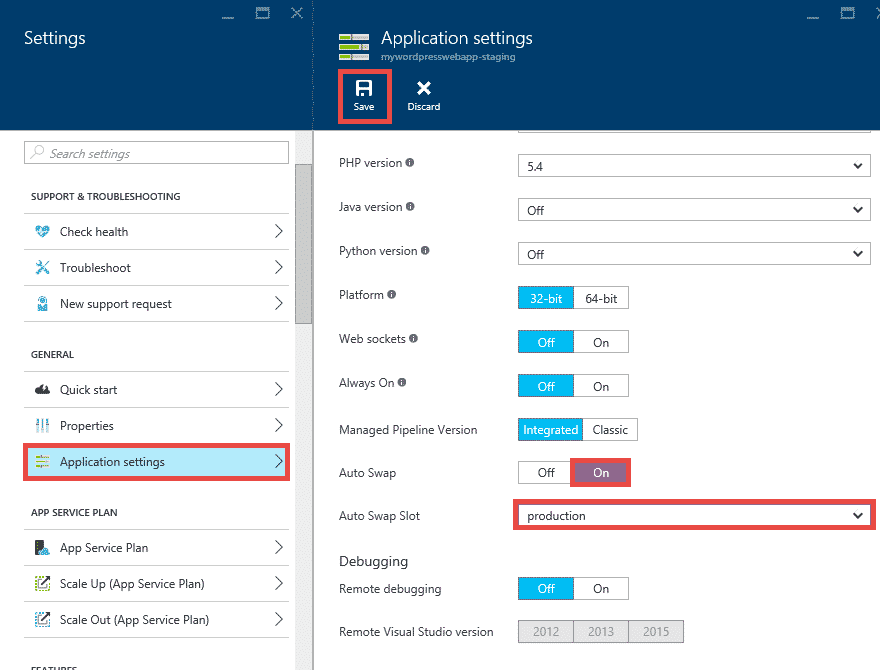
Finally If the staging deployment and tests have finished, you should configure “Azure Swap” feautures on Azure portal.
4. Create and Configure Jenkins FreeStyle Project
4.1. Configure Source Code Management
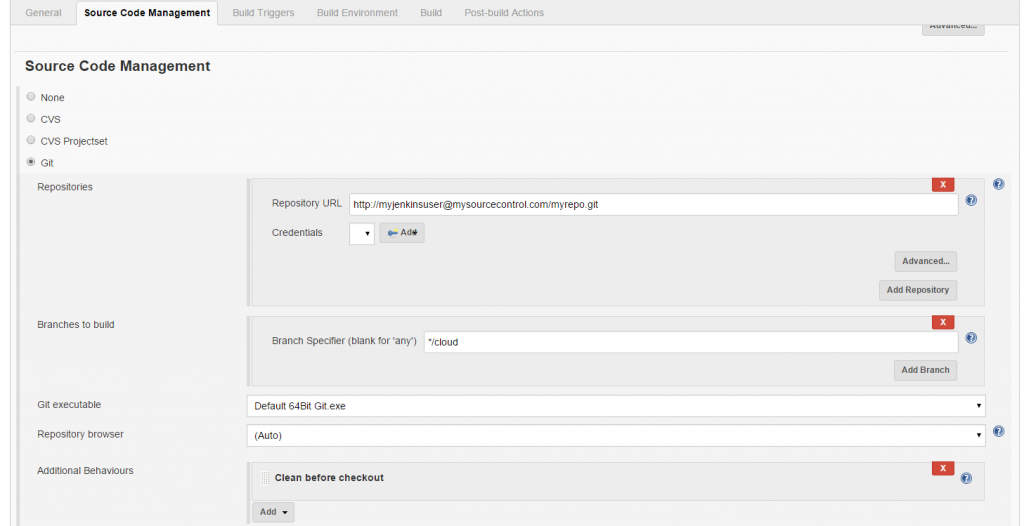
Configure your source code for getting the latest application code to Jenkins Workspace.
You should define your specific branch name.
4.2. Configure Build Triggers
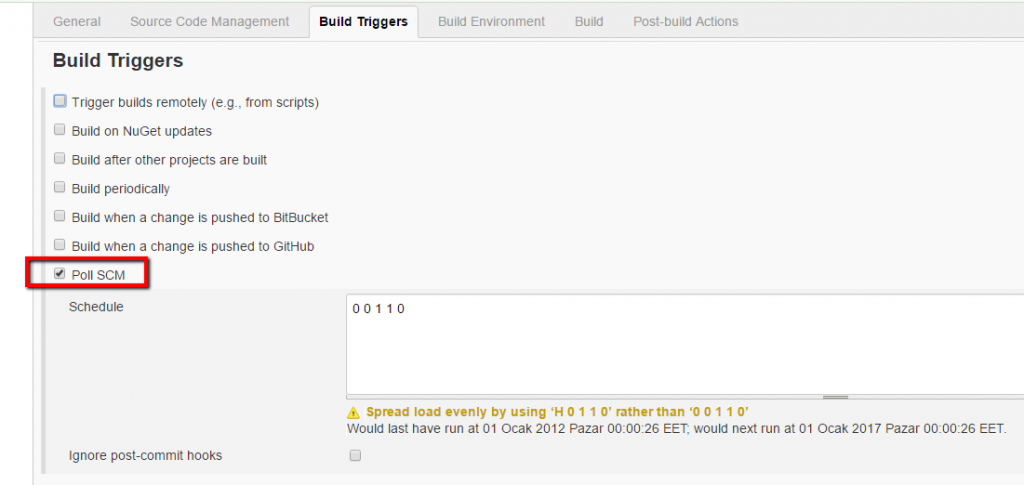
Configure Poll SCM to “00110” for auto triggering Jenkins job on each check-in operation immediately.
4.3. Configure Build Environment & Versioning
If Version Number Plug-In has already installed, there will be an option “Create a formatted version number”.
Check this box and give an environment variable name. We will use it on the build step for build and DLL versioning.
Version Number Format String must be unique for each build. So I recommend to create it with unique parameters like this.
“${BUILD_YEAR}.${BUILD_MONTH}.${BUILD_DAY}.${BUILDS_TODAY}”
4.4. Configure Build
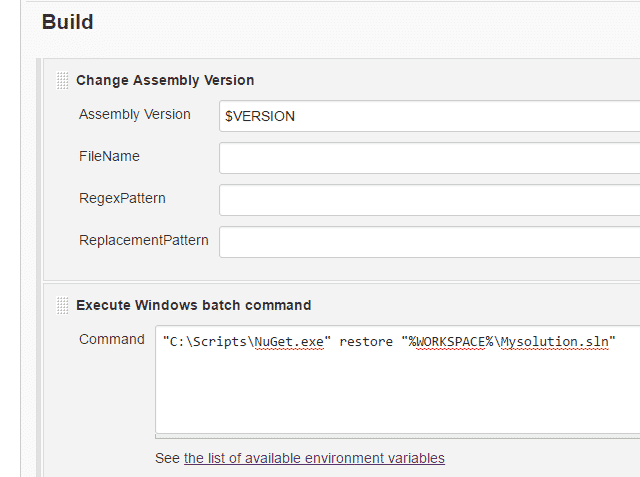
If Change assembly version plugin has already installed, there will be a build step“Change Assembly Version”.
You should use it for dll file versioning.
$VERSION parameter will be dynamically set on each Jenkins build.
You should add a step “Execute Windows batch command” for nuget package restoring before the msbuild process.
You should copy nuget.exe file to your custom static location(C:\Scripts\Nuget.exe) on your Jenkins server or you should call it from Jenkins job workspace like this “%WORKSPACE%\.nuget\nuget.exe”
We have already get Azure publish profile for our webapp. File name must be like this “myazureapp-staging.PublishSettings”
Copy this file to Jenkins custom folder (“C:\Scripts\Azure\MySolution\PublishProfiles”)
Open the publish settings file and copy the userPWD value and paste it to Jenkins Job’s MSbuild command line argument as “/p:Password=xxxxxxxxx”
Add a build step “Build a Visual Studio Project or solution using MSBuild”. Fill in the “MsBuild Build file” for your sln file location. You should use parameters with Jenkins like this. $WORKSPACE\somefolder\myproject.sln
Fill in the command line arguments for publishing the application to Azure App Services.
/p:DeployOnBuild=true /p:AllowUntrustedCertificate=true /p:PublishProfile=C:\Scripts\Azure\MySolution \PublishProfiles\ myazureapp__staging.pubxml /p:Password=xxxxxxxxxxxxxxxxxxxxxxxxxxxxxx
5. (Optional) Deploy your specified files with FTP
Use should deploy your files with different sources like DropBox, OneDrive, Github, Bitbucket.. And there is an another deployment option with FTP.
Some of your application files couldn’t included in your solution or you need an another option for deployment.
So you should use FTP deployment as main deployment step or an extra step after the Azure publish process.
– Create an FTP user on Azure portal and test it with and FTP client program like Filezilla.
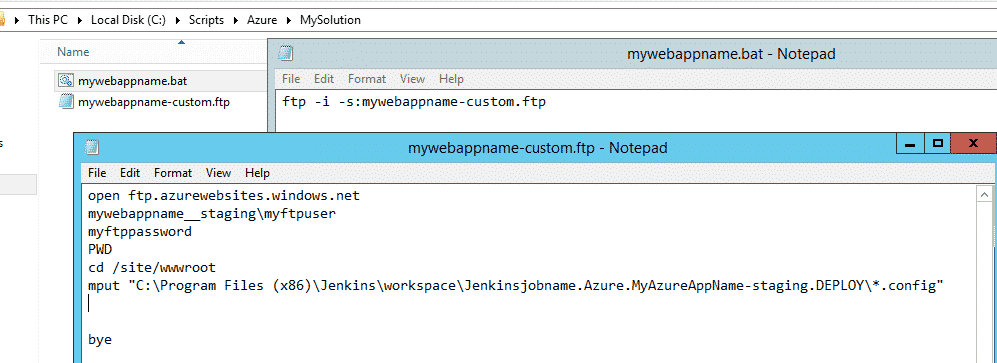
– Create a batch file and run it from Jenkins by adding a build step “Execute Windows batch command”.
ftp -i -s:mywebappname.ftp

#Create a mywebappname.ftp file for FTP connection and files to be copied to Azure WebApps.

open ftp.azurewebsites.windows.net

mywebappname__staging\MyFtpUser

MyFtpPassword

PWD

cd /site/wwwroot

mput "C:\Program Files (x86)\Jenkins\workspace\Cloud.mywebappname–staging.DEPLOY\*.config"
Note: If There is a big total file count, It can be very slow moving files via ftp. Please use an another option.
6. Configure Post build notifications
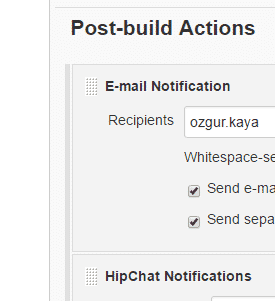
You must be sure that the build has started or finished successfully. So You should add post build actions like mailing and any other communication tools. First of all, they must be configured at Jenkins Configure System page as you need.After that you should run your test automation on Staging environment as your configured pipeline. And could auto swap for Production with Jenkins.

Özgür KAYA is a Senior Software Testing and DevOps professional with 10+ years of experience. He has worked at Turkcell Global Bilgi, Veripark, Turkcell, N11, Trendyol, Emirates Airlines, and Arute Solutions, and Mobven.





Hi Ozgu,
I’m getting this error while trying to deploy WebAPI project to Azure.
C:\Scripts\Azure\CtbDistributorApi\PublishProfiles\CtbDistributorApi.PublishSettings(1,1): error MSB4068: The element is unrecognized, or not supported in this context.
Will appreciate your help.