In this article, I describe how to report JUnit 5 test results (and artifacts/files) with Tesults. I will assume you already have a testing setup with JUnit 5.
Let’s get started.
Step 1 – Sign Up
Tesults is a web-based application which means there is nothing to set up with respect to infrastructure or software but it requires signing up.
Go to Tesults – https://www.tesults.com and sign up.
Step 2 – Create a Project
After signing up, log in and click the settings (middle) icon from the top right menu bar.

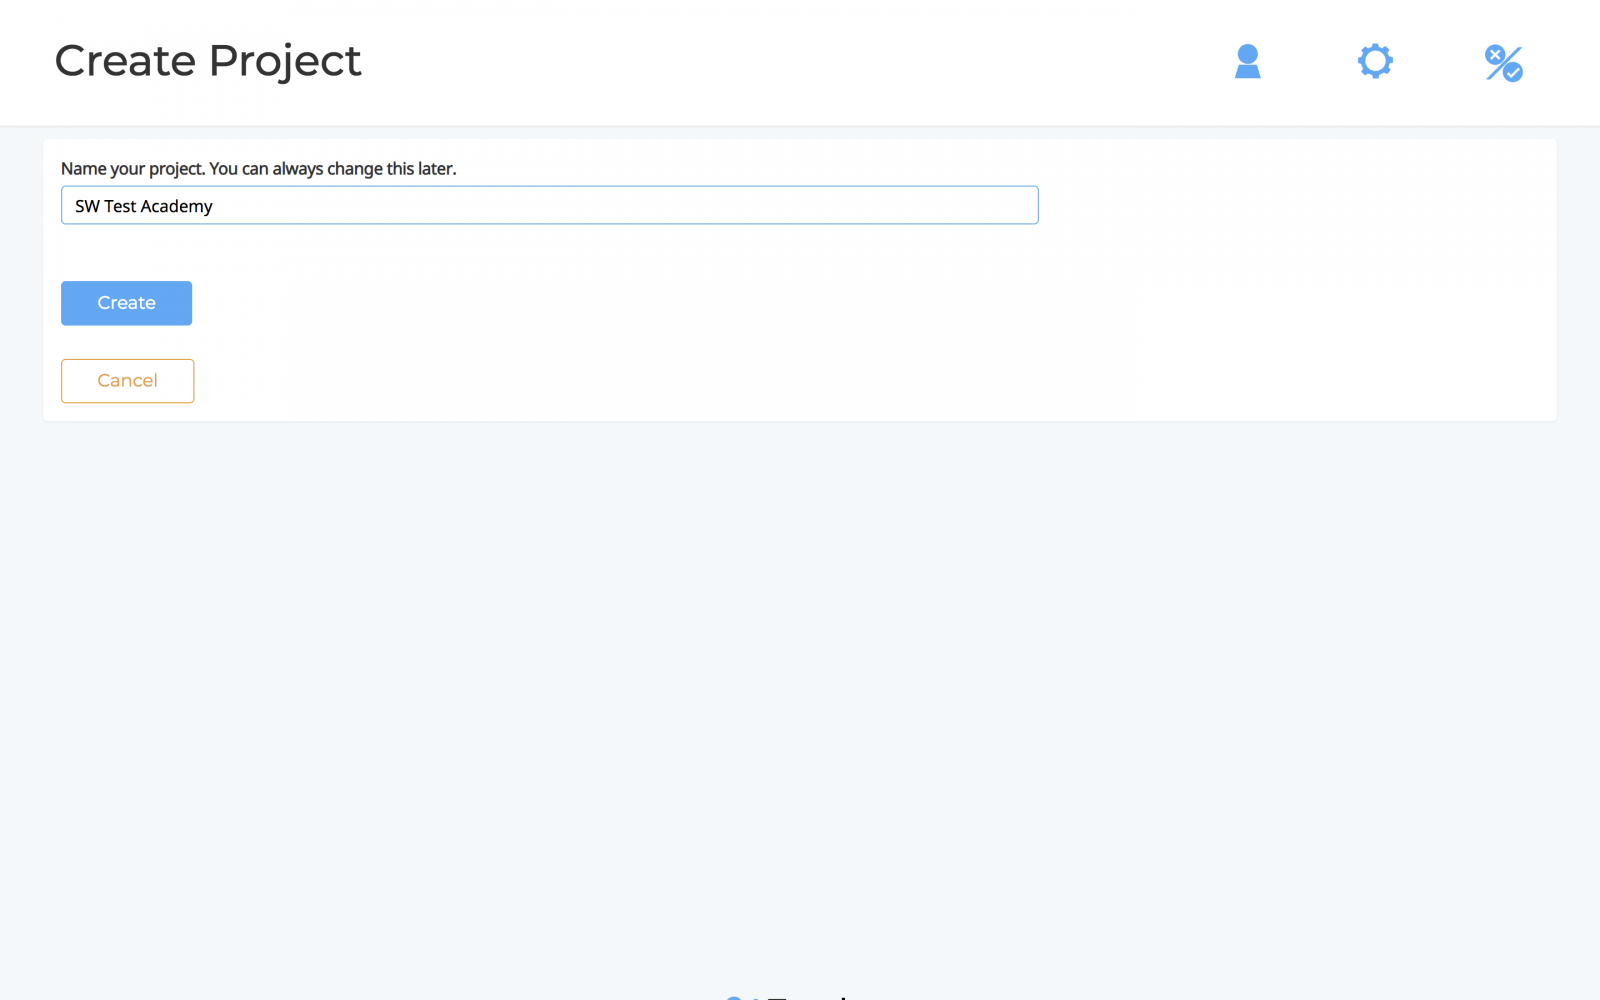
This opens settings/configuration. Create a project to start reporting results. Click create a project and name the project.
Finish creating the project by selecting a free or paid plan. A token is provided:
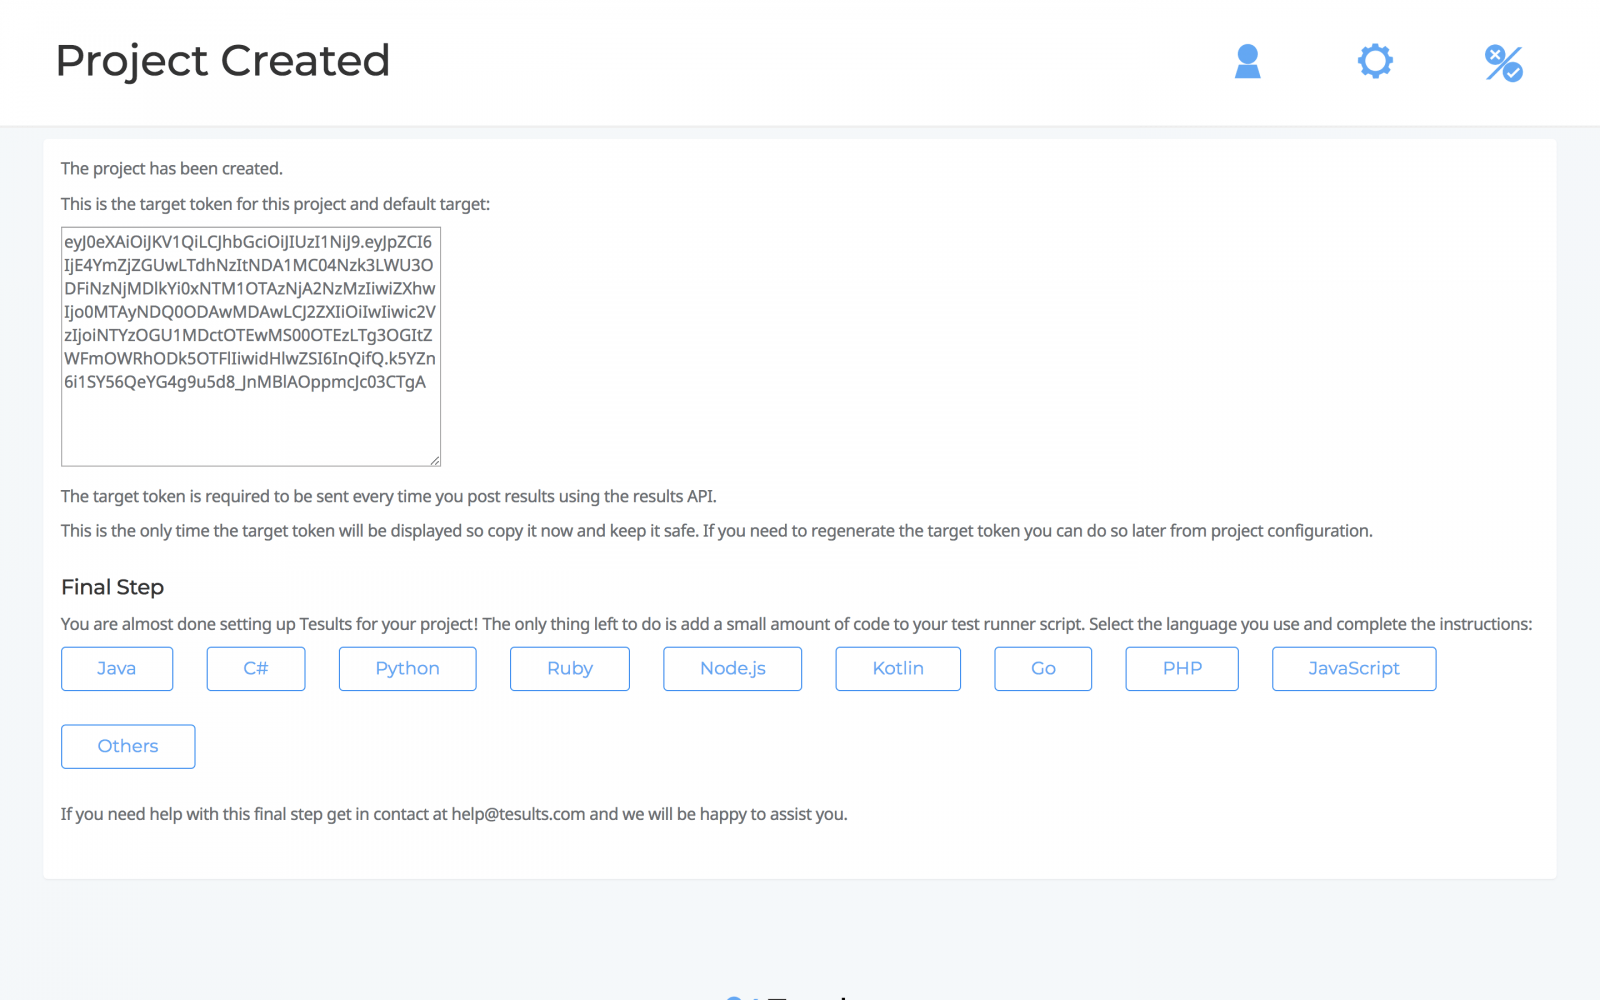
You must copy this token because it is needed later in the code to upload results from pytest.
Step 3 – Add Required Library To Your Java Project
There are three different ways to do this as outlined here:
1. If your project uses Gradle add this to build.gradle file:
dependencies {
     compile 'com.tesults:tesults:1.0.1'
}
2. If your project uses Maven add this to your pom.xml:
<dependency>
<groupId>com.tesults</groupId>
<artifactId>tesults</artifactId>
<version>1.0.1</version>
</dependency>
3. A JAR can be downloaded from here: https://www.tesults.com/docs?doc=java (where the configuration details can also be found).
Step 4 – JUnit 5 TestExecutionListener
JUnit 5 test execution listeners listen to test events and can be used to gather data about test results. Tesults provides a custom TestExecutionListener to collect results data. Add this class to your project:
import org.junit.platform.engine.TestExecutionResult;
import org.junit.platform.launcher.TestExecutionListener;
import org.junit.platform.launcher.TestIdentifier;
import org.junit.platform.launcher.TestPlan;
import com.tesults.tesults.*;
import java.util.*;

public class TesultsListener implements TestExecutionListener {
    // A list to hold your test cases.
    List<Map<String, Object>> testCases = new ArrayList<Map<String, Object>>();

    public void executionFinished(TestIdentifier testIdentifier, TestExecutionResult
            testExecutionResult) {
        if (testIdentifier.isTest()) {
            System.out.println("Execution finished: " + testIdentifier.getDisplayName() + " " +
                    testExecutionResult.toString());
            String result = testExecutionResult.getStatus().toString();
            // Tesults requires result to be one of: [pass, fail, unknown]
            if (result == "SUCCESSFUL") {
                result = "pass";
            } else if (result == "FAILED") {
                result = "fail";
            } else {
                result = "unknown";
            }
            String reason = "";
            if (testExecutionResult.getThrowable().isPresent()) {
                reason = testExecutionResult.getThrowable().get().getMessage();
            }
            String suite = "";
            String separator = "class:";
            if (testIdentifier.getParentId().isPresent()) {
                suite = testIdentifier.getParentId().get();
                suite = suite.substring(suite.indexOf(separator) + separator.length(), suite.lastIndexOf("]"));
            }
            Map<String, Object> testCase = new HashMap<String, Object>();
            String name = testIdentifier.getDisplayName();
            if (name.indexOf("(") != -1) {
                name = name.substring(0, name.lastIndexOf("("));
            }
            testCase.put("name", name);
            testCase.put("result", result);
            testCase.put("suite", suite);
            testCase.put("desc", testIdentifier.getDisplayName());
            testCase.put("reason", reason);
            // (Optional) For uploading files:
            //List<String> files = new ArrayList<String>();
            //files.add("/path-to-files/test-name/img1.png");
            //files.add("/path-to-files/test-name/img2.png");
            //testCase.put("files", files);
            testCases.add(testCase);
        }
    }

    public void testPlanExecutionFinished(TestPlan testPlan) {
        // Map<String, Object> to hold your test results data.
        Map<String, Object> data = new HashMap<String, Object>();
        data.put("target", "token");
        Map<String, Object> results = new HashMap<String, Object>();
        results.put("cases", testCases);
        data.put("results", results);
        // Upload
        System.out.println("Uploading results data to Tesults...");
        Map<String, Object> response = Results.upload(data);
        System.out.println("success: " + response.get("success"));
        System.out.println("message: " + response.get("message"));
        System.out.println("warnings: " + ((List<String>) response.get("warnings")).size());
        System.out.println("errors: " + ((List<String>) response.get("errors")).size());
    }
}
Important -> replace “token” with the token from Step 3. Other than that nothing needs to be modified except if you are uploading files, detailed here:
(Optional – uploading files)
You can save files like logs and screen captures with each test case. To do this when your tests are running, save files to a temporary local location within a directory that can then be referenced later, preferably by test name. Then the only thing that needs to be changed in the above class is to replace the file path under line 51 (// (Optional) For uploading files). Your files will then be automatically saved. Screen captures and logs are displayed automatically in the test case on the results page. If you save data in CSV format it can be automatically charted.
Step 5 – Register Custom TestExecutionListener
The custom test execution listener needs to be registered for use. Tesults provides this launcher class which should be added to your project too:
import static org.junit.platform.engine.discovery.ClassNameFilter.includeClassNamePatterns;
import static org.junit.platform.engine.discovery.DiscoverySelectors.selectClass;
import static org.junit.platform.engine.discovery.DiscoverySelectors.selectPackage;
import org.junit.platform.launcher.Launcher;
import org.junit.platform.launcher.LauncherDiscoveryRequest;
import org.junit.platform.launcher.TestExecutionListener;
import org.junit.platform.launcher.TestPlan;
import org.junit.platform.launcher.core.LauncherDiscoveryRequestBuilder;
import org.junit.platform.launcher.core.LauncherFactory;
import org.junit.platform.launcher.listeners.SummaryGeneratingListener;

public class TestLauncher {
    public void LaunchTests () {
        LauncherDiscoveryRequest request = LauncherDiscoveryRequestBuilder.request()
                .selectors(
                        selectClass(TestSuiteA.class)
                )
                .filters(
                )
                .build();
        Launcher launcher = LauncherFactory.create();
        TestPlan testPlan = launcher.discover(request);
        // Register a listener of your choice
        TestExecutionListener listener = new TesultsListener();
        launcher.registerTestExecutionListeners(listener);
        launcher.execute(request);
    }
}
In Line 18 you must replace TestSuiteA with the class containing your tests. If you have multiple classes containing tests add them all one line after the other.
Step 6 – Run tests and view results
You can now run the tests using the custom TestExecutionListener like so:
public class TestsExecute {
    public static void main(String [ ] args) {
        TestLauncher tl = new TestLauncher();
        tl.LaunchTests();
    }
}
If you are using Gradle you run this by adding a task to the build.gradle file:
task tesults(type:JavaExec) {
     main = 'TestsExecute'
     classpath = sourceSets.main.runtimeClasspath
}
Then run the tesults task from Gradle.
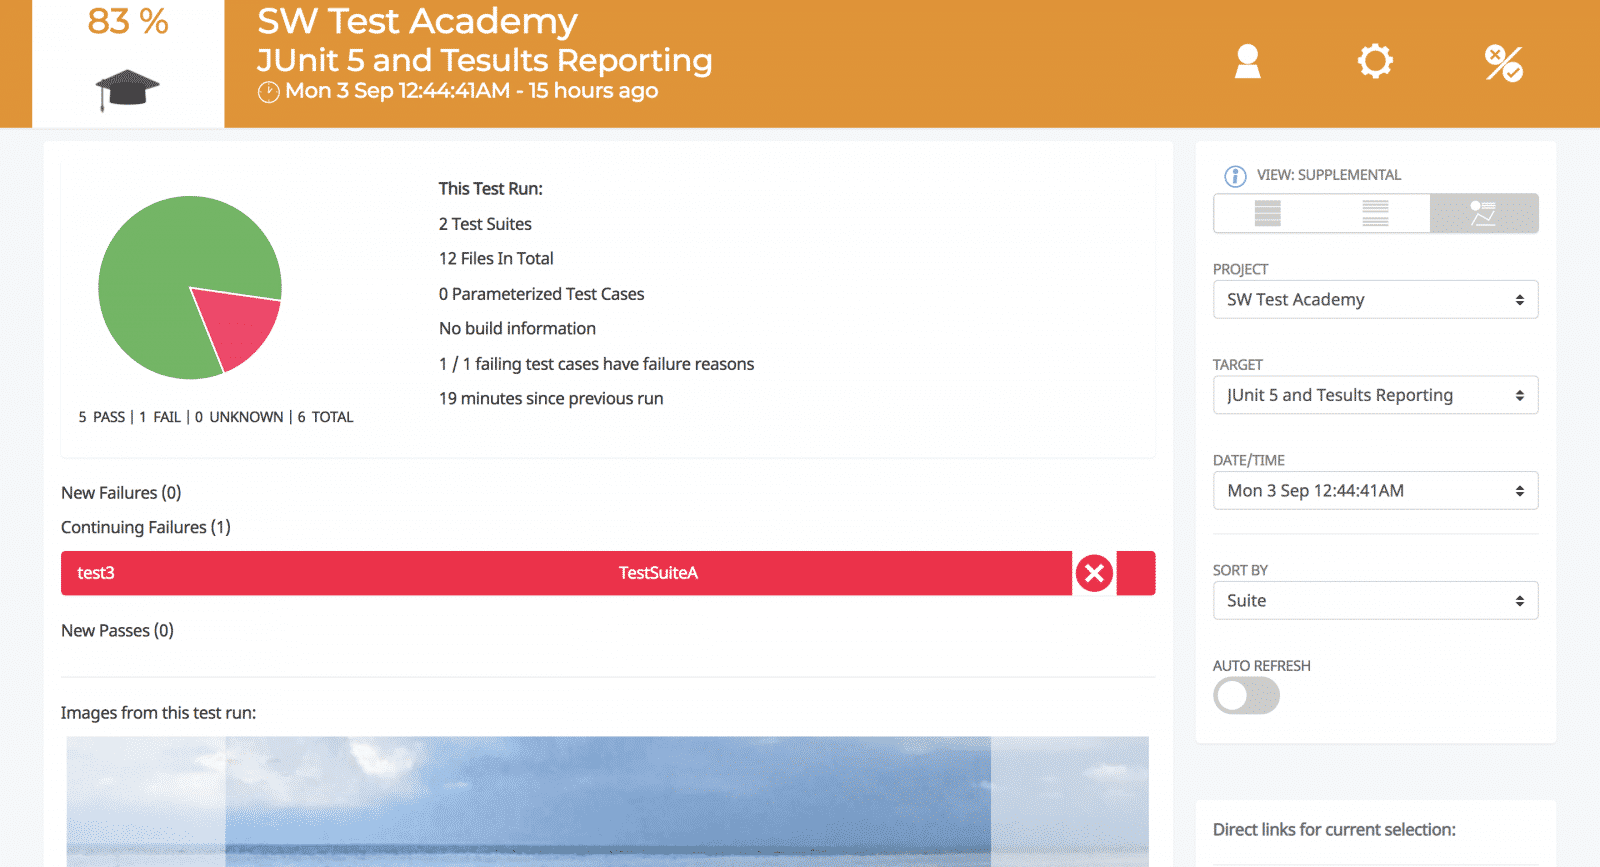
View https://www.tesults.com/results:
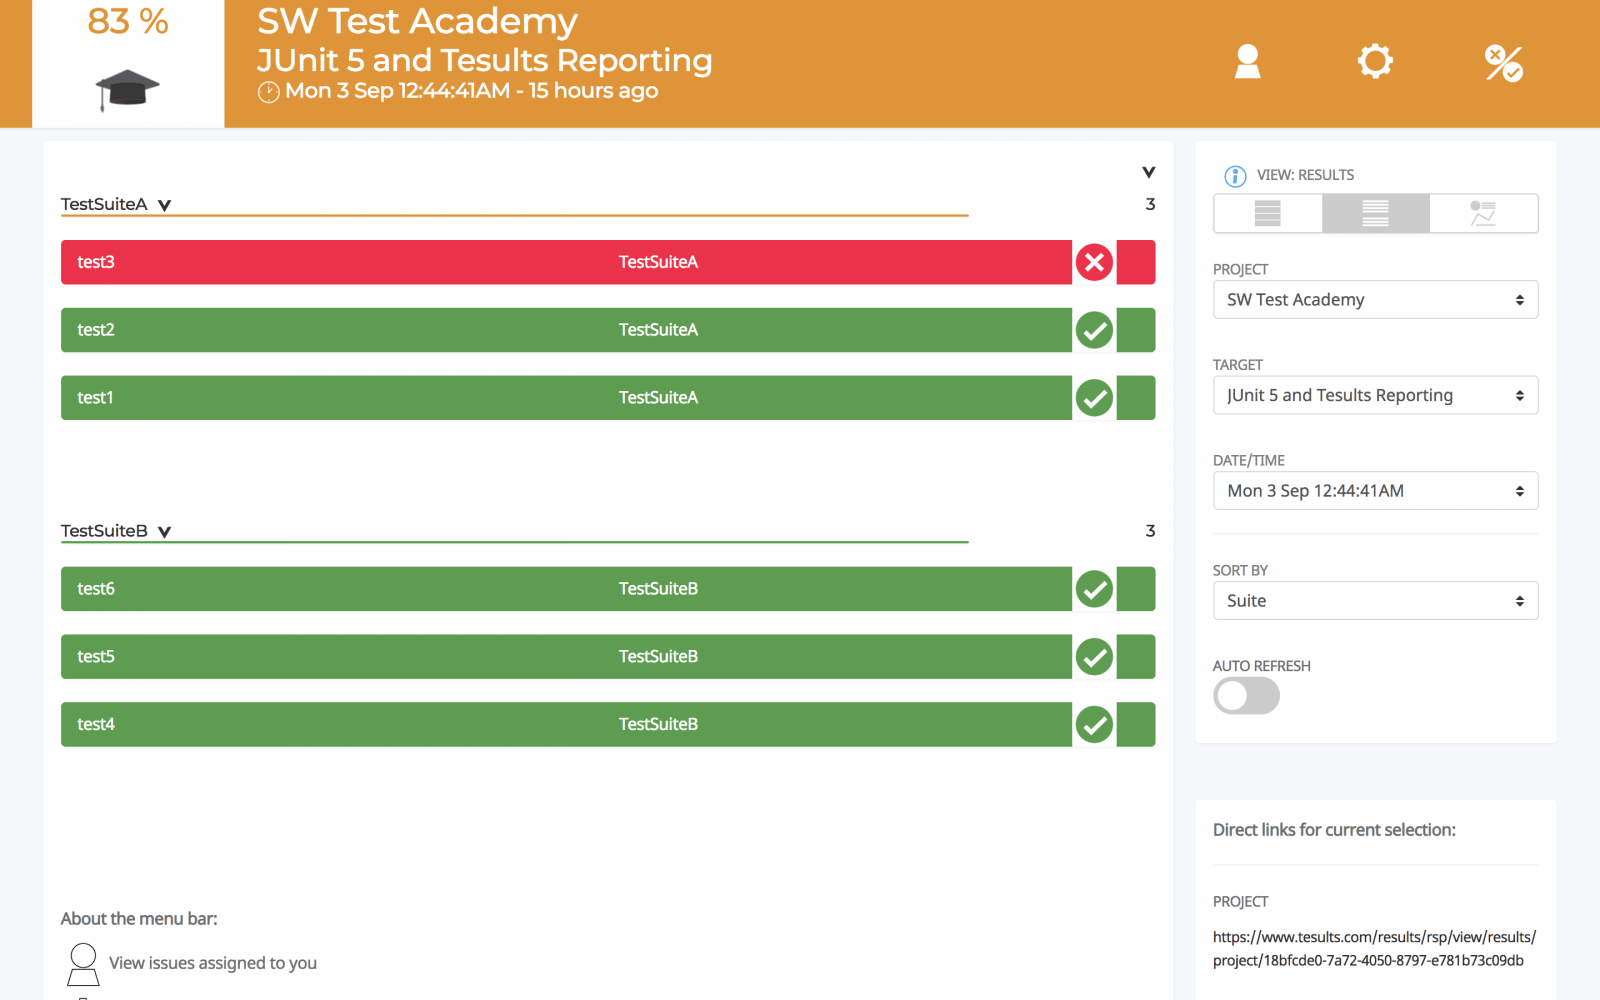
Click on a test to see details and files for the test case:
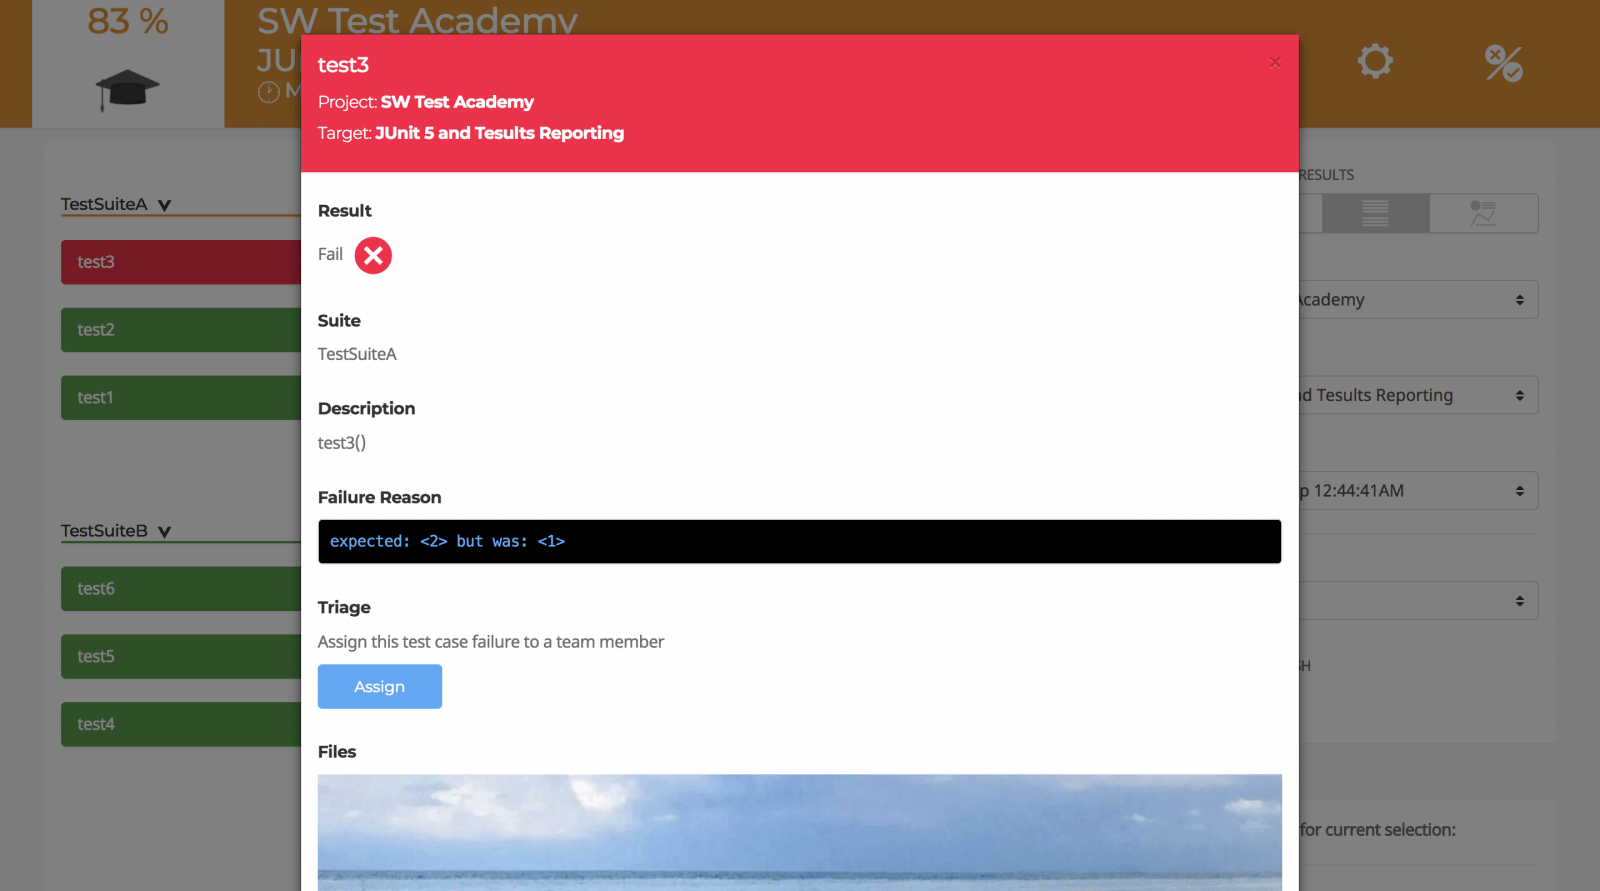
Other views show which failures are new, old or what has been recently fixed.
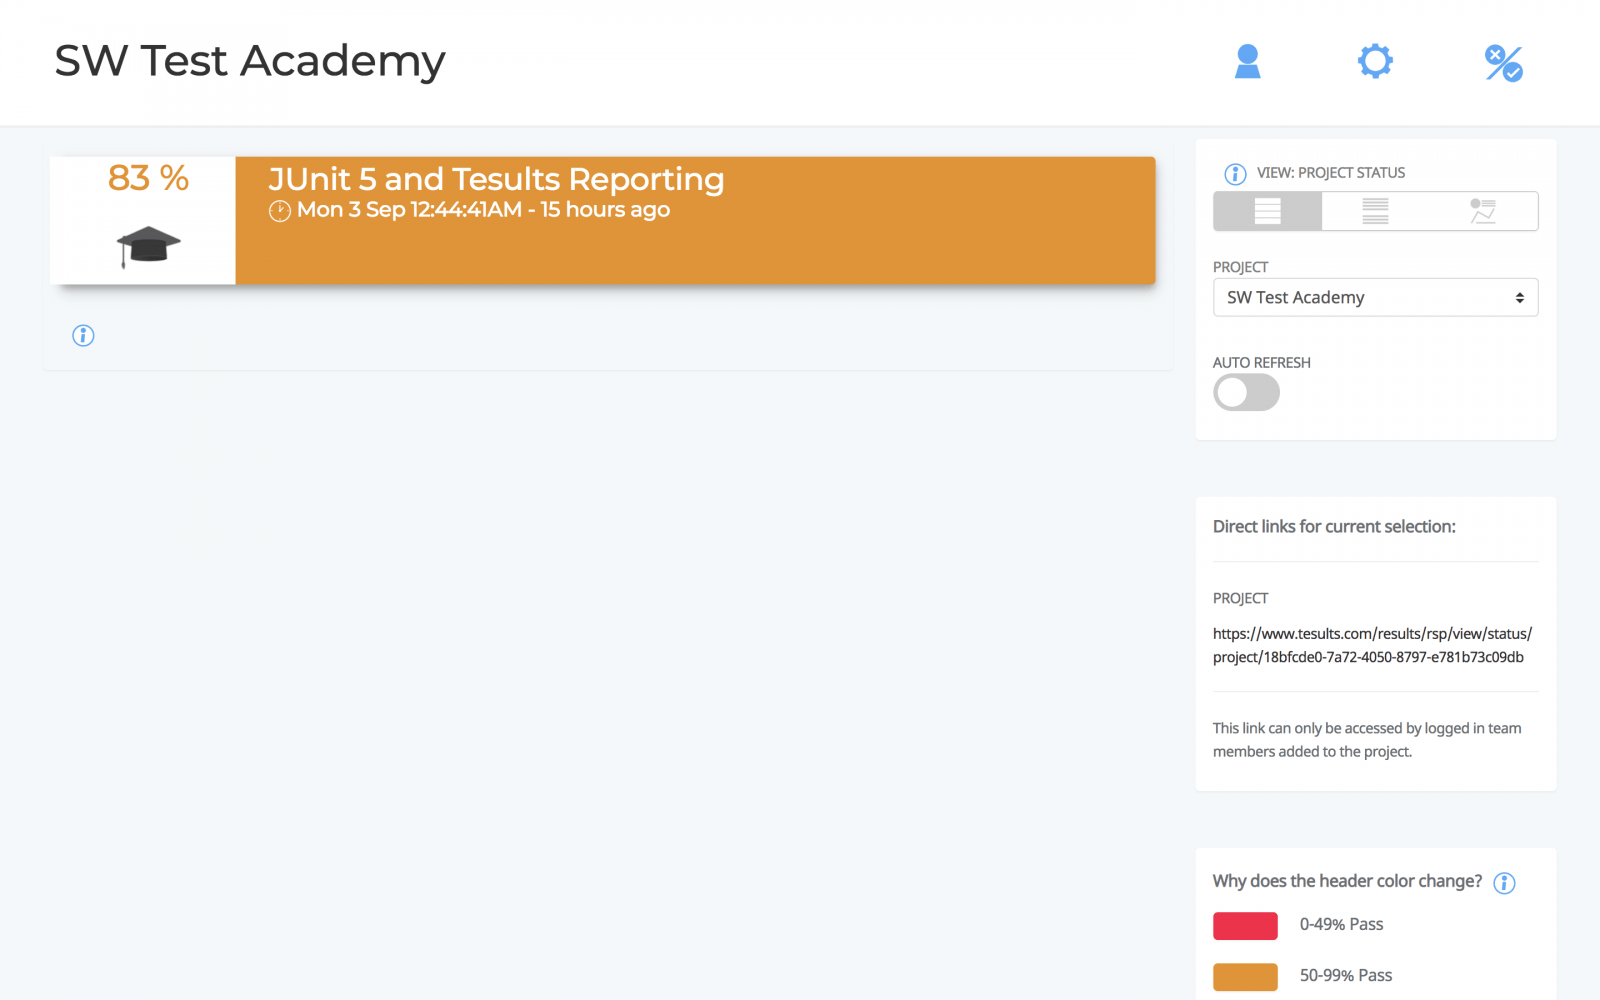
An overall status view shows results for each target (such as platform, build flavor), in this case, we only have one target.
For more integration details see the Tesults docs for JUnit 5 here.
Thanks.
Ajeet Dhaliwal

Onur Baskirt is a Software Engineering Leader with international experience in world-class companies. Now, he is a Software Engineering Lead at Emirates Airlines in Dubai.