Today, I am going to tell you how to integrate your Circle CI account with Github, build a project, run test and publish reports. CircleCI is Continuous Integration, a development practice used by development teams allowing them to build, test and deploy applications easier and quicker on multiple platforms.
Integrate with GitHub
Whenever you login Circle CI with your GitHub logins, Circle Ci will be automatically integrated with GitHub. But it will not have access to all your project. You have to allow them one by one.
You should go to Add Projects menu and set up your project.
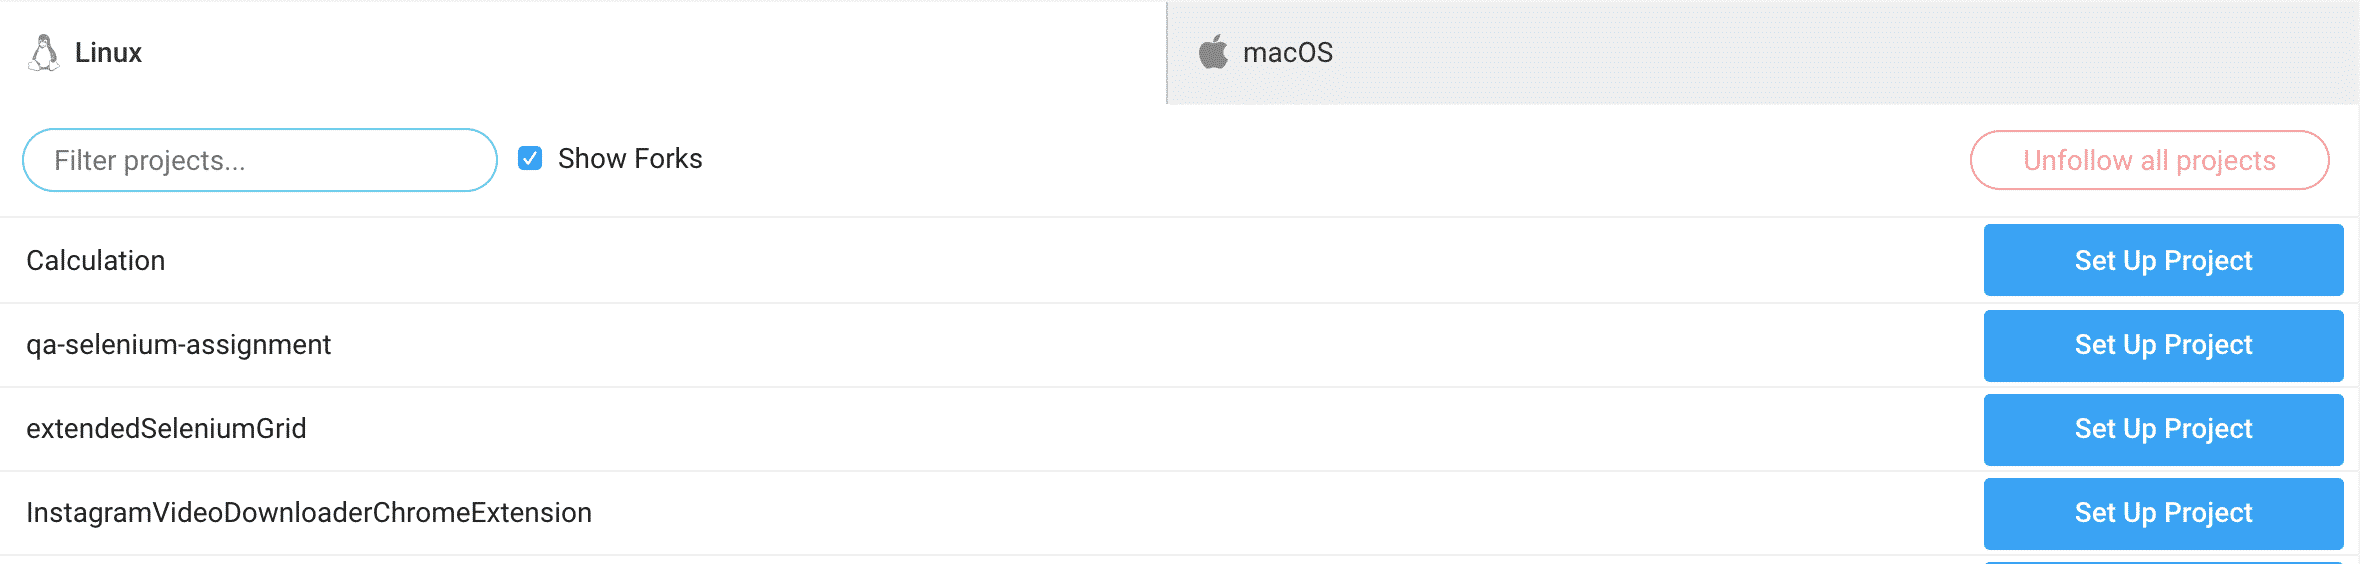
I set up my demo project and click Setup Project button.
Circle CI will ask a few questions about your project. It asks OS that you will use as a build environment. The other question is about the development language of your project.
I say Linux and Java(Maven).
Then it provides a .yml file to put into my project. That is a very basic yml file to build and test my project. If you put that fil under .circleci folder on your root folder, Circle CI will start watching your project and whenever there’s a change, it will trigger commands defined in yml file.
Build and Test Application
In your yml file, under the steps, you should put below command.
- run: mvn test
This will start your test, let’s say you use gradle. This command will be
- run: gradle test
In case you have additional commands, you might provide them here.
When you push that command to GitHub, Circle CI will get a notification from GitHub and will fetch the latest changes and start building your project. Here’s the execution result. We have a green light. It means our application is built and tested successfully.
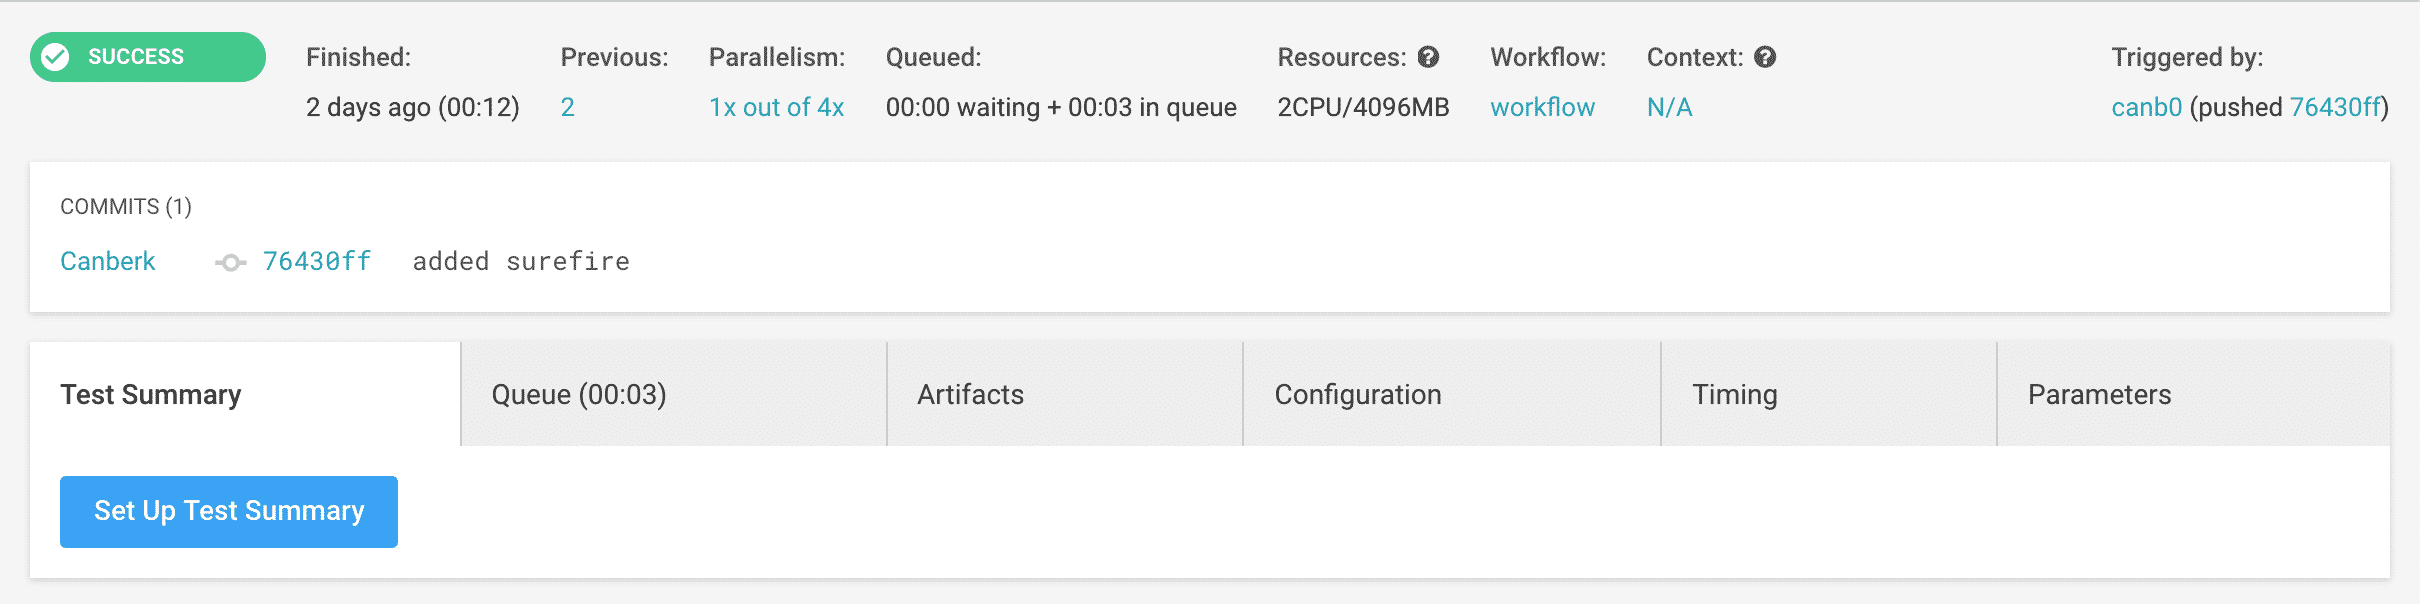
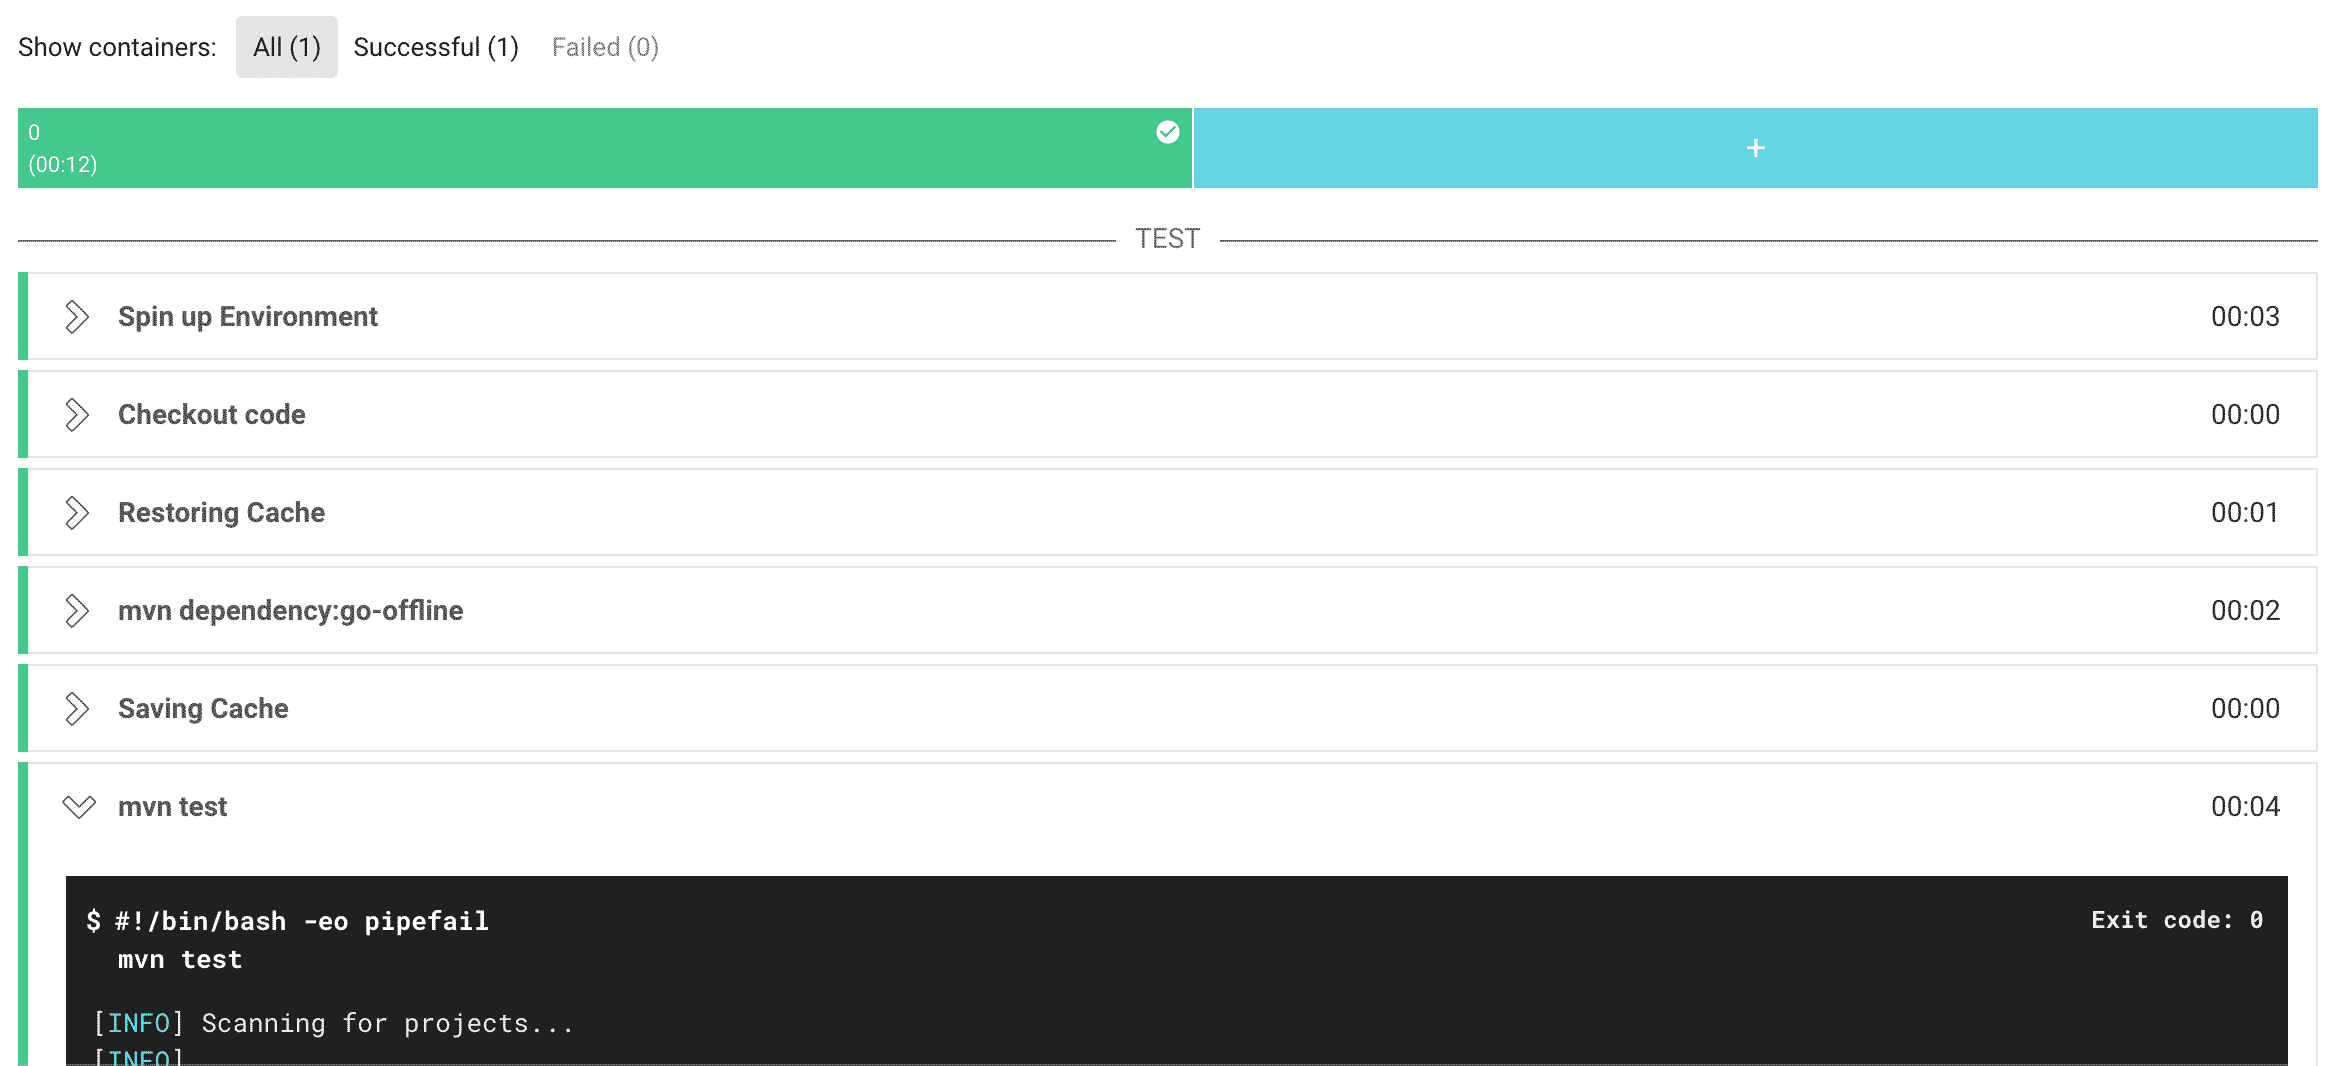
You can see all the steps that CircleCI executed
But we have no information about the test status. That’s because CircleCI doesn’t have any idea which tests execution library that we used and where the results are stored. So we need to add some new commands into our yml file.
Publish Test Results
We are using JUnit with our project. In order to publish and store JUnit reports with CircleCi, you need to run command in your yml file so you can grab them and copy them in a folder specifically for your build.
To do so, we execute the below command.
 - run:
          name: Save test results
          command: |
            mkdir -p ~/test-results/junit/
            find . -type f -regex ".*/target/surefire-reports/.*xml" -exec cp {} ~/test-results/junit/ \;
          when: always
      - store_test_results:
          path: ~/test-results/junit
      - store_artifacts:
          path: ~/test-results/junit
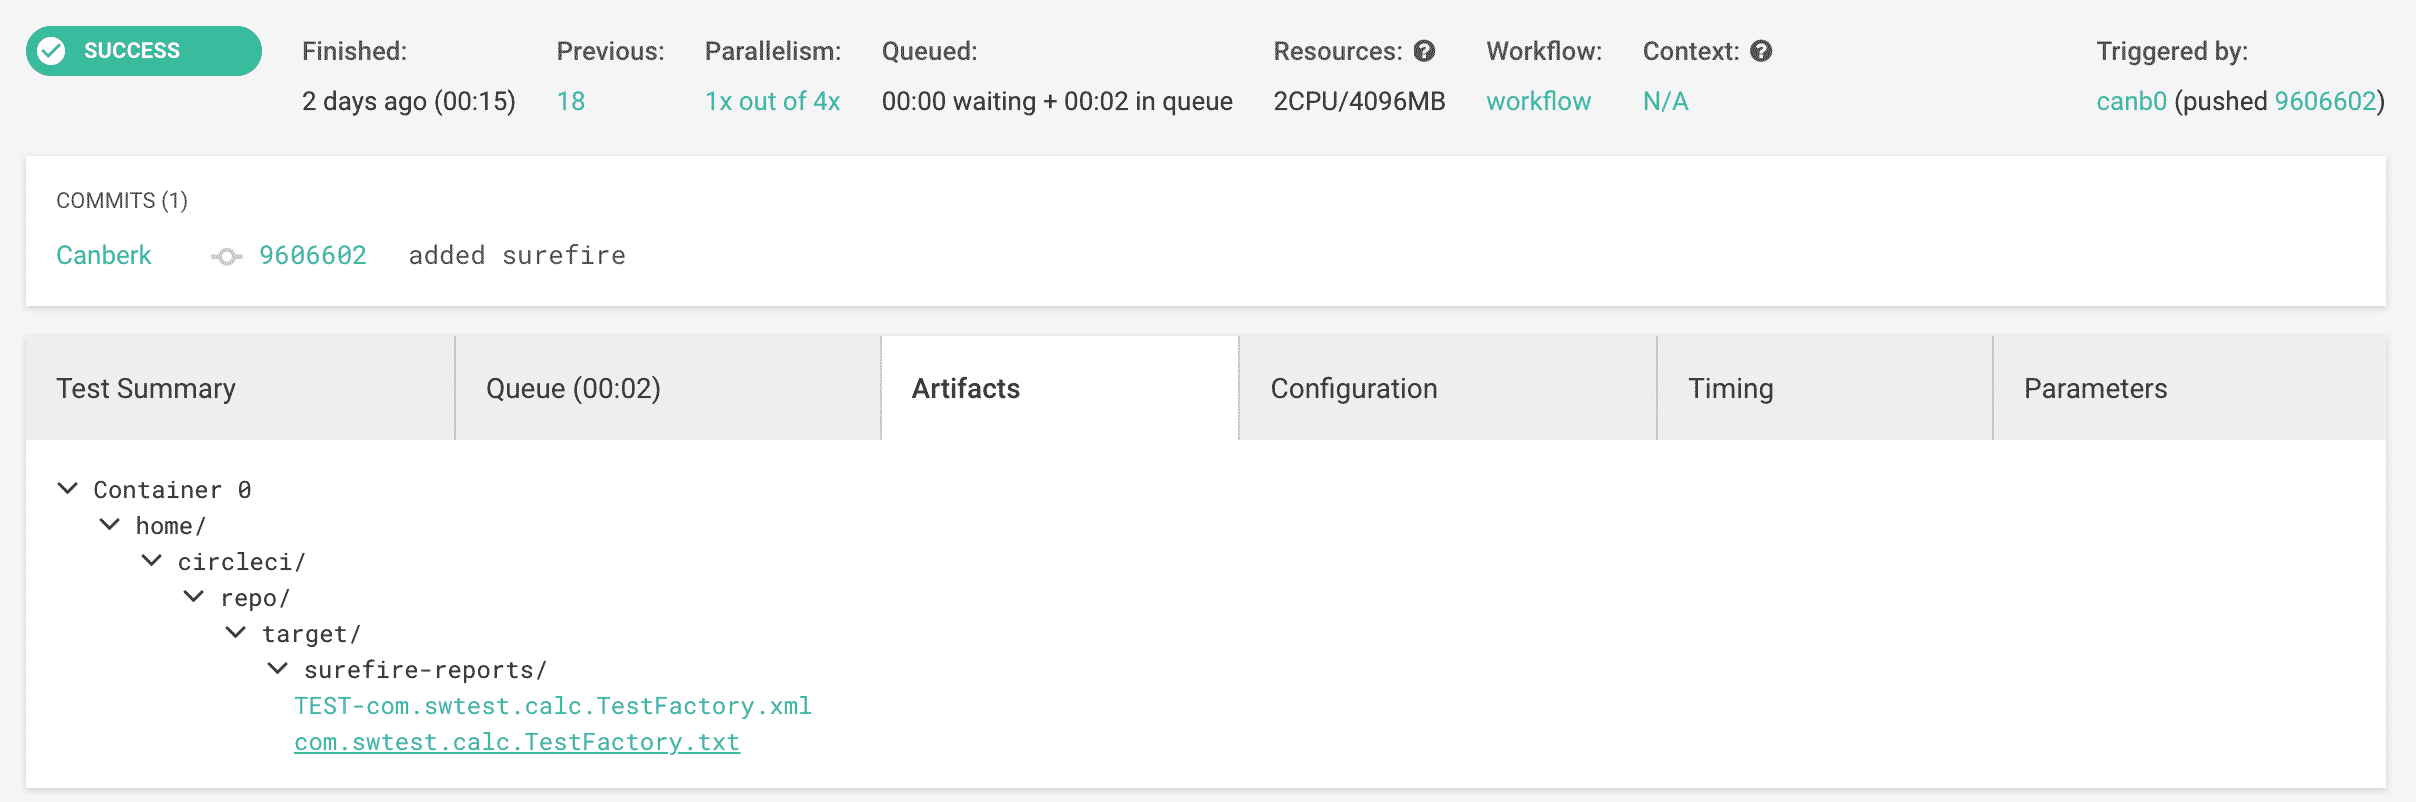
First, we create a folder structure name as “test-results/junit“. You can name it as you want. Secondly, you execute the command to find the XML file created after the JUnit execution. Then you copy it under the folder that you created. Finally, you store them as test results and artifacts.
When you commit that file, CircleCi will build and trigger your tests once again. Then you will see the results on the Artifacts tab.
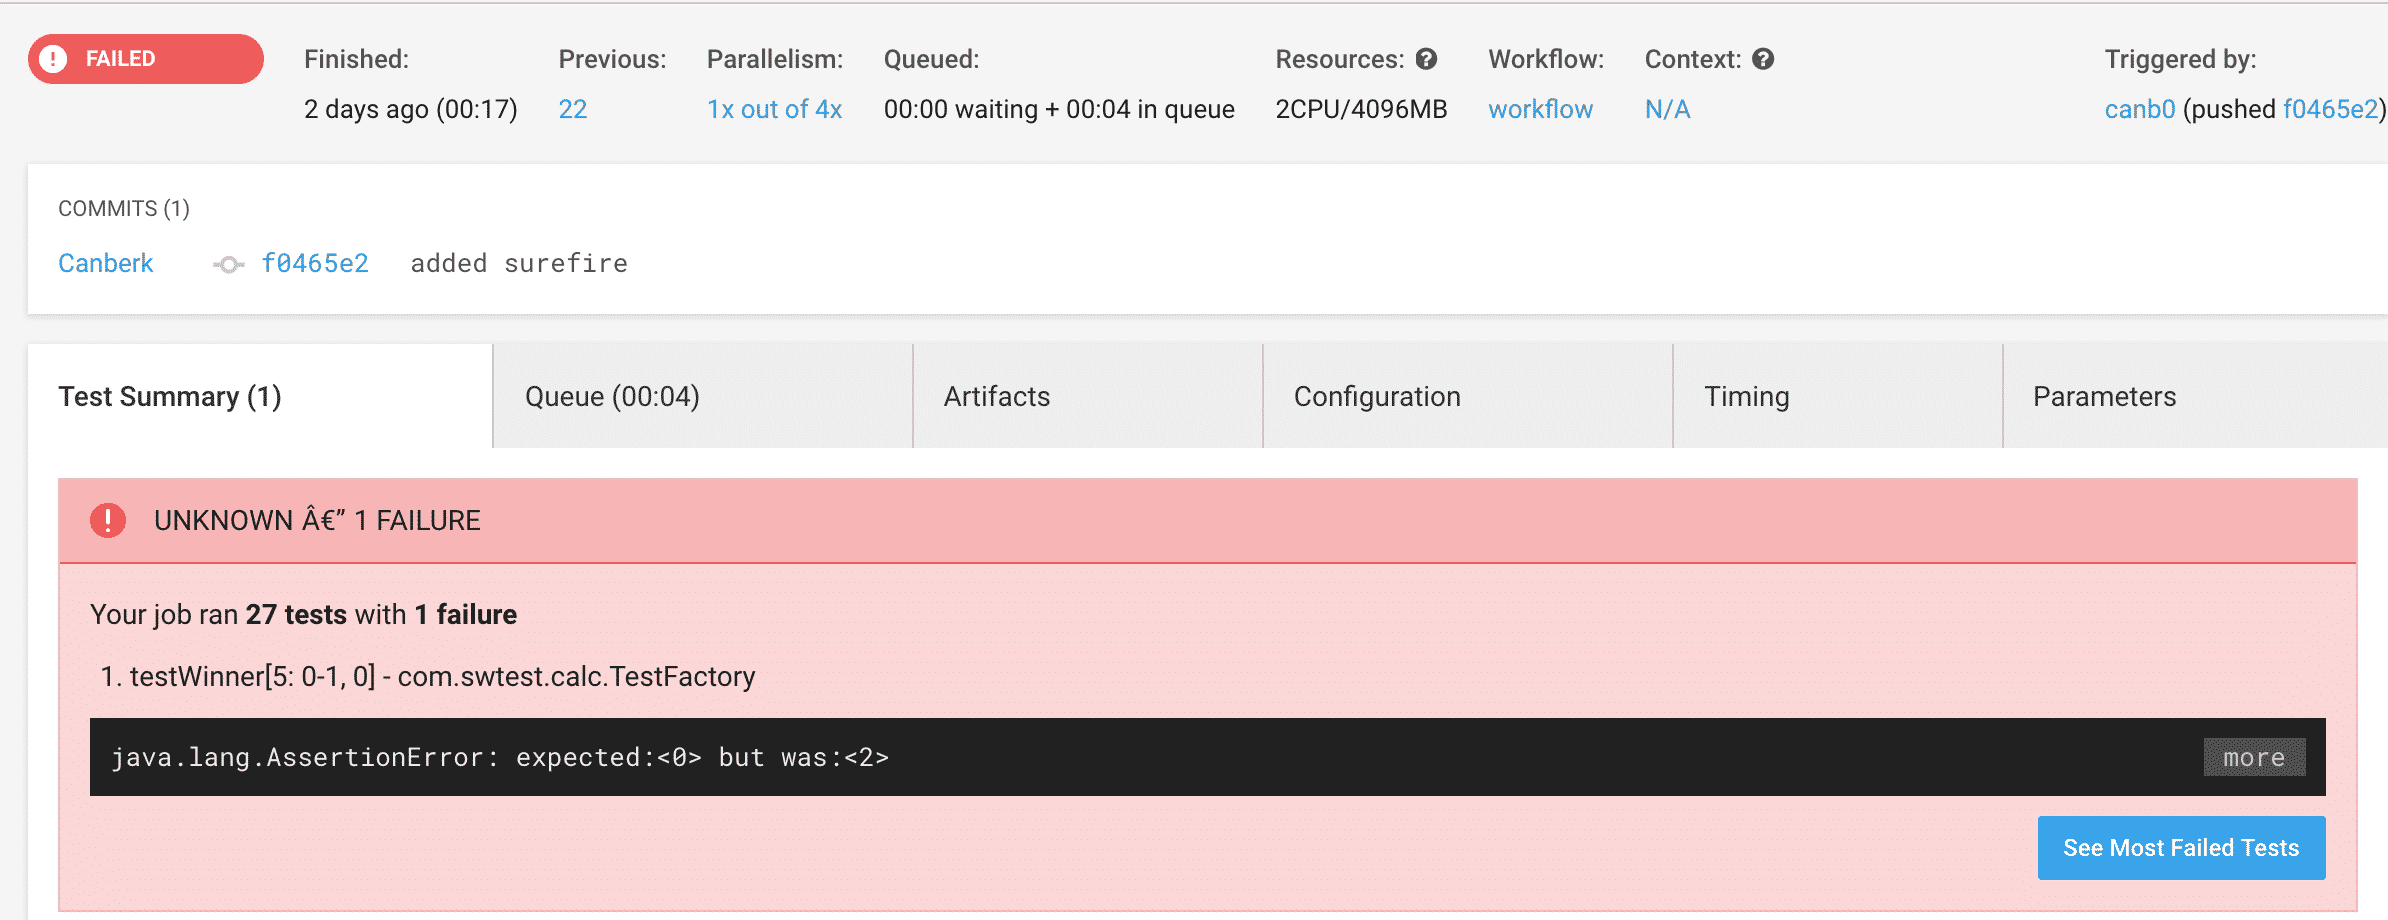
What if a test fails? What happens?
I am going to make one change on my project so one tests fail. After making the change, CircleCi will once trigger the build and test process. Here’s the result. Now our build is red because one test failed. You can see the result on the main screen when you go in the specific build.
That’s a basic tutorial that would give some basic information about CircleCI. There are endless features. You can build your app, publish it to AWS, Heroku or some other cloud service.
You can check the whole yml file on https://github.com/canb0/Calculation/blob/master/.circleci/config.yml
Hope you enjoyed the article.

Canberk Akduygu is a Test Lead working in the Netherlands