In this article, I describe how to integrate Tesults with TestNG, specifically using TestNG Listeners. TestNG Listeners were described in this article: http://www.swtestacademy.com/how-to-use-testng-listeners/. Integrating with Allure was described here: http://www.swtestacademy.com/allure-testng/ and Extent here: http://www.swtestacademy.com/extentreports-testng/. Let’s get started integrating Tesults into our test automation project.
Step 1 – Sign Up to Tesults
Tesults is a web-based (cloud hosted service) app which means that unlike Allure or ExtentReports there is nothing to setup with respect to infrastructure or software but it does require signing up.
Go to Tesults – https://www.tesults.com and sign up.
Step 2 – Create a Project
After signing up, log in and click the settings (middle) icon from the top right menu bar.

This opens up the settings/configuration. You need to create at least one project to start reporting results. Click create a project.
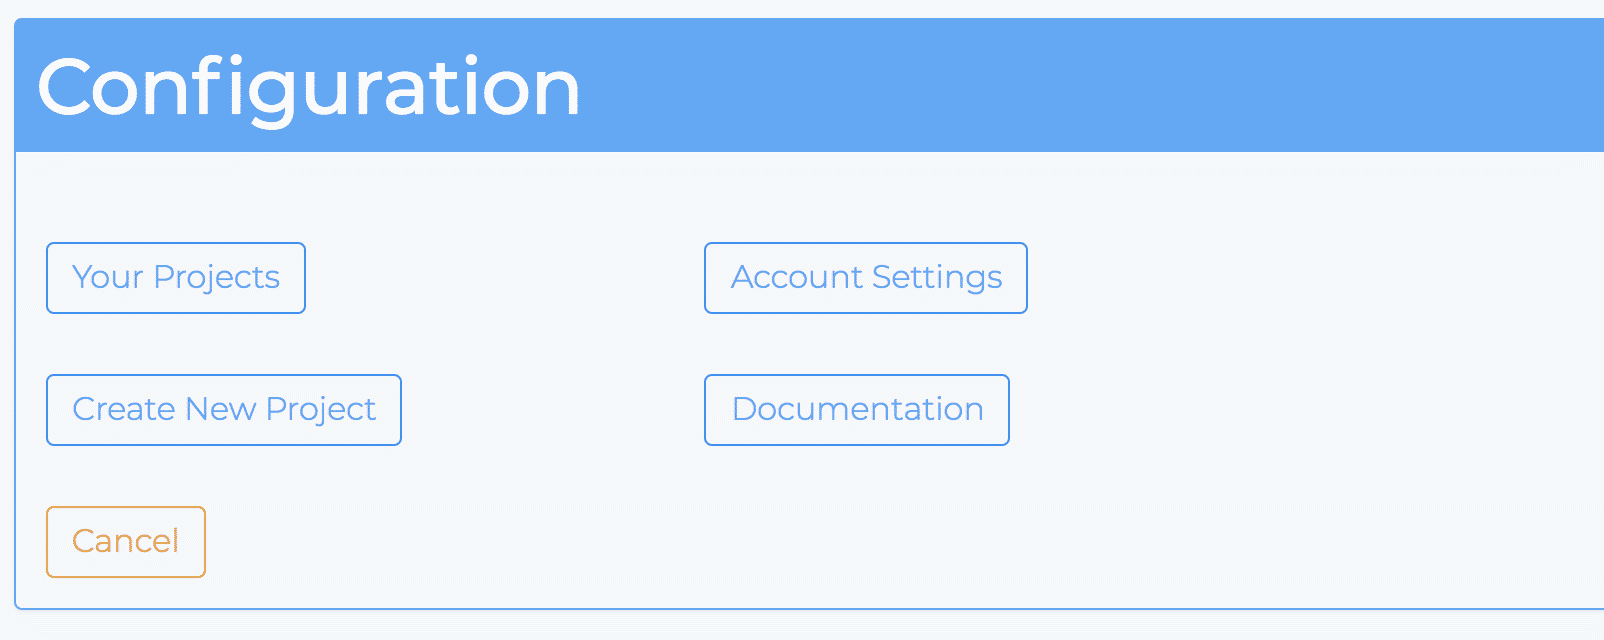
Give a name to the project.

Tesults is a hosted service and you need to select a plan. Select the DevOps plan which is free.
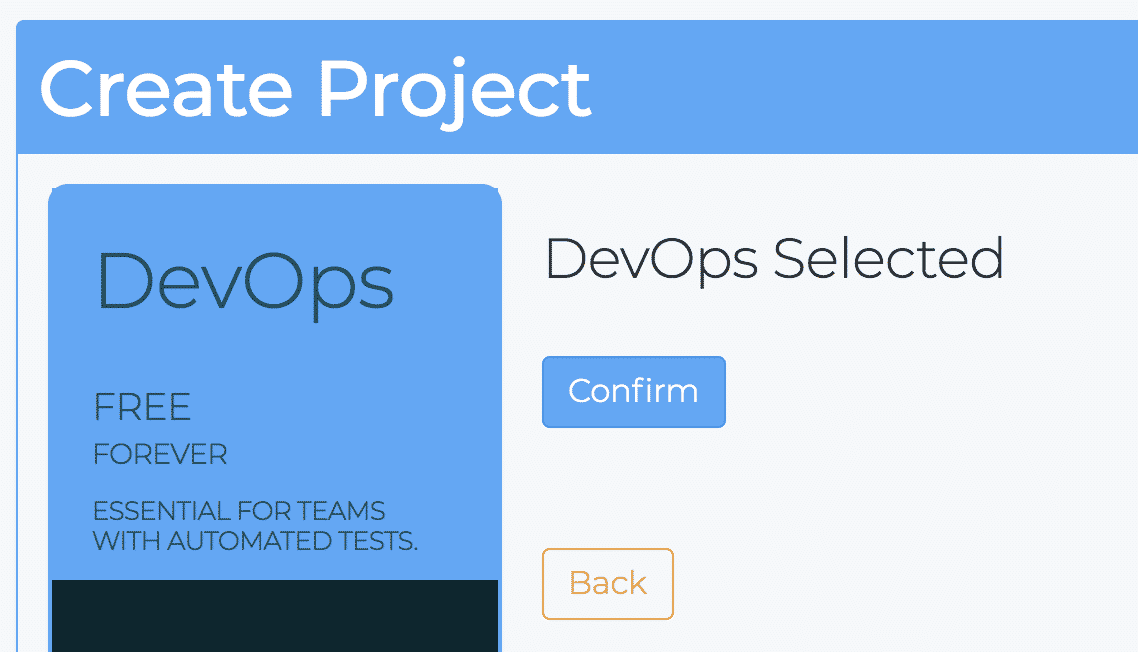
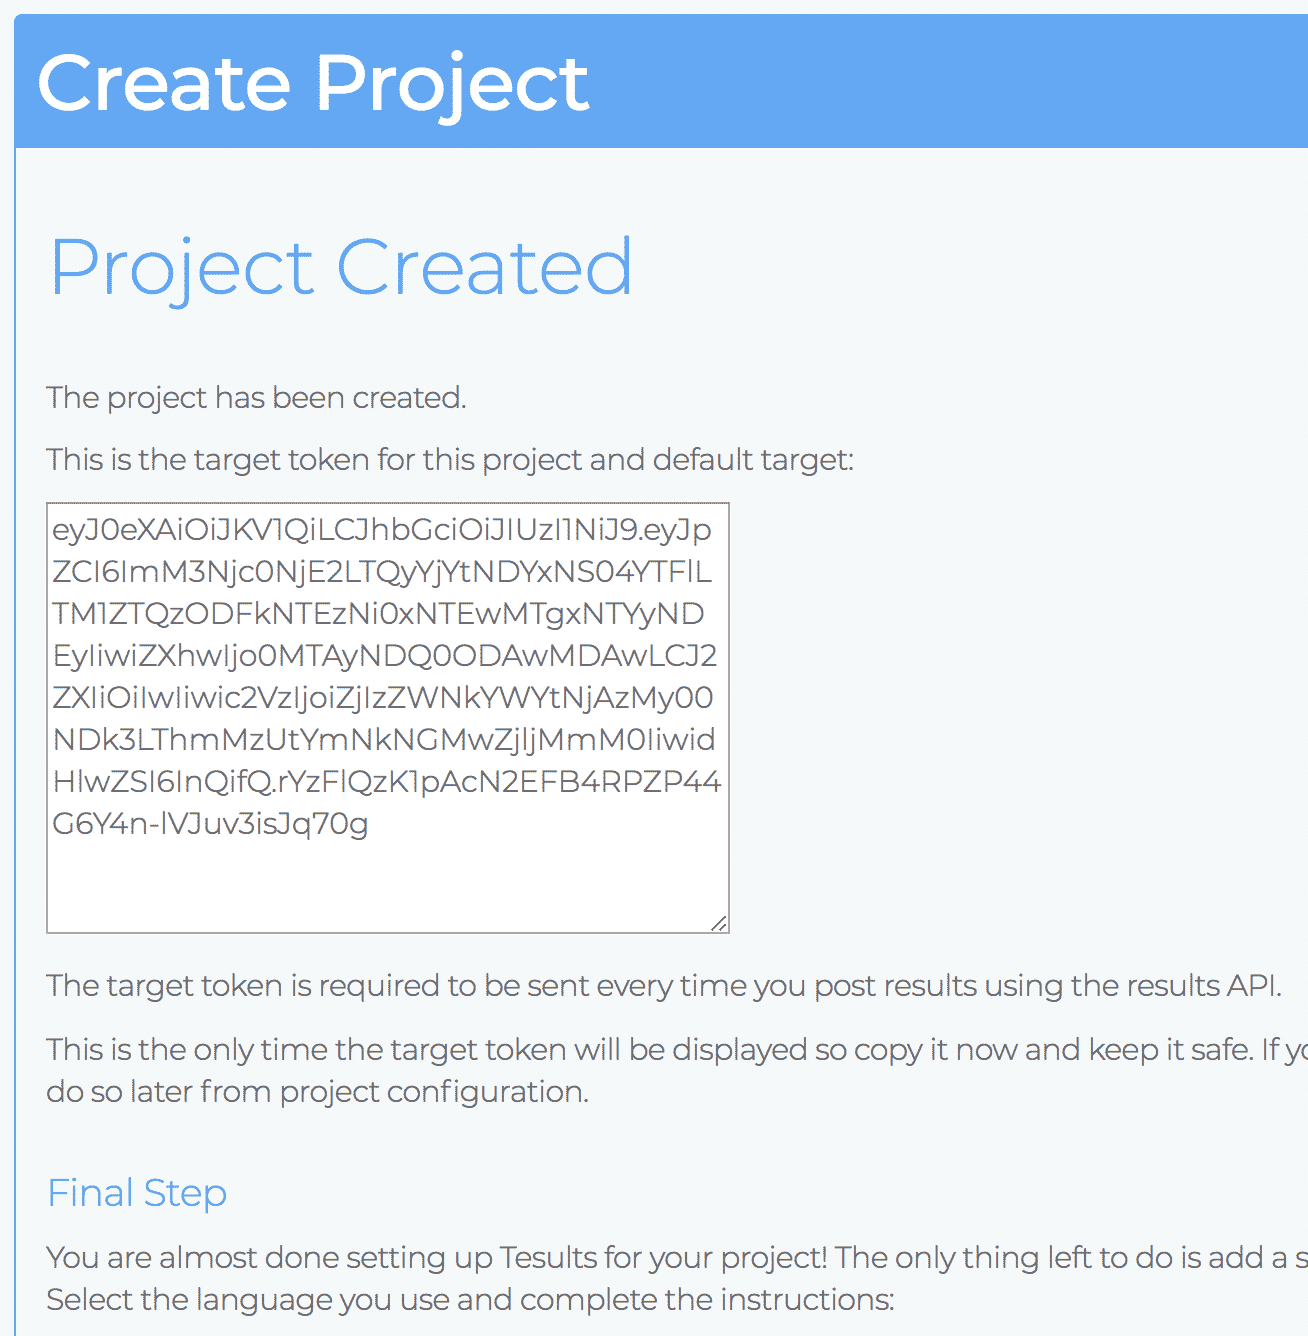
Click confirm and the project is created and a token is provided. You must copy this token because it is needed later in the code to upload results from TestNG.
Step 3 – Modify TestNG Listener Class to Send Results to Tesults
Download the Tesults JAR from this page: https://www.tesults.com/docs?doc=java (or directly from https://www.tesults.com/tesults.jar)
Make the JAR available for your project. How you do this depends on your IDE but in IntelliJ you open File > Project Structure and select Modules on the left panel, then go to the Dependencies tab and click the + icon at the bottom which opens up a file browser window allowing you to select the JAR.

After this is done, add this import line to make the Tesults API available in the TestNG Listener:
import com.tesults.tesults.*;
Also, create a List to hold your test cases.
List<Map<String,Object>> testCases = new ArrayList<Map<String, Object>>();
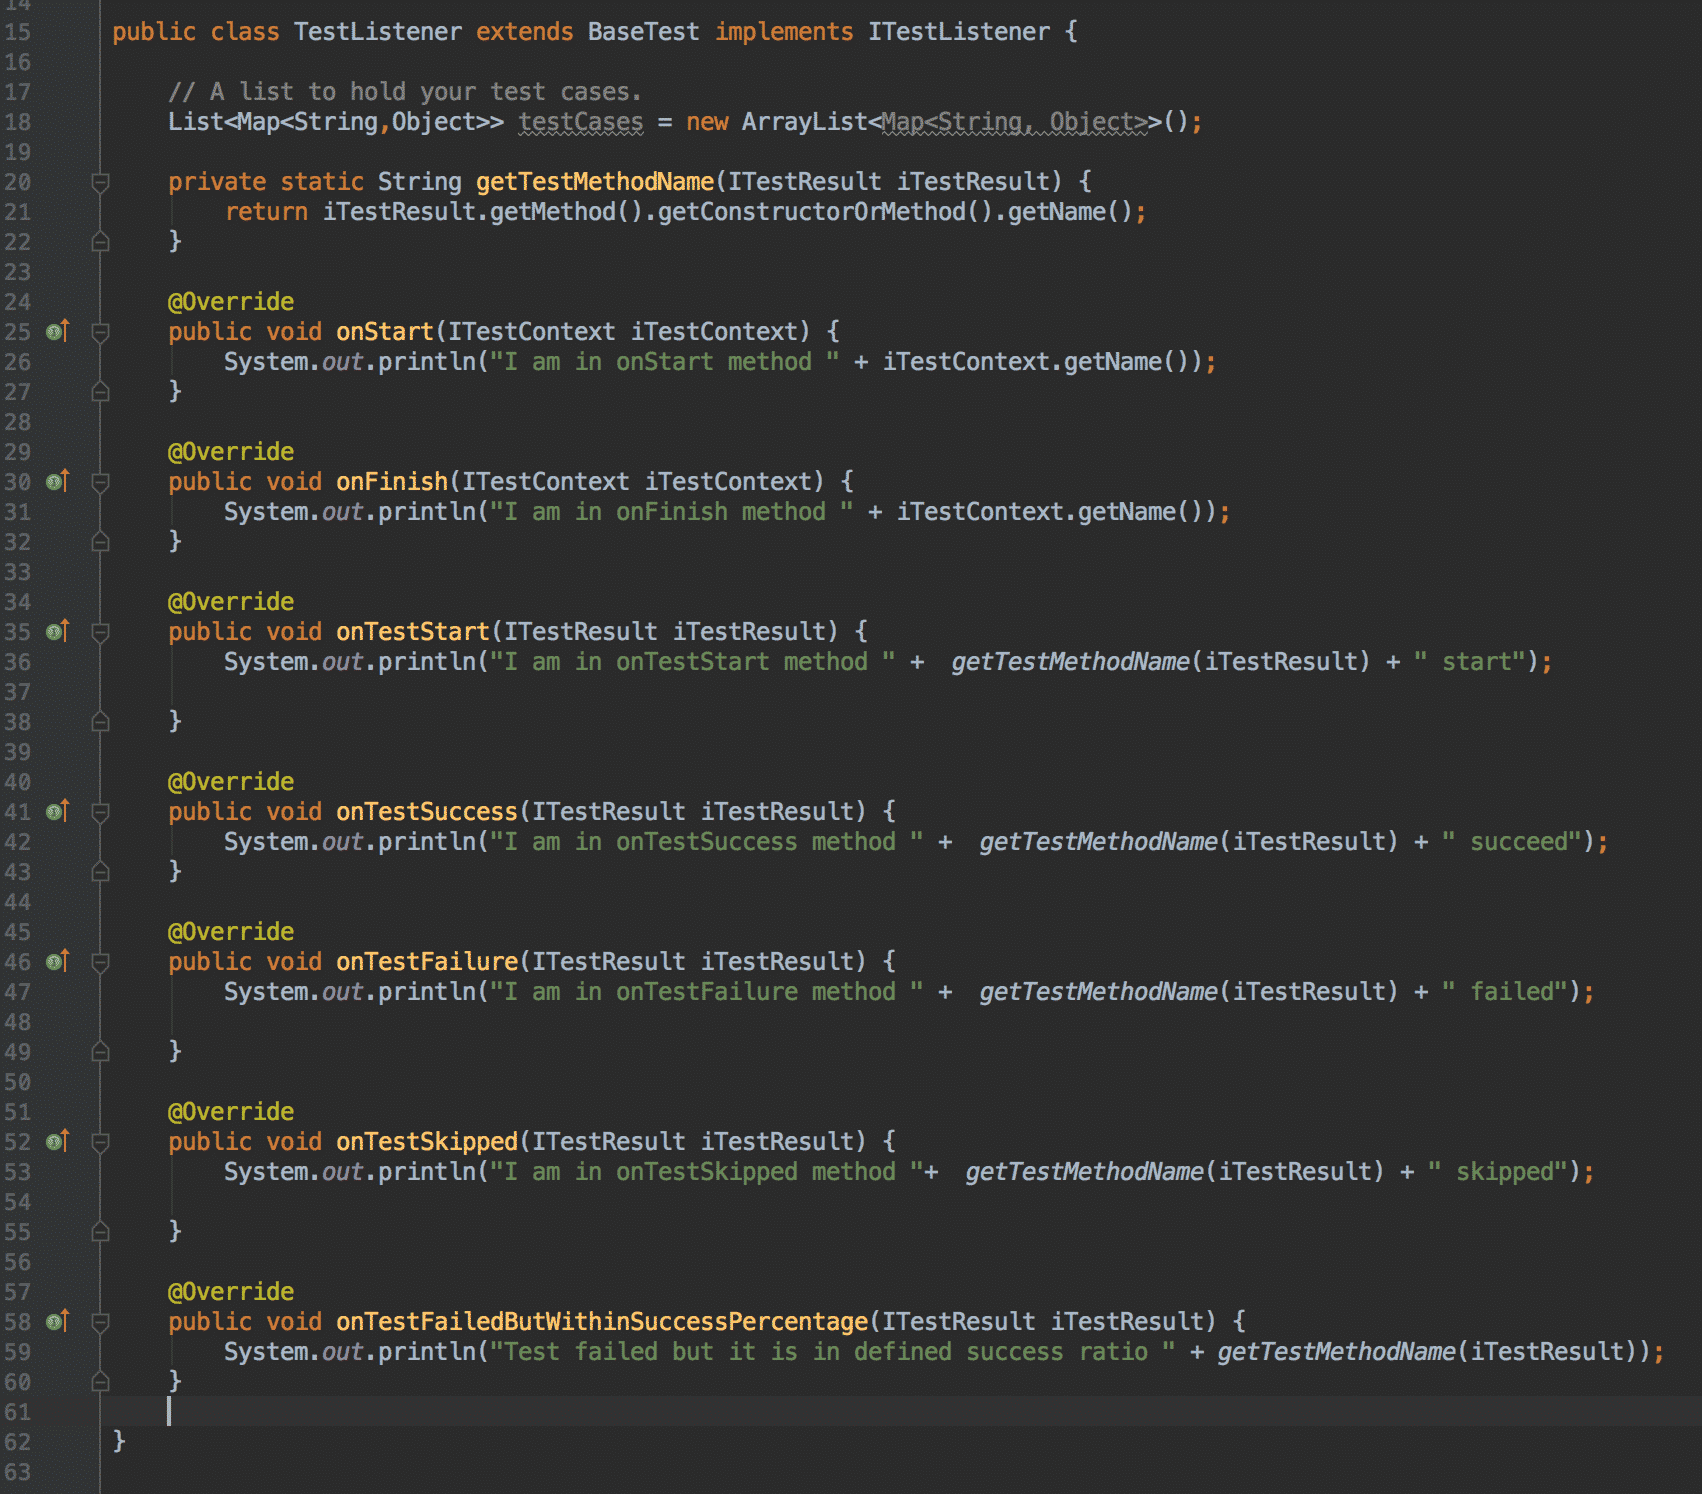
Here are how these two lines fit in within the TestNG TestListener class:
All that is left to do is add test cases to the list as the listener detects the end of a test. At the end of the entire test run, we will make a call to transfer results to Tesults.
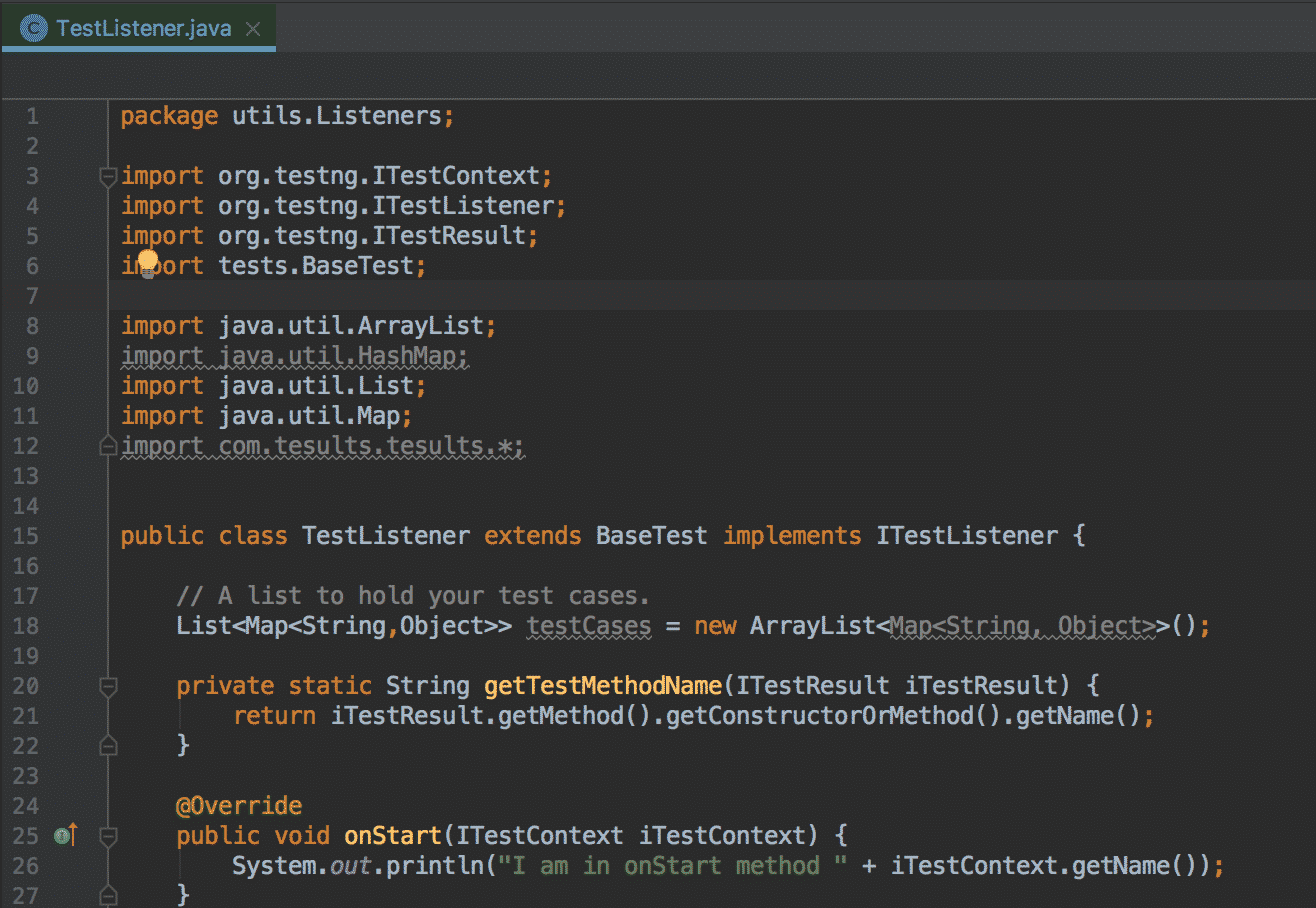
We can add tests in the onTestSuccess, onTestFailure and onTestSkipped methods of TestListener and make the upload to Tesults in the onFinish method. For context this is what the TestListener looks like when starting out (methods are empty):
This the code to add in onTestSuccess. Tesults accepts “pass”, “fail” or “unknown” as possible test results. The code for onTestFailure and onTestSkipped methods would be exactly the same except with a different result.
@Override public void onTestSuccess(ITestResult iTestResult) {
    Map<String, Object> testCase = new HashMap<String, Object>();
    testCase.put("name", getTestMethodName(iTestResult));
    testCase.put("suite", "TesultsExample");
    testCase.put("result", "pass");
    testCases.add(testCase);
}
Here it is within the class. This is explicit but clearly, you could refactor this to avoid duplication:
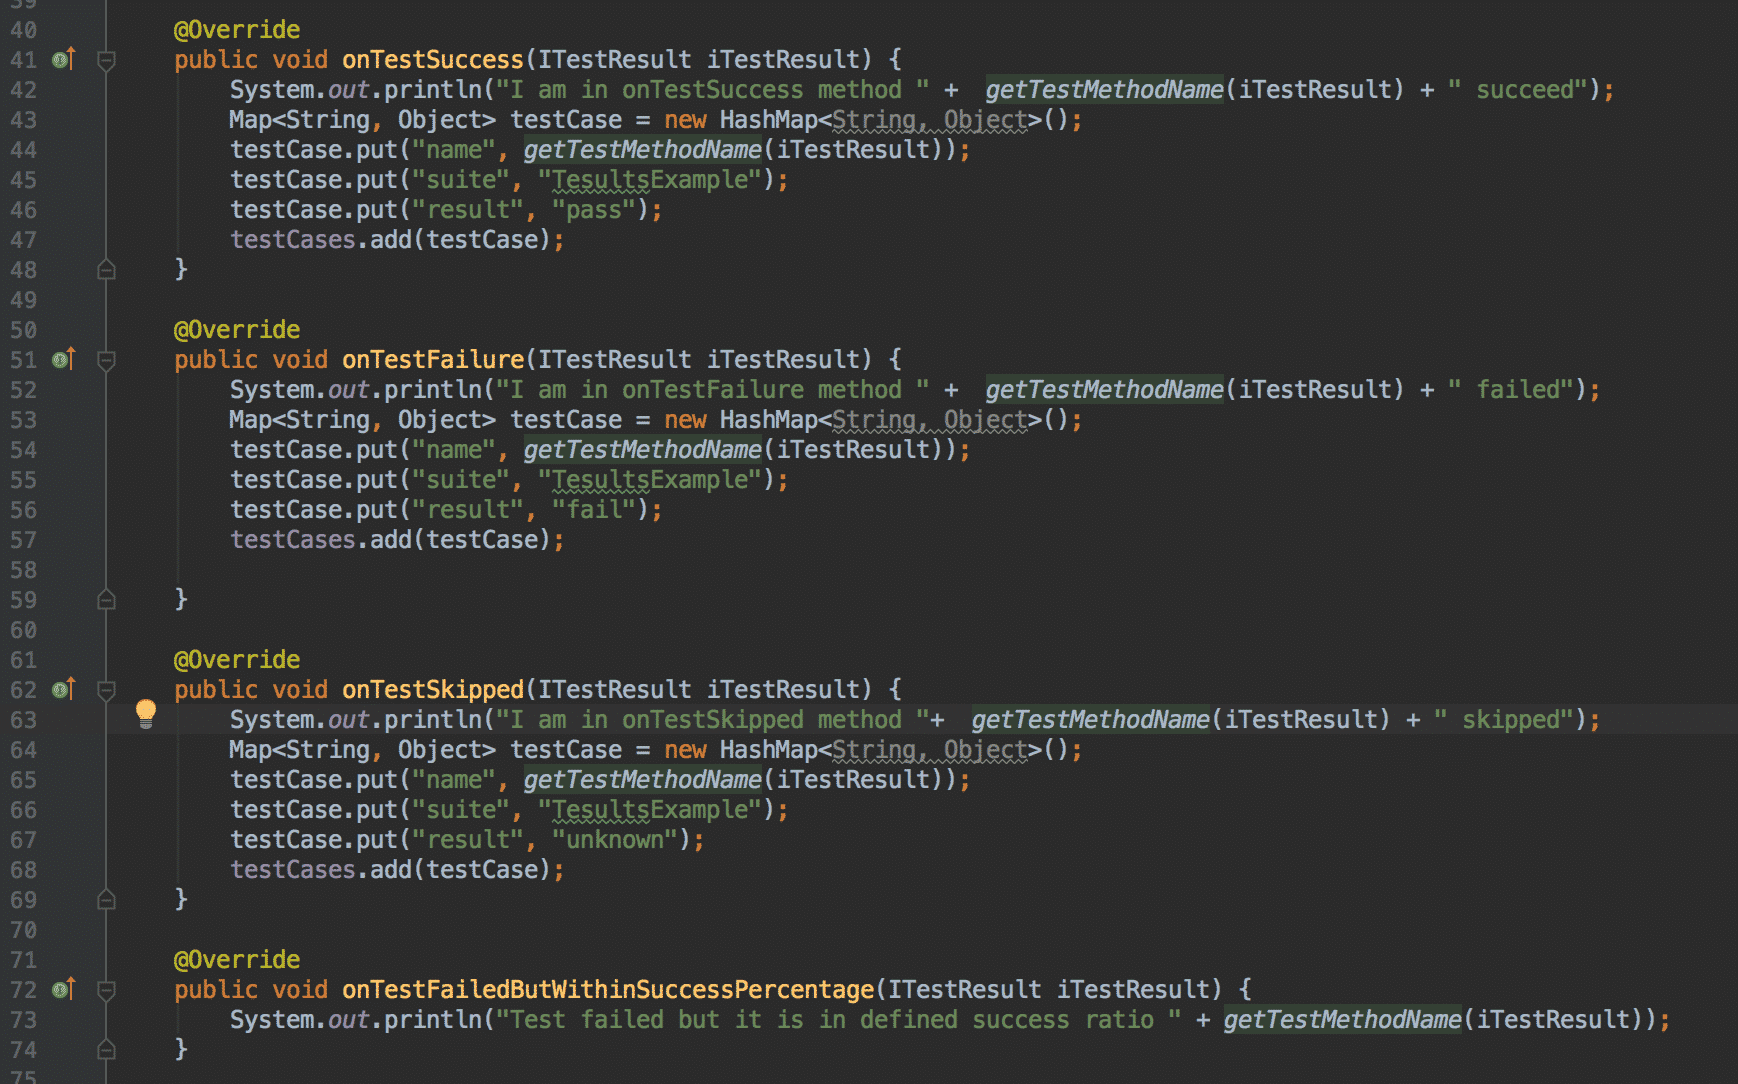
I have set the test case name and result, both of which are required and I have also set an optional suite property as well. There are various other optional fields that you can set including description, reason (a failure reason), params (test parameters), and files (files generated by the test case for upload such as log files or screenshots).
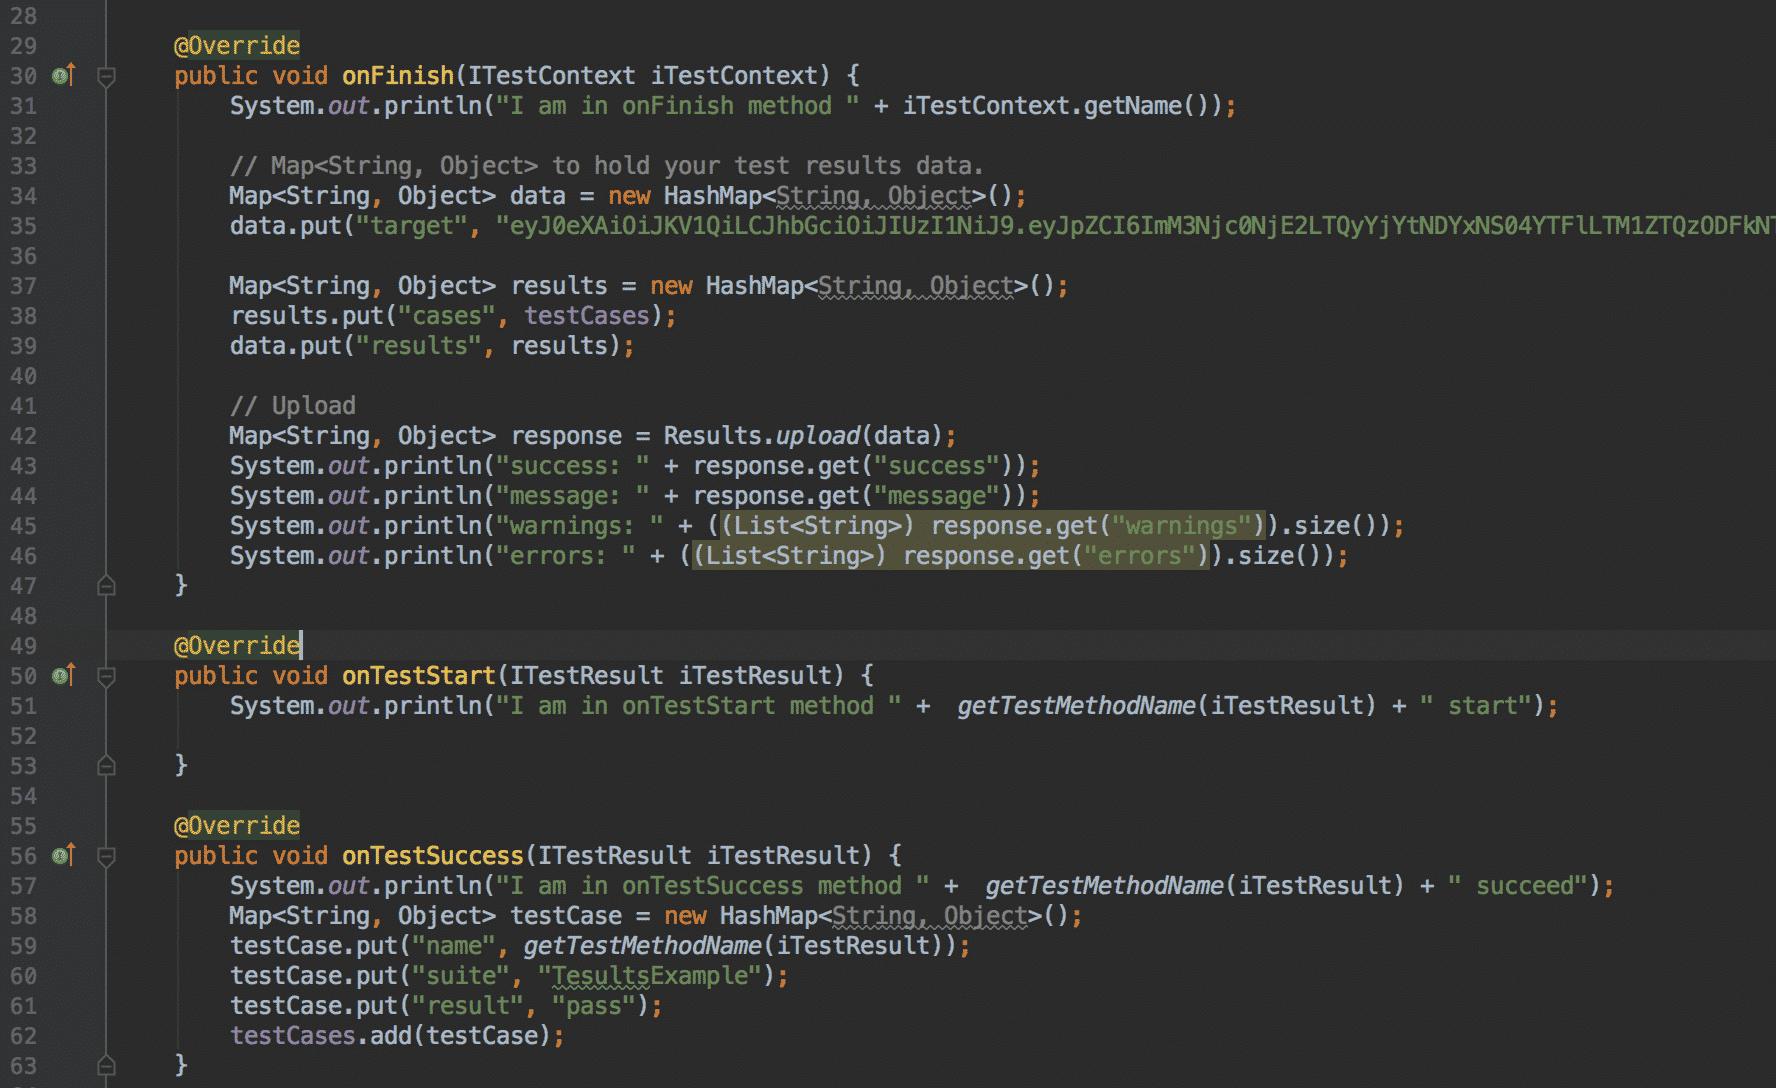
Now it’s time to add the last piece of code in the onFinish method to upload the test results to Tesults.
@Override public void onFinish(ITestContext iTestContext) {
    // Map<String, Object> to hold your test results data.
    Map<String, Object> data = new HashMap<String, Object>();
    data.put("target", "token");

    Map<String, Object> results = new HashMap<String, Object>();
    results.put("cases", testCases);
    data.put("results", results);

    // Upload
    Map<String, Object> response = Results.upload(data);
    System.out.println("success: " + response.get("success"));
    System.out.println("message: " + response.get("message"));
    System.out.println("warnings: " + ((List<String>) response.get("warnings")).size());
    System.out.println("errors: " + ((List<String>) response.get("errors")).size());
}
Remember that token I said needs to be copied earlier on? Well, now that is time to use it. Replace the “token” string in the code above with the pasted token as seen in the screenshot below.
That completes the integration. Now run the tests.
Step 4 – Run the Tests and Generate the Report on Tesults
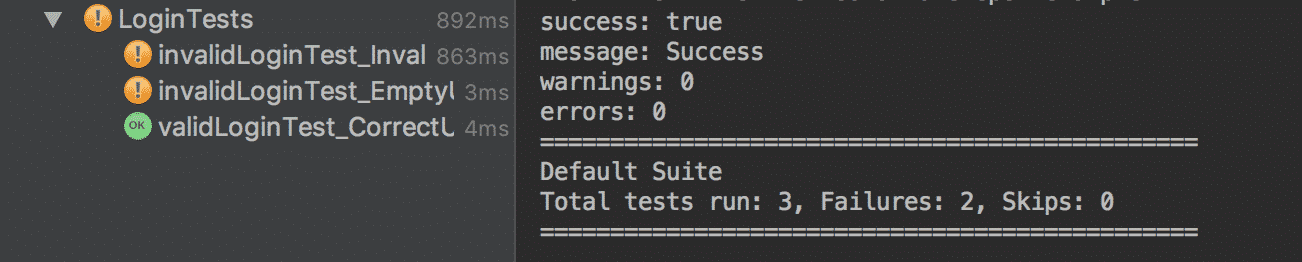
As can be seen in the output the upload to Tesults has been successful. Now we can go back to the web browser to Tesults and view the results at https://www.tesults.com/results
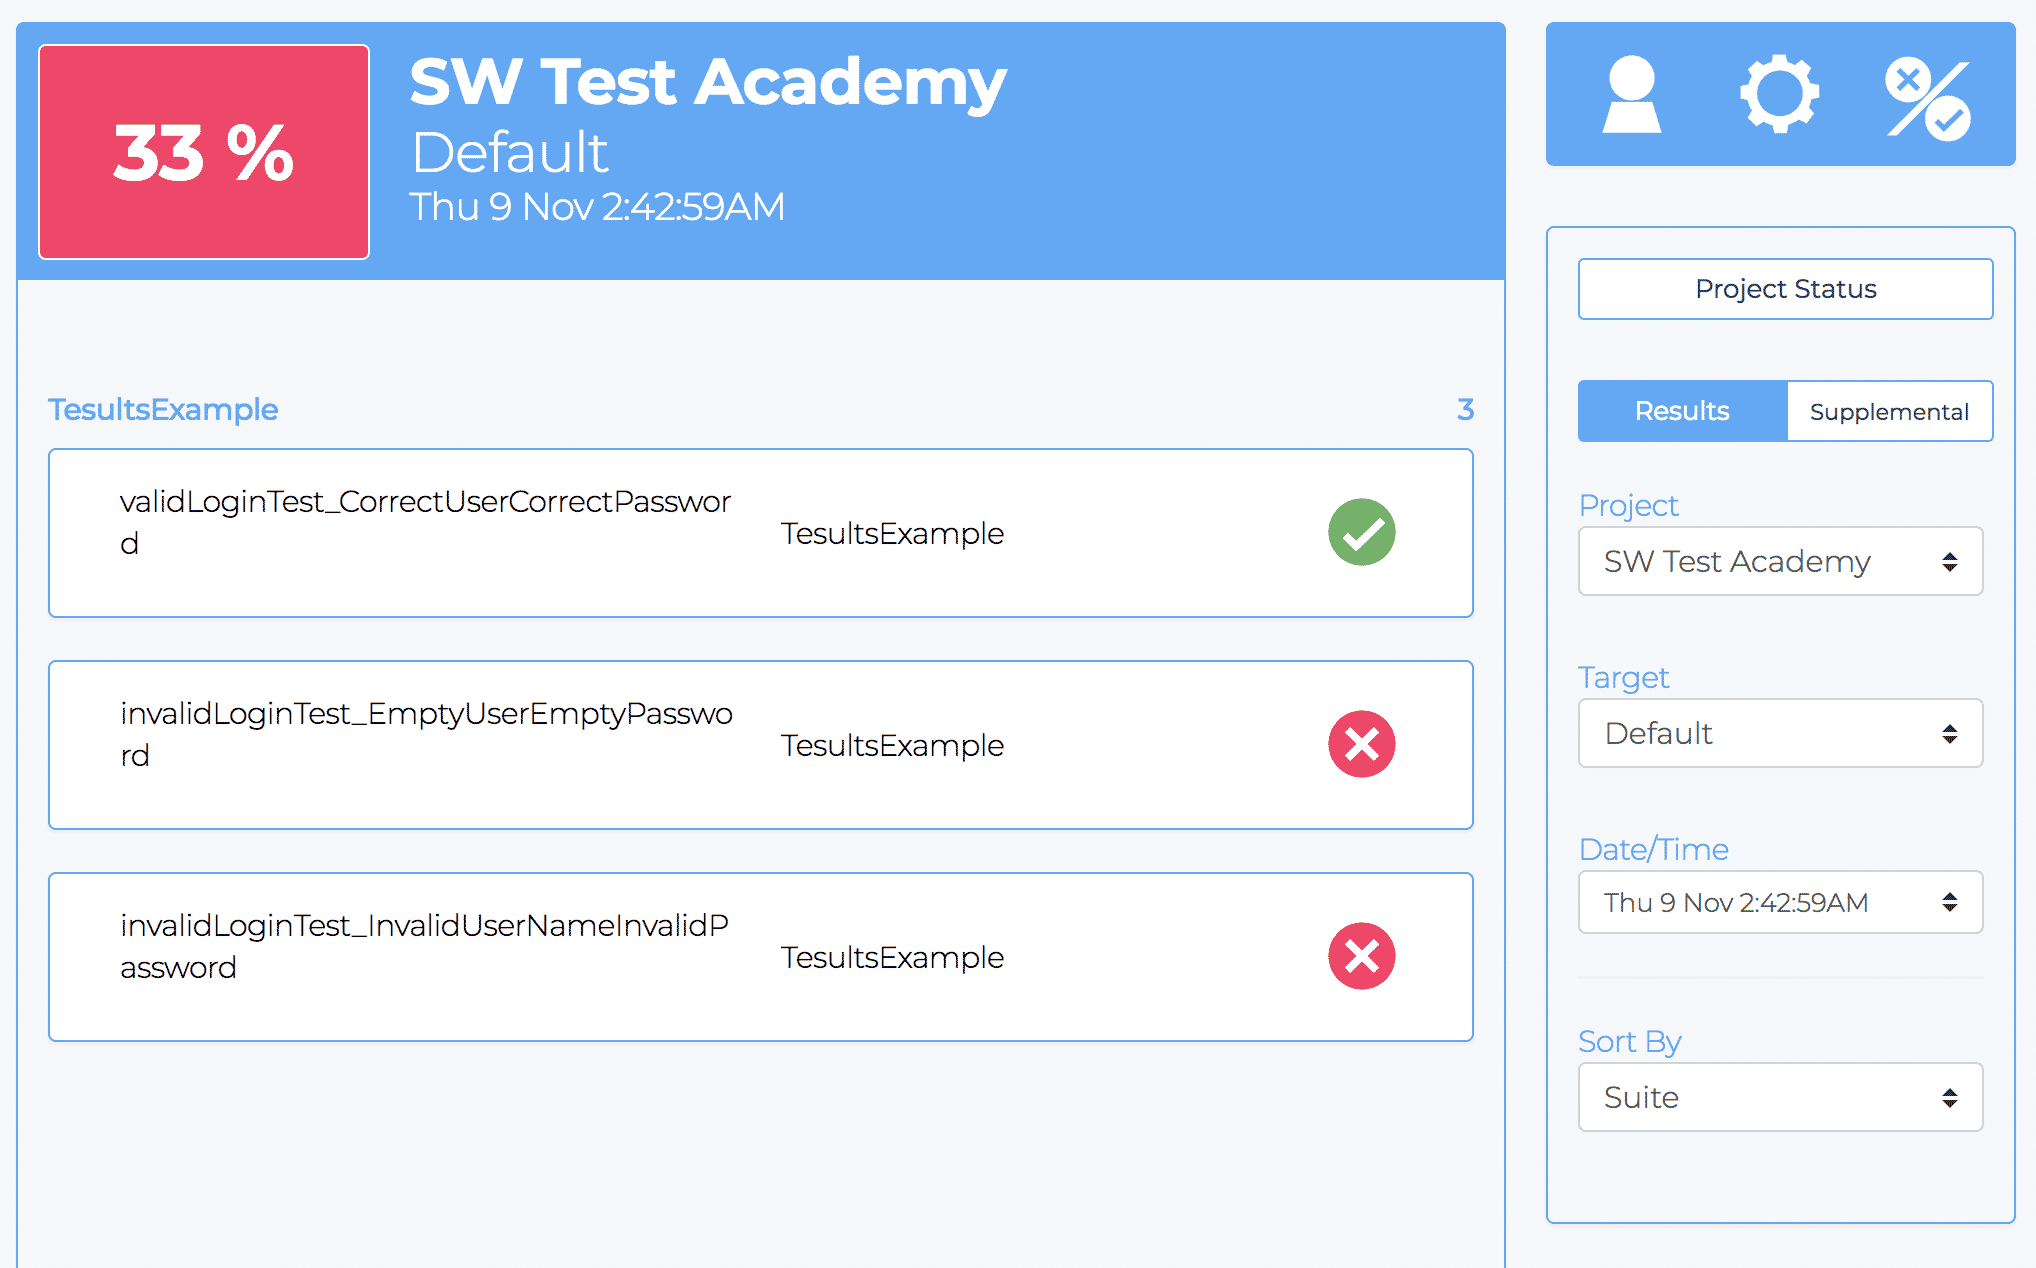
The results have successfully appeared. If I click on a test, I can see test case details. Note that because I only uploaded minimal data a number of the fields are empty such as description and failure reason.
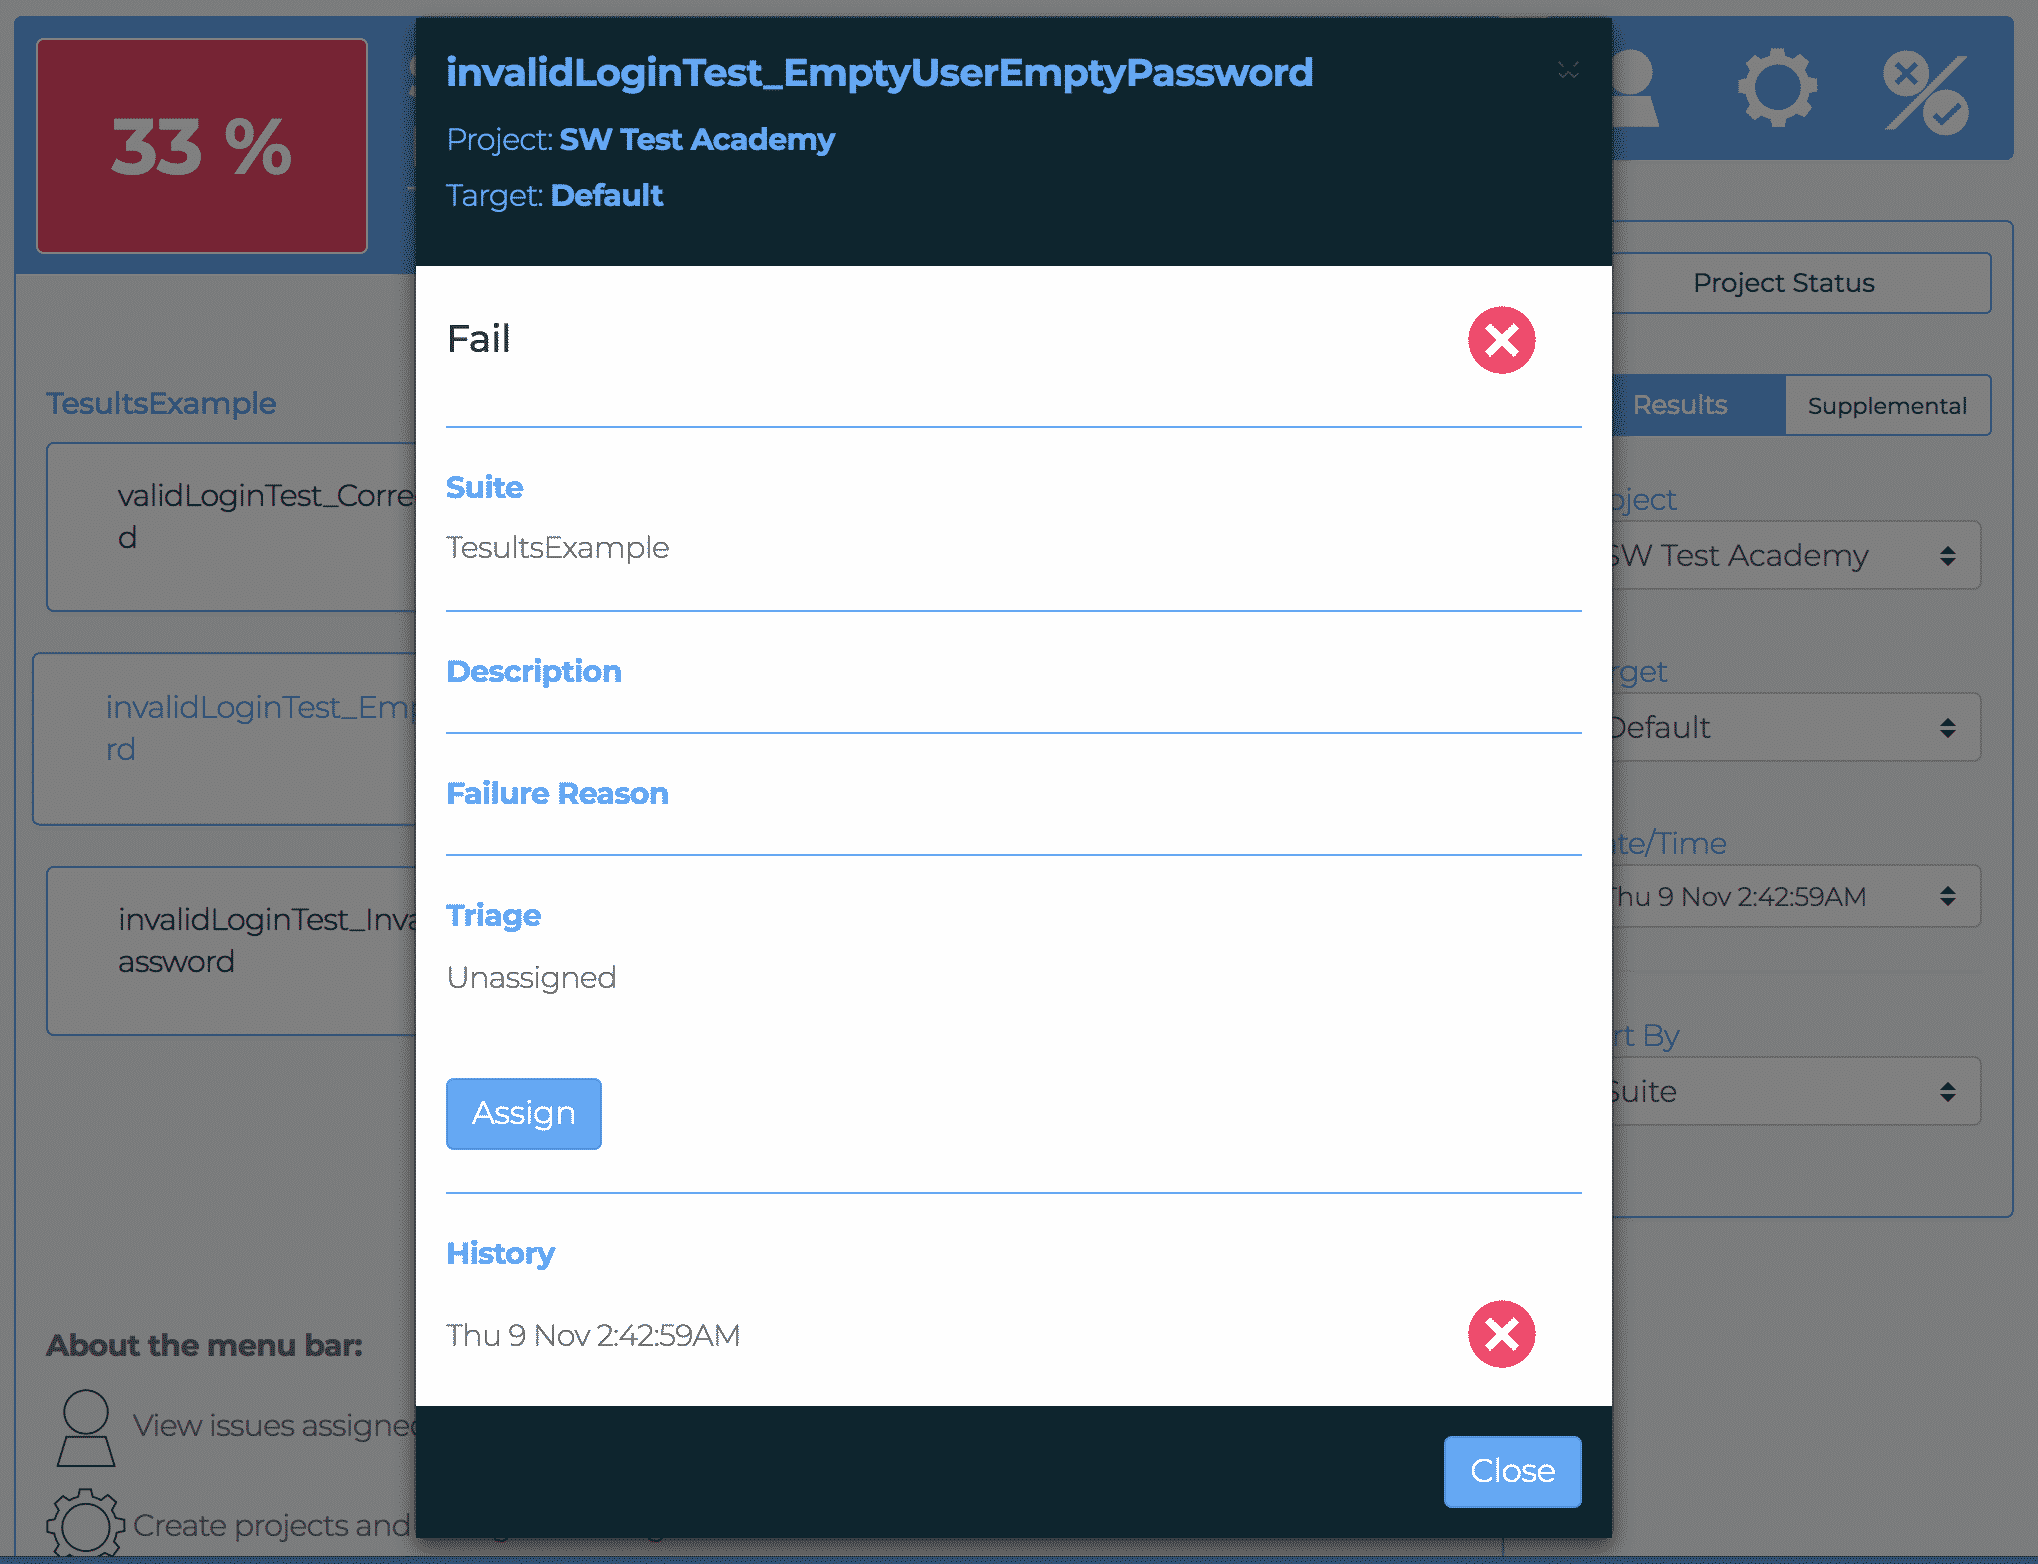
Adding these other properties is simple, just another line in the onTestSuccess, onTestFailure and onTestSkipped methods.
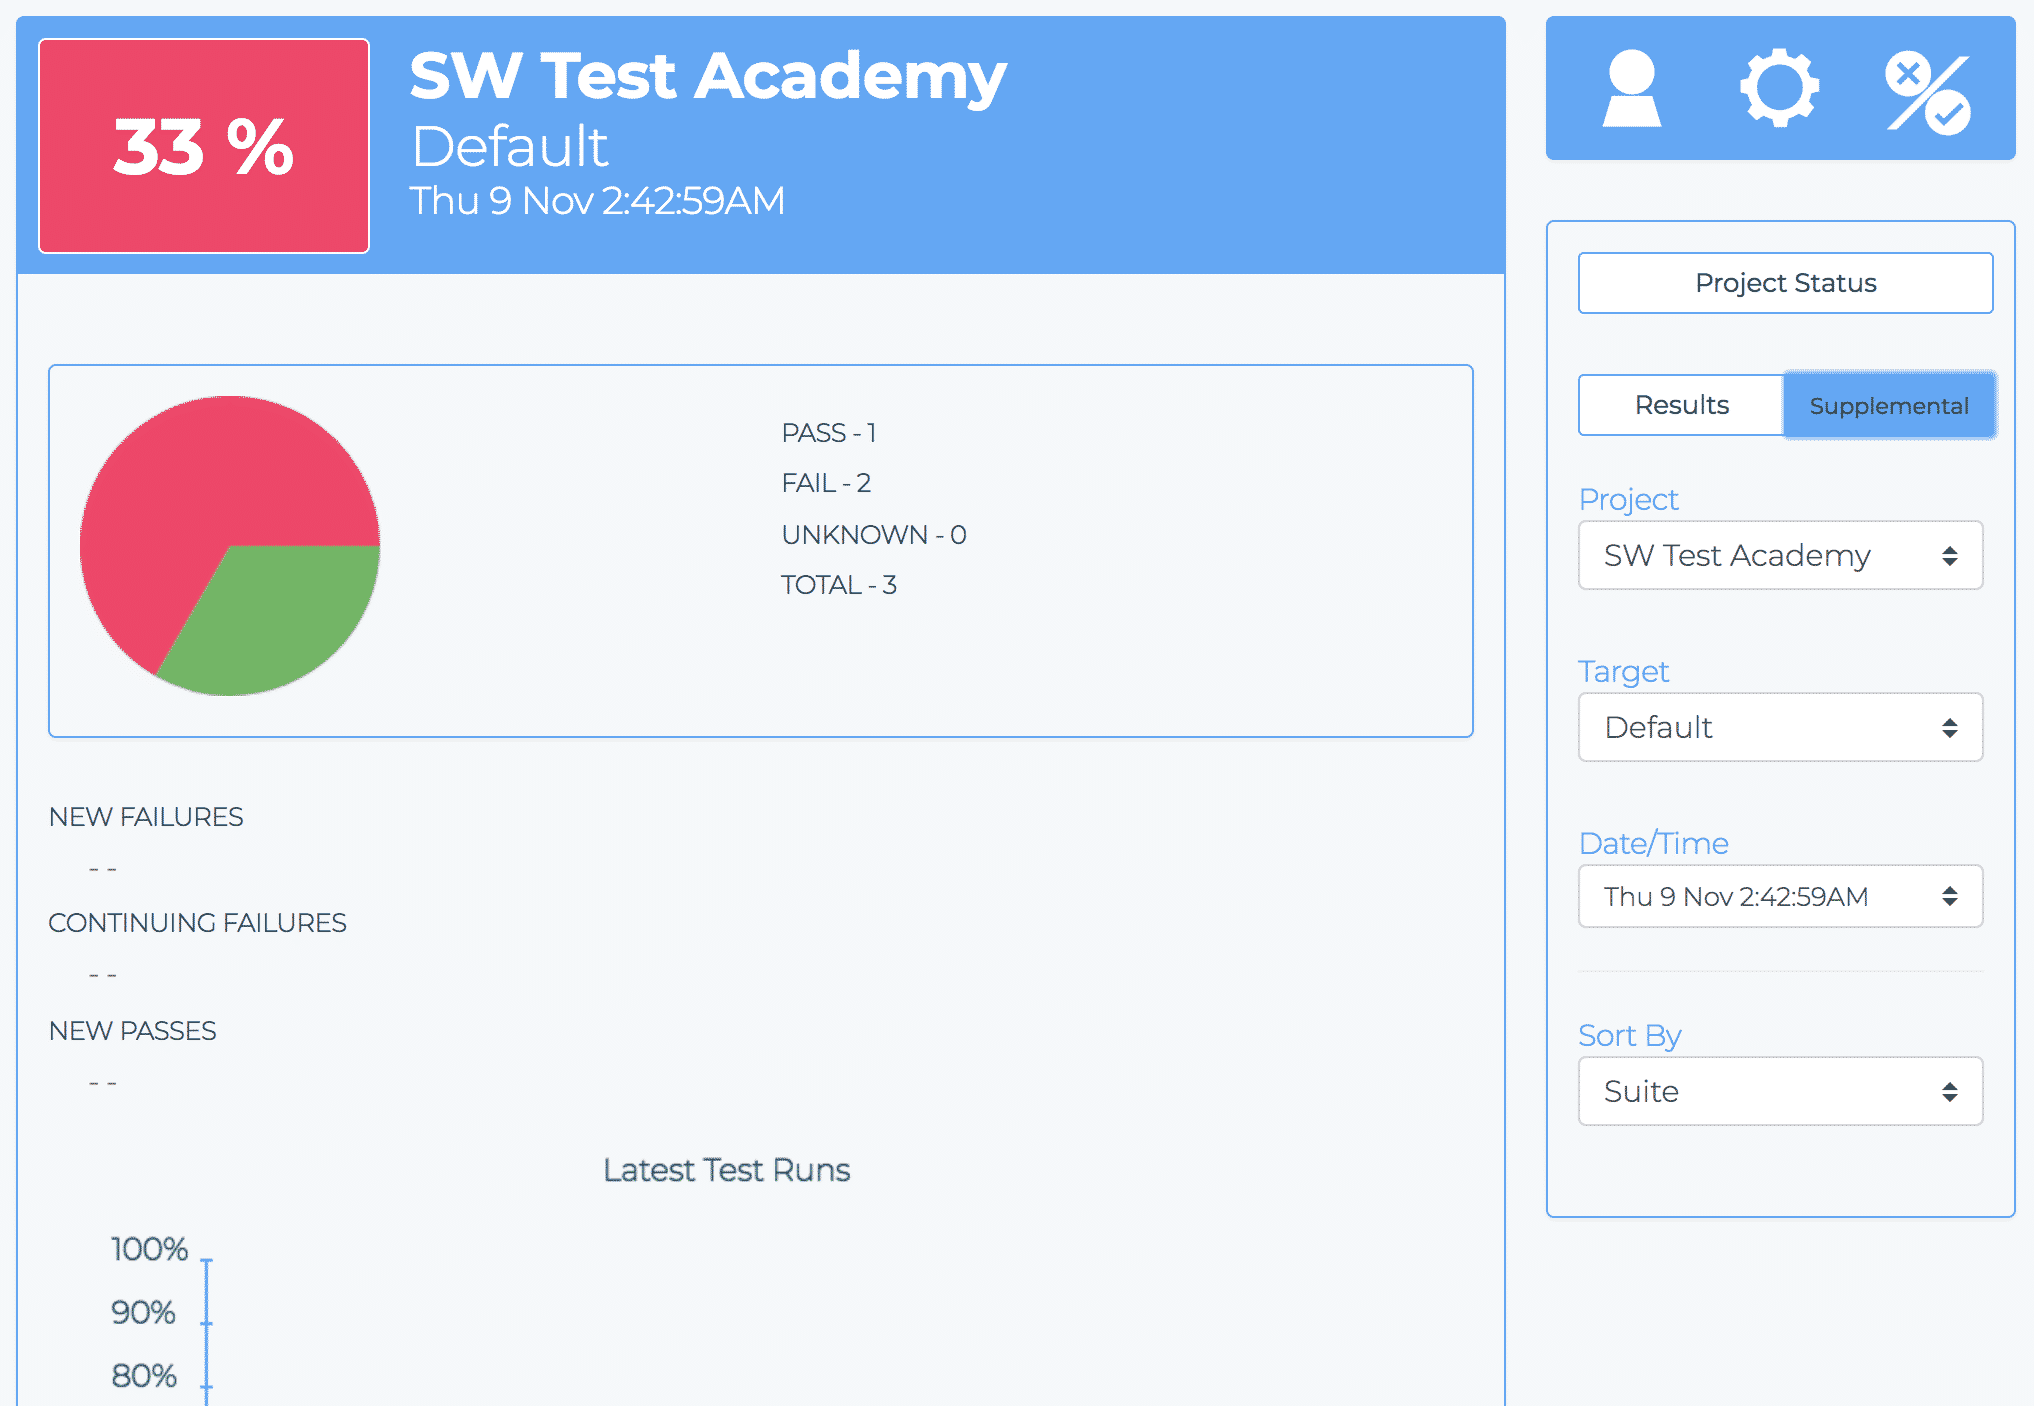
The view above becomes very useful when several test runs have occurred because you can be notified of new and continuing failures. Tesults can report parameters, you can also store test and build files like logs and screenshots that will then be viewable the same way. You can add other people who work with you to your project and assign test failure tasks, you can set up targets (buckets) for the test run properties to have results grouped by each platform and configuration. There are several features but covering everything is out of scope for this article. The purpose of this article was to describe how to integrate Tesults reporting with TestNG and as can be seen it a mixture of setting up a project on the web app and then adding some code to the TestNG Listener.
Selenium Webdriver Tutorial Series
[fusion_widget_area name=”avada-custom-sidebar-seleniumwidget” title_size=”” title_color=”” background_color=”” padding_top=”” padding_right=”” padding_bottom=”” padding_left=”” hide_on_mobile=”small-visibility,medium-visibility,large-visibility” class=”” id=””][/fusion_widget_area]
Note: This article is written in collaboration with Ajeet Dhaliwal. Thanks Ajeet for his contributions to swtestacademy.com
Thanks.
-Onur

Onur Baskirt is a Software Engineering Leader with international experience in world-class companies. Now, he is a Software Engineering Lead at Emirates Airlines in Dubai.