This article is a comprehensive and pain-free Appium start guide using GenyMotion emulator, TestNG framework, and IntelliJ IDEA. At the end of the article, you can also find how to do mobile automation with real devices.
Onur’s Advice: This post is outdated but it comprises of good information thats why I am keeping it in swtestacademy website but I highly suggest starting to Appium with this Appium Tutorial. If you face any problem, please write a comment and share with us.
Prerequisites
- Appium for Windows
- Android SDK
- JAVA JDK
- IntelliJ
- GenyMotion Emulator
- RapidEE (For changing Windows environmental variables easily.)
Step by Step Instructions
Step-1: Install JAVA JDK
Link: http://www.oracle.com/technetwork/java/javase/downloads/jdk8-downloads-2133151.html
It is described in this article at step-4.
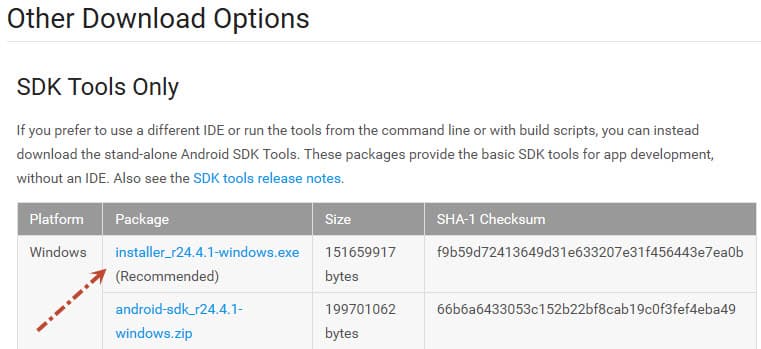
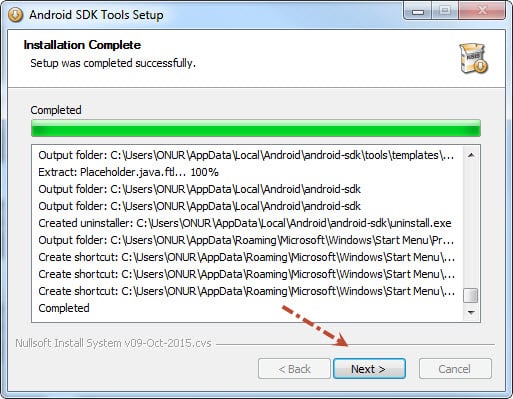
Step-2: Install Android SDK (Stand-Alone)
Link: http://developer.android.com/sdk/index.html
Install SDK Tools Only version.
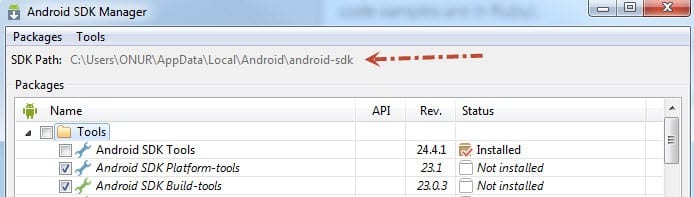
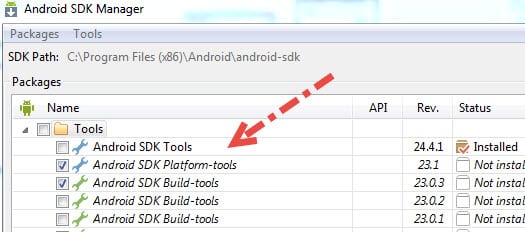
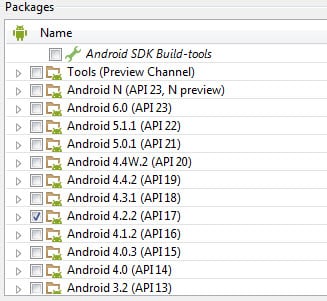
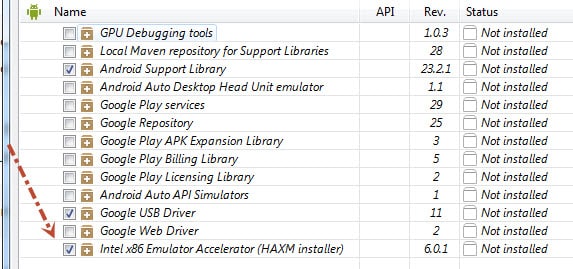
Then, check below options and install them:
- Android SDK Platform-tools
- Android SDK Build-tools
- Android 4.2.2 (API 17)
- Intel x86 Emulator Accelerator (HAXM installer) [fusion_builder_container hundred_percent=”yes” overflow=”visible”][fusion_builder_row][fusion_builder_column type=”1_1″ background_position=”left top” background_color=”” border_size=”” border_color=”” border_style=”solid” spacing=”yes” background_image=”” background_repeat=”no-repeat” padding=”” margin_top=”0px” margin_bottom=”0px” class=”” id=”” animation_type=”” animation_speed=”0.3″ animation_direction=”left” hide_on_mobile=”no” center_content=”no” min_height=”none”][It accelerates built-in emulator]
Create new environmental variable as ANDROID_HOME and assign it with Android SDK Path.
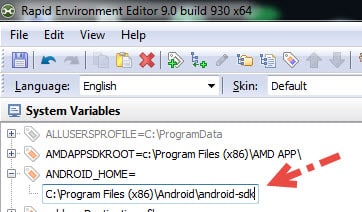
Append Android SDK directory, tools and platform-tools paths to system Path variable.

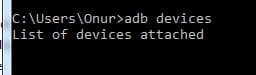
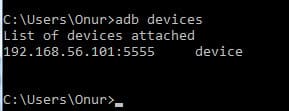
In order to test settings, open command prompt and run adb devices command. You will see below result.
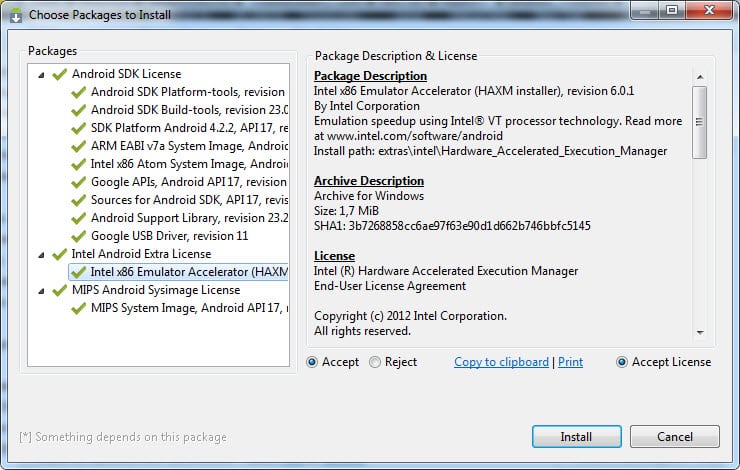
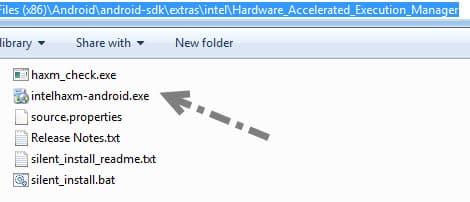
Go to, extras\intel\Hardware_Accelerated_Execution_Manager under android SDK folder and install intelhaxm-android.exe . It accelerates built-in emulators.
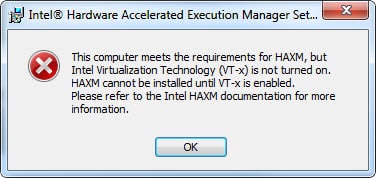
Note: If your Intel Virtualization Technology(VT-x) option is enabled in BIOS. You should restart your computer and disable it in your computer’s BIOS.
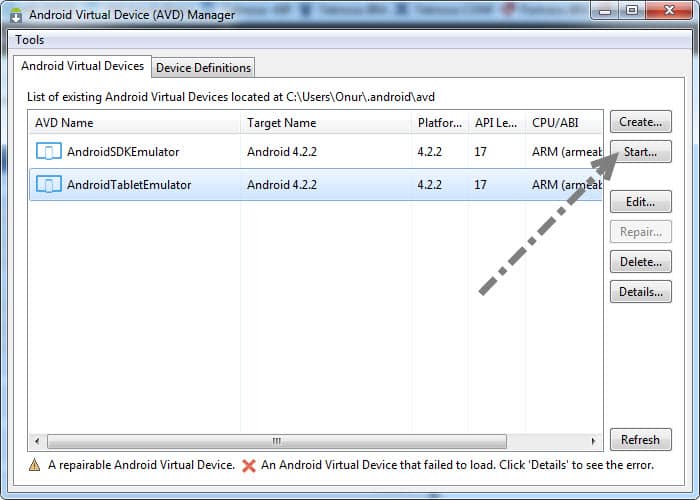
Step-3: Create Built-in Emulator (or you can use GenyMotion (Fast) Emulator ->> Step-4)
Open AVDManager.exe under android SDK path. Then, click “Create” button. After that, set the values as shown in the figure below and click “OK”.

You can start emulator by clicking “Start” button.

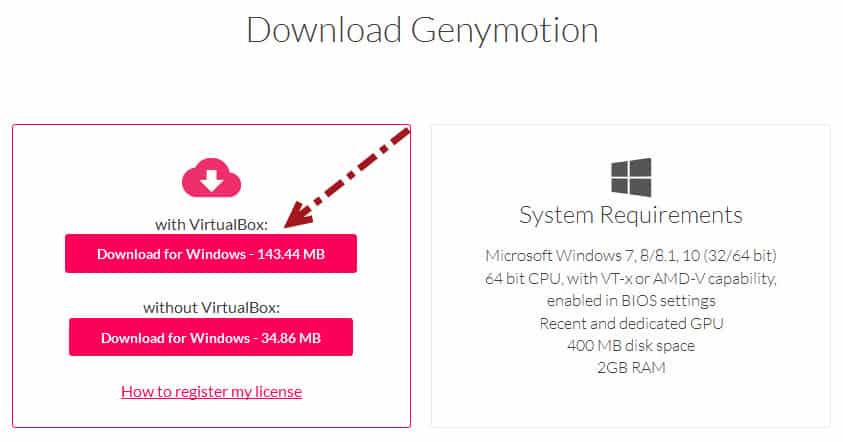
Step-4: Install and Create Genymotion Emulator (Fast Emulator)
Link: https://www.genymotion.com/
Go to Pricing Page and Select Individual (BASIC) plan and sign-in.

Then, click to “with VirtualBox: Download for Windows” button to download it. Then, install it.
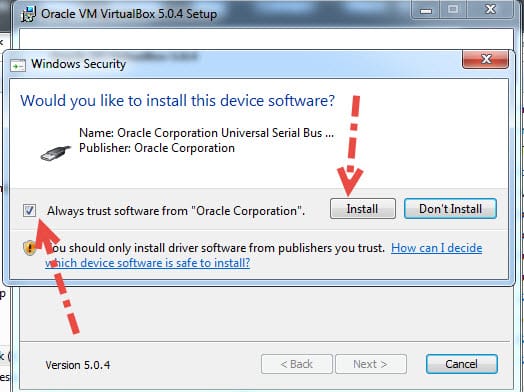
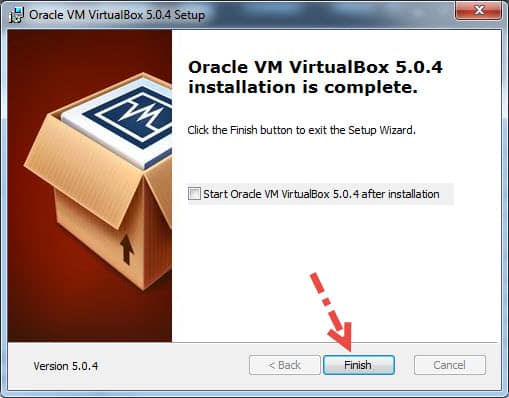
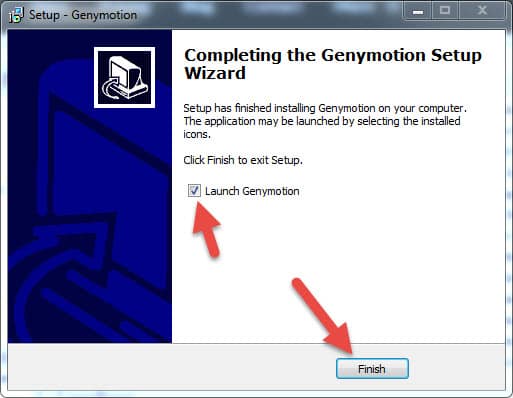
During installation, trust Oracle Corporation Universal Serial Bus Driver and finish installation and launch Genymotion.
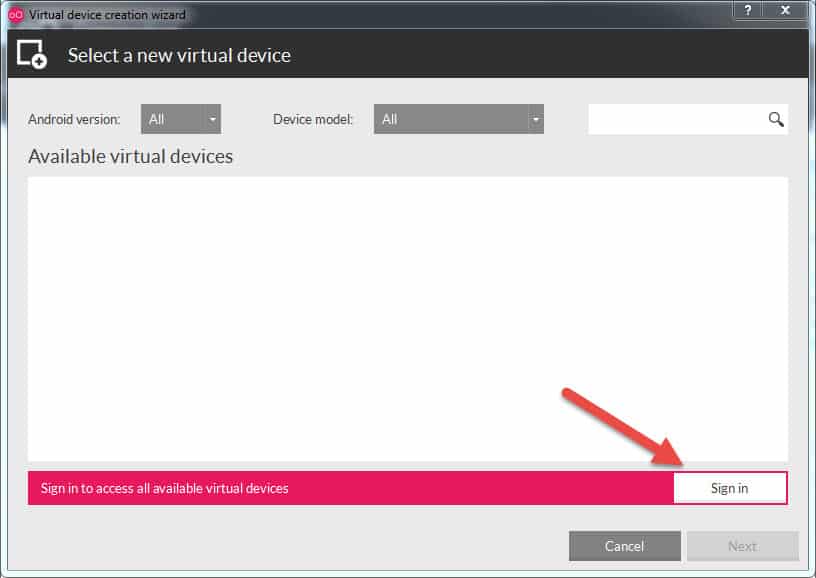
Click “+” sign to add a new device. First, you should sign in.
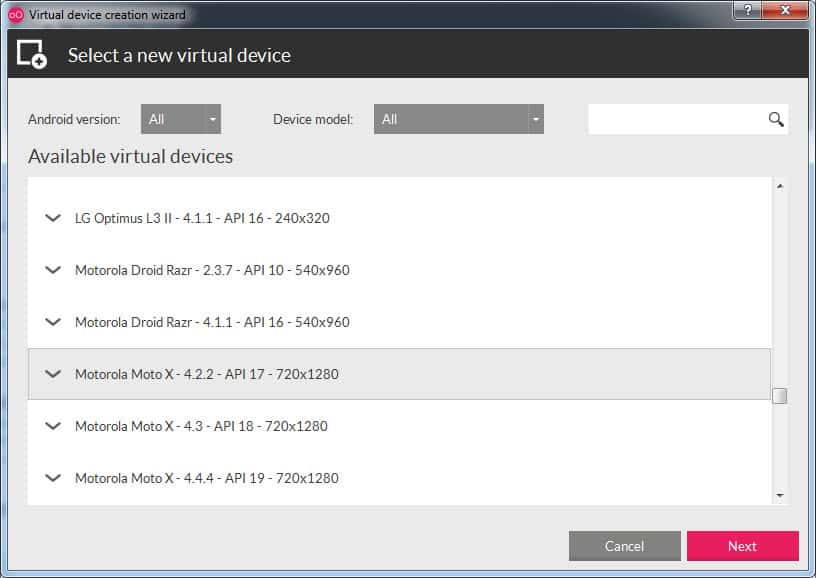
Select a device (I prefer a device with low resolution).
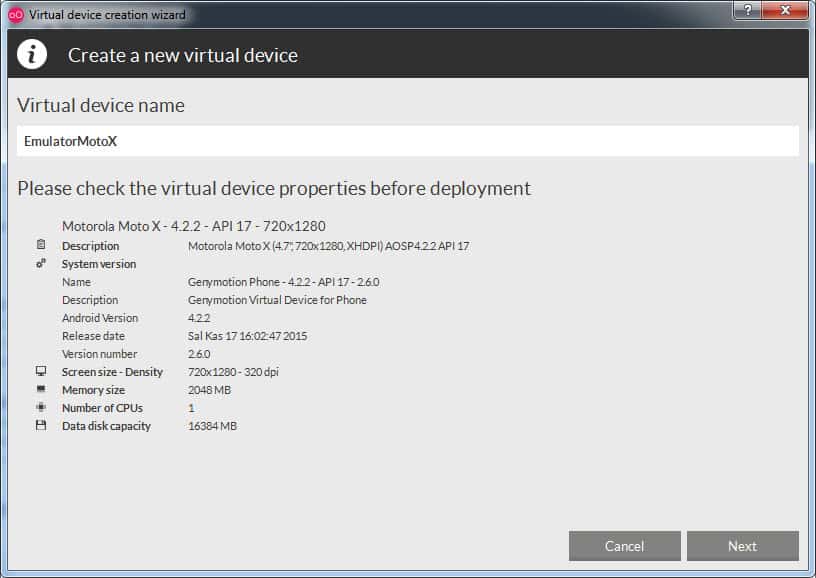
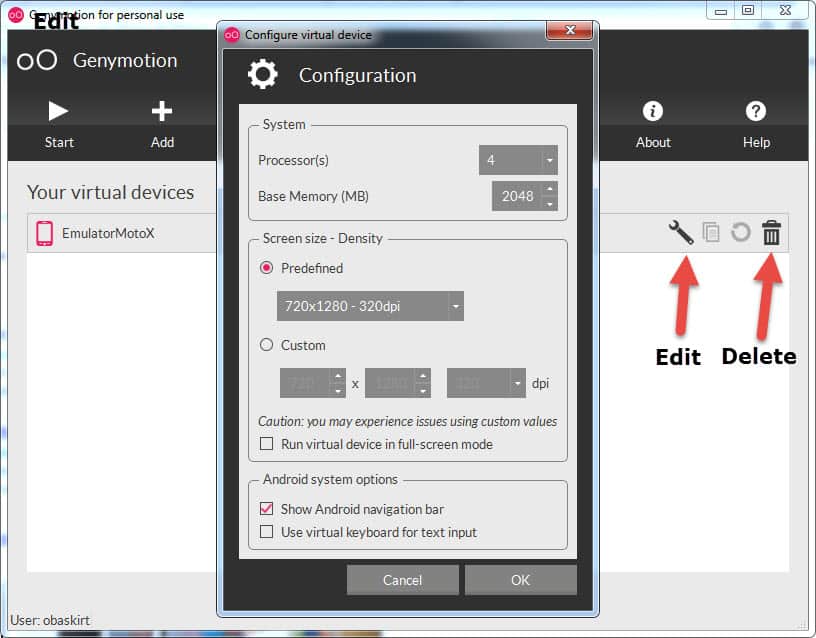
If you want, you can Edit and Delete your emulator anytime you want.
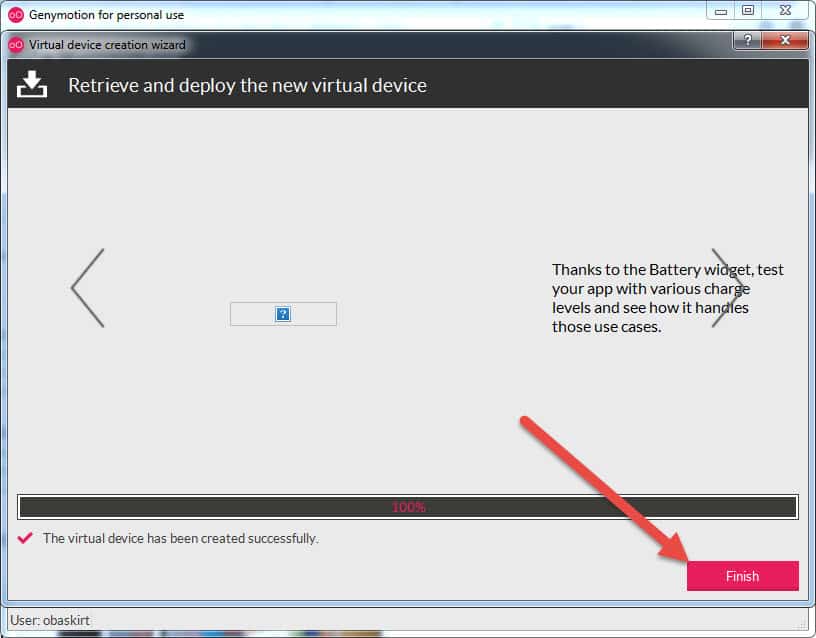
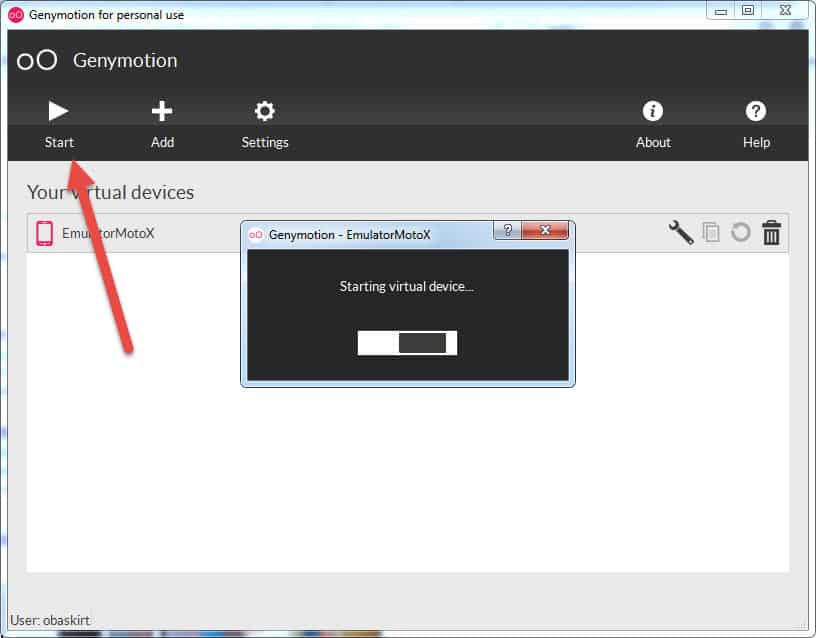
Click Start to start emulator. Genymotion is very fast emulator. I highly suggest you to use it.
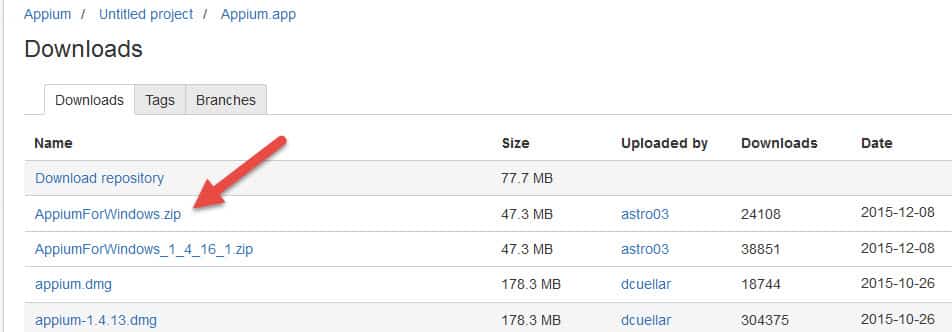
Step-5: Install Appium
Link: https://bitbucket.org/appium/appium.app/downloads/
Download the latest release.
Extract the zip file and run the installer (appium-installer.exe)

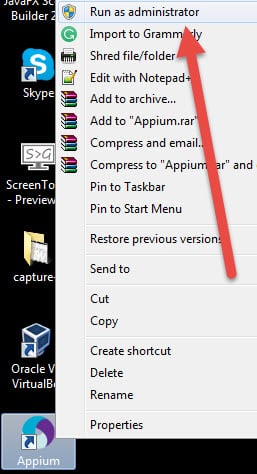
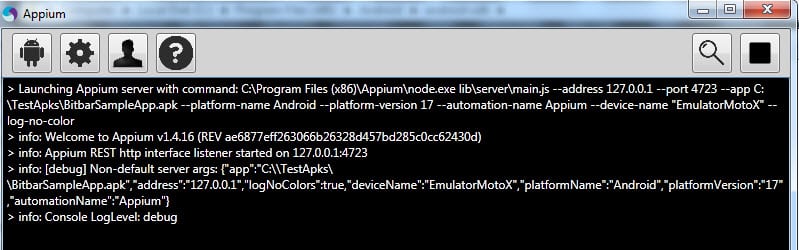
Step-6: Open Appium & Emulator and Integrate Them
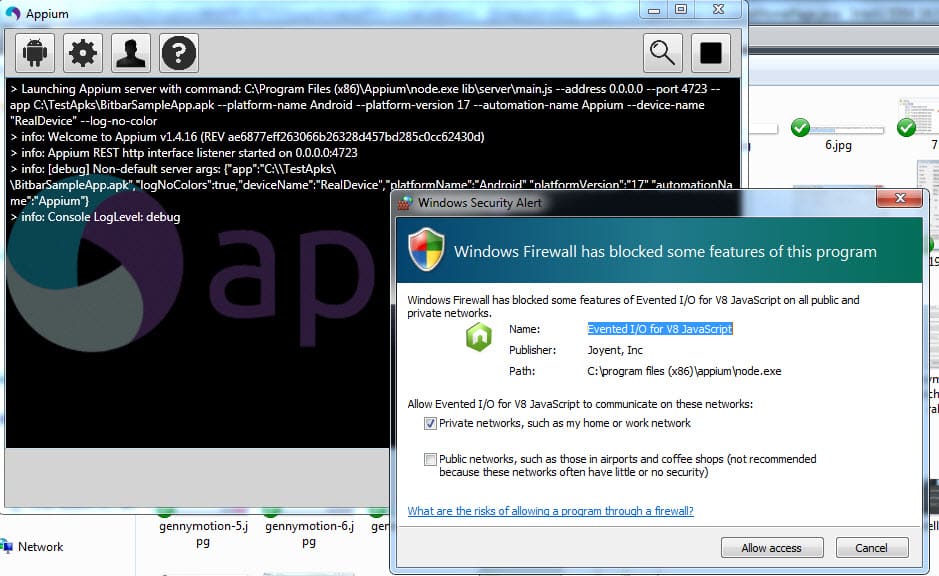
After Appium installation, right click Appium shortcut and click “Run as administrator”
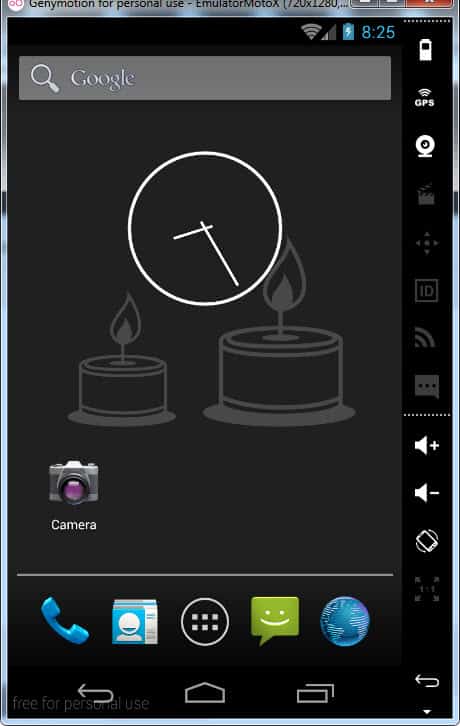
Then, Start your Genymotion emulator.
Note: Don’t start Genymotion “Run as administrator” mode!!! If you run as administrator, you cannot drag and drop any item into emulator. Reference link: http://stackoverflow.com/questions/20002138/genymotion-2-0-drag-and-drop
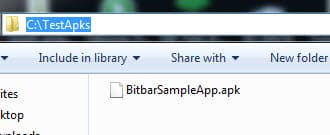
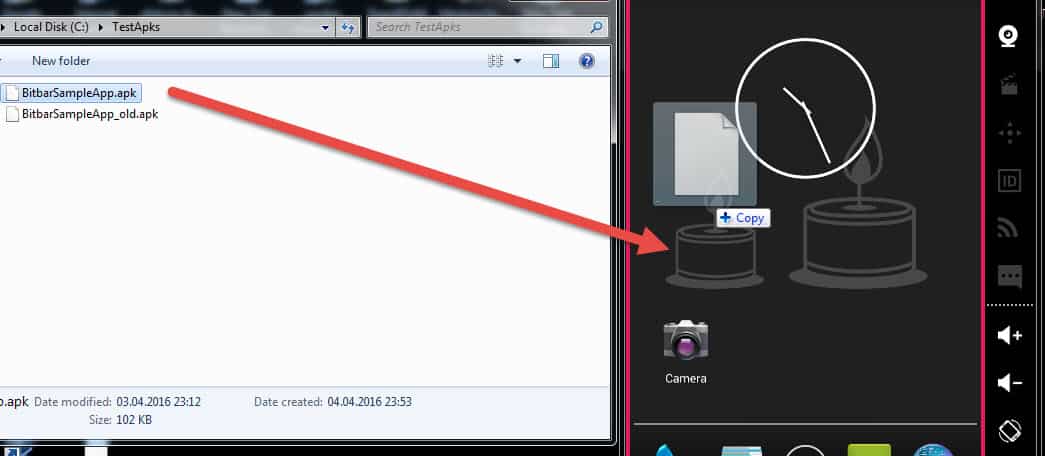
Then, download sample .apk file from here. Andv then save it under “C:\TestApks”
When you type “adb devices” on the command prompt you will see the Genymotion emulator as shown below.
We should install sample apk into our emulator. First, open virtualbox and do the below settings.
Then, download Genymotion-ARM-Translation_v1.1 from the link below.
http://forum.xda-developers.com/attachment.php?attachmentid=2680937&d=1397258016
and download the gapps-jb-20130813-signed.zip from the link below.
http://en.osdn.jp/projects/sfnet_rommirrors/downloads/gapps-jb-20130813-signed.zip/
Then, follow the guide here to flash the emulator with these files.
Here is the video that shows how to do this: https://www.youtube.com/watch?v=vZKiqJyLBkU
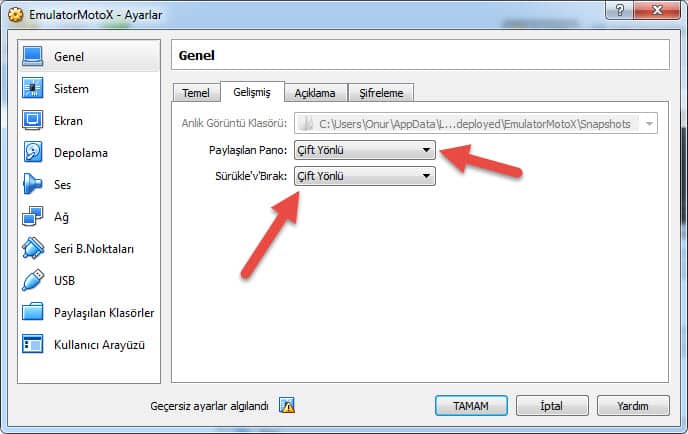
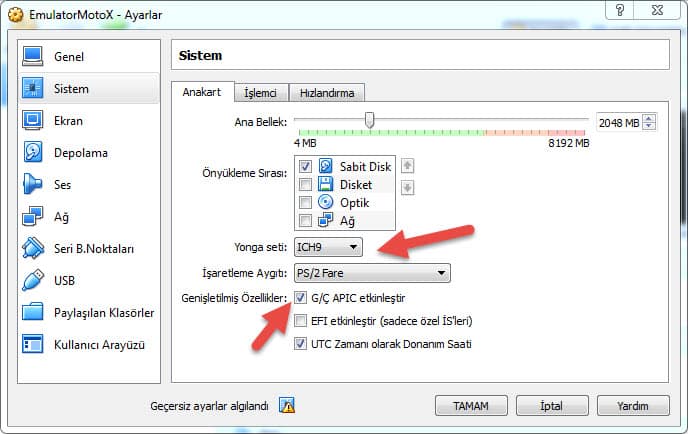
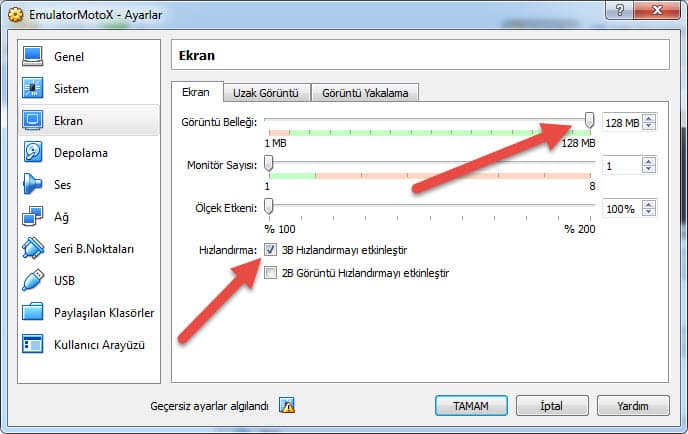
After these settings, go to Settings on the emulator and apply the below settings:
Then drag and drop the BitbarSampleApp.apk into Genymotion.
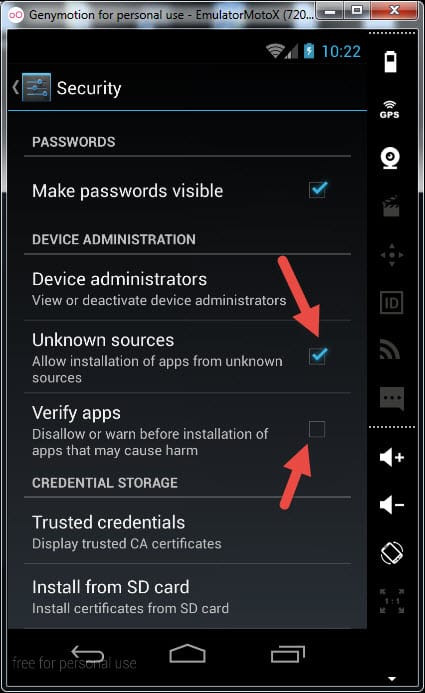
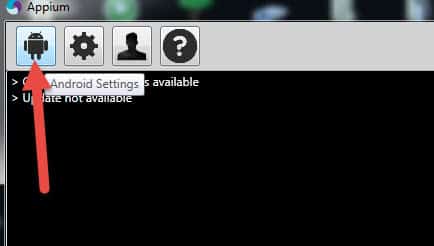
Click Android Settings on the Appium window.
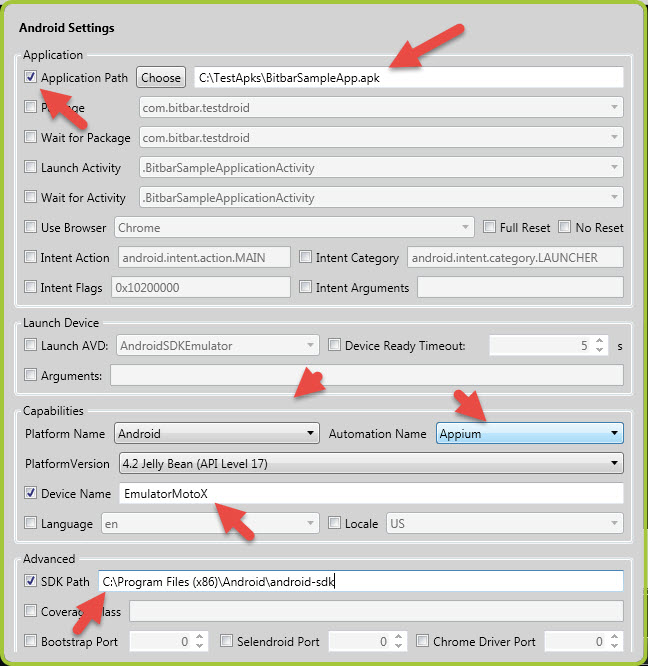
And then, do the below settings as shown below.
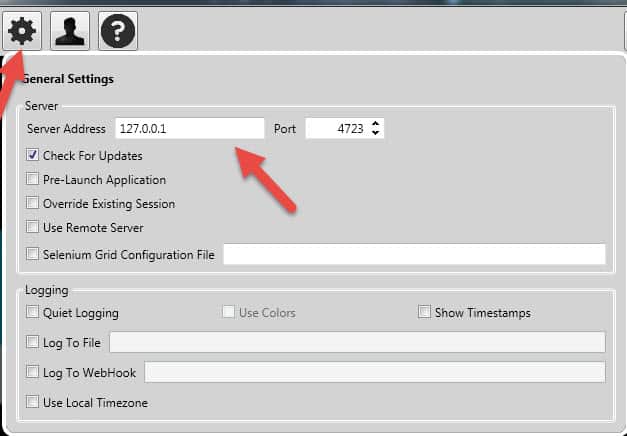
Then, Click settings icon and set the below settings.
Then, click to the Run icon on Appium.

You should see the below window.
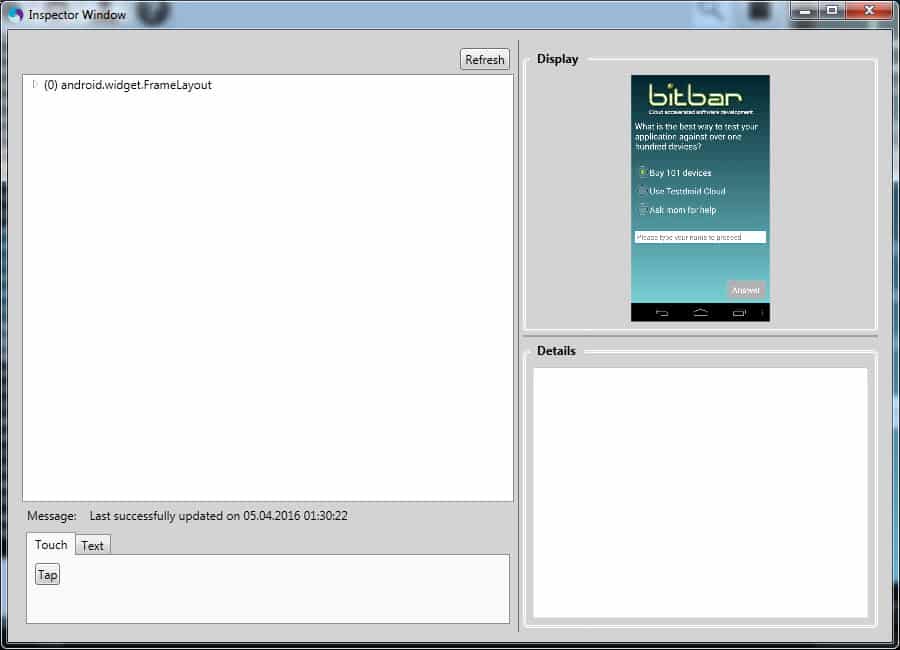
After clicking magnifier icon, inspector window will open, and then click “Refresh” button. You will see our test application on the inspector window.
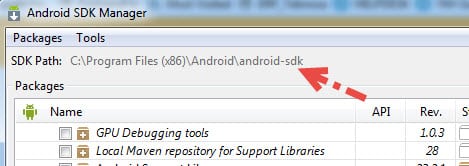
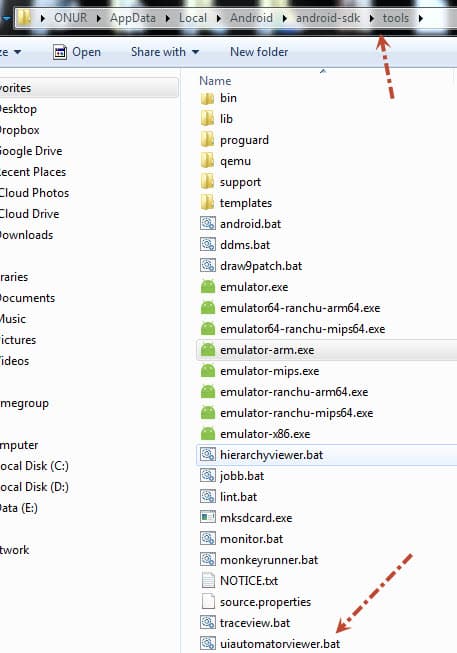
Alternative Way to Locate Elements: We can also go to “C:\Program Files (x86)\Android\android-sdk\tools” and open “uiautomatorviewer.bat”
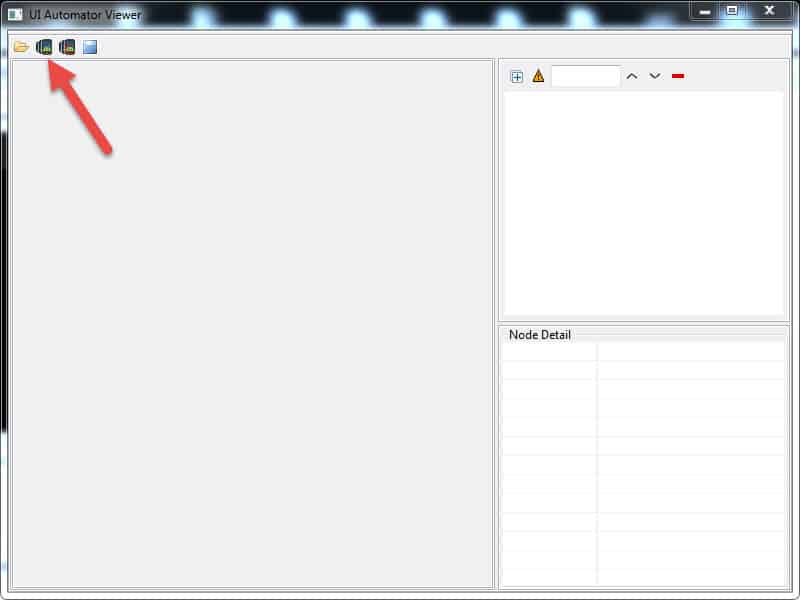
When UI Automator Viewer opens, click the highlighted icon to capture the current view of the application for inspecting elements.
UI Automator is much better option for locating elements.

Step-7: Writing Test Code with TestNG and IntelliJ
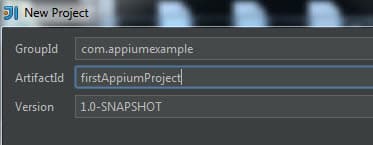
Select New Project
In the New Project window, select Maven on the left side of the screen.
Then, fill the GorupId, ArtifactId as shown below.
Copy and paste the below the line in your pom.xml
<?xml version="1.0" encoding="UTF-8"?>
<project xmlns="http://maven.apache.org/POM/4.0.0"
         xmlns:xsi="http://www.w3.org/2001/XMLSchema-instance"
         xsi:schemaLocation="http://maven.apache.org/POM/4.0.0 http://maven.apache.org/xsd/maven-4.0.0.xsd">
    <modelVersion>4.0.0</modelVersion>

    <groupId>com.example</groupId>
    <artifactId>myAppiumProject</artifactId>
    <version>1.0-SNAPSHOT</version>

    <dependencies>
        <dependency>
            <groupId>org.seleniumhq.selenium</groupId>
            <artifactId>selenium-java</artifactId>
            <version>2.53.0</version>
        </dependency>
        <dependency>
            <groupId>org.seleniumhq.selenium</groupId>
            <artifactId>htmlunit-driver</artifactId>
            <version>2.20</version>
        </dependency>
        <dependency>
            <groupId>org.testng</groupId>
            <artifactId>testng</artifactId>
            <version>6.9.9</version>
            <scope>test</scope>
        </dependency>
        <dependency>
            <groupId>io.appium</groupId>
            <artifactId>java-client</artifactId>
            <version>3.4.1</version>
            <scope>test</scope>
        </dependency>
    <dependencies>
</project>
Test Scenario:
- Open the bitBarSample.apk
- Click the second radio button
- Write “SW Test Academy” on the text area
- Click the “Answer” button
- Wait and Check the expected text on the next page
Test Code:
import io.appium.java_client.android.AndroidDriver;
import io.appium.java_client.remote.MobileCapabilityType;
import org.openqa.selenium.By;
import org.openqa.selenium.remote.DesiredCapabilities;
import org.openqa.selenium.support.ui.ExpectedConditions;
import org.openqa.selenium.support.ui.WebDriverWait;
import org.testng.annotations.AfterClass;
import org.testng.annotations.BeforeClass;
import org.testng.annotations.Test;

import java.net.MalformedURLException;
import java.net.URISyntaxException;
import java.net.URL;

/**
 * Created by Onur Baskirt on 05.04.2016.
 */
public class AppiumBitBarTest {

    private AndroidDriver driver;
    private WebDriverWait wait;

    @BeforeClass
    public void setUp() throws MalformedURLException {
        //Setup Appium
        DesiredCapabilities caps = DesiredCapabilities.android();
        caps.setCapability(MobileCapabilityType.APP, "C:/TestApks/BitbarSampleApp.apk");
        caps.setCapability(MobileCapabilityType.DEVICE_NAME,"EmulatorMotoX");
        caps.setCapability("platformName", "Android");
        caps.setCapability("VERSION", "4.4.2");
        //caps.setCapability("        newCommandTimeout", 600);
        driver = new AndroidDriver(new URL("http://127.0.0.1:4723/wd/hub"), caps);
        wait= new WebDriverWait(driver,20);
    }

    @Test
    public void appiumBitBarTest() throws MalformedURLException, InterruptedException,URISyntaxException {
        //Click second radio button
        driver.findElement(By.name("Use Testdroid Cloud")).click();

        //Write SW Test Academy to the text area
        driver.findElement(By.className("android.widget.EditText")).sendKeys("SW Test Academy");

        //Hide Keyboard
        driver.hideKeyboard();

        //Click Answer Button
        driver.findElement(By.name("Answer")).click();

        //Synchronization after click and check the expected text
        wait.until(ExpectedConditions.presenceOfElementLocated(By.name("You are right!")));
    }

    @AfterClass
    public void teardown(){
        //Teardown operation
        driver.quit();
    }
}
Test Results:
Testing with Real Device
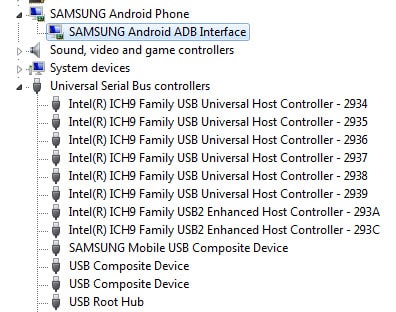
Download your phone’s driver. I am using Samsung Grand NEO
Link: http://www.driverscape.com/download/gt-i9060
After driver installation, you will see the below figure on the device manager.
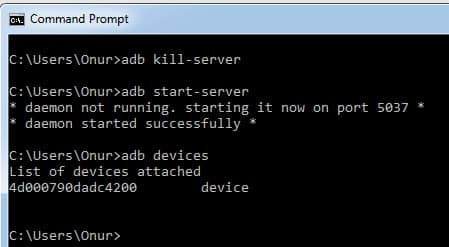
Then, connect your device and run the following commands
Adb kill-server
Adb start-server
Adb devices
And you will see the below result.
After that, Change android settings in Appium.

Start Appium Server.
Then, run the same test on IntelliJ.
Here is the video of the execution:

Onur Baskirt is a Software Engineering Leader with international experience in world-class companies. Now, he is a Software Engineering Lead at Emirates Airlines in Dubai.
Hi Onur,
Now-a-days Genymotion is not listing any device to download. Is there any alternative available ?
Hi Siddharth,
I also used official Android Studio’s emulators but they also behave weirdly. I could not run my tests effectively. Especially, I got many Element Not Found exceptions on XPath declarations. However, the same code runs on real devices without any problem. Thus, if you have a chance to run your tests in real devices, please go in this way.
Yes, agreed. I am facing the same issue in android studio emulators. Prefers real device instead.
Thanks,
Welcome, Siddharth. It is the best way to do mobile test automation. This post also a little bit old. I wrote the new ones. You can check here.
http://www.swtestacademy.com/appium-tutorial/
http://www.swtestacademy.com/appium-parallel-tests/
http://www.swtestacademy.com/appium-cucumber-testng-parallel-testing/
Thanks Onur sharing, I am a small blogger on appium. Your links are useful.
Merhaba Onur Bey,
Cloudbees kullanmadan Jenkins ile Linux makinada mobil test otomasyonu nasıl çalıştırabiliriz?
Saygılarımla,
Burak A. Türkpencesi
Eger projeniz java appium maven bazli ise mvn test komutlari ile testinizi Jenkins de calistirabilirsiniz. Internette cesitli yazilar var. Birkacini paylasiyorum.
https://stgconsulting.com/running-automated-selenium-tests-from-jenkins-on-linux/
https://medium.com/@sonaldwivedi/jenkins-setup-in-ubuntu-6a7ee12b648f
https://stackoverflow.com/questions/30593116/selenium-test-execution-via-jenkins-on-linux-box