
In this article, I will walk you through the initial steps of automated testing with Selenium Webdriver using C#. For this purpose we will need:
- Visual Studio
- NUnit Framework
- Selenium Webdriver
First, let’s see how we obtain these elements if we do not have them already.
Install Visual Studio
The only professional IDE available for C# at the time is Visual Studio (JetBrains is coming with a project called ‘JetBrains Rider’ and will release it soon). The most recent version of Visual Studio at the time I am writing this article is VS2017. The community edition can be downloaded here: https://www.visualstudio.com/downloads/

It is a lightweight installer. Click on it and then click ‘Yes’ when asked for permission. After clicking on ‘Continue’ you will end up with below screen:
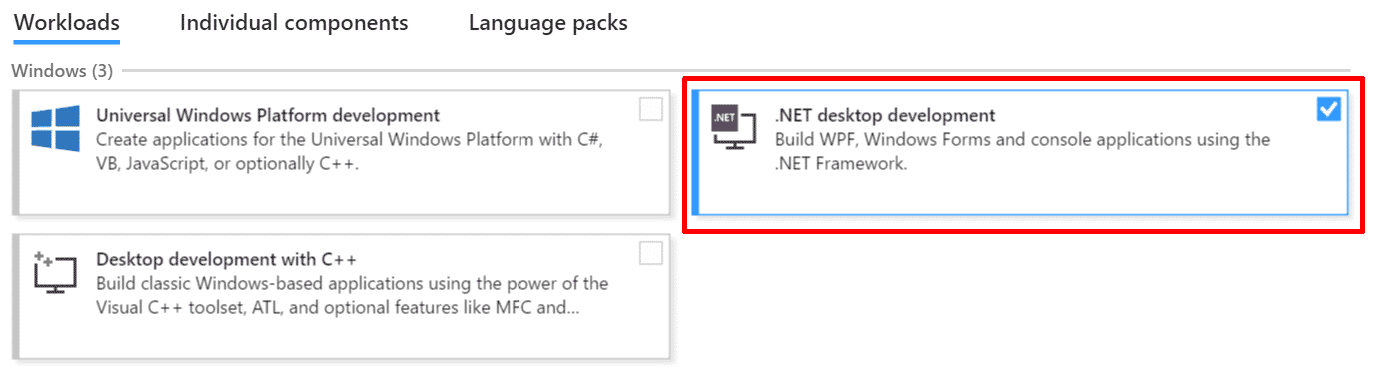
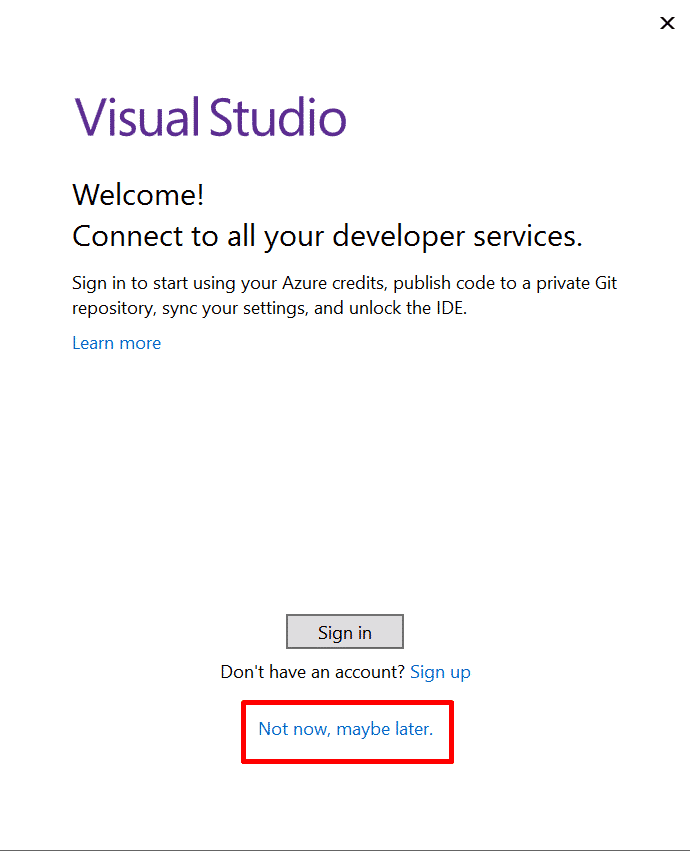
For this tutorial, let’s choose .NET desktop development option and click install. After the installation, a reboot might be required. Once you run the Visual Studio 2017, you will be asked to sign in. You can create an account or you might continue to use it without one. For doing that so:
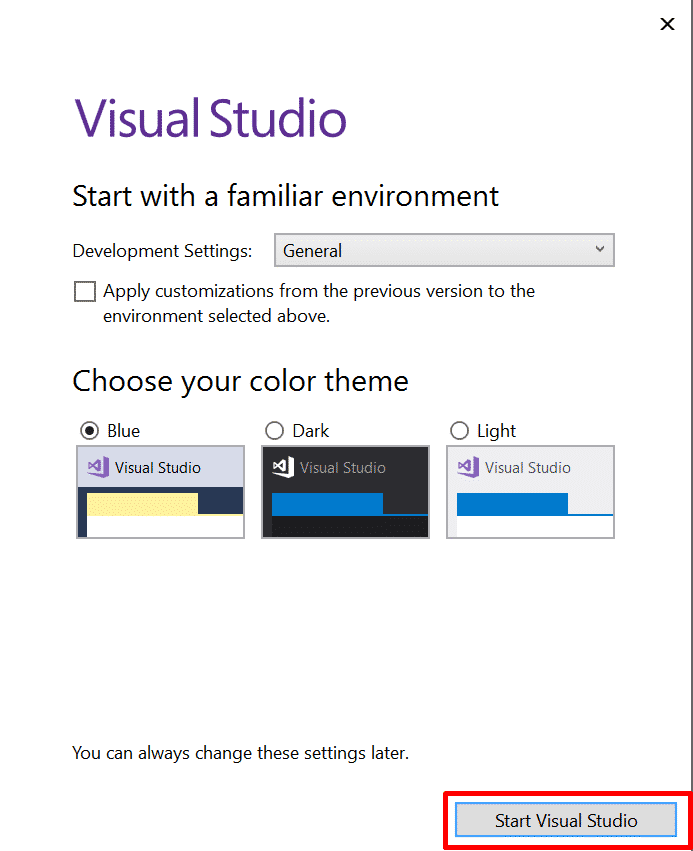
On next screen, you will be asked to opt a color theme. Choose as you will ( I like the blue better) and click on ‘Start Visual Studio’.
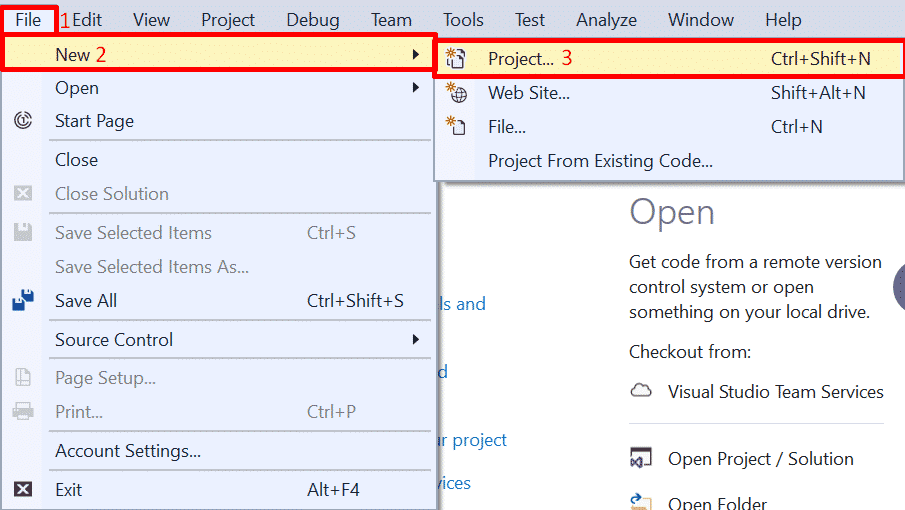
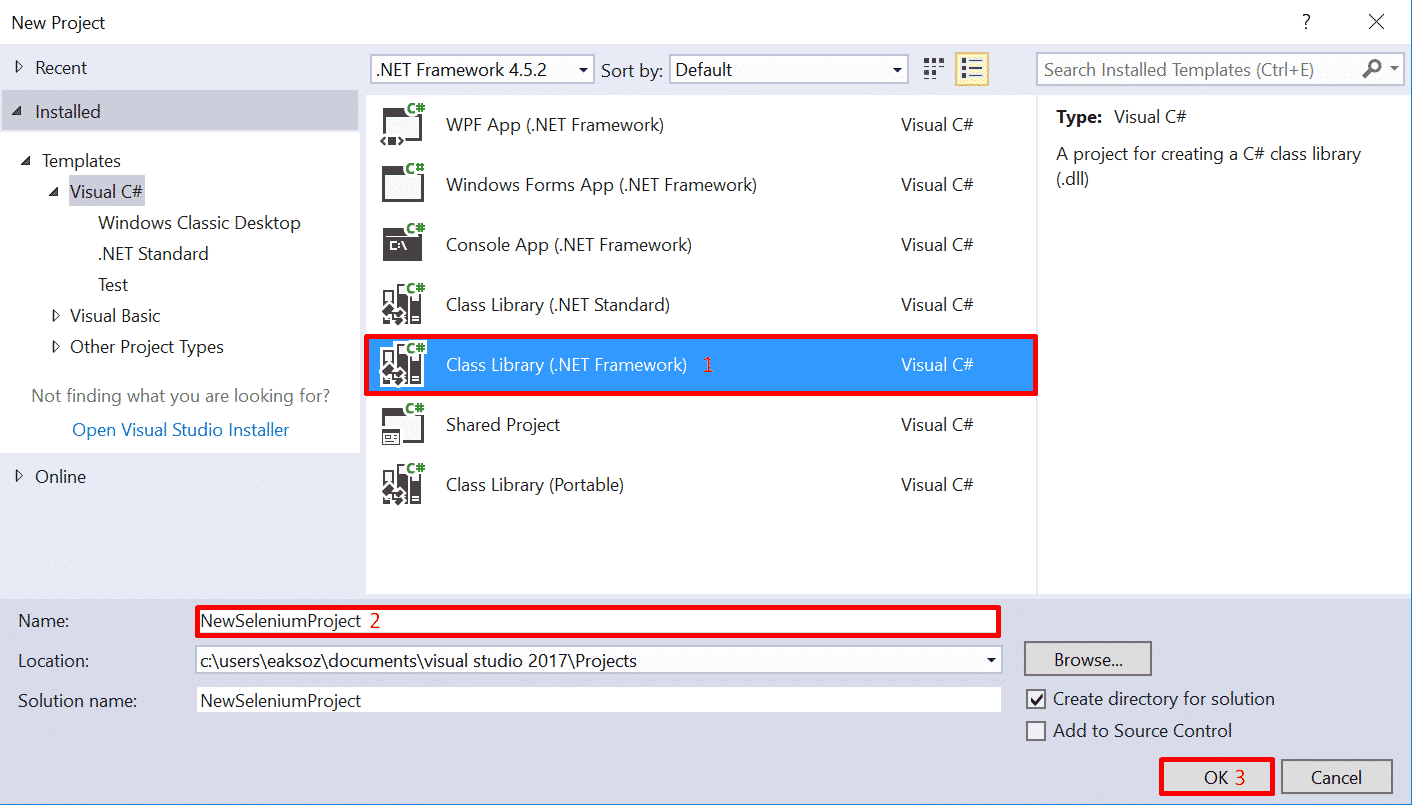
To get started with Visual Studio we need to create a new project. Press ‘File’ on the top left and then ‘New’ and ‘Project’.
Select Class Library (.NET Framework) and name the project as you will before you click ‘OK’.
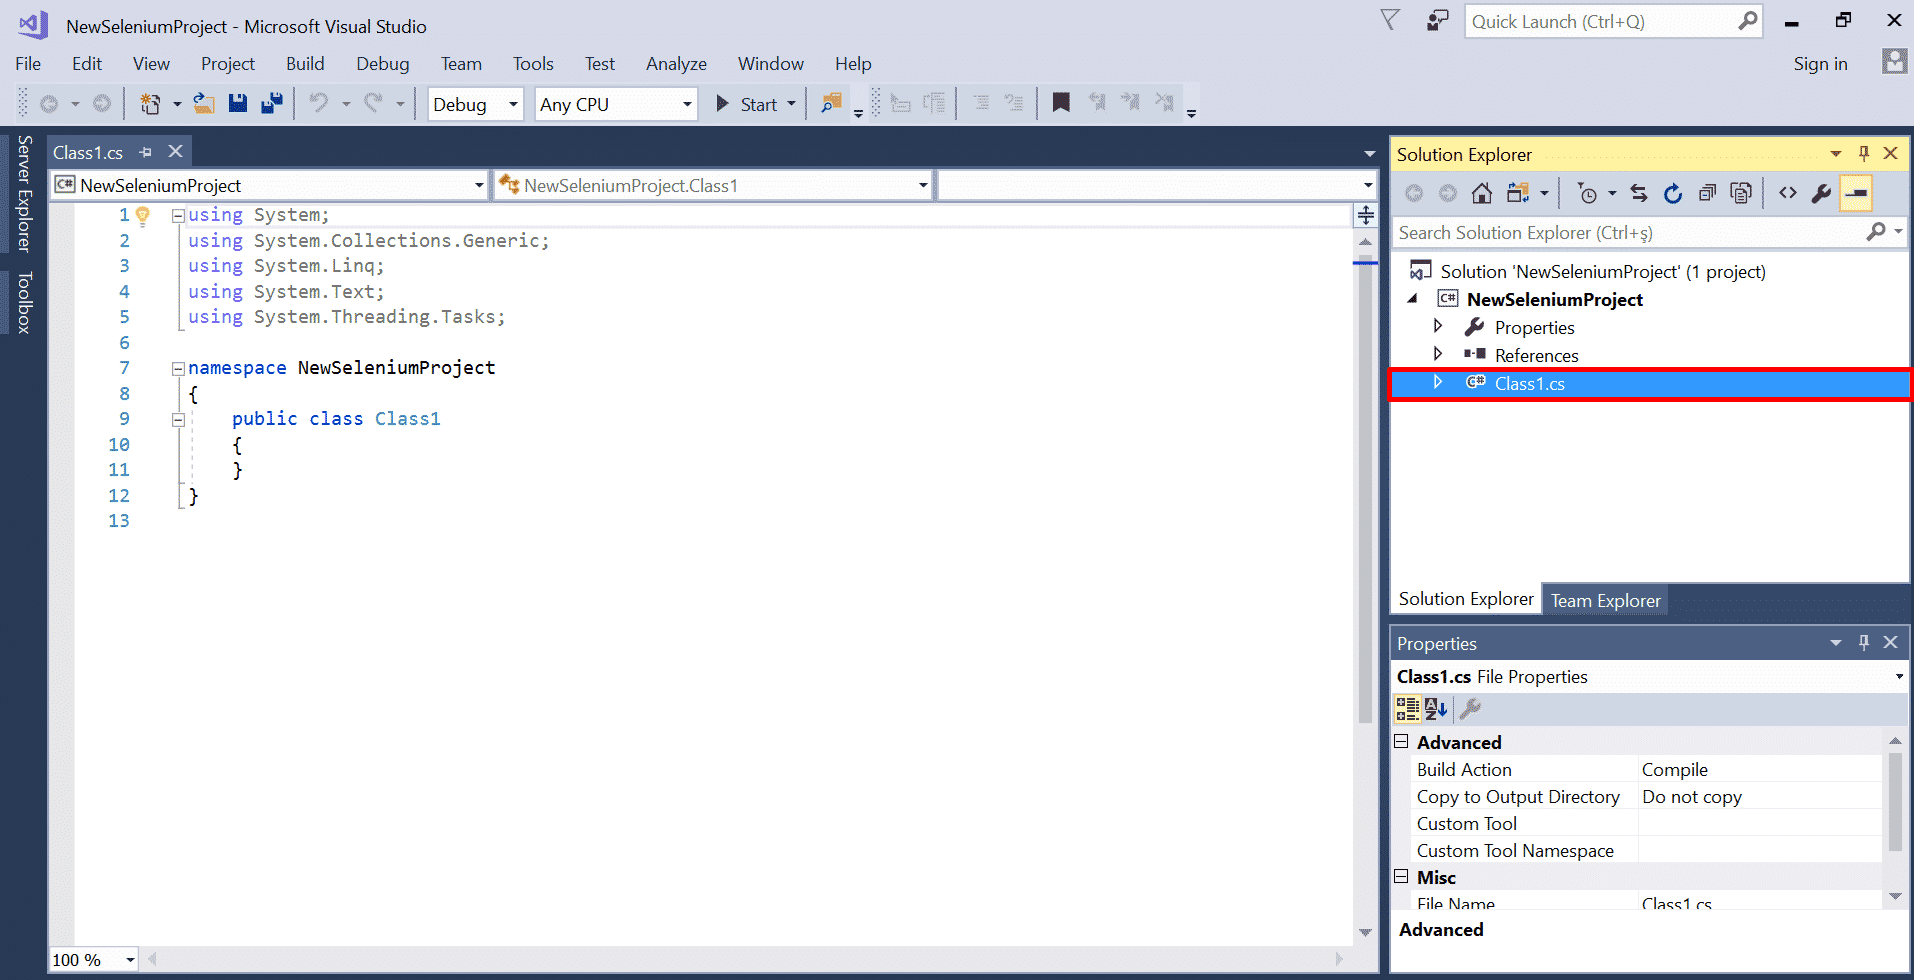
You may want to change your class name to something relative to your test (i.e LoginTest, HomePageTest etc..). For achieving this, right-click on your class on solution explorer window located at the right-hand side of the screen.
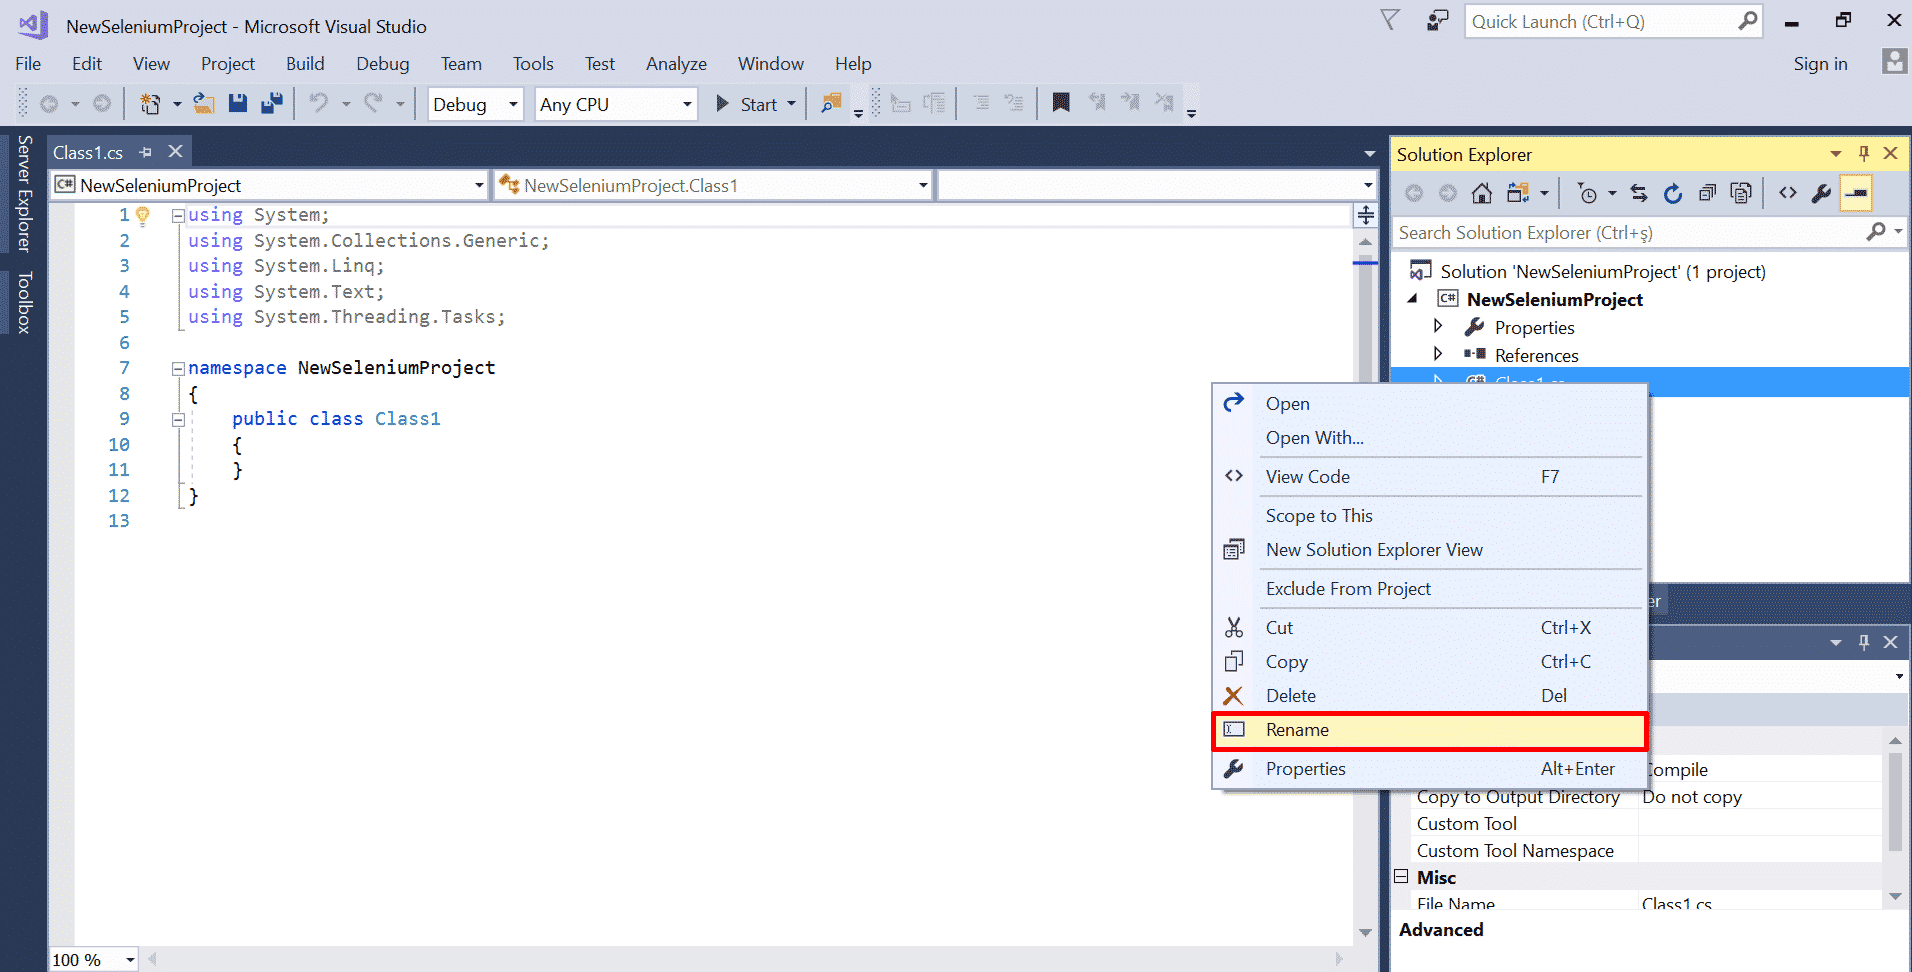
Click “Rename”
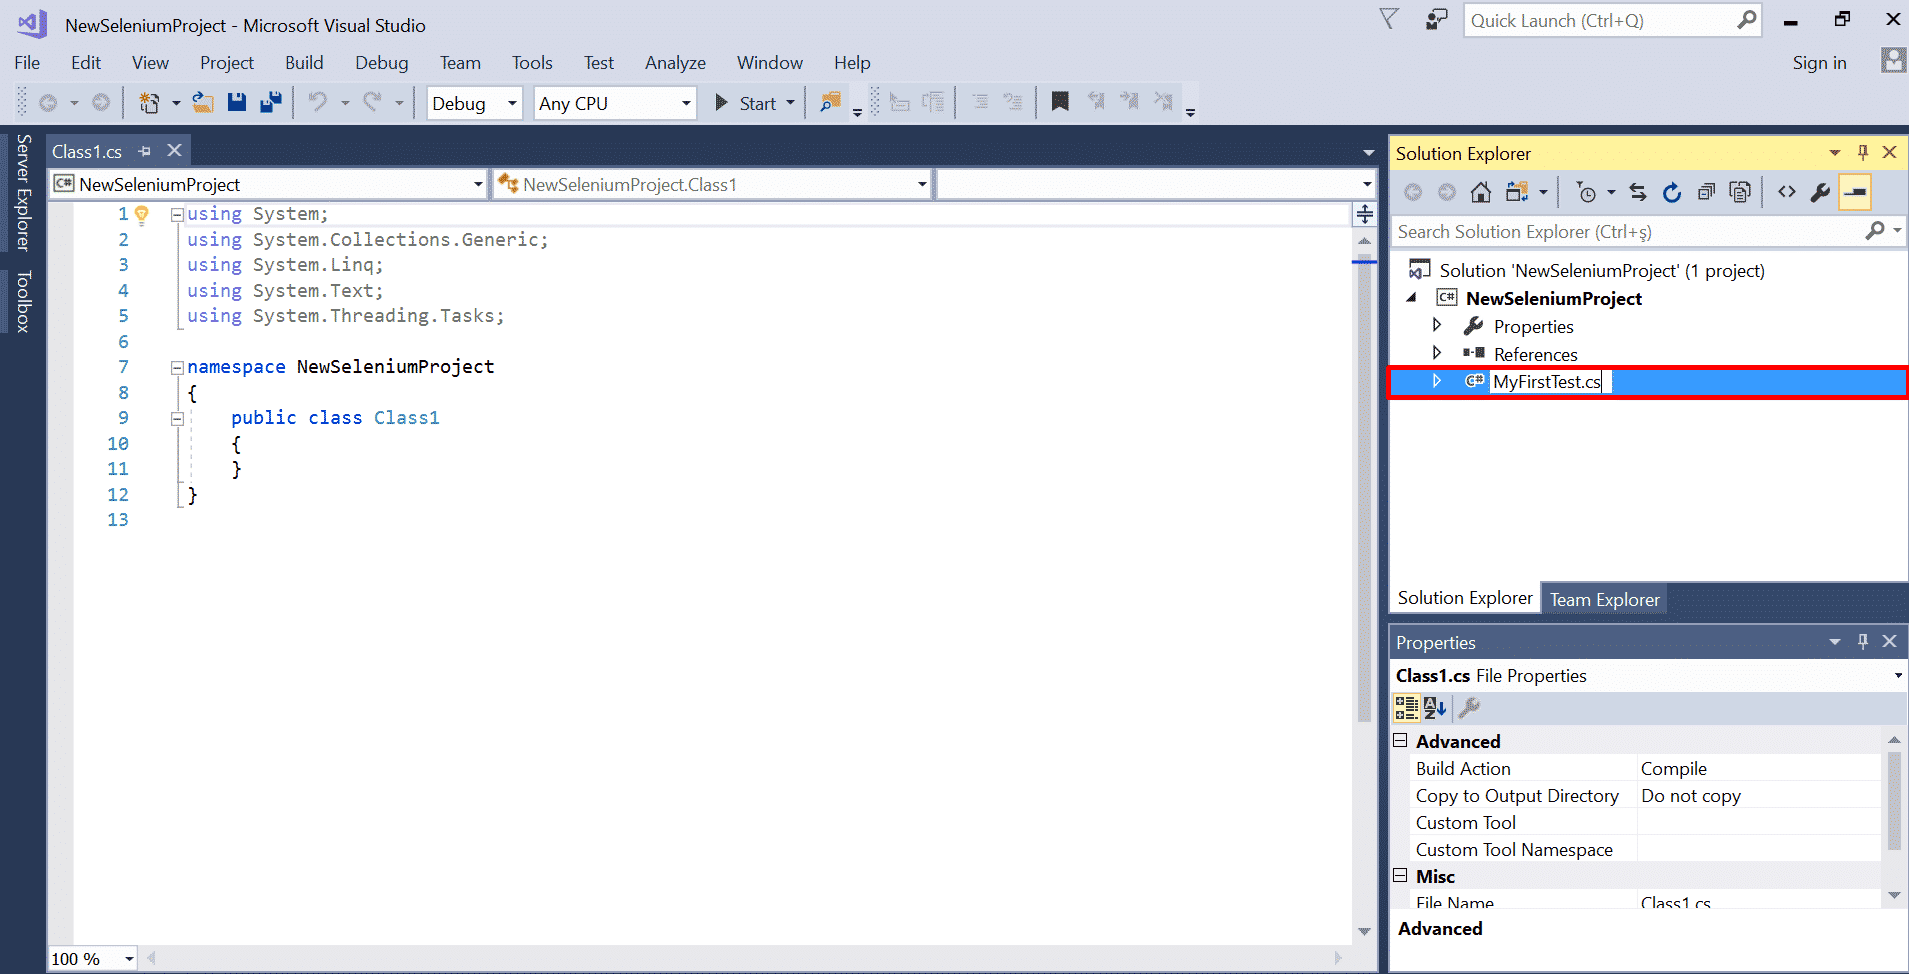
Then rename it.
And that’s it! We created it a new C# project using Visual Studio 2017. Next step is to download NUnit Framework and Selenium Webdriver.
Install NUnit Framework
NUnit is a free to use unit-testing framework for all .NET languages. It makes the unit testing lot easier. Hence we will use it on our Selenium tests.
For downloading NUnit Framework, we will use the NuGet Package Manager built into Visual Studio. NuGet is the package manager for the Microsoft development platform including .NET.
There are two ways for installing via NuGet:
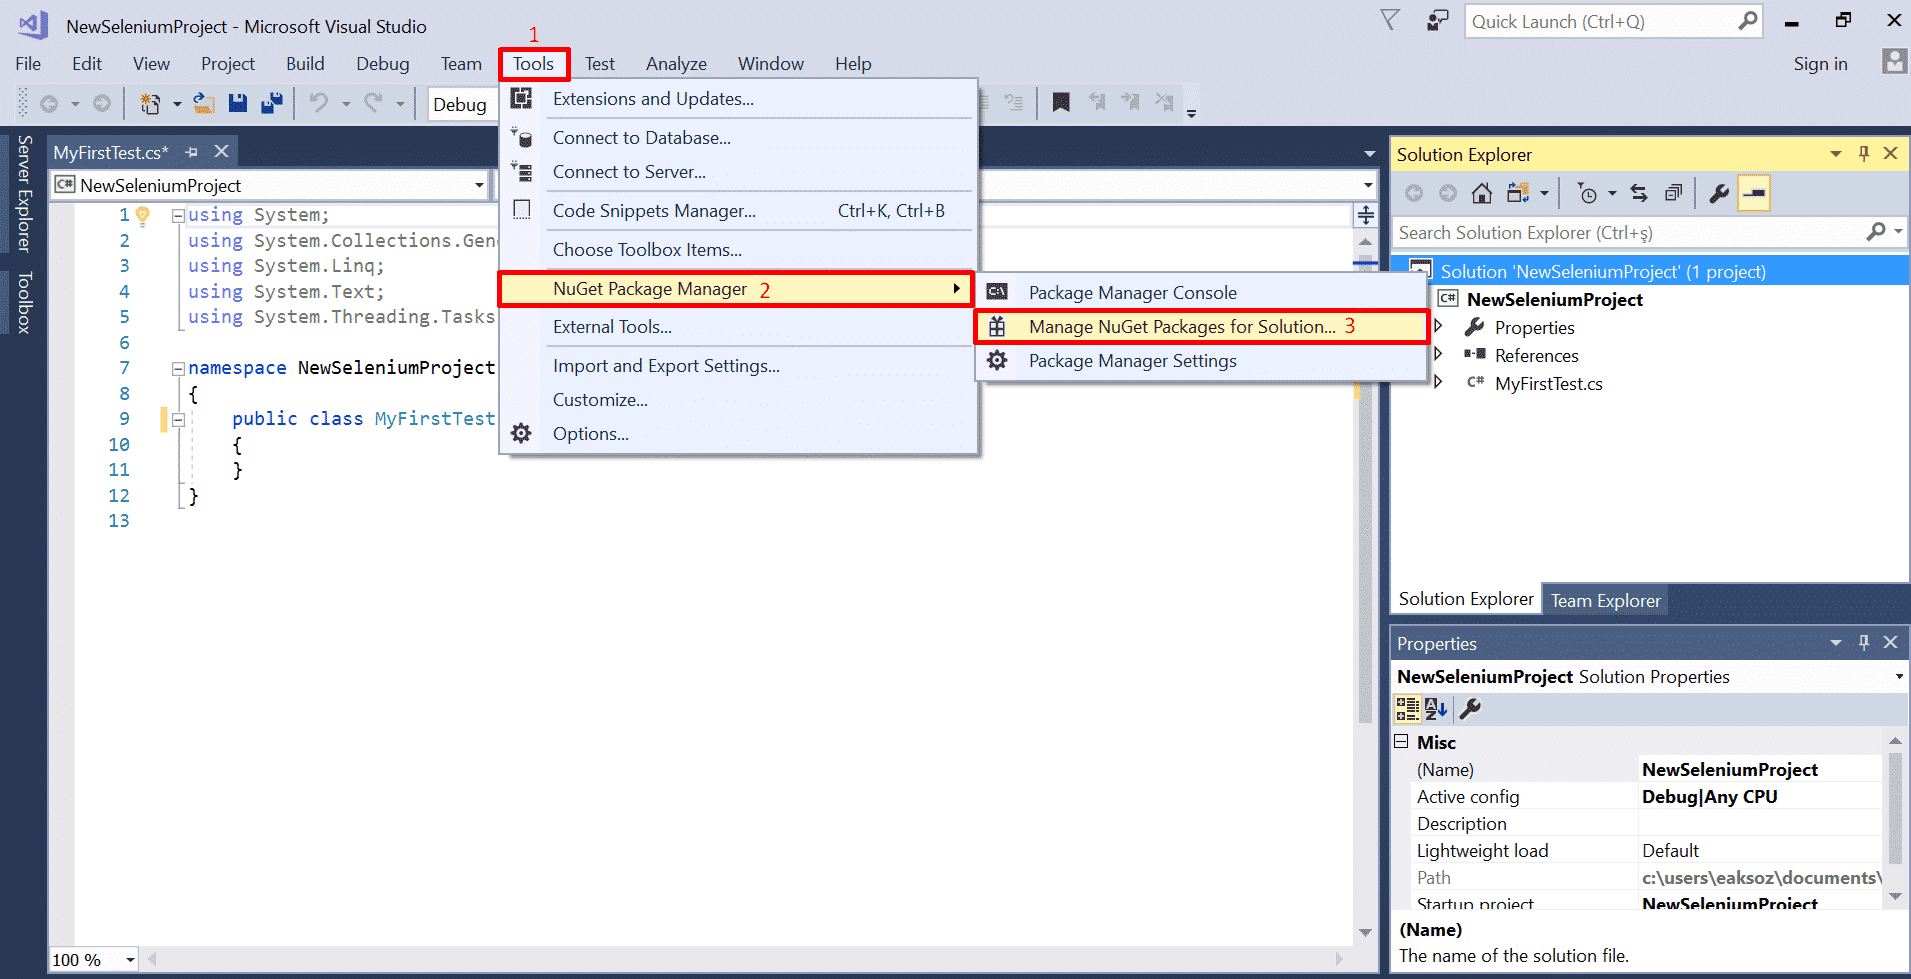
First way is to click on ‘Tools’ on top menus and then hover on ‘NuGet Package Manager’ option and select ‘Manage NuGet Packager for Solution…’.
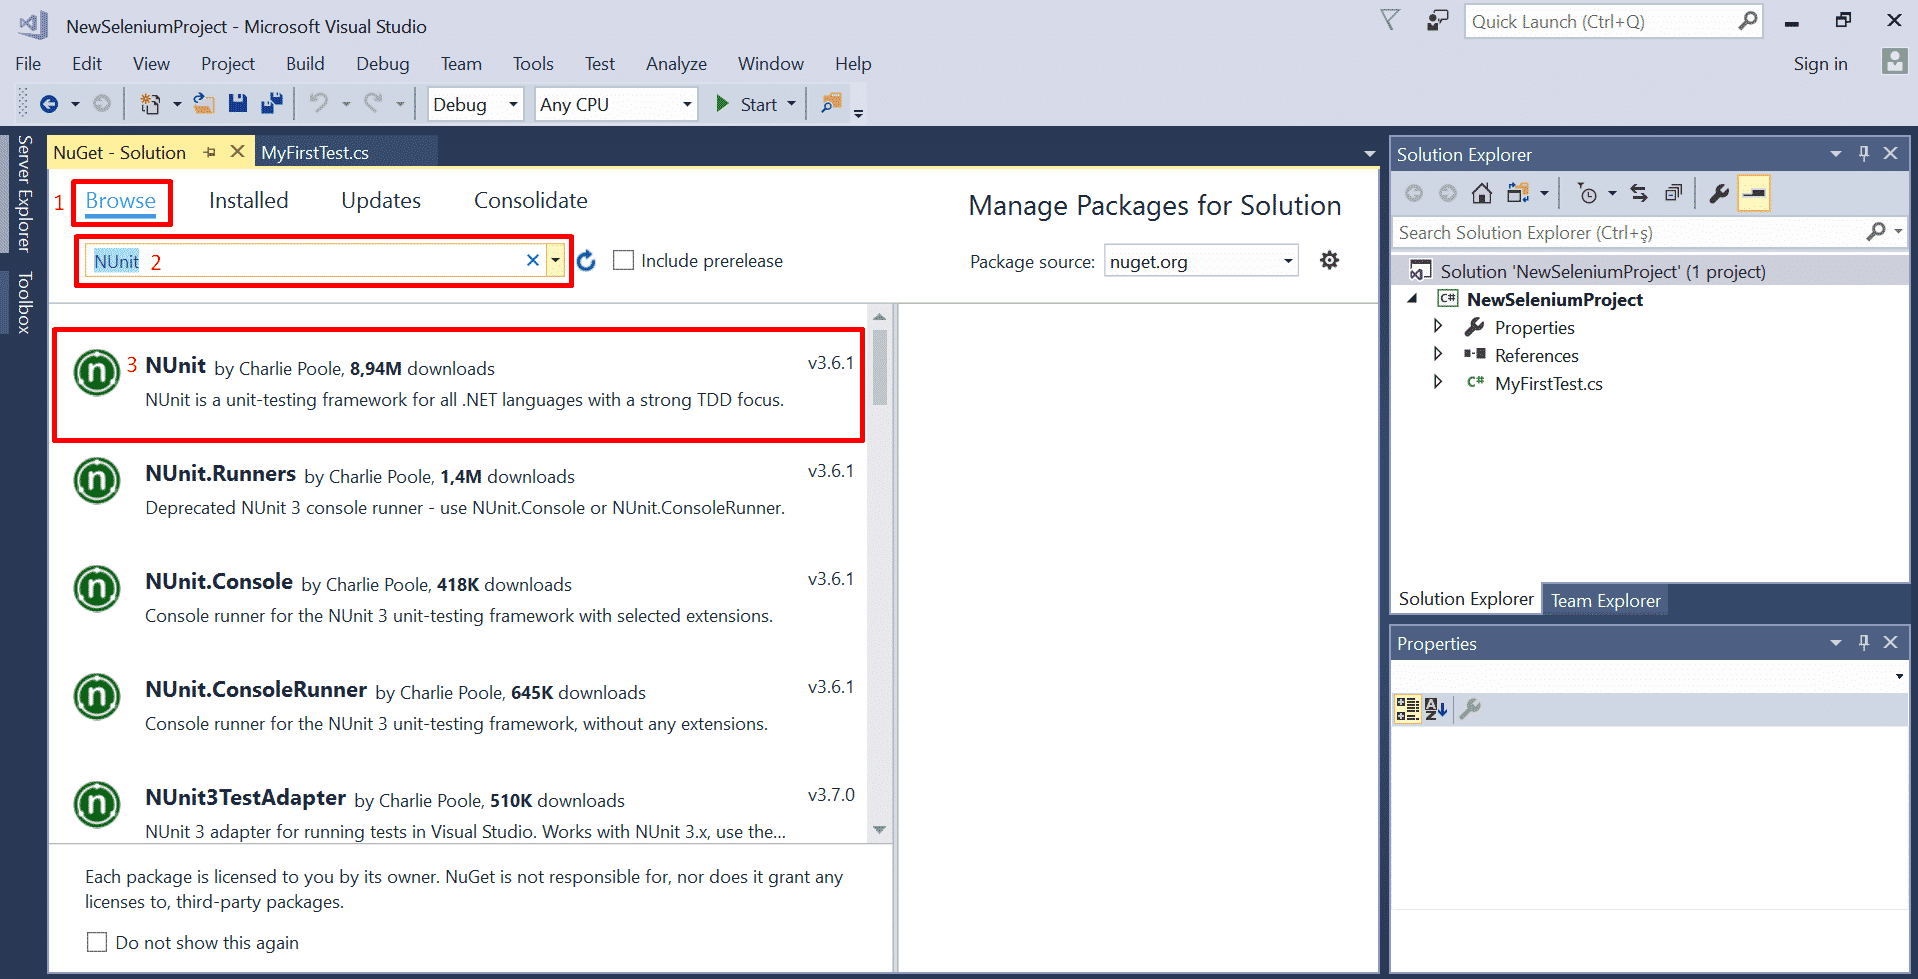
Click on ‘Browse’, then type ‘NUnit’ in the search box and hit enter. Click on NUnit ( most recent version is v3.6.1 at the time).
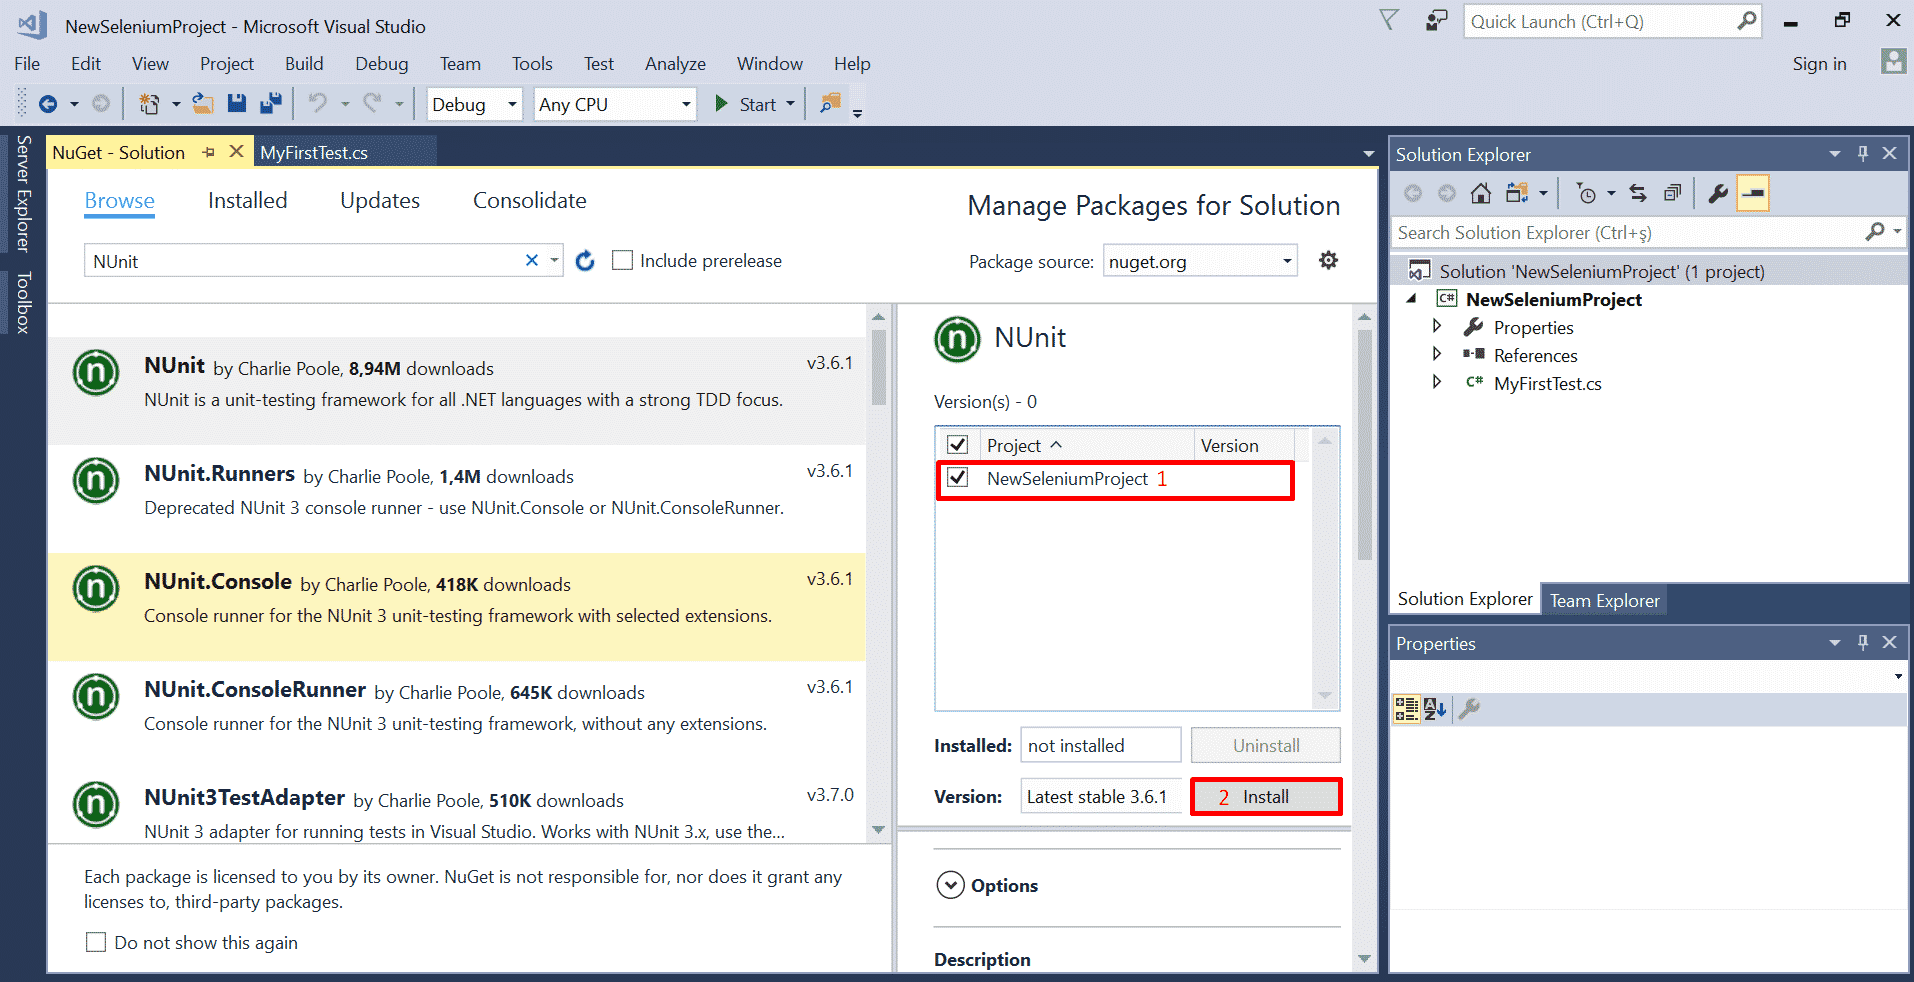
Select the project that you would like to install NUnit to and then click ‘Install’.
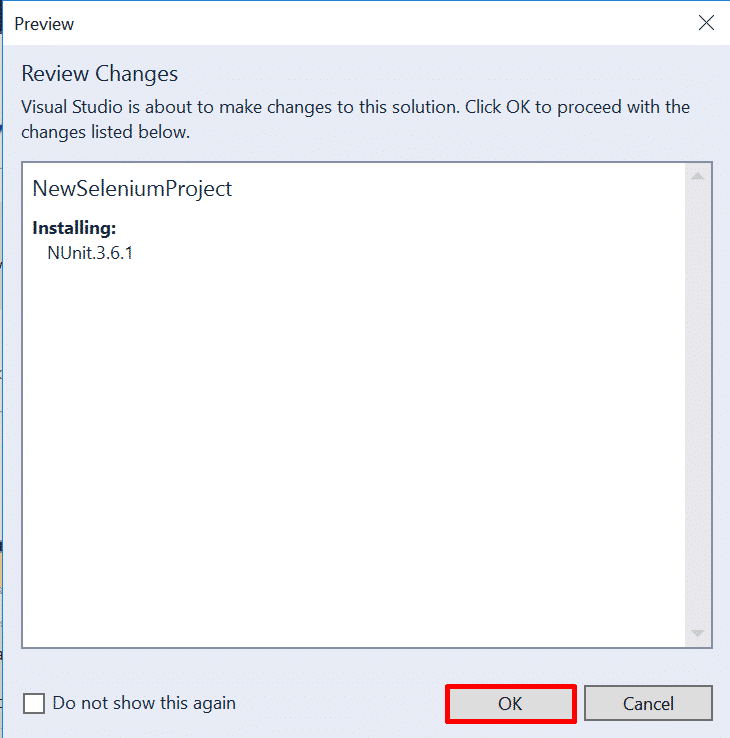
Click ‘OK’ once you are asked to review changes.
You have installed NUnit! But we need install Test Adapter for NUnit in order to run the tests inside Visual Studio. Therefore search for Nunit3TestAdapter, once you found it click on it and click ‘Install’.
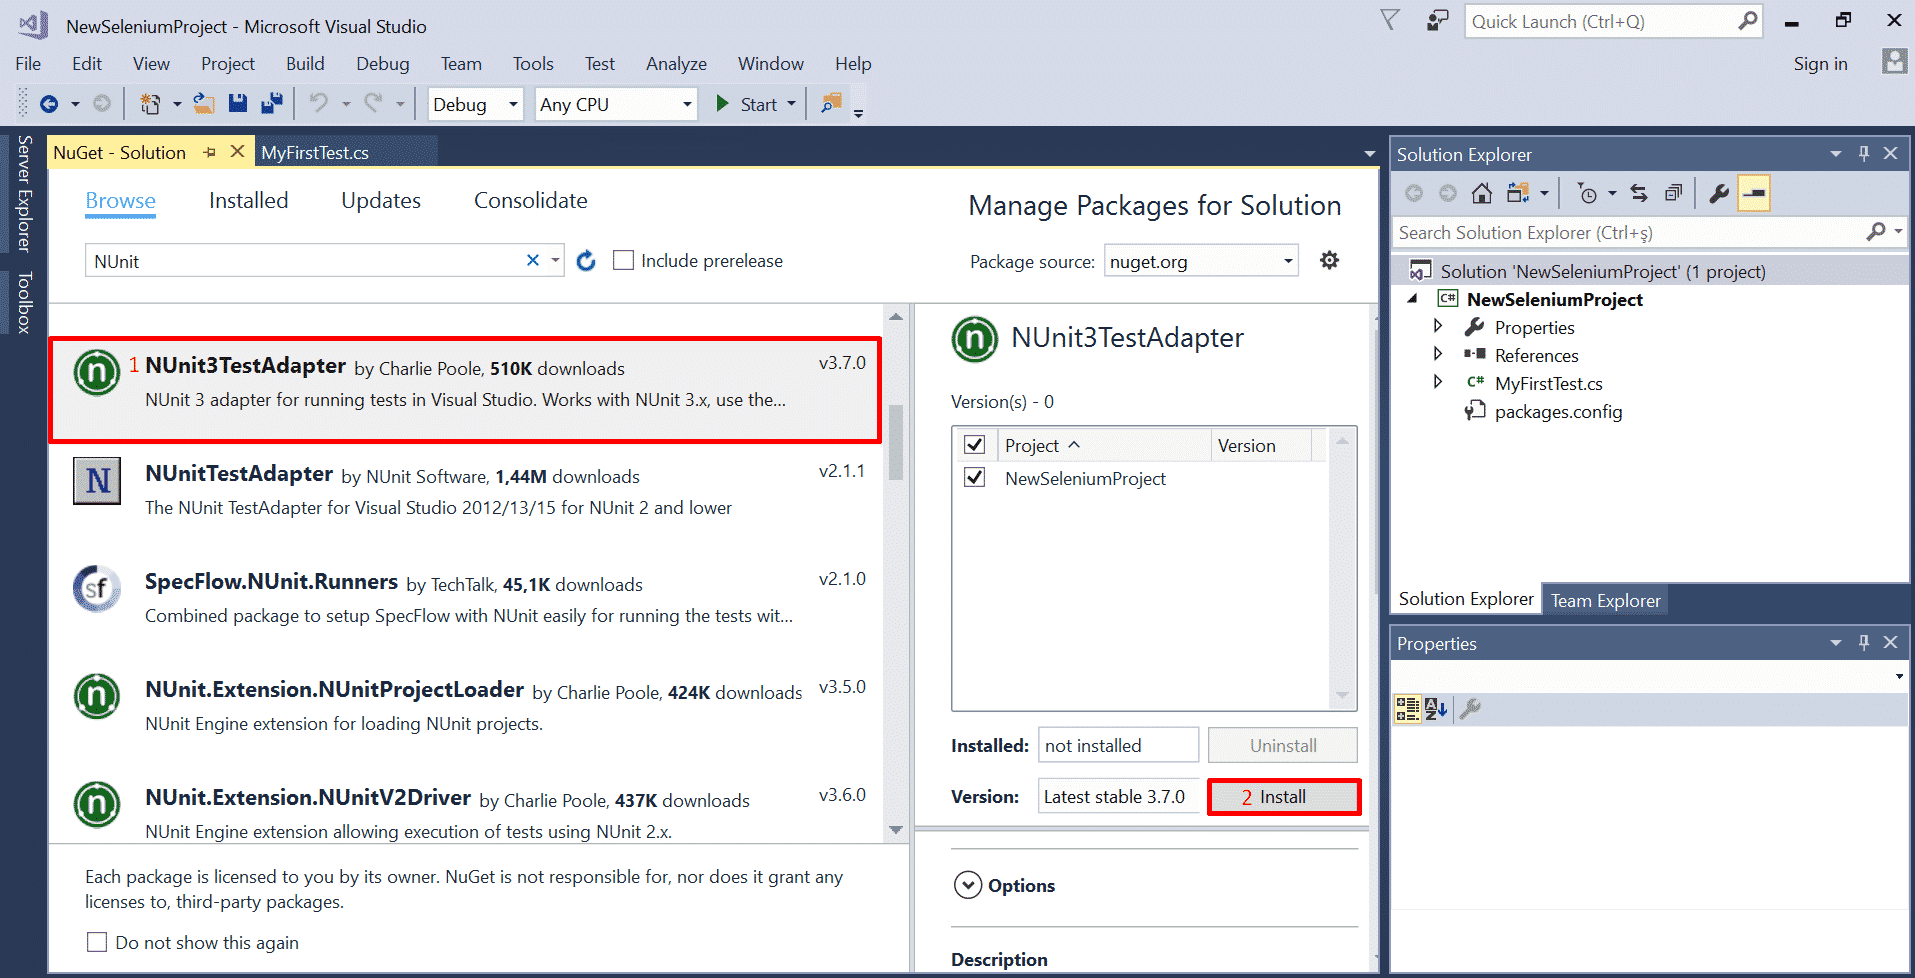
Once again, click ‘OK’ when you are asked to review changes.
We now installed NUnit and NUnit Test Adapter and ready move on installing the Selenium WebDriver.
Install Selenium WebDriver
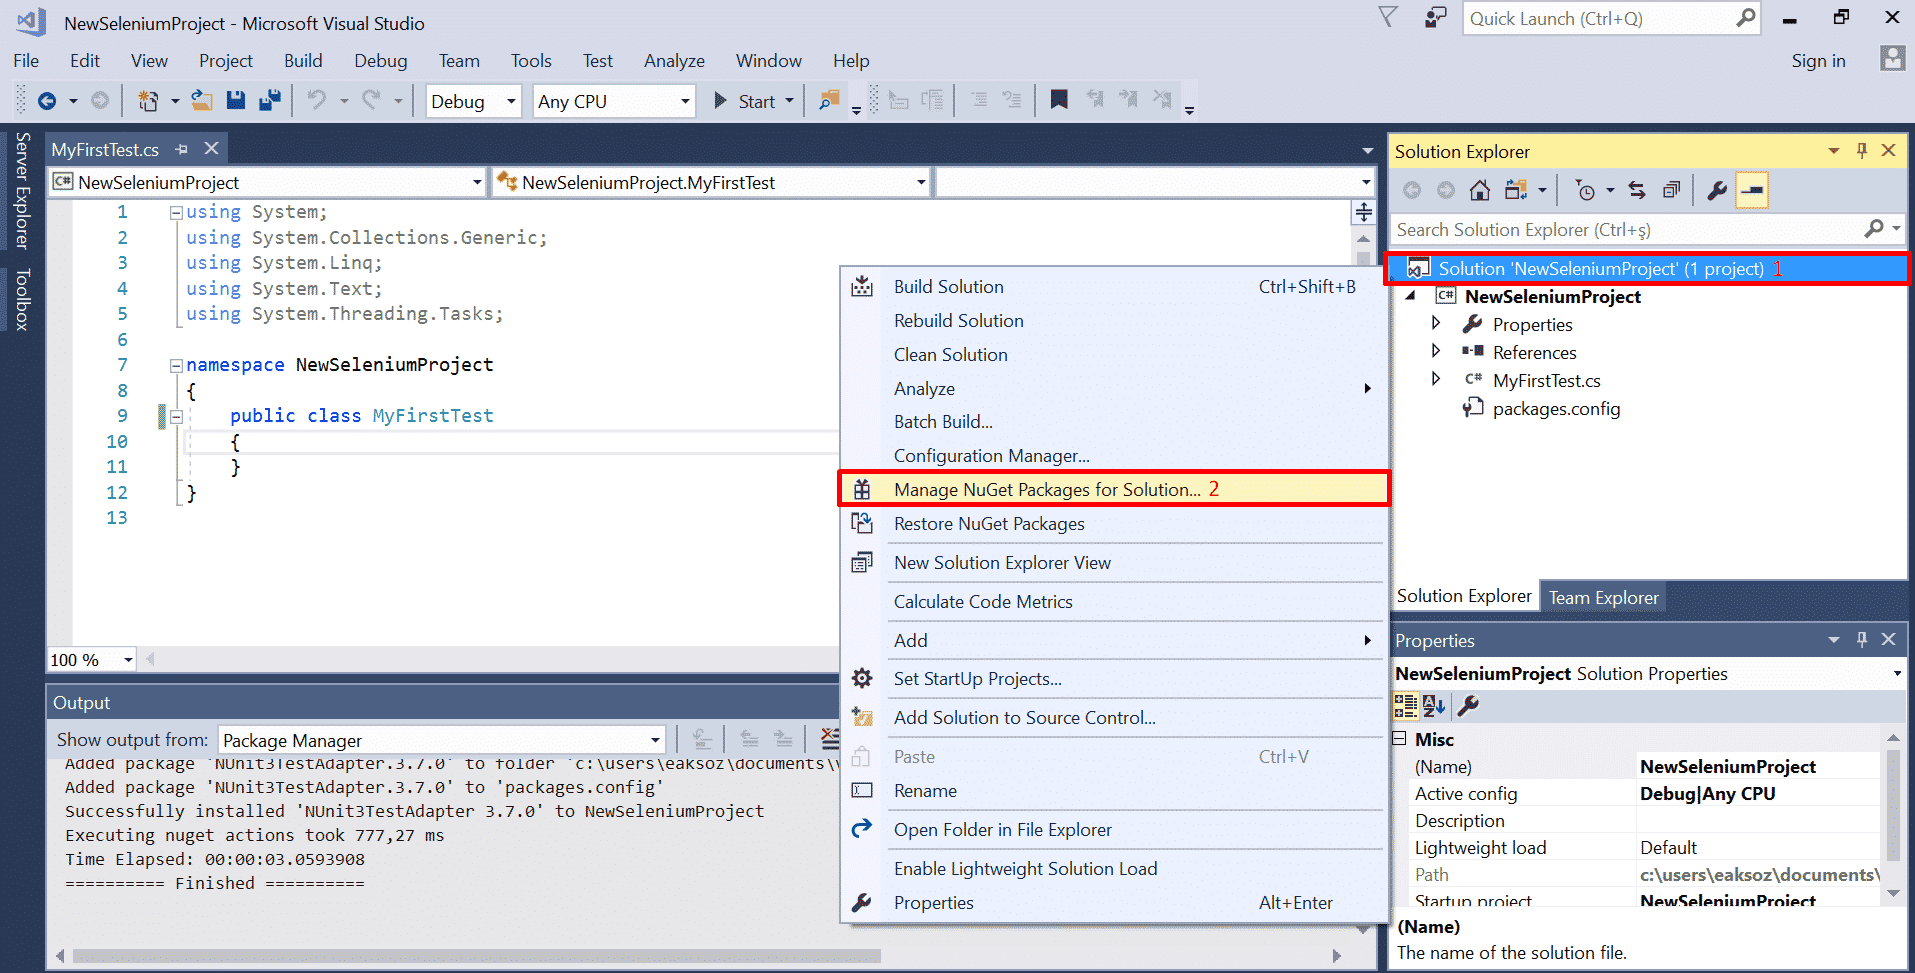
The second way to use NuGet Package Manager ( First way is mentioned during the installation of Nunit), is to right click on your solution on solution explorer and click ‘Manage NuGet Packages for Solution…’
This time type ‘Selenium’ on the search box and hit enter.
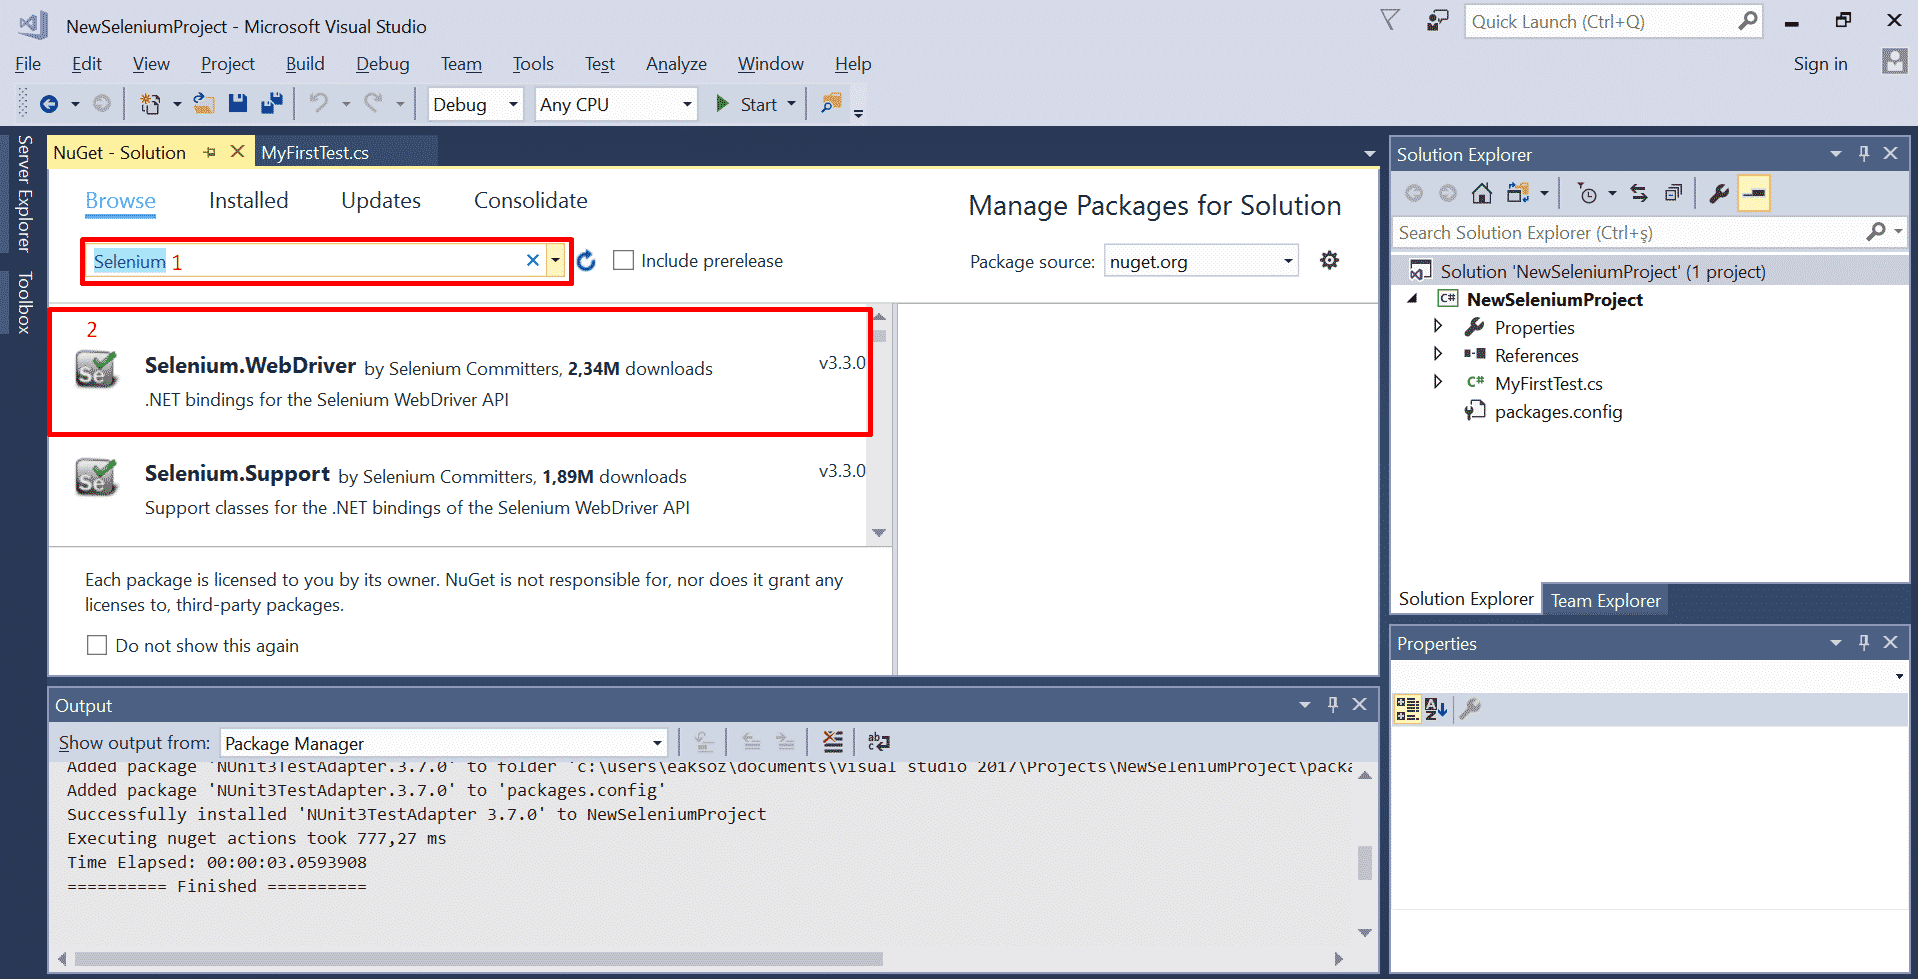
Select the Selenium.WebDriver and continue with the installation.
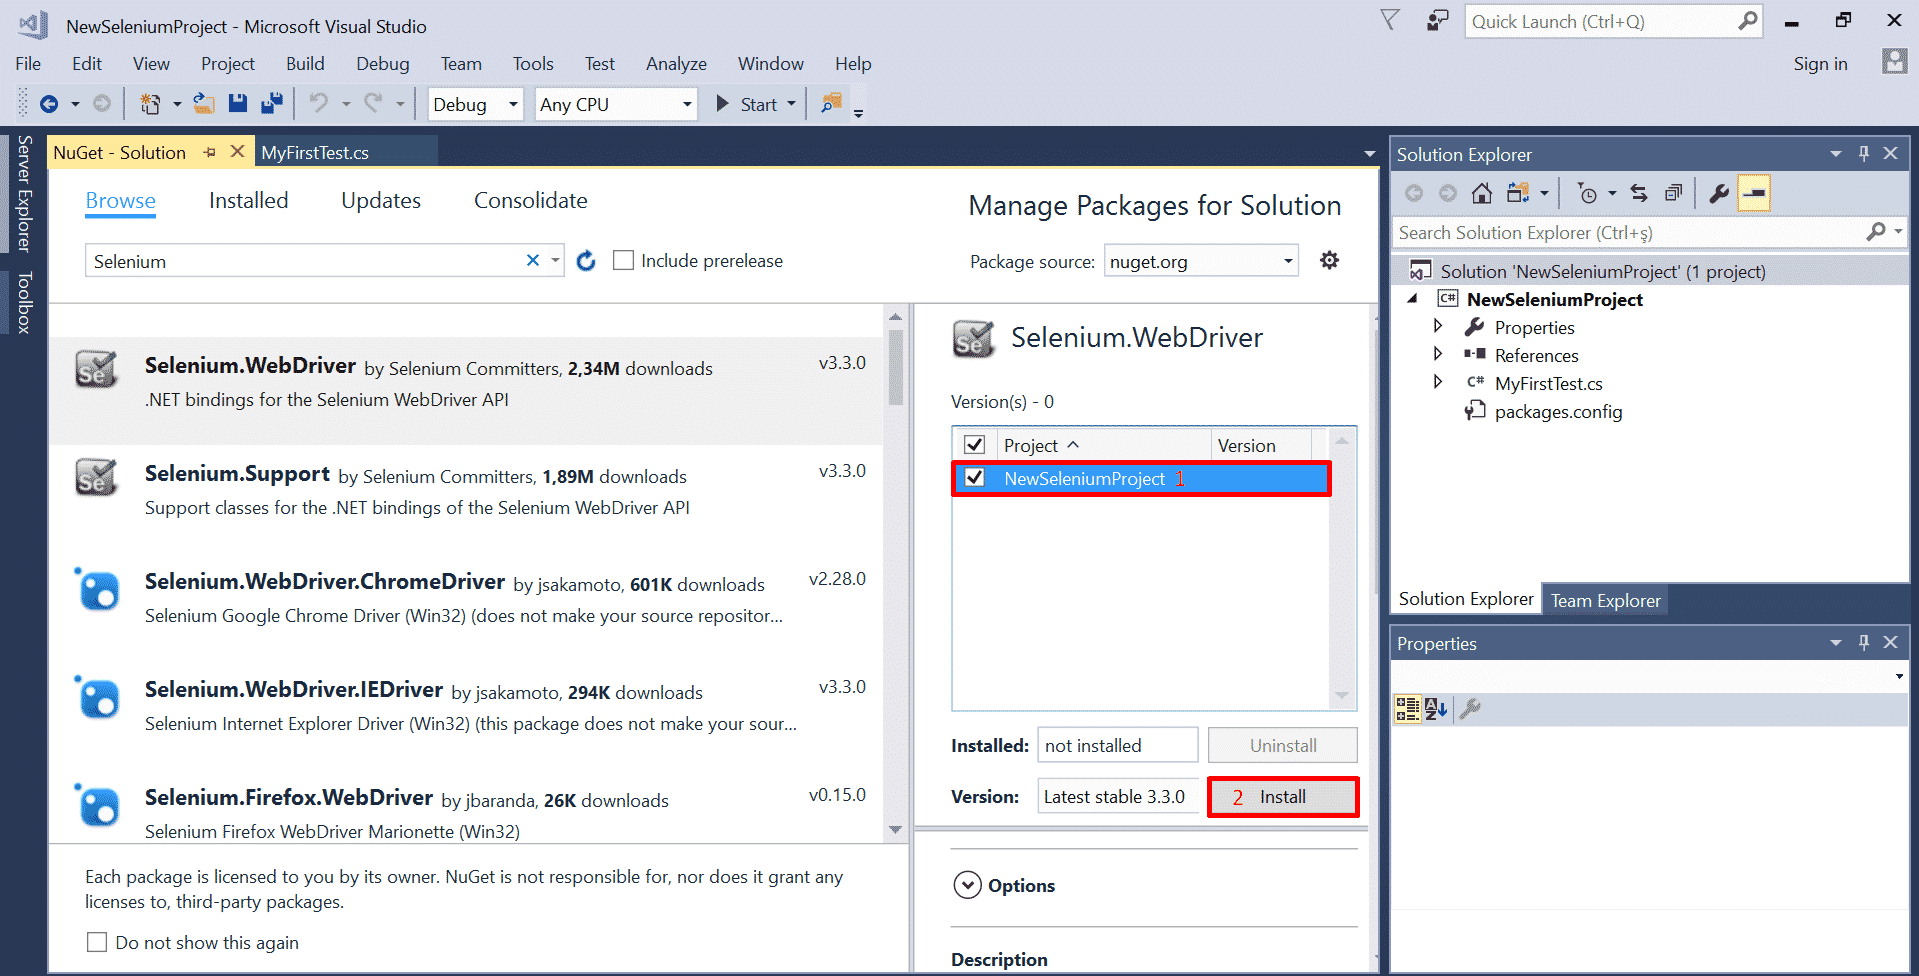
Again click ‘OK’ if asked for on review changes screen.
Well done! You have installed Selenium WebDriver! But for driving the latest versions of browsers, we need to install the driver explicitly for that browser.
In this tutorial, I am going automate Google Chrome. Therefore, I need to install ChromeDriver. You may download it via the internet or easy way to obtain it is to use NuGet again!
Since we previously searched ‘Selenium’, ChromeDriver is displayed on search results. Click on ‘Selenium.WebDriver.ChromeDriver’ and select the project you want to install it and click ‘Install’ again.
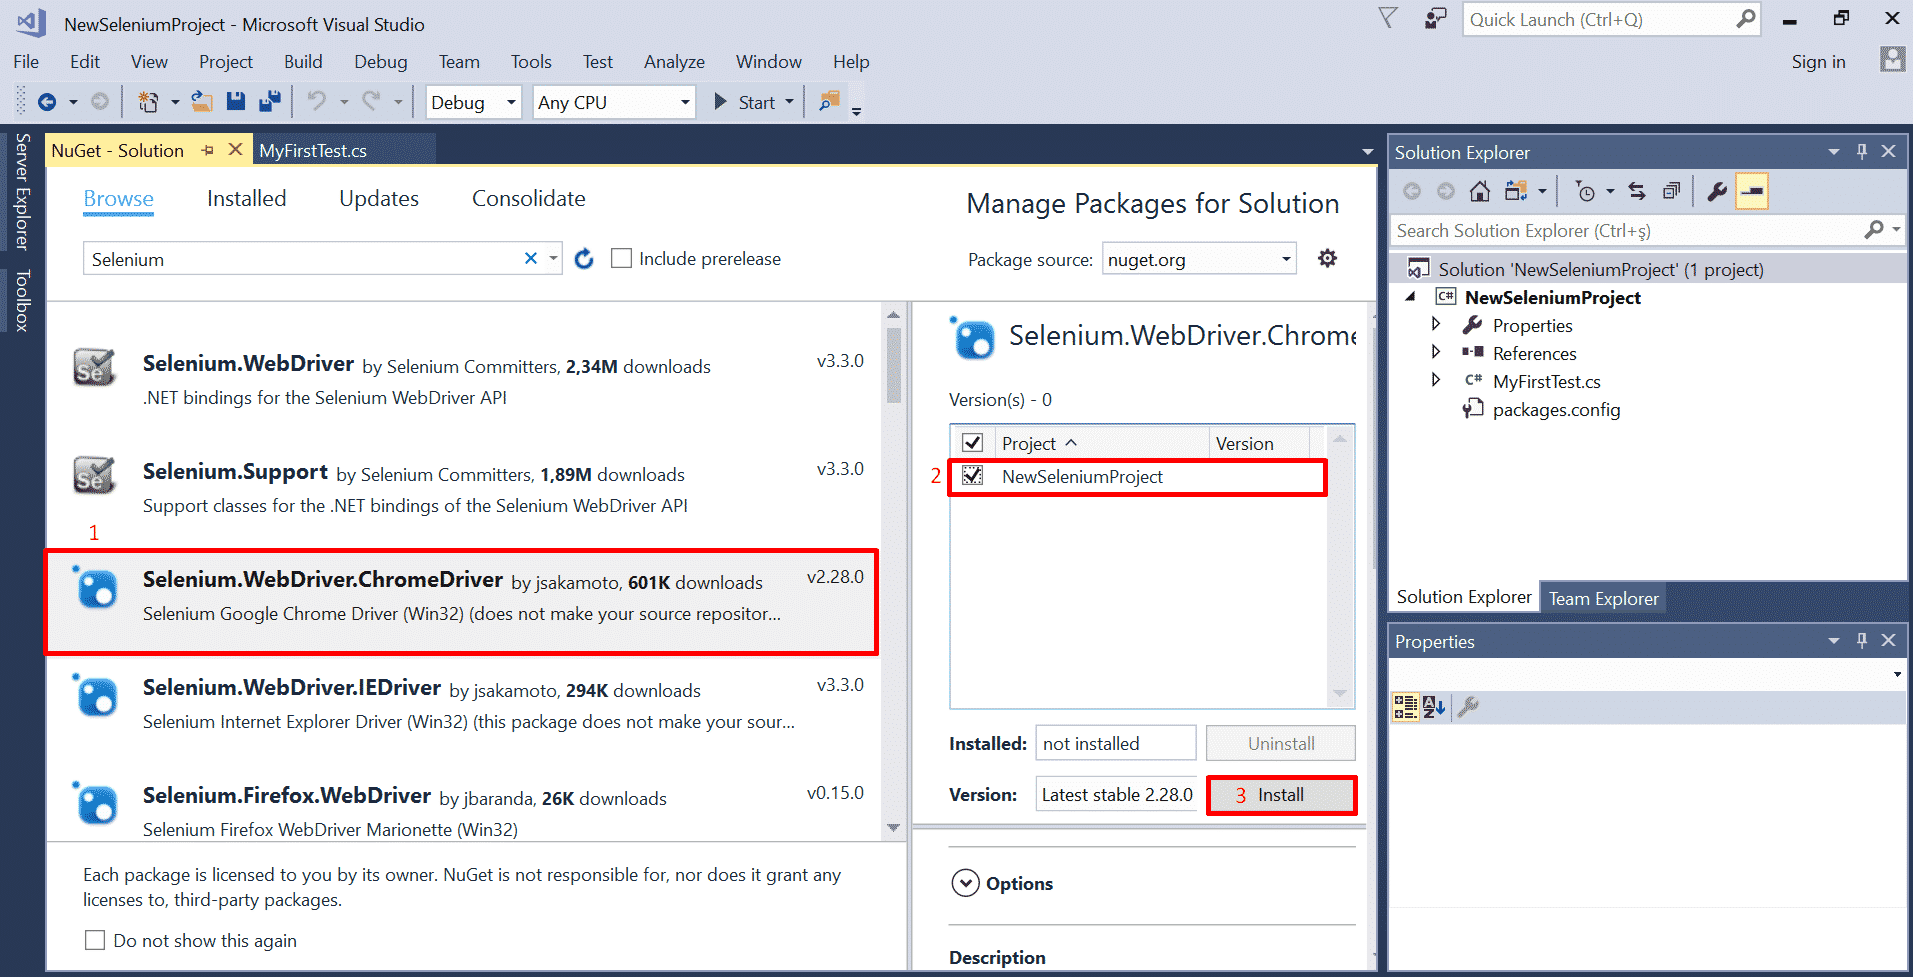
Yet again click ‘OK’ on review changes screen.
Congratulations! Since all components are installed, we are ready to write our first test!
Writing First Selenium Test with C#
Now, it is time to write our Selenium test.
For automating chrome using selenium webdriver, we need to create an instance of webdriver as a new chrome driver.
Add the following the code inside your class in order to create an instance of webdriver called ‘driver’.
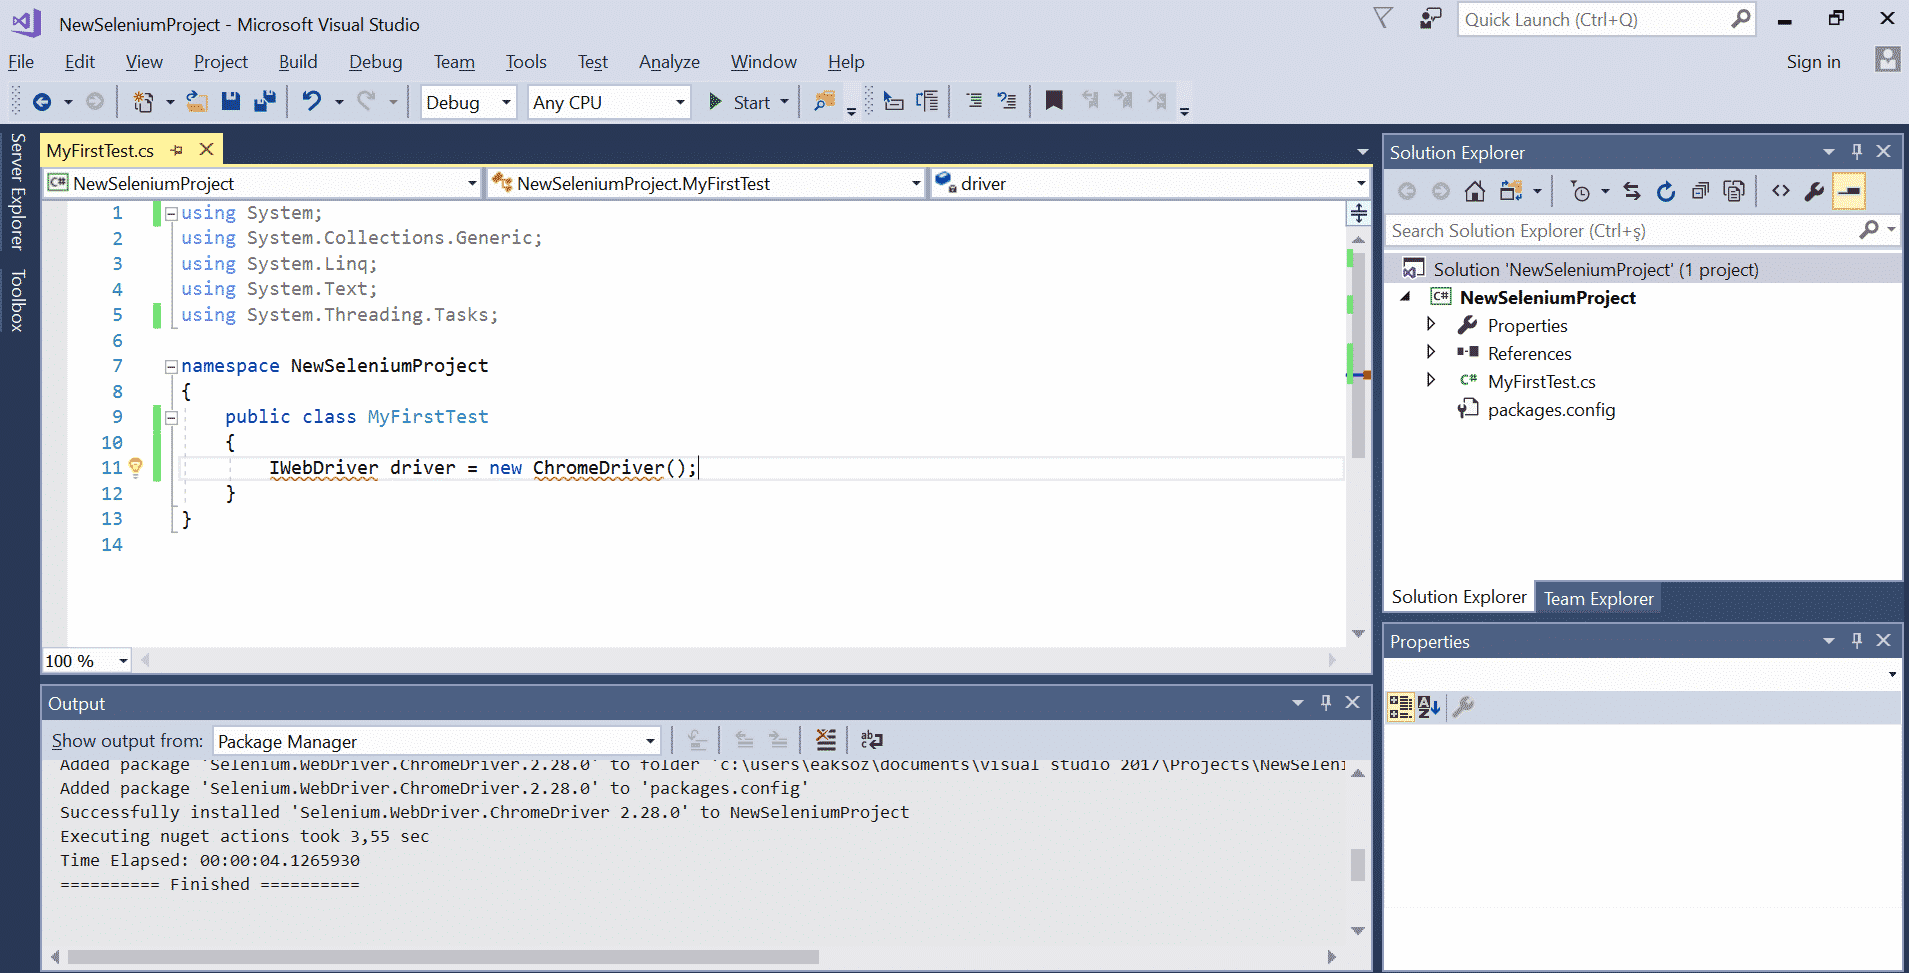
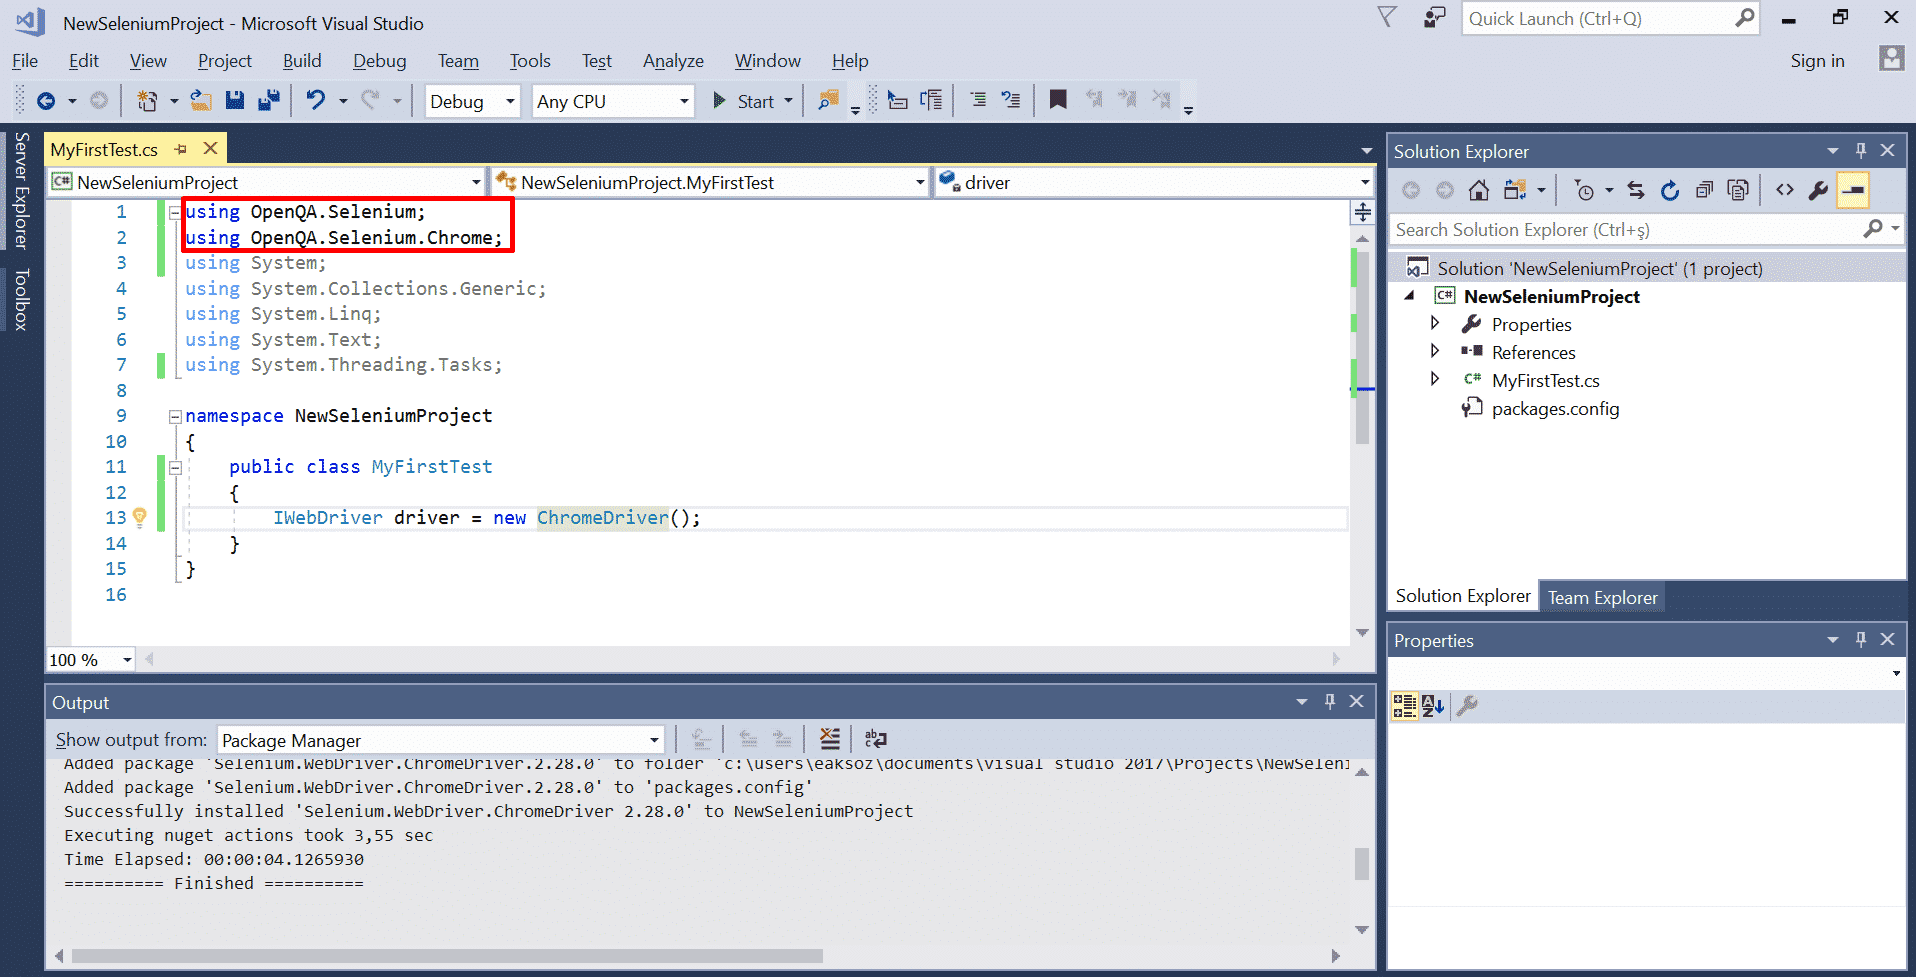
You might notice there is an error in our code. It occurred because, though we installed Selenium Webdriver and ChromeDriver, we have not imported the necessary libraries.
An easy way to do it instead of typing the libraries explicitly in Visual Studio is to press ‘Ctrl + .’ on the words missing the references. Once you have done it below screen will pop-up:
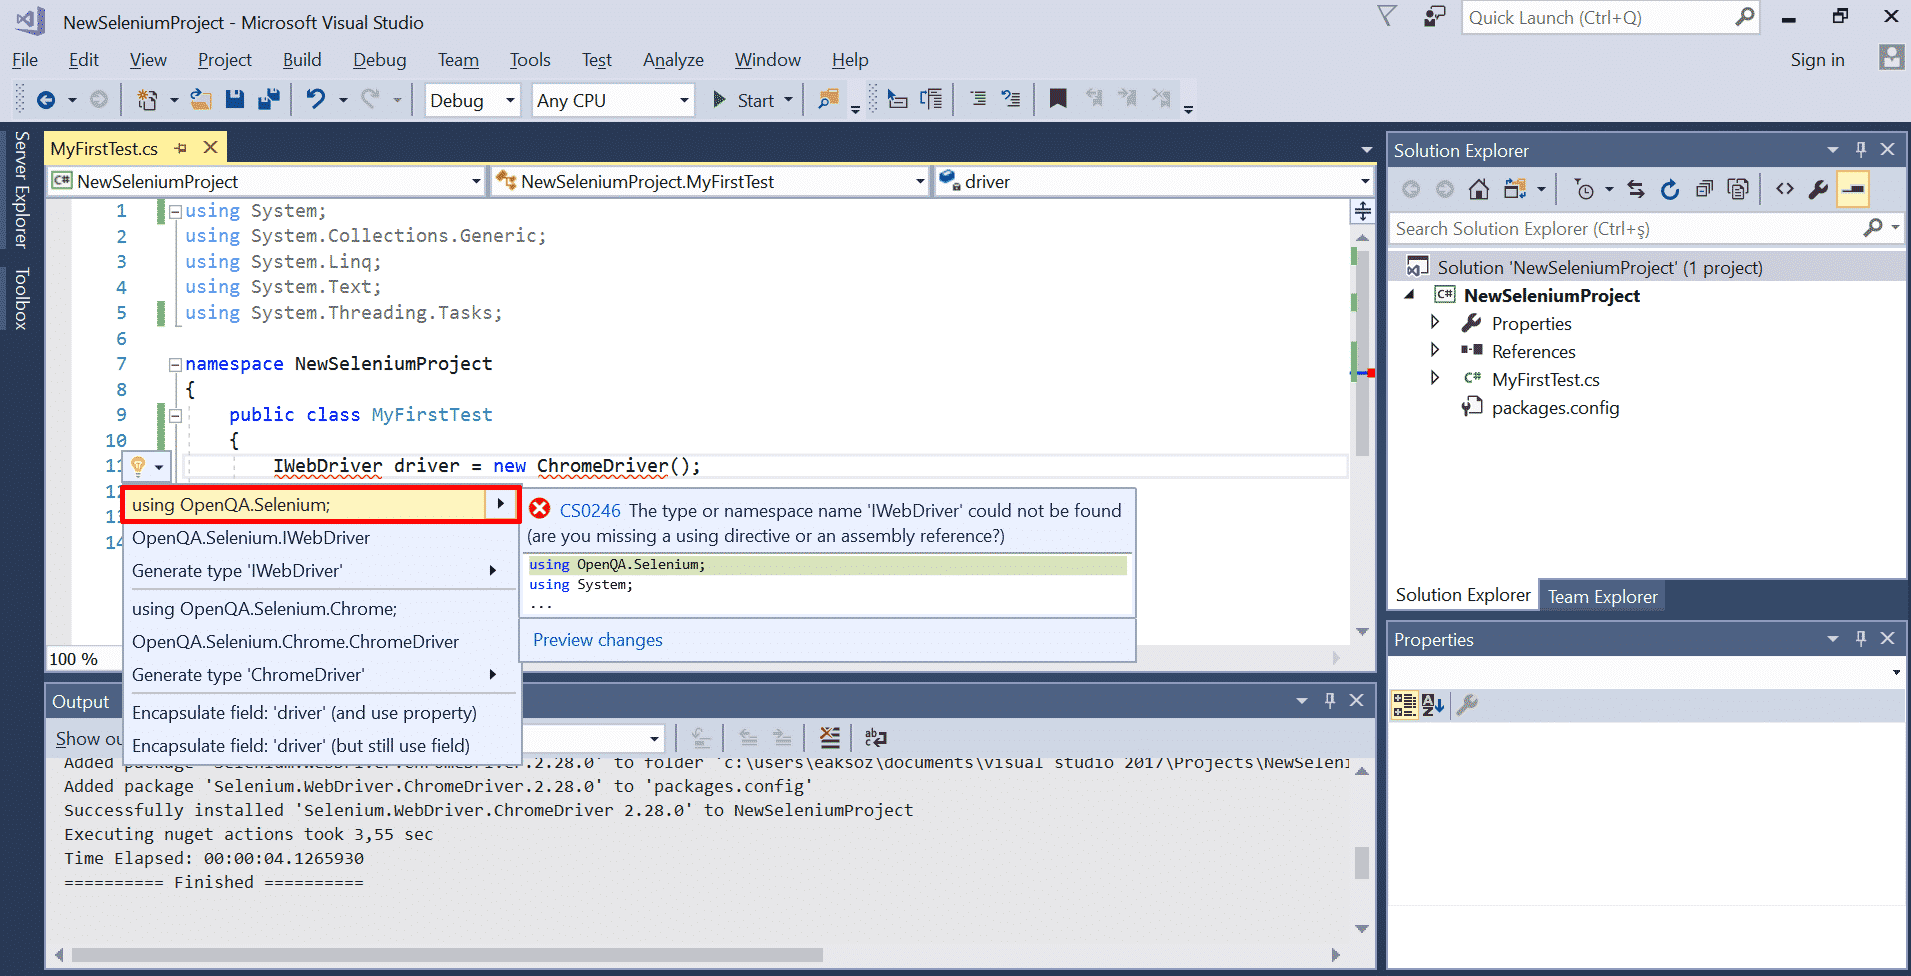
Click on ‘using OpenQA.Selenium’. Then do the same thing on ‘ChromeDriver()’.
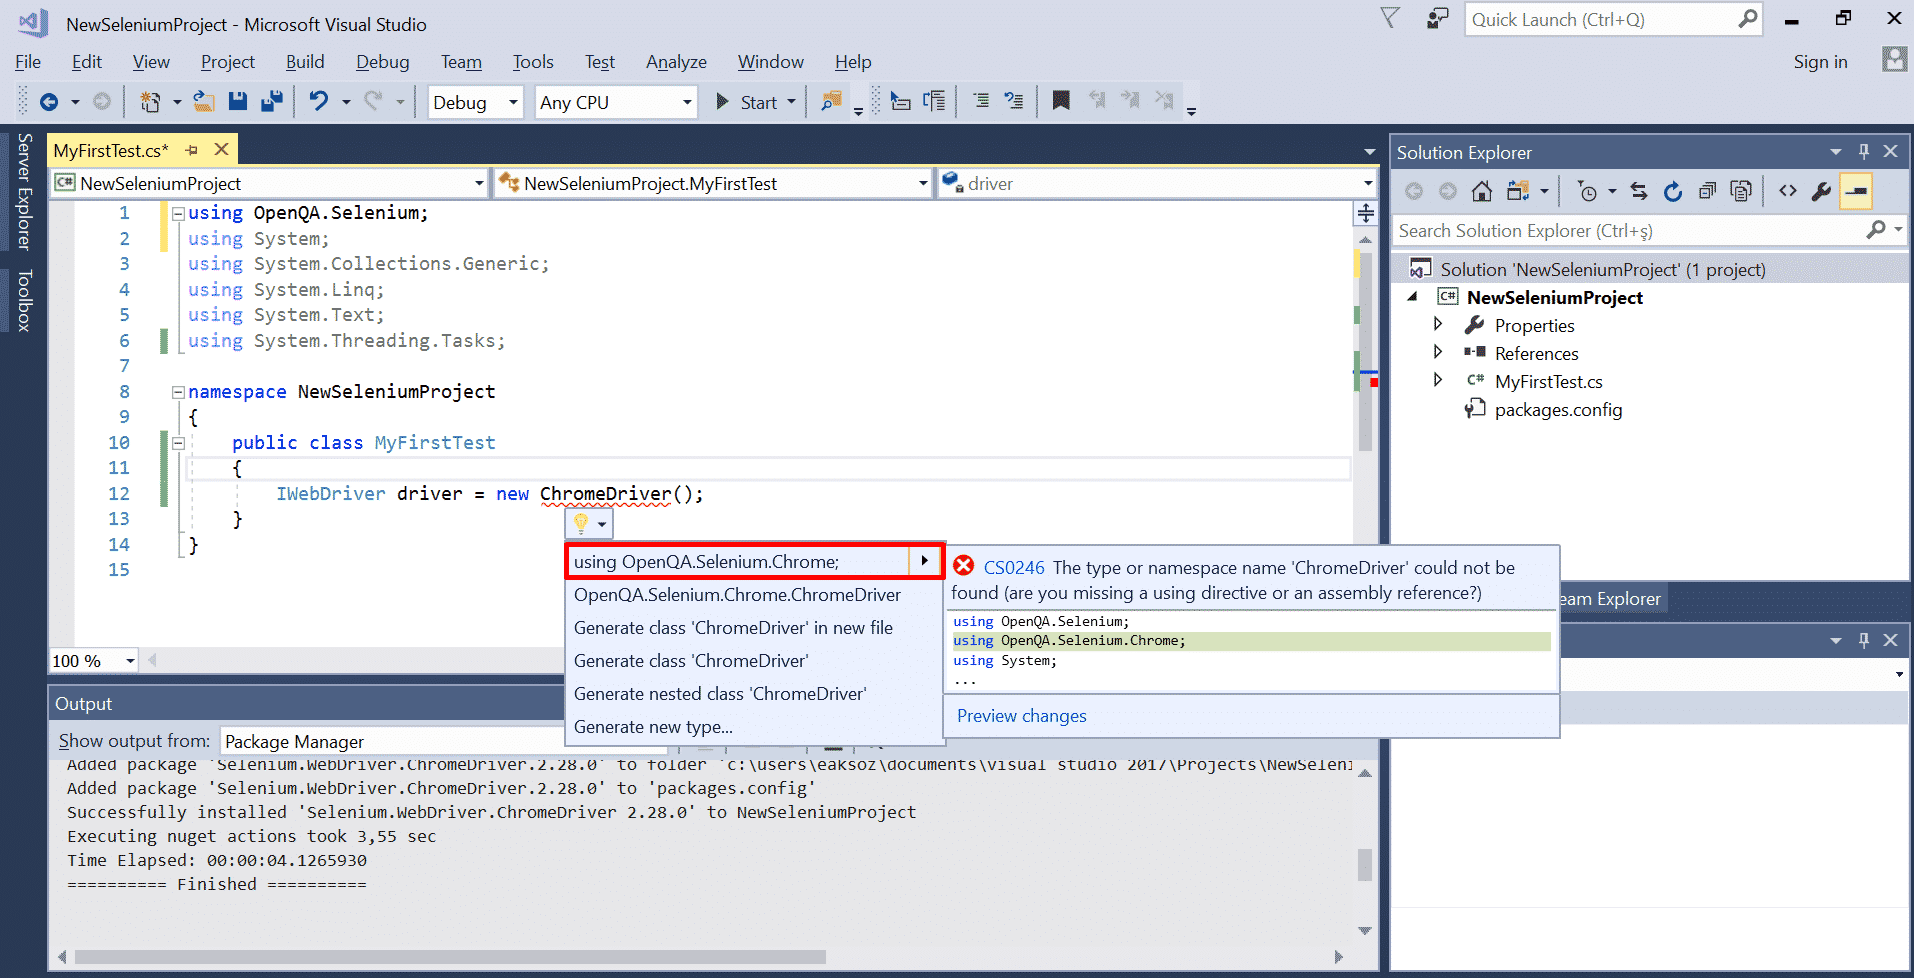
Notice the two libraries added on top of our class.
Since the driver is implemented, we can now write our first test.
All test methods must be written under ‘[Test]’ annotation provided by NUnit. Add the mentioned annotation and again import the necessary library.

Name your method (it will be the name of your test), and we can start writing the tests.
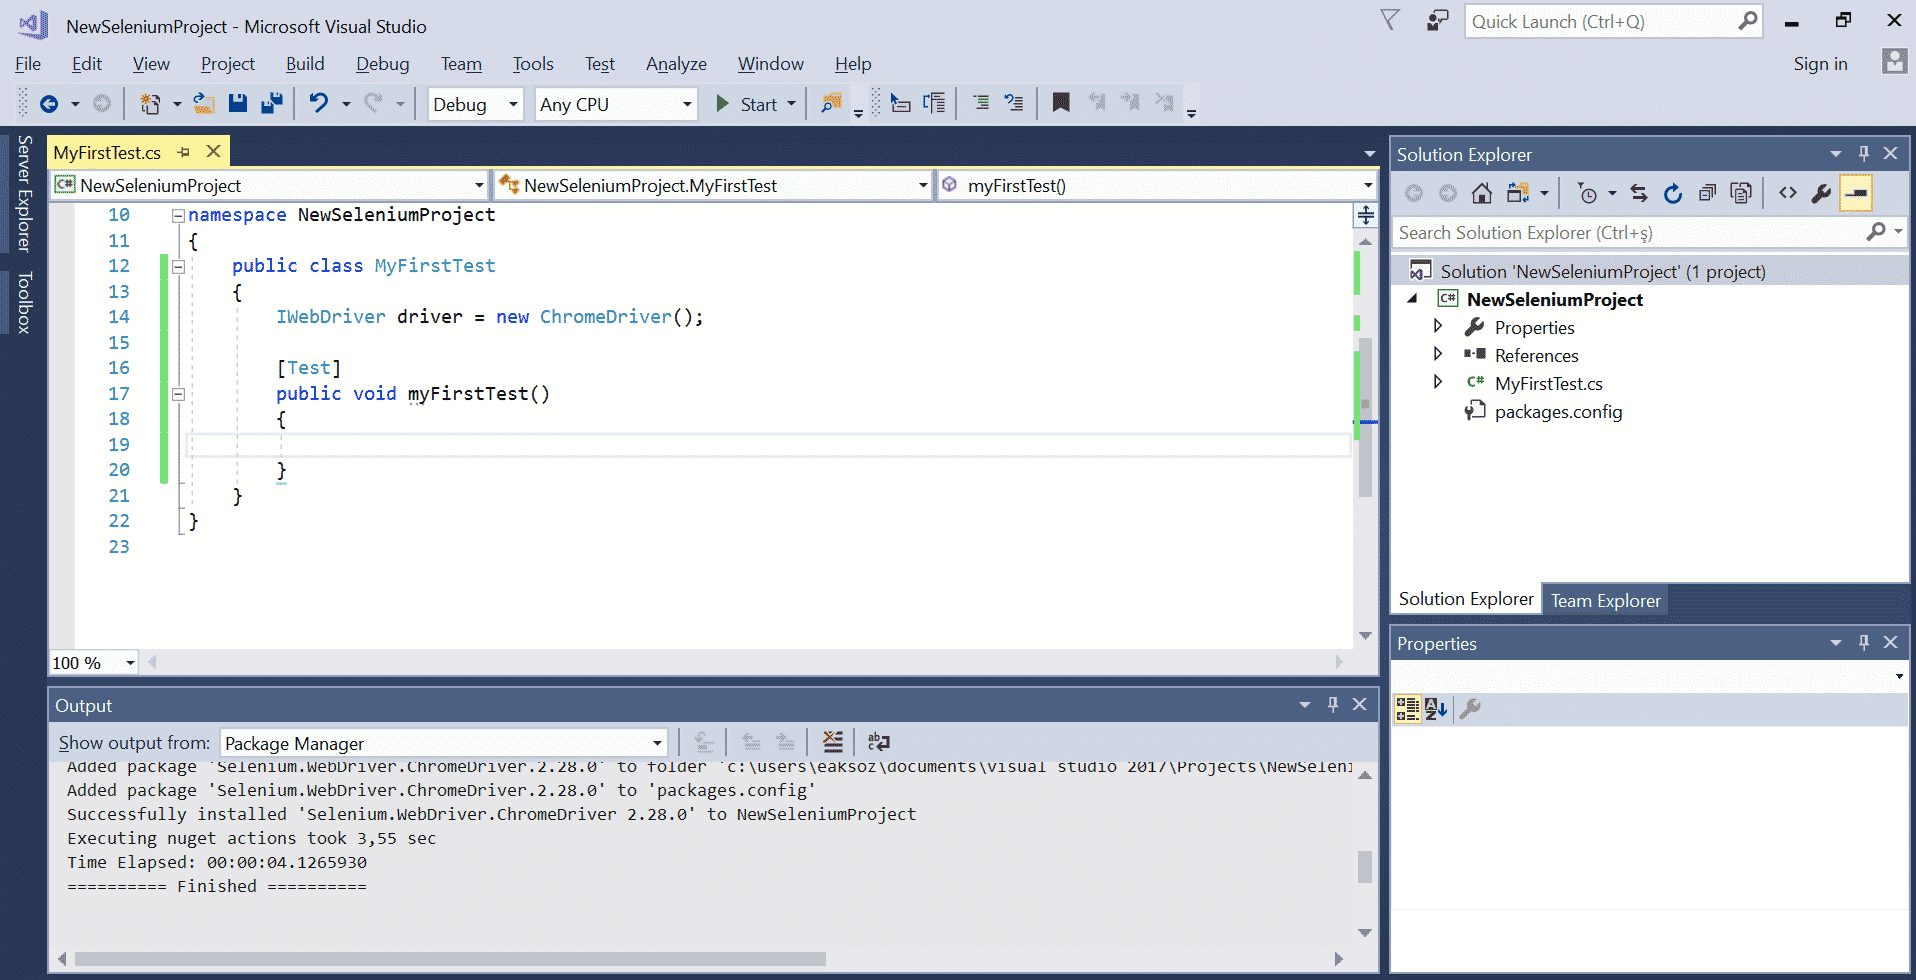
Now we can start writing our test!
First thing first, let’s navigate to the website which we would like to test.
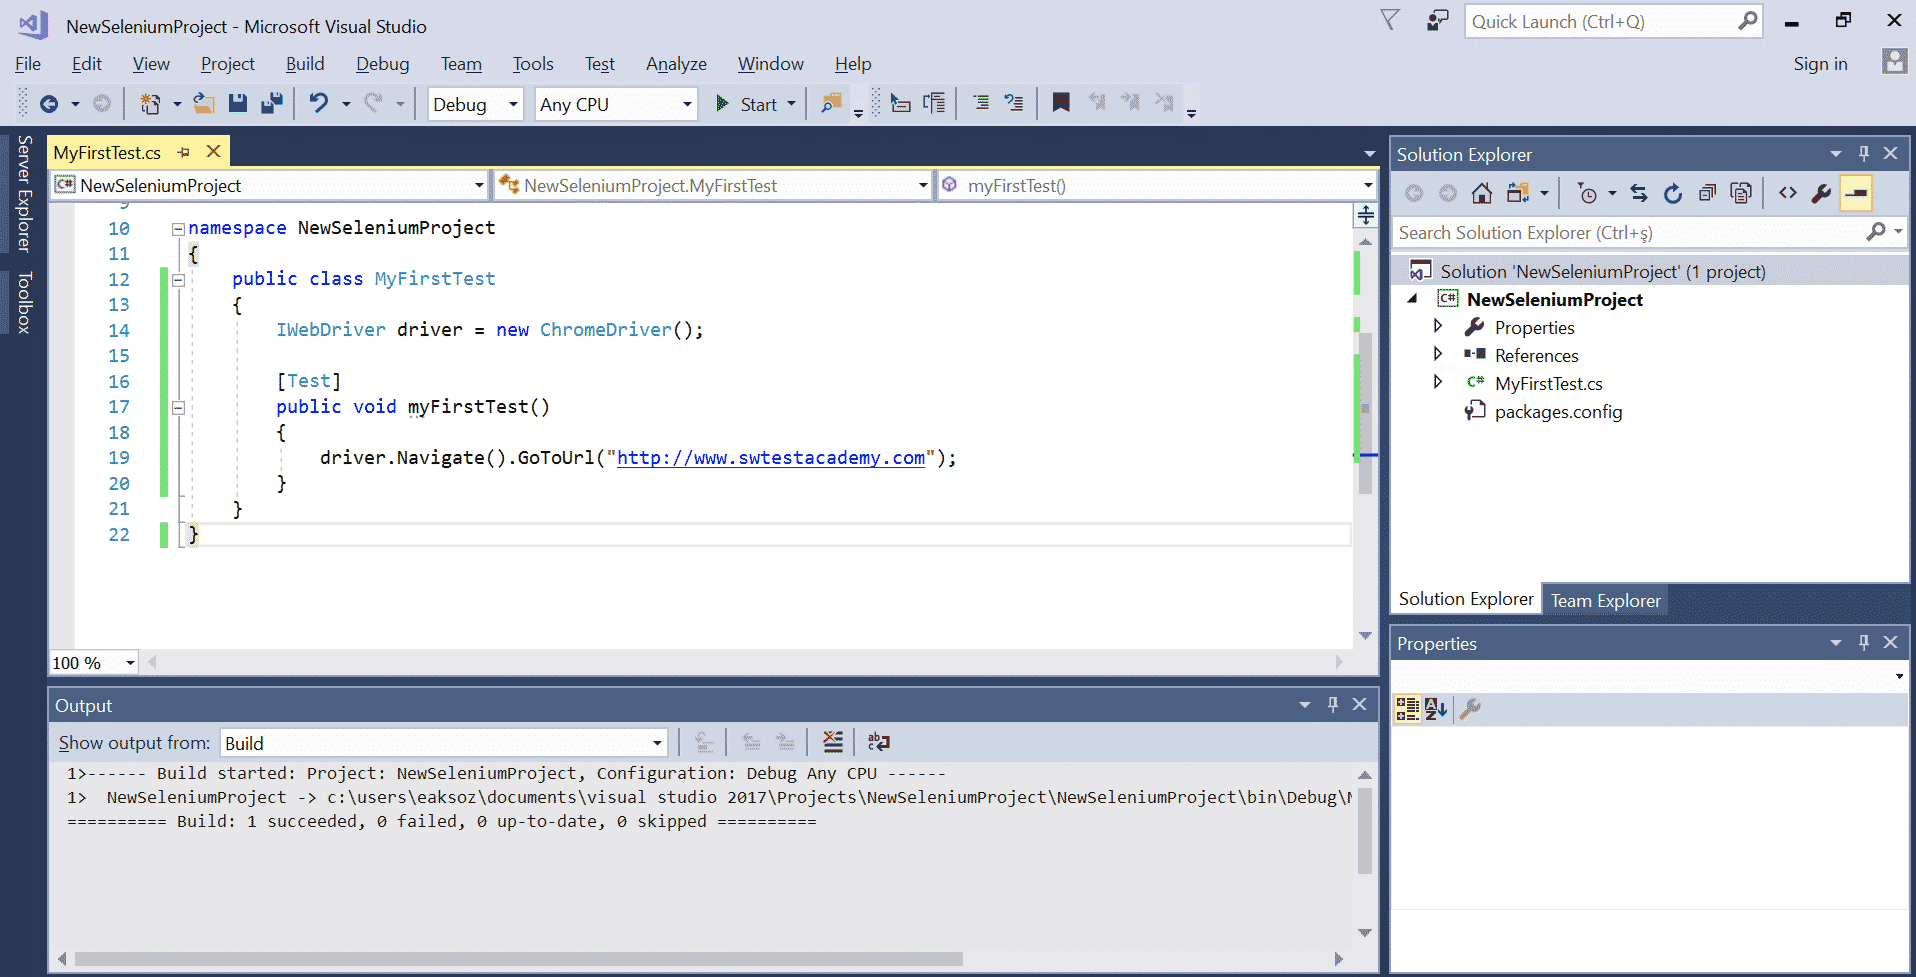
Don’t forget to type ‘http://’ before your URL, otherwise, Selenium would not recognise it. Note that alternative to driver.Navigate().GoToUrl(), you may use driver.Url() only.
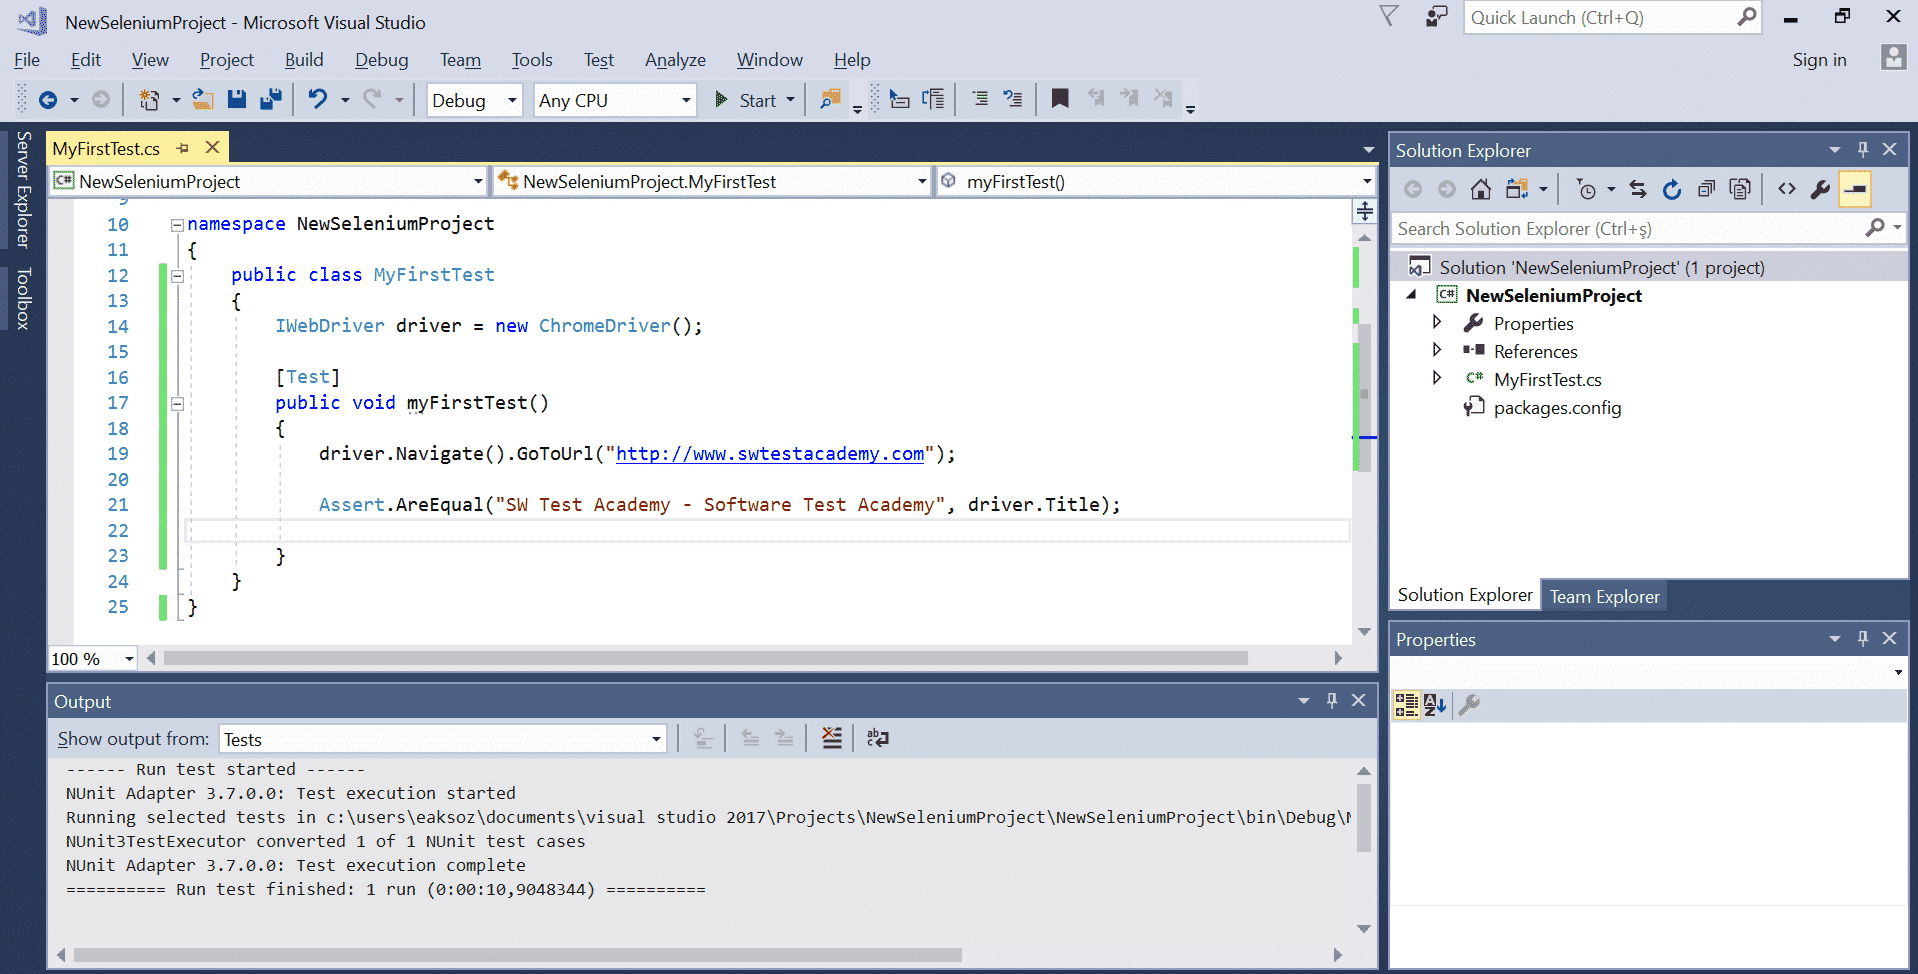
After navigating to the website, let’s assert the title of the page is true.
Since we are done, we can close the browser and dispose our driver.
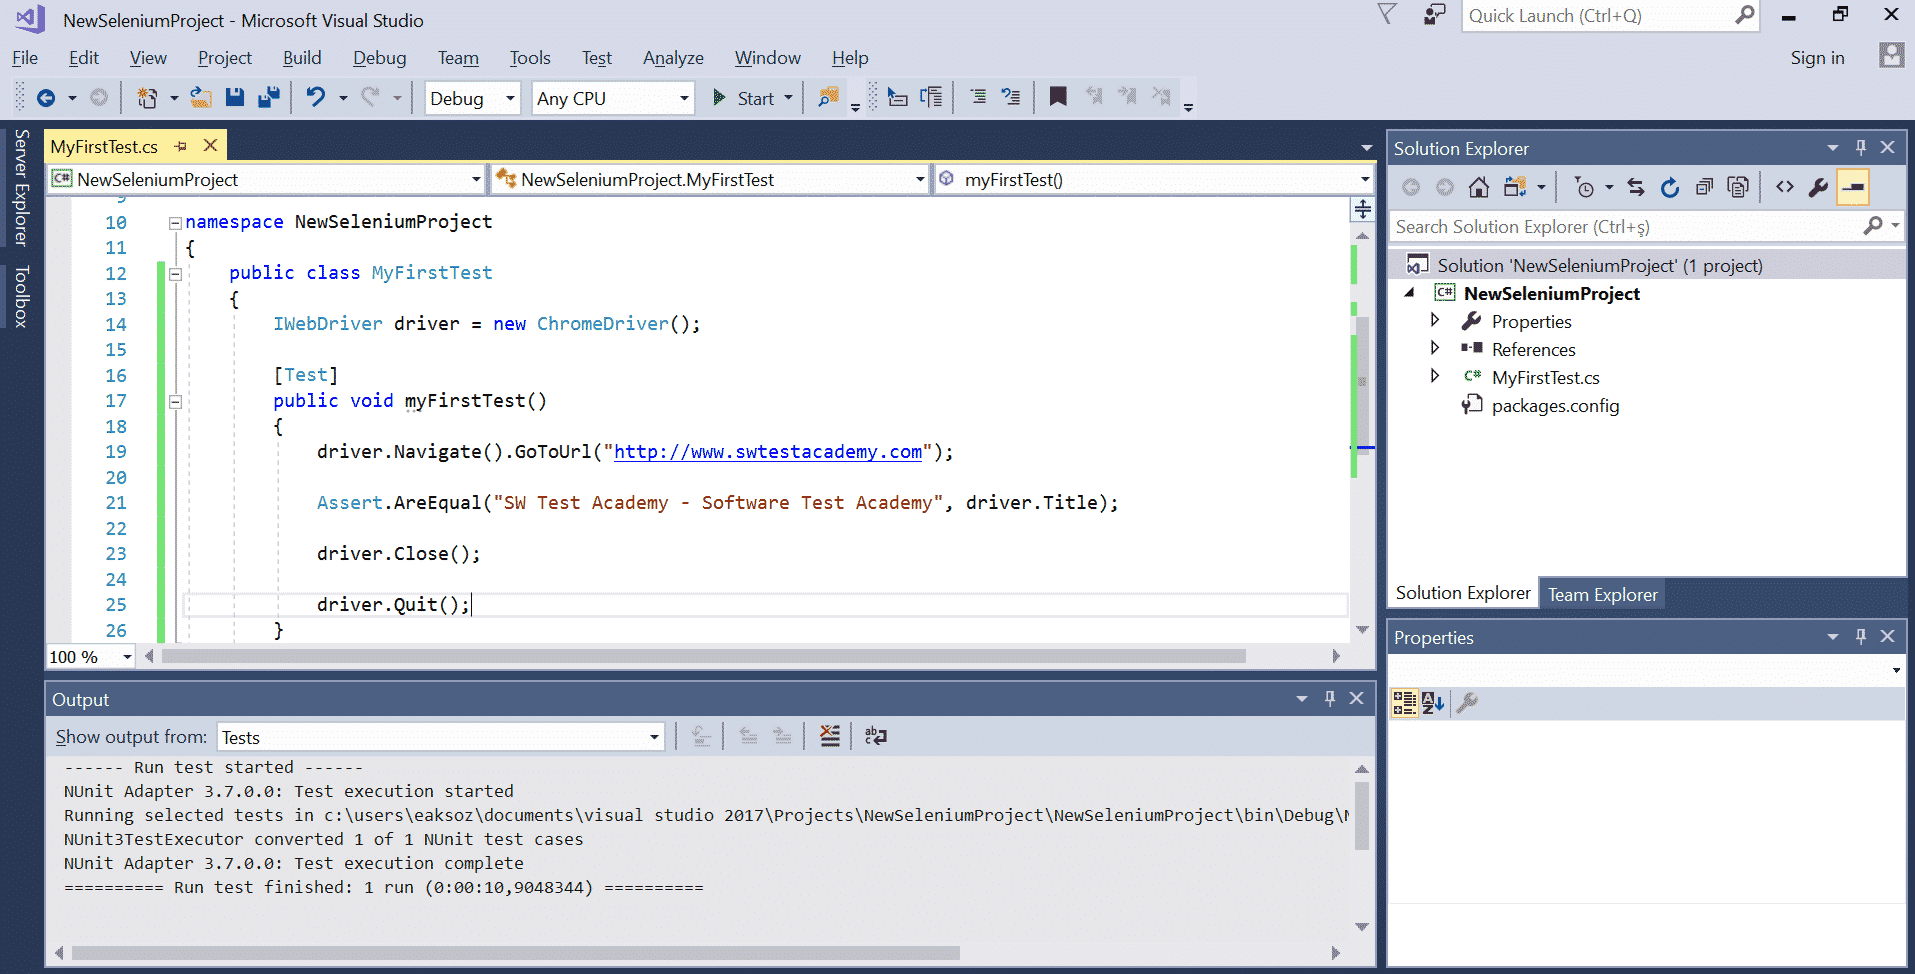
We just wrote our first test!
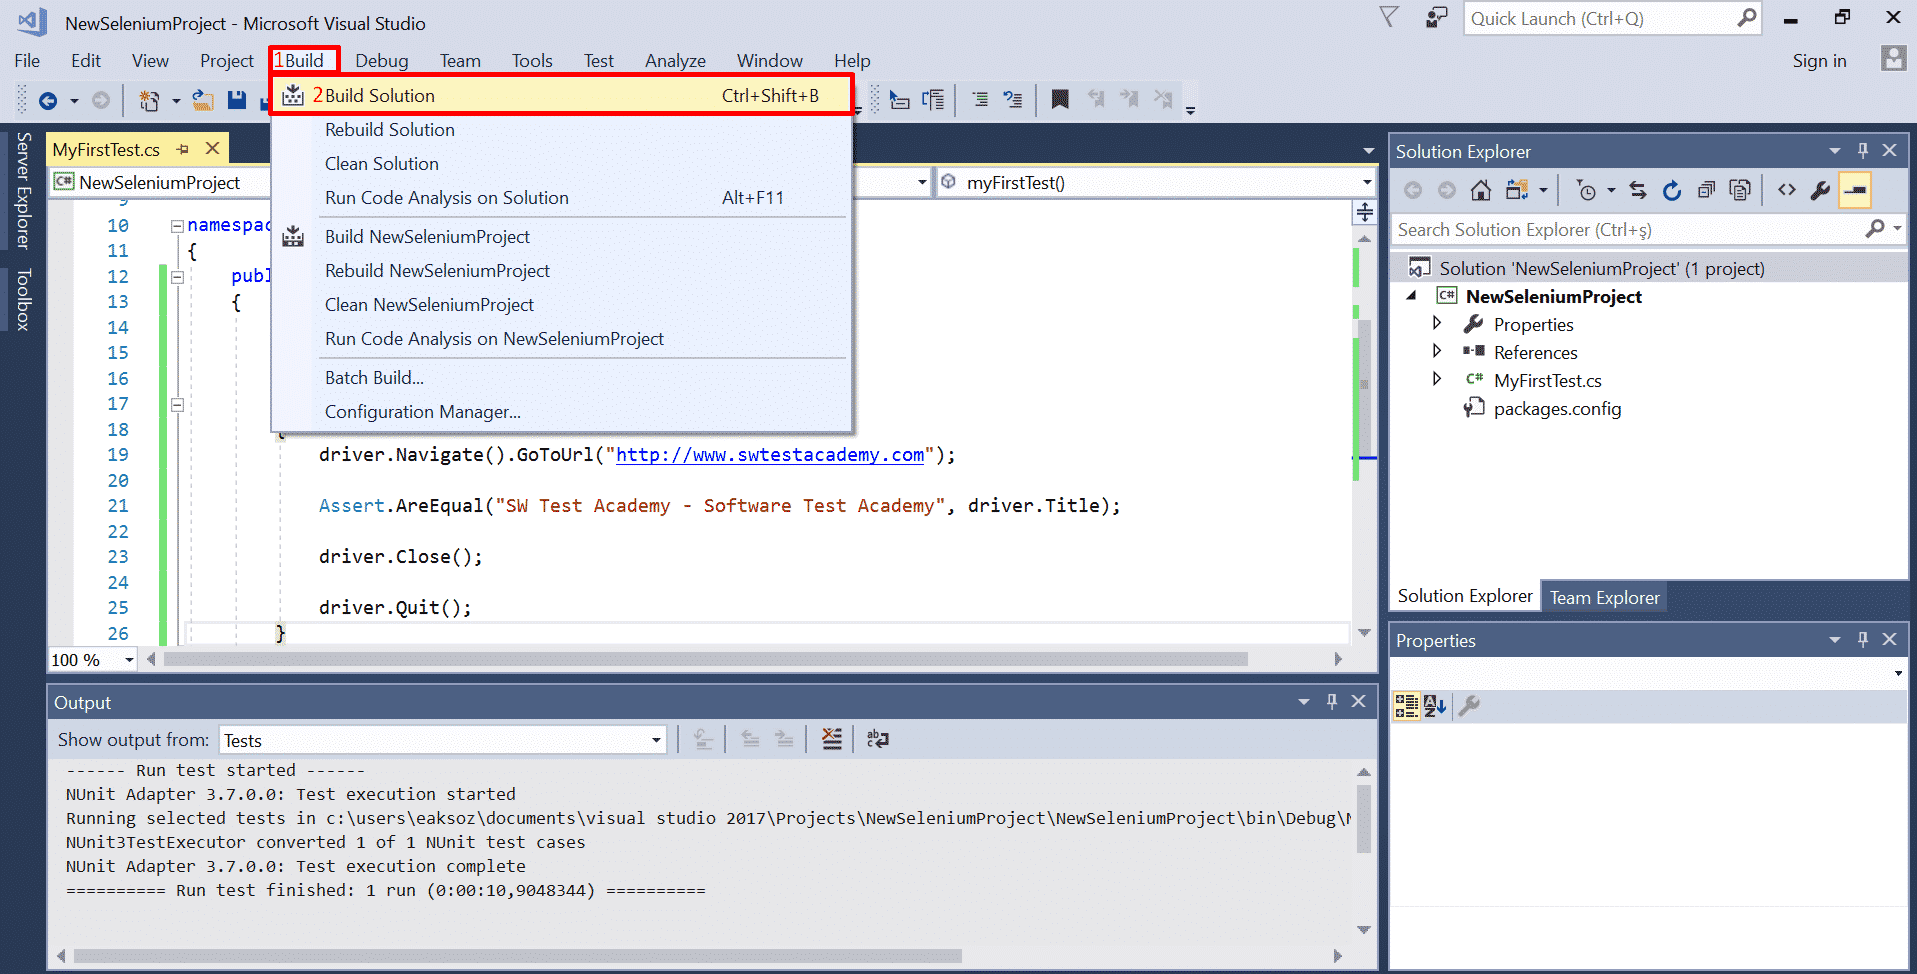
But how do we run it? Before running it lets build our project. Click on ‘Build’ on the top menu and ‘Build Solution’ option.
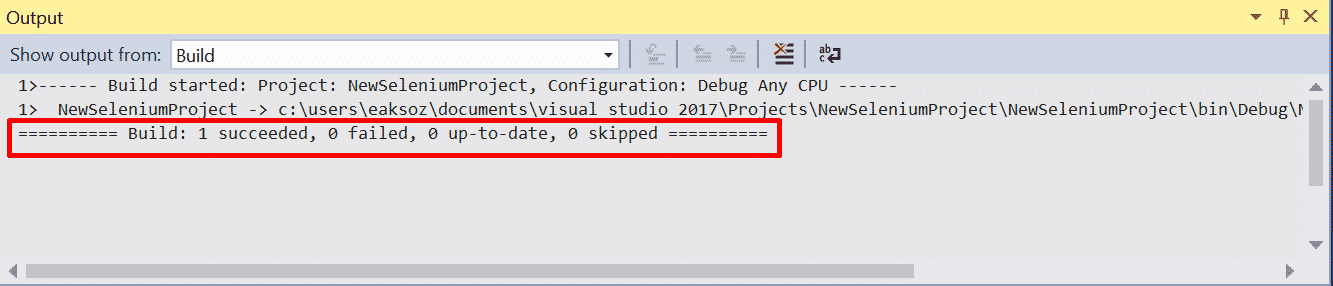
Once the build is done. You can it is built successfully on output console.
Now head back to the top menu and click ‘Test’ this time. Hover on ‘Windows’ option and click ‘Test Explorer’.

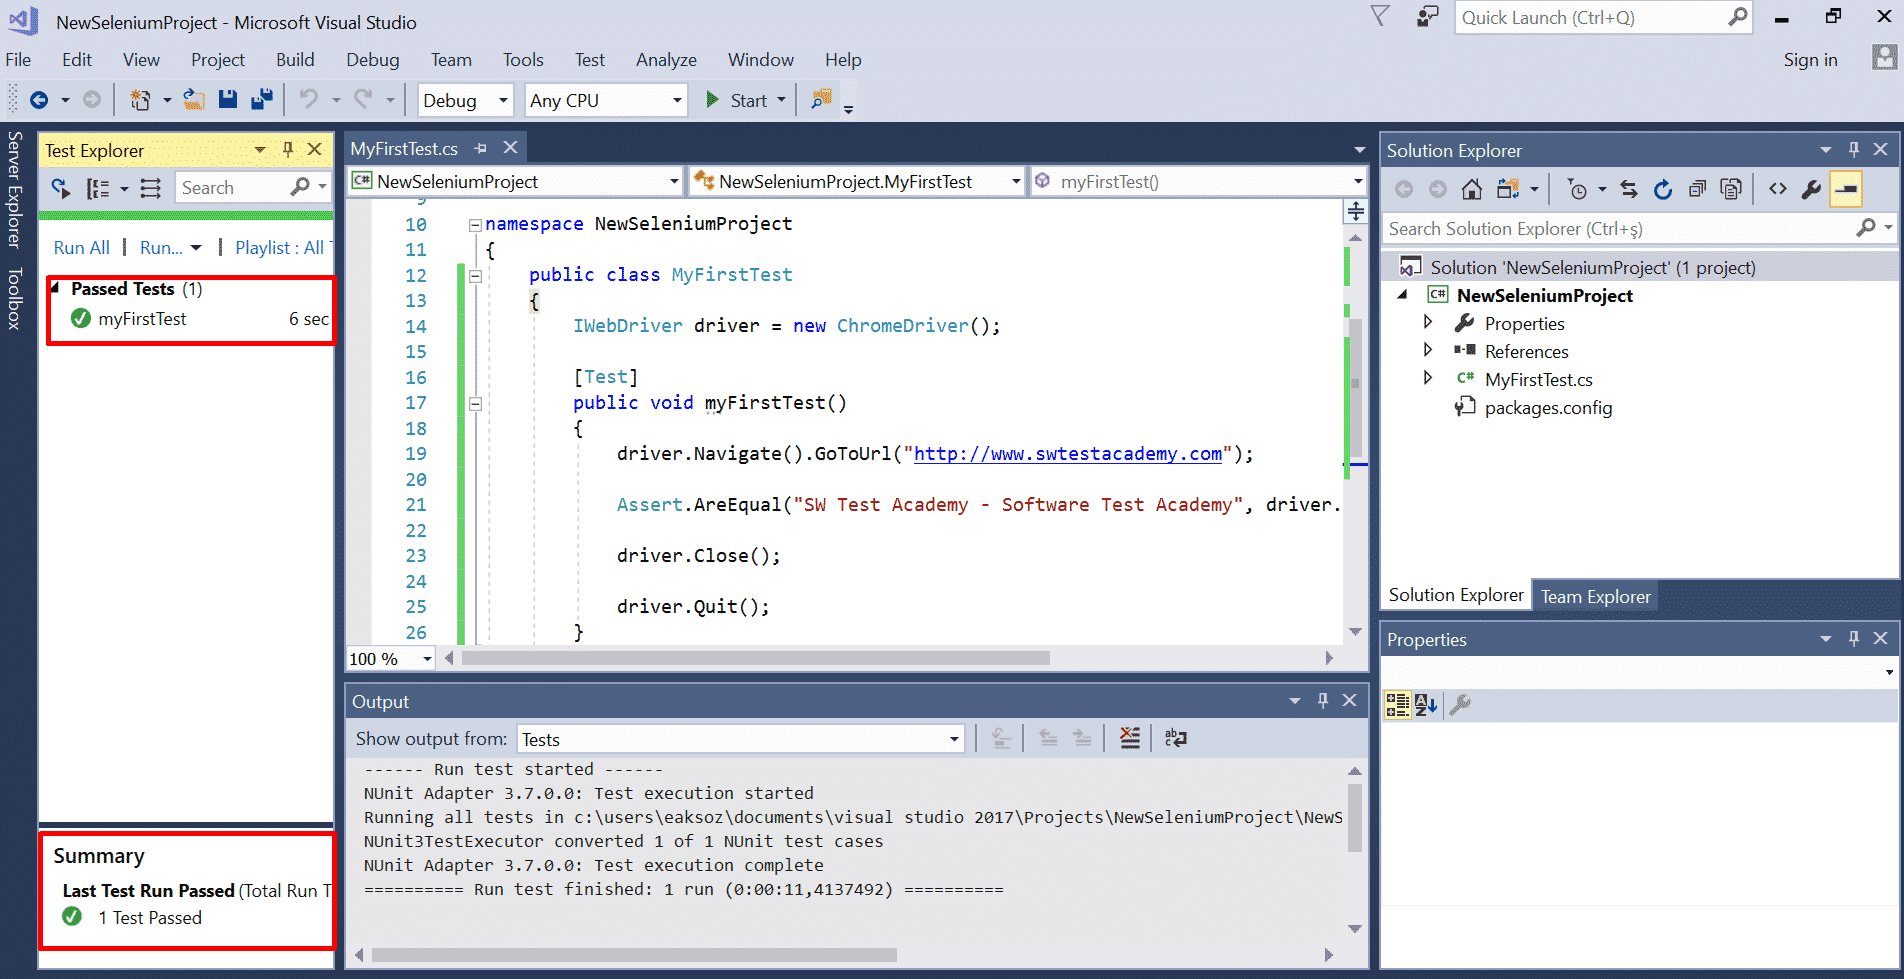
You will see the test we recently have written on the list.
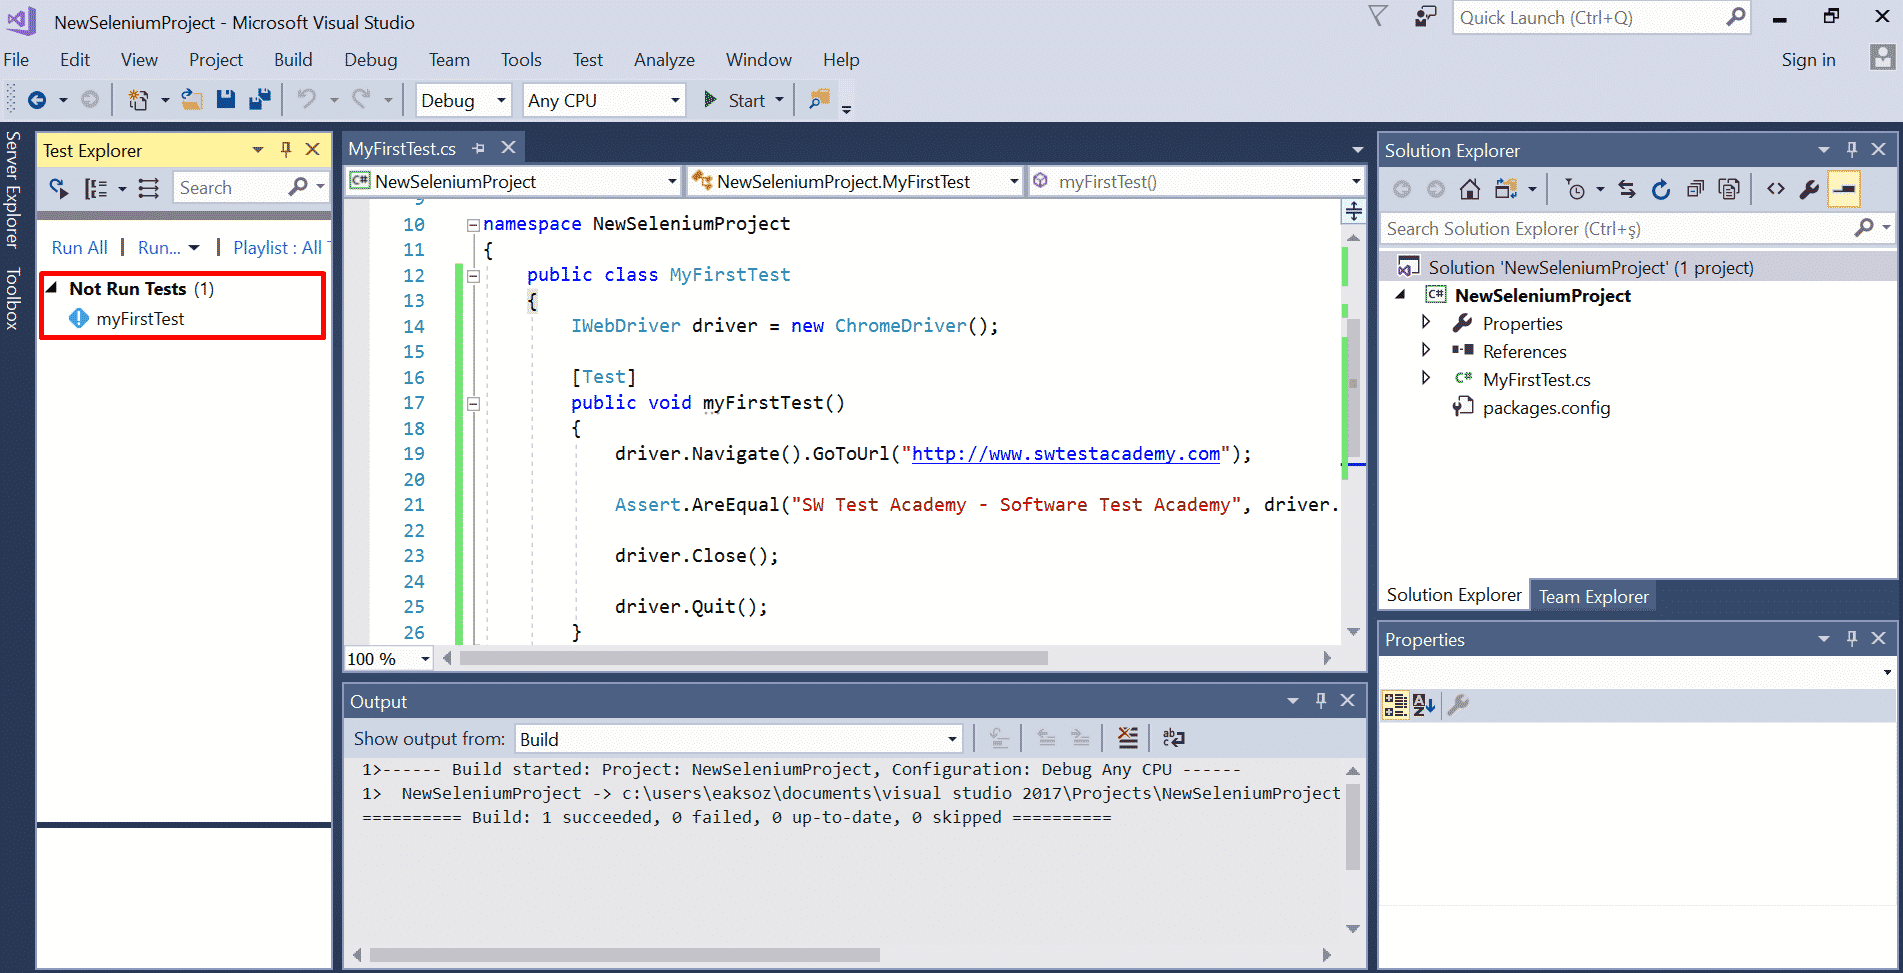
Click on ‘Run All’ and our your tests will start to run.

Once it is finished we can see if it passed or not.
The End! :) If you like this article please write a comment and share it on social media.
GitHub Link: https://github.com/swtestacademy/NewSeleniumProjectVS
Spoiler: Stay tuned for the advance C# Selenium and Selenium with Python articles ;)
Happy Testing!

Holding a BSc in Mechatronics, Ege loves to automate. He is now working as a Software Development Engineer In Test at XebiaLabs, Amsterdam.
Useful Article
Really Help full
Thanks. Our technical author Ege Aksoz did his best.
Nice Article
Nice Article, Ege Aksoz! The most clear & comprehensive intro I’ve seen so far.
I followed step-by-step as a total newbie, but found the it is not working for Firefox FirefoxDriver —
The latest Firefox is requiring GeckoDriver now. I’ve overcome that huddle, but the GeckoDriver and my latest Firefox ESR 52 is not talking to each other. Detailed at https://stackoverflow.com/questions/47779190/.
Would you help please Ege? Thanks a lot!
Thank you xpt! You can install GeckoDriver from NuGet and instead of ChromeDriver use;
IWebDriver driver = new FirefoxDriver();
Or if you have downloaded GeckoDriver, you may use;
FirefoxDriverService firefoxDriverService = FirefoxDriverService.CreateDefaultService(@”path/to/GeckoDriver”);
firefoxDriverService.firefoxBinaryPath = @”path/to/your/firefox”;
IWebDriver driver = new FirefoxDriver(firefoxDriverService);
Hope this helps!
Wow, thanks for the swift reply Ege!
So I chose the easy route to install GeckoDriver from NuGet, and delete the `geckodriver.exe` from my PATH. But I’m getting the following now:
OpenQA.Selenium.WebDriverException : Cannot find Firefox binary in PATH or default install locations. Make sure Firefox is installed.
This is after every possible precaution I can think of, restart VS, clean, rebuild, etc. But the problem remain the same.
BTW, when installing GeckoDriver from NuGet, I saw *four* different options.
– WebDriver.GeckoDriver
– Selenium.WebDriver.GeckoDriver
– Selenium.WebDriver.GeckoDriver.Win64
– Selenium.WebDriver.GeckoDriver.Win32
So I chose `Selenium.WebDriver.GeckoDriver.Win64`.
How to fix it now?
Would you update you GitHub repo https://github.com/swtestacademy/NewSeleniumProjectVS (so as to include GeckoDriver from NuGet) please? So that people can know for sure they are using a working solution.
Thanks a lot!
Hey, updating my repository with a working example is a great idea! But I am sorry to say that, it cannot be any time sooner than christmas due to my workload.
Gotya, NP, take your time, looking forward to it.
Hey Ege, no need updating your repository any more because,
– The current one works perfectly, I managed to get it working.
– The latest Selenium.Support v3.8.0 dll breaks the firefox — the firefox start with security errors.
Thanks again for your good article and published ***working*** code!
That’s nice to hear!
Ops, I spoke too eagerly — Just realized that you are using `ChromeDriver`, NOT `FirefoxDriver`. I.e., my `FirefoxDriver` is still broken.
I think downloading the latest GeckoDriver and place it in my PATH works fine for me. The real problem is that, I think, the GeckoDriver and my latest Firefox ESR 52 is not talking to each other.
Details in https://stackoverflow.com/questions/47779190/. Thx.
Sometimes the latest versions of browsers won’t work with the drivers, if you find a working firefox version, then please wait for Mozilla come up with an update because if there is a problem chances are they will come up with one asap.
Hi Ege, enjoyed your article but can you tell me how you handle running more than one test? I am getting the error message “no connection could be made because the target machine actively refused it…” The first test passes, but the other 5 fail.
Any input would be appreciated. My framework is in VS2017, C#, NUnit, Selenium 3.8.0, Chrome 63, ChromeDriver 2.34.
Thanks!
Thanks Eva. You have to add a new test annotation [Test] within the same class below the other test. I have never experienced such issue and it is difficult to diagnose on comments, but I have few things in mind. First, there might be some chromedriver sessions that have not been closed. On command prompt, you can type “taskkill /f /im chromedriver.exe” for killing all instances. Please add driver.Quit() after your each test. Second, there might be a firewall issue.
Very good article.
Thank you very much.